Sepulcher of the First Ones is the last raid in World of Warcraft: Shadowlands. It came out on March 1, 2022. In the War Within, it’s still a great place to farm new transmogs, mounts, and pets (solo or with teammates). This ancient prison in Zereth Mortis has 11 bosses, including the iconic Jailer.
![]() This guide covers:
This guide covers:
- Sepulcher of the First Ones location
- Bosses and their rewards
- Available mounts, weapons, and transmogs
- Achievements you can earn
- Can you solo Sepulcher of the First Ones?
If you’re chasing best-in-slot tier set gear, legendary Protoform mounts, and prestigious raid achievements, our Sepulcher of the First Ones carry service delivers the ultimate raid experience. You’ll face the cosmic threats of Zereth Mortis alongside our elite raiders who’ve mastered every encounter across Normal, Heroic, and Mythic difficulties – including the punishing Mythic Jailer fight.
![]() Whether you’re looking to check the loot table or trying to find out if it’s possible to solo the SotFO raid, this guide will help you make the most of your Sepulcher of the First Ones runs in WoW Retail (The War Within).
Whether you’re looking to check the loot table or trying to find out if it’s possible to solo the SotFO raid, this guide will help you make the most of your Sepulcher of the First Ones runs in WoW Retail (The War Within).
Sepulcher of the First Ones Entrance and Subregions
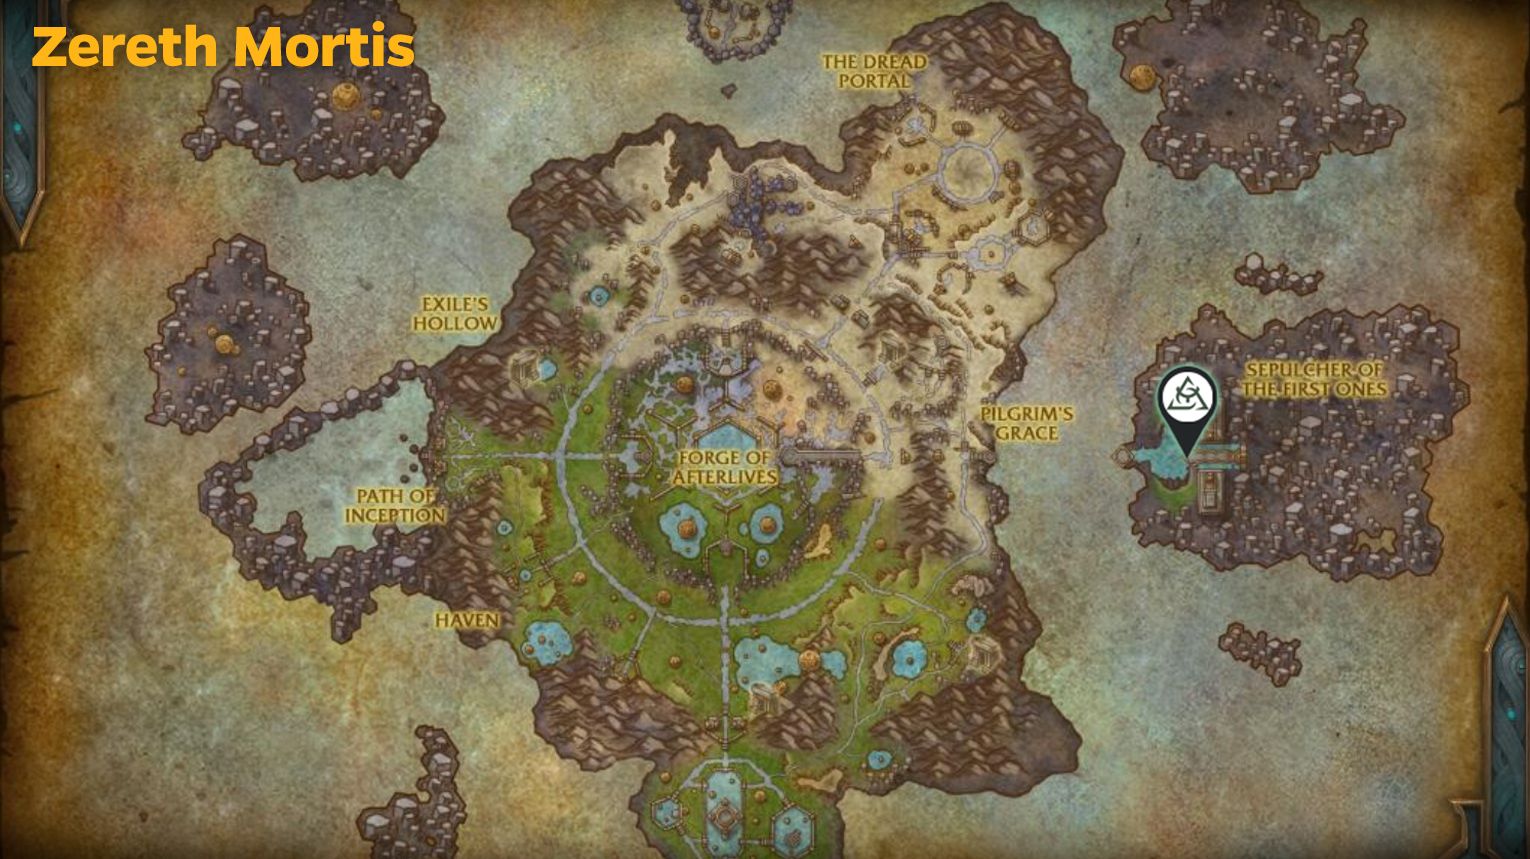
Sepulcher of the First Ones is in the Zereth Mortis zone in World of Warcraft: Shadowlands. To get there, go to Zereth Mortis from Oribos, the main hub of the Shadowlands. To reach the raid entrance, use the teleporter at coordinates 64.8, 53.5 in Zereth Mortis after completing Chapter 4 of the Zereth Mortis Campaign, or fly to Pilgrim’s Grace and use the Ancient Translocator.
The raid entrance is at coordinates 80.61 53.41. Follow the path to the big structure and go through the large doors to enter the raid.
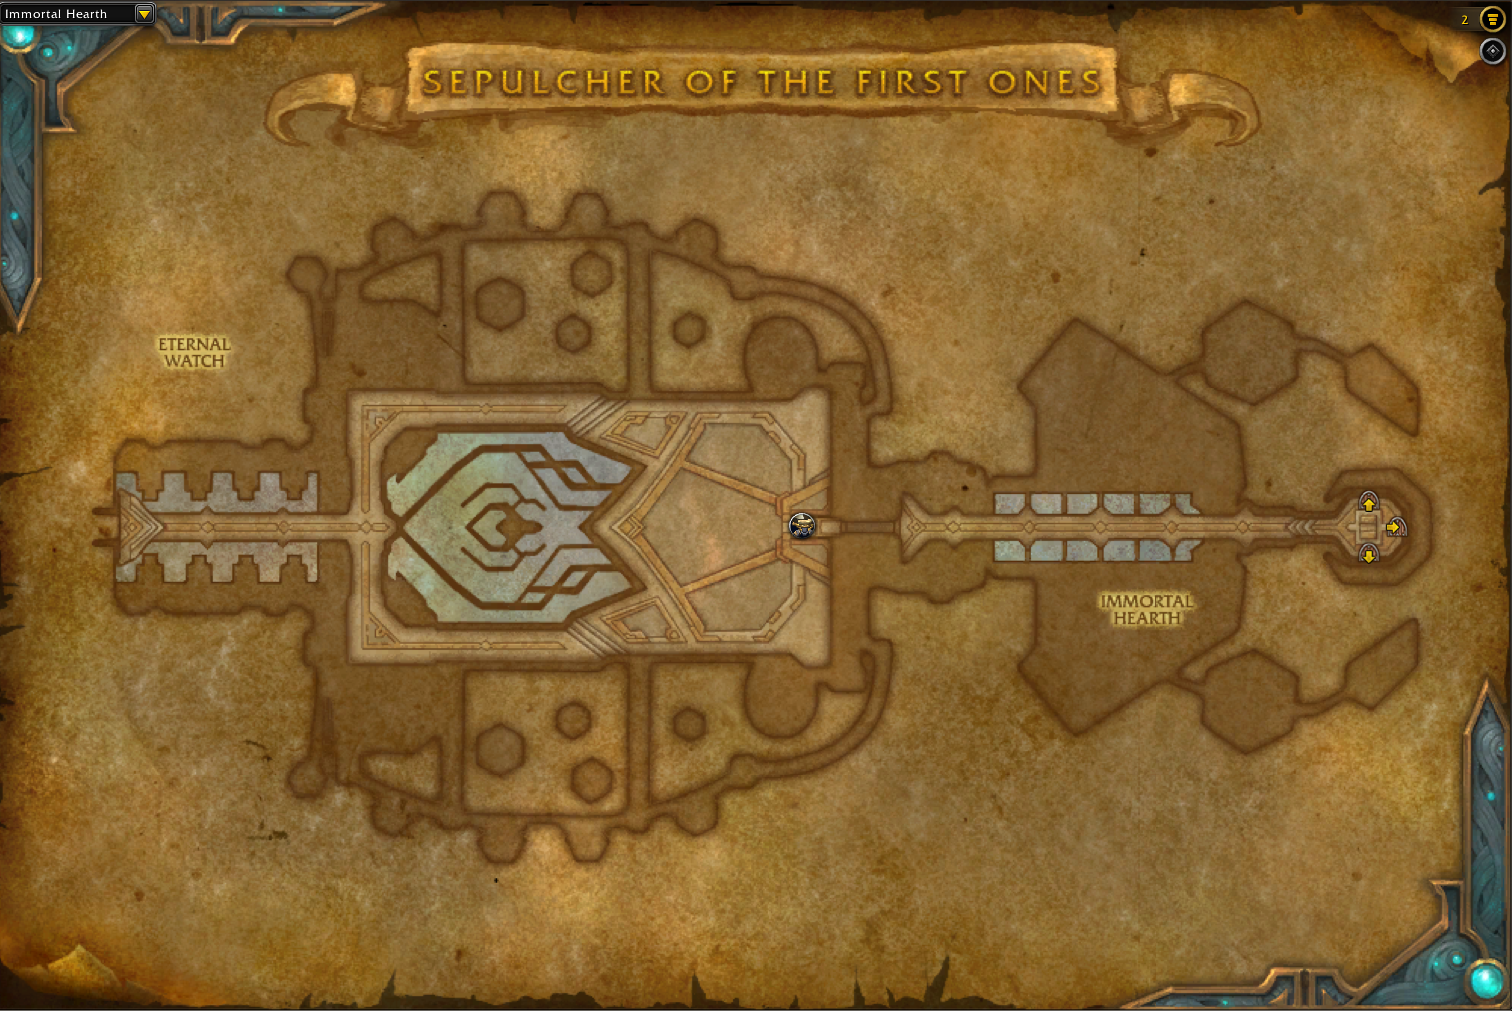
Inside SotFO, you’ll go through different areas as you fight your way to the Jailer.
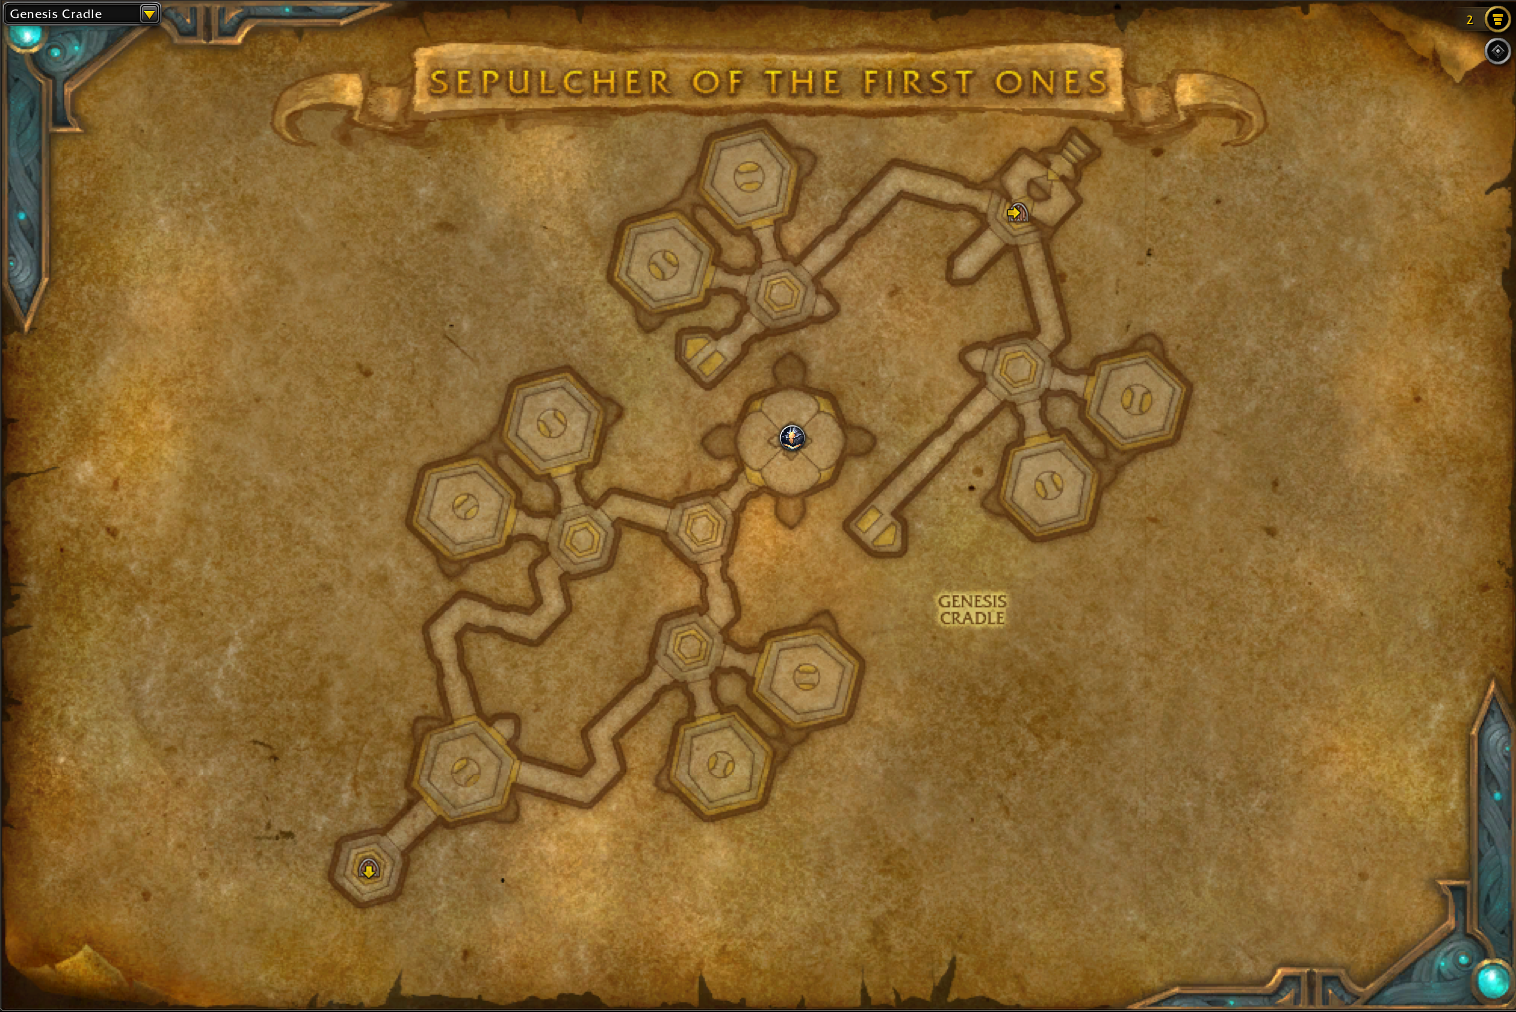
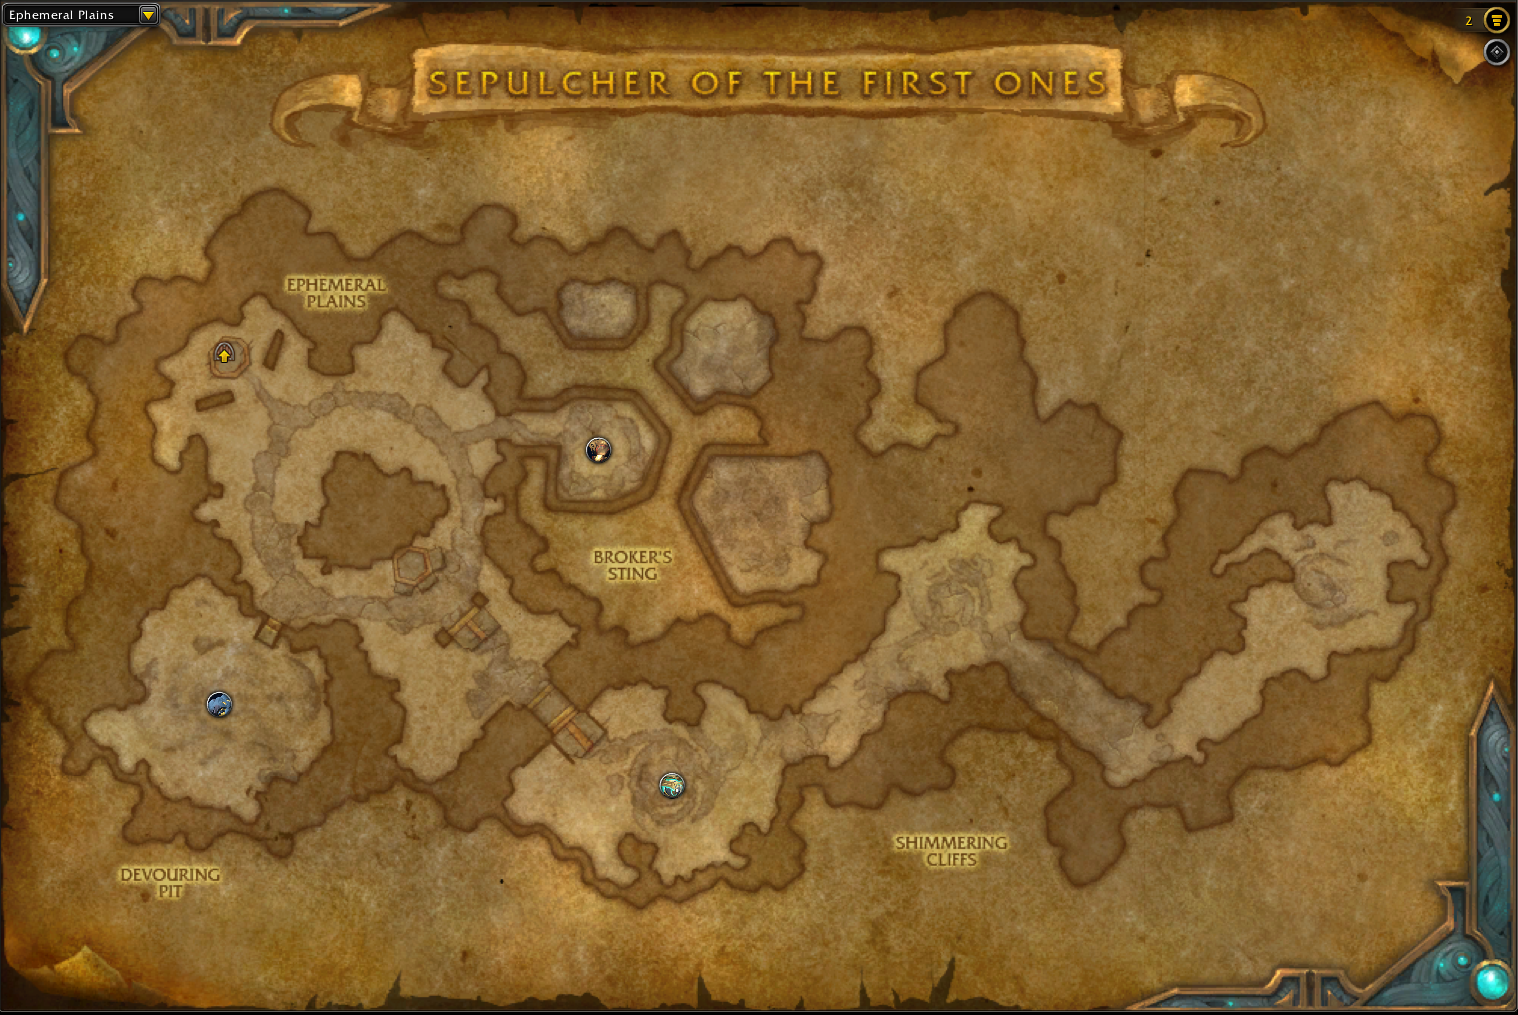
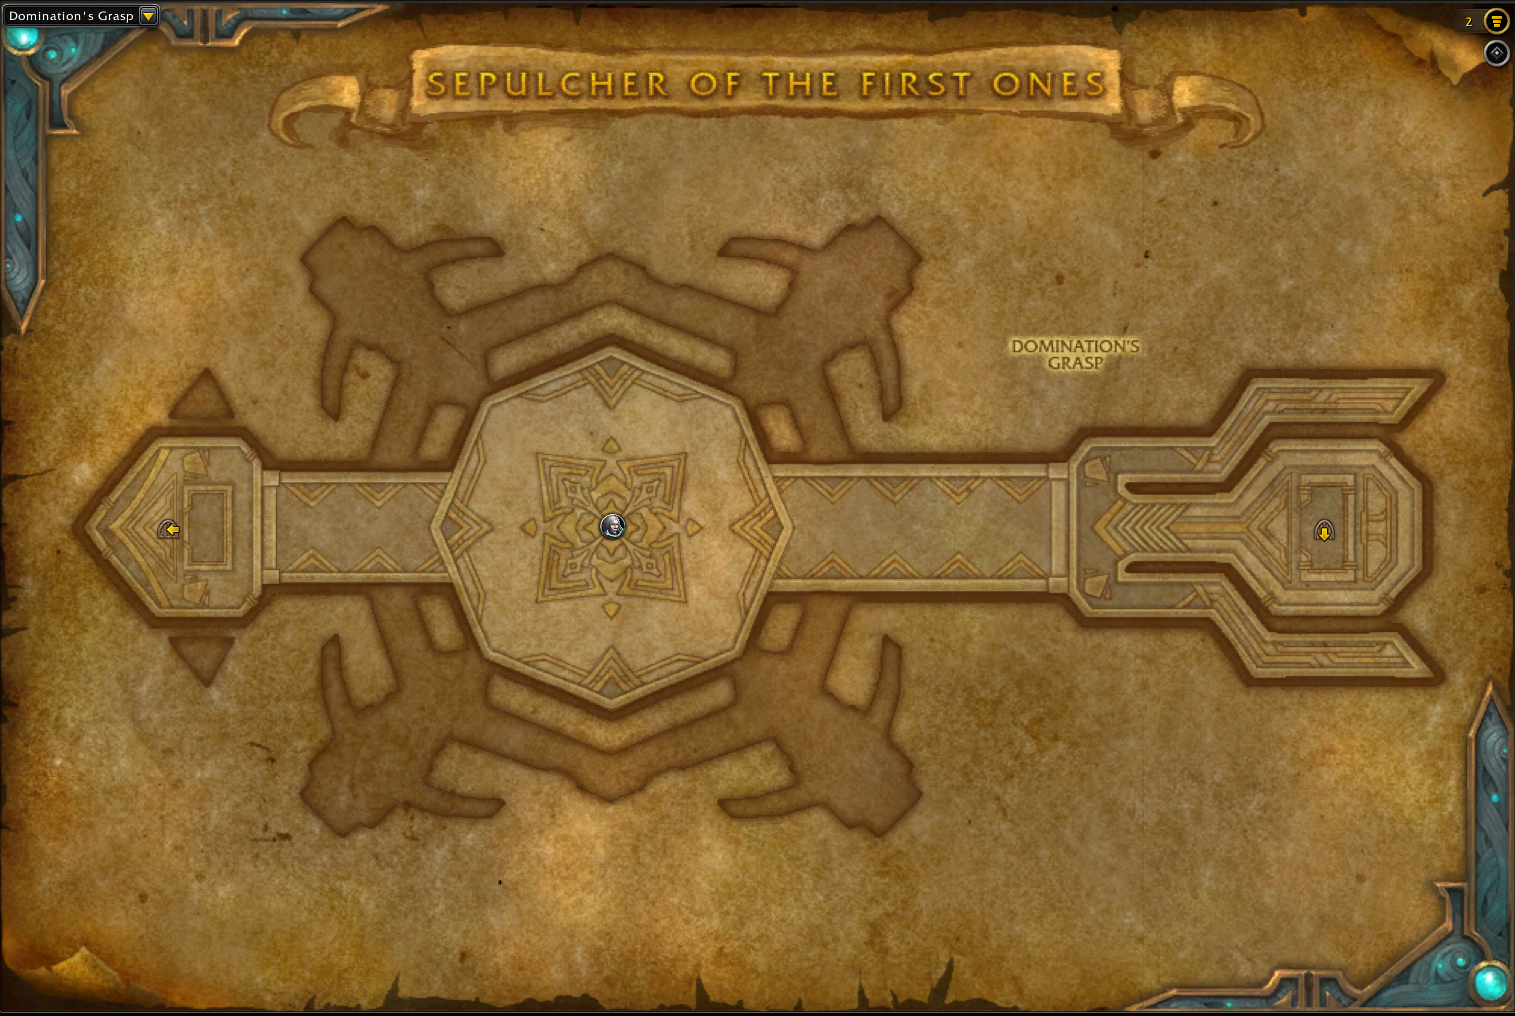
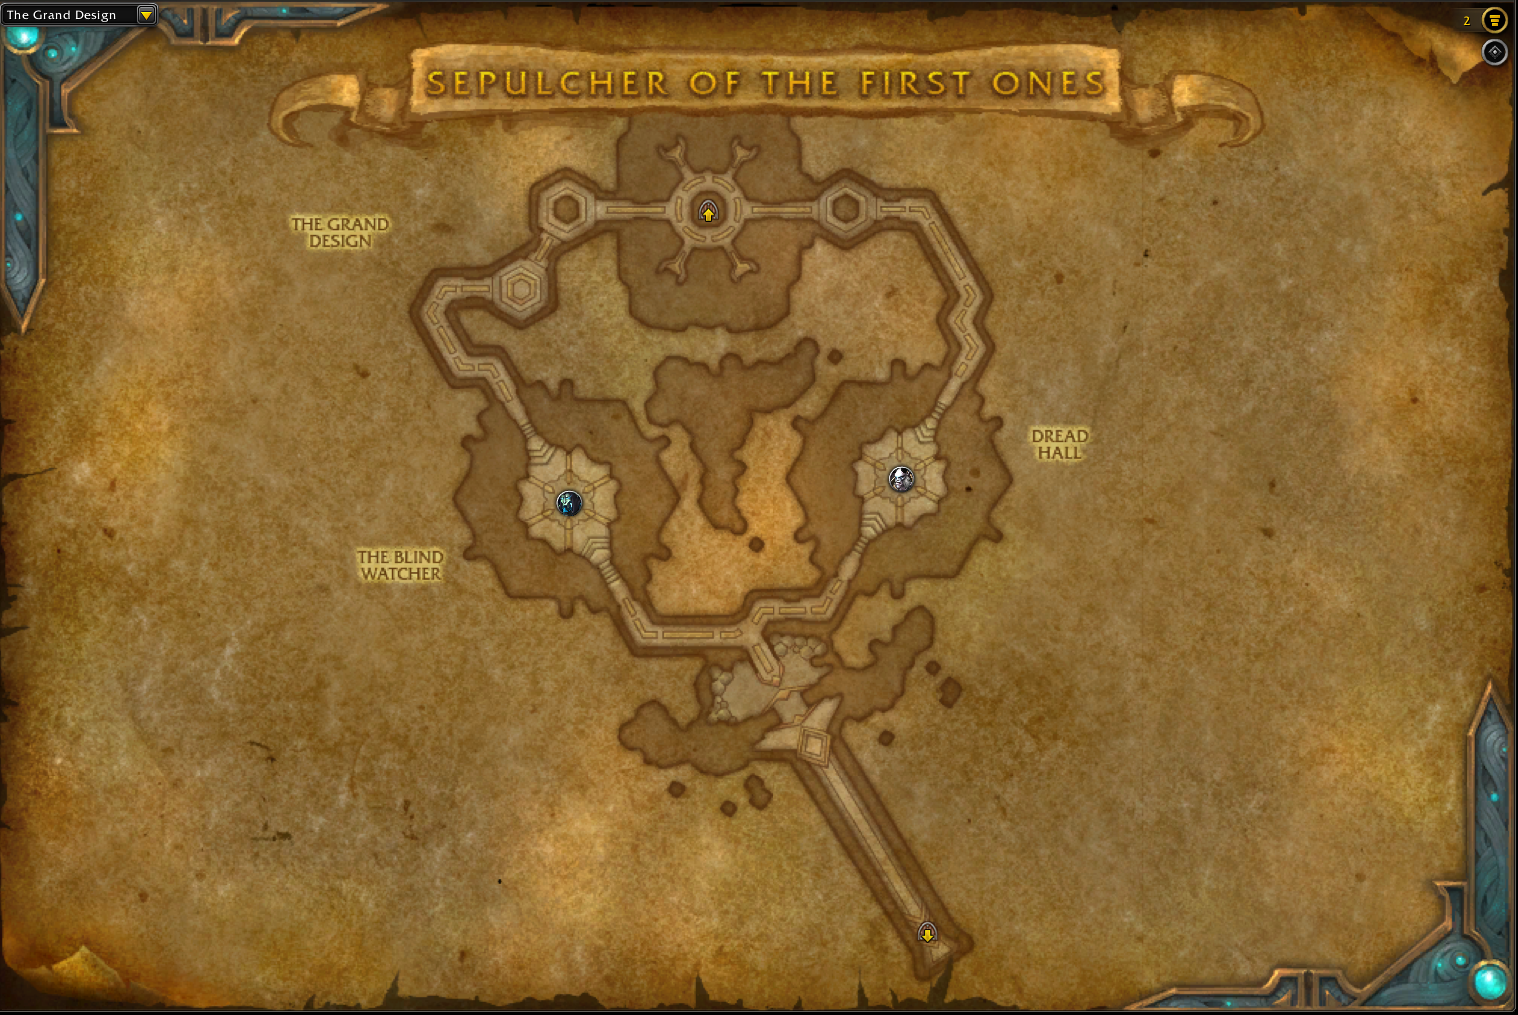
![]() Sepulcher of the First Ones has several subregions (check the gallery below), each with its own challenges and bosses:
Sepulcher of the First Ones has several subregions (check the gallery below), each with its own challenges and bosses:
- Immortal Hearth,
- Genesis Cradle,
- The Endless Foundry,
- Ephemeral Plains,
- Domination’s Grasp,
- The Grand Design,
- Heart of Eternity.


Each area has its own challenges and bosses. Here’s a quick overview.
Sepulcher of the First Collectibles: Mounts, Pets, Transmogs

| Collectible | Source (% drop rate) | Obtainable / Not Obtainable |
| Sepulcher of the First Ones Tier Sets | ||
| Fractal Cypher of the Zereth Overseer | The Jailer (1%) | Yes |
| Carcinized Zerethsteed | Ahead of the Curve: The Jailer | No |
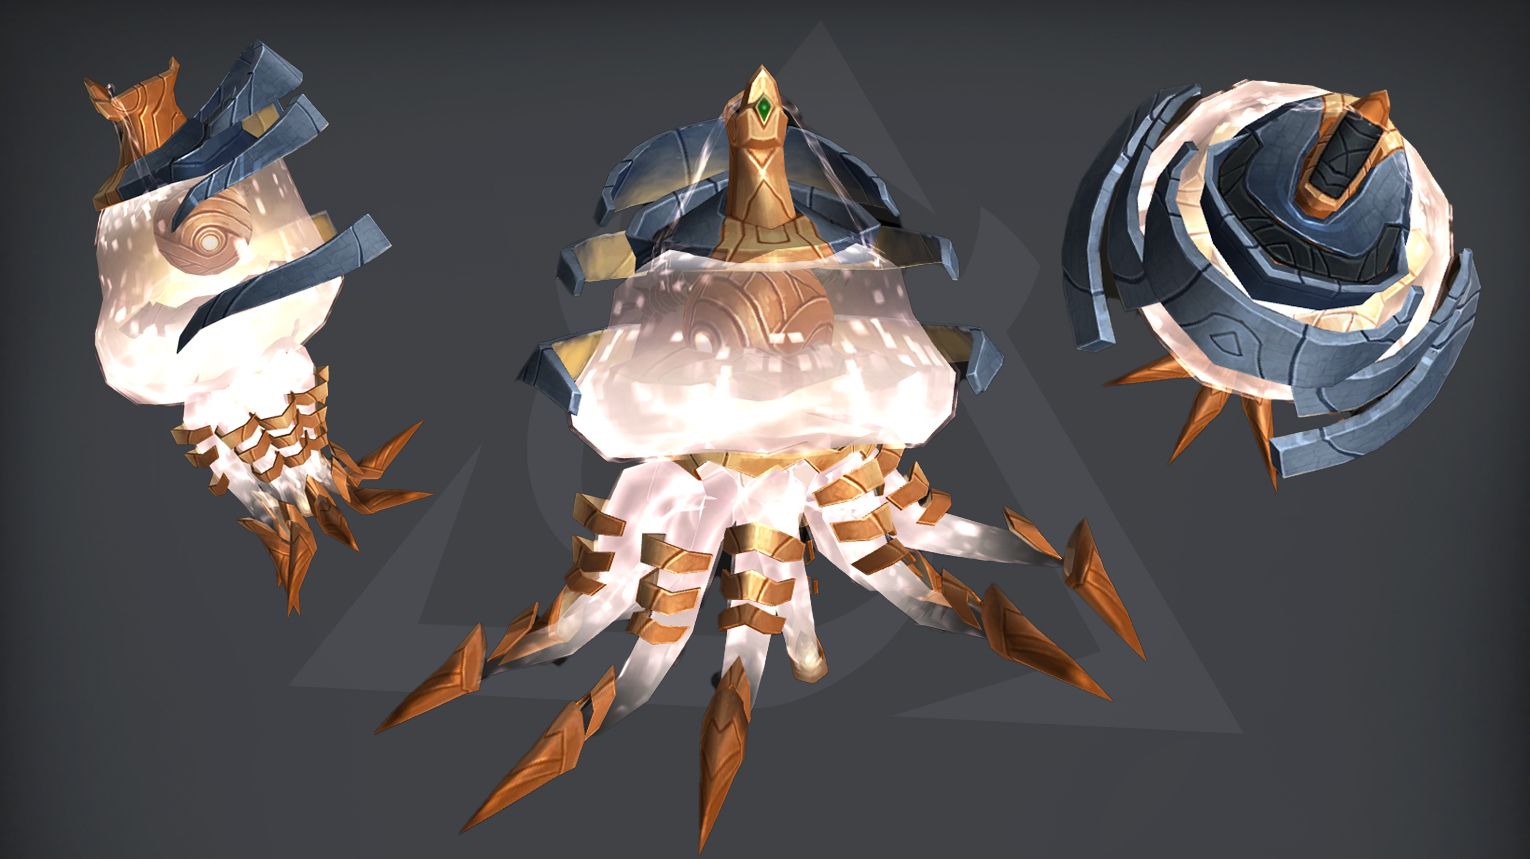
| Shimmering Aurelid | Glory of the Sepulcher Raider | Yes |
Sepulcher of the First Ones Bosses Overview
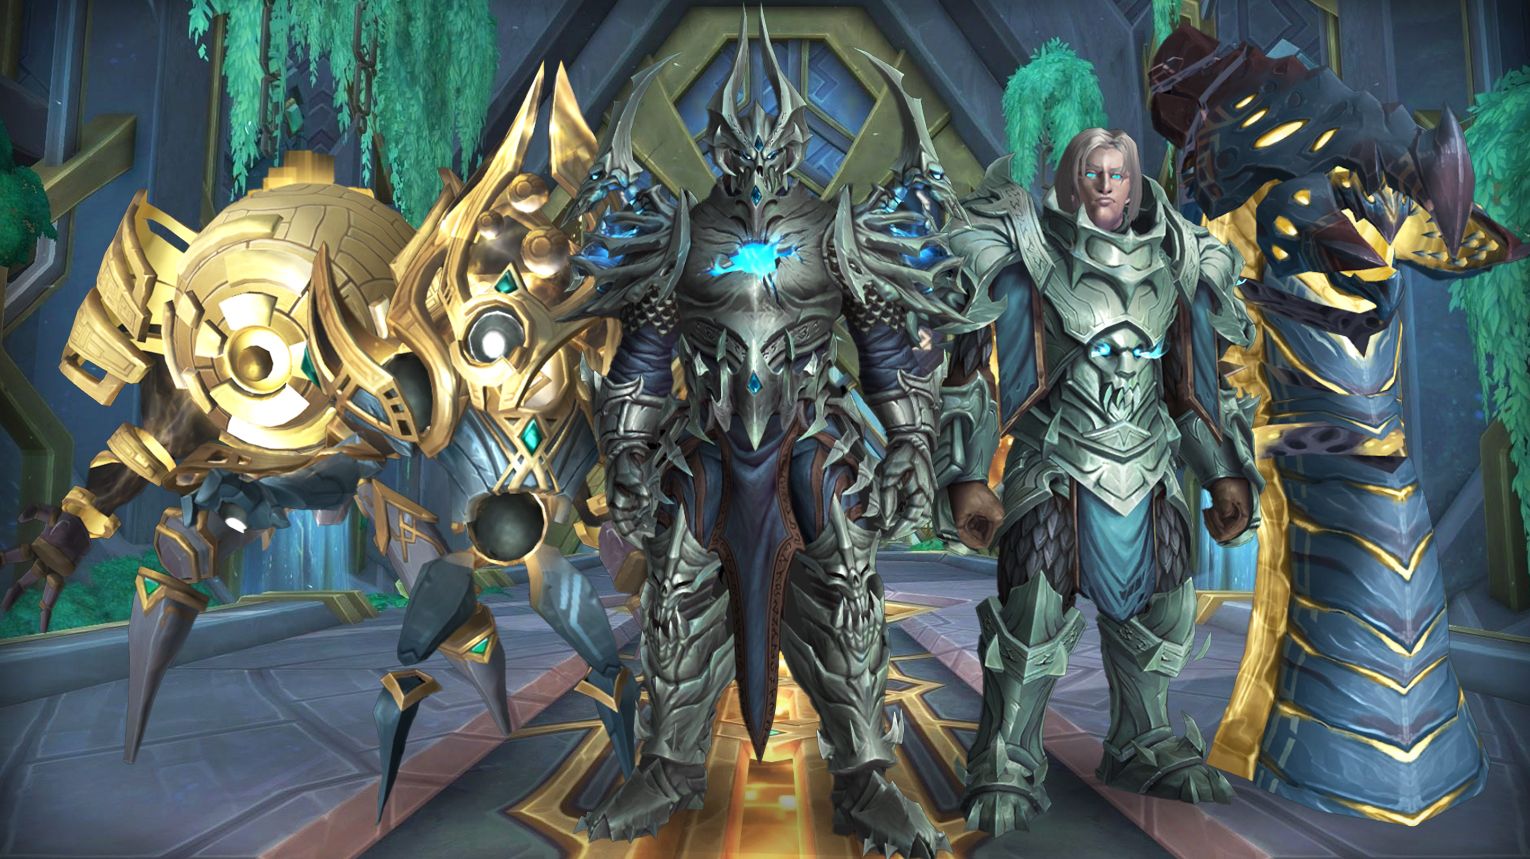
Sepulcher of the First Ones is a cosmic-themed raid in Shadowlands, where players confront the Jailer and his forces in Zereth Mortis. Players face the Jailer and his allies in Zereth Mortis. The raid features 11 bosses, each connected to themes of creation and control. These bosses range from the Vigilant Guardian, a huge defender, to Rygelon, a celestial being twisted by the Jailer‘s influence.
Fights vary from chaotic, like Halondrus the Reclaimer with its environmental dangers, to strategic, like the Pantheon of Death, which needs good teamwork. The final battle against the Jailer is a big, dramatic showdown where players must defeat his great power and stop his reality-changing plans.
![]() Next, we’ll look at the boss fights in Sepulcher of the First Ones and the loot you can get.
Next, we’ll look at the boss fights in Sepulcher of the First Ones and the loot you can get.
Can You Solo Sepulcher of the First Ones in The War Within?

Soloing Sepulcher of the First Ones in World of Warcraft: The War Within is possible but depends on several factors: your class, gear, and the specific boss mechanics. Some SotFO encounters are easier to brute force, while others have mechanics that can still be a challenge even with high item levels.
![]() Things to Consider Before Soloing:
Things to Consider Before Soloing:
- Item Level: The higher your gear, the easier it will be. Shadowlands raids still require a decent amount of DPS and survivability.
- Class & Spec: Tanks and self-healing classes (like Blood Death Knights or Druids) will have an easier time. Classes with immunities can also bypass some dangerous mechanics.
- Boss Mechanics: Some fights require you to handle mechanics properly, as ignoring them can still cause instant death or a wipe.
Below’s a quick rundown of major solo difficulty points in Sepulcher of the First Ones.
![]() Simple SotFO Bosses (Soloable with Good Gear):
Simple SotFO Bosses (Soloable with Good Gear):
- Vigilant Guardian – Kill adds to trigger the shield, then damage the boss. If you have enough DPS, you can push through without dying.
- Skolex – High damage output, but manageable with strong defensives.
- Artificer Xy’mox – Can be brute-forced if you have enough DPS to push through phases quickly.
- Lihuvim – No major mechanics that block solo play; just kill the boss.
![]() Challenging SotFO Bosses (Mechanics May Stop You):
Challenging SotFO Bosses (Mechanics May Stop You):
- Halondrus – The moving bombs mechanic can make this fight frustrating. You must manage the orbs properly or face overwhelming damage.
- Prototype Pantheon – High healing absorption and stacking damage can be tough without a way to clear debuffs.
- Dausegne – Damage over time effects can stack too high, forcing you to handle mechanics properly or have strong defensives.
- Lords of Dread – The Among Us phase stuns you for 18 seconds, which can wipe you if you don’t have a way to remove it.
![]() Difficult to Solo SotFO Bosses (May Require Future Nerfs):
Difficult to Solo SotFO Bosses (May Require Future Nerfs):
- Anduin Wrynn – The intermission phase is a major issue for solo players. If you cannot enter Kingsmourne Hungers, you’ll take too much damage and likely fail the encounter.
- Rygelon – If the Cosmic Irregularity stacks too high, it will instantly kill you unless you can absorb or immune it.
- The Jailer – Mind control mechanics and high damage phases make this nearly impossible to solo in current tuning.
![]() Quick Summary: Is Soloing Sepulcher Possible?
Quick Summary: Is Soloing Sepulcher Possible?
- LFR/Normal Difficulty: All bosses are soloable, but some of them like Anduin, Rygelon, and The Jailer are still major roadblocks.
- Heroic/Mythic Difficulty: Some classes can already complete the mythic SotFO solo, however, keep in mind that you will need to know the raid mechanics and have good PDS (check the video guide below). It goes without saying that you’ll need to use the Bloodlust or Drums of Deathly Ferocity at the right phase of each fight.
- Future Potential: As gear levels rise and Blizzard adjusts older content, it will eventually become easier to solo.
If you’re looking to farm Sepulcher of the First Ones for transmog or mounts and are struggling and can’t kill some boss, it’s best to bring a few friends or wait for more tuning adjustments in future patches.
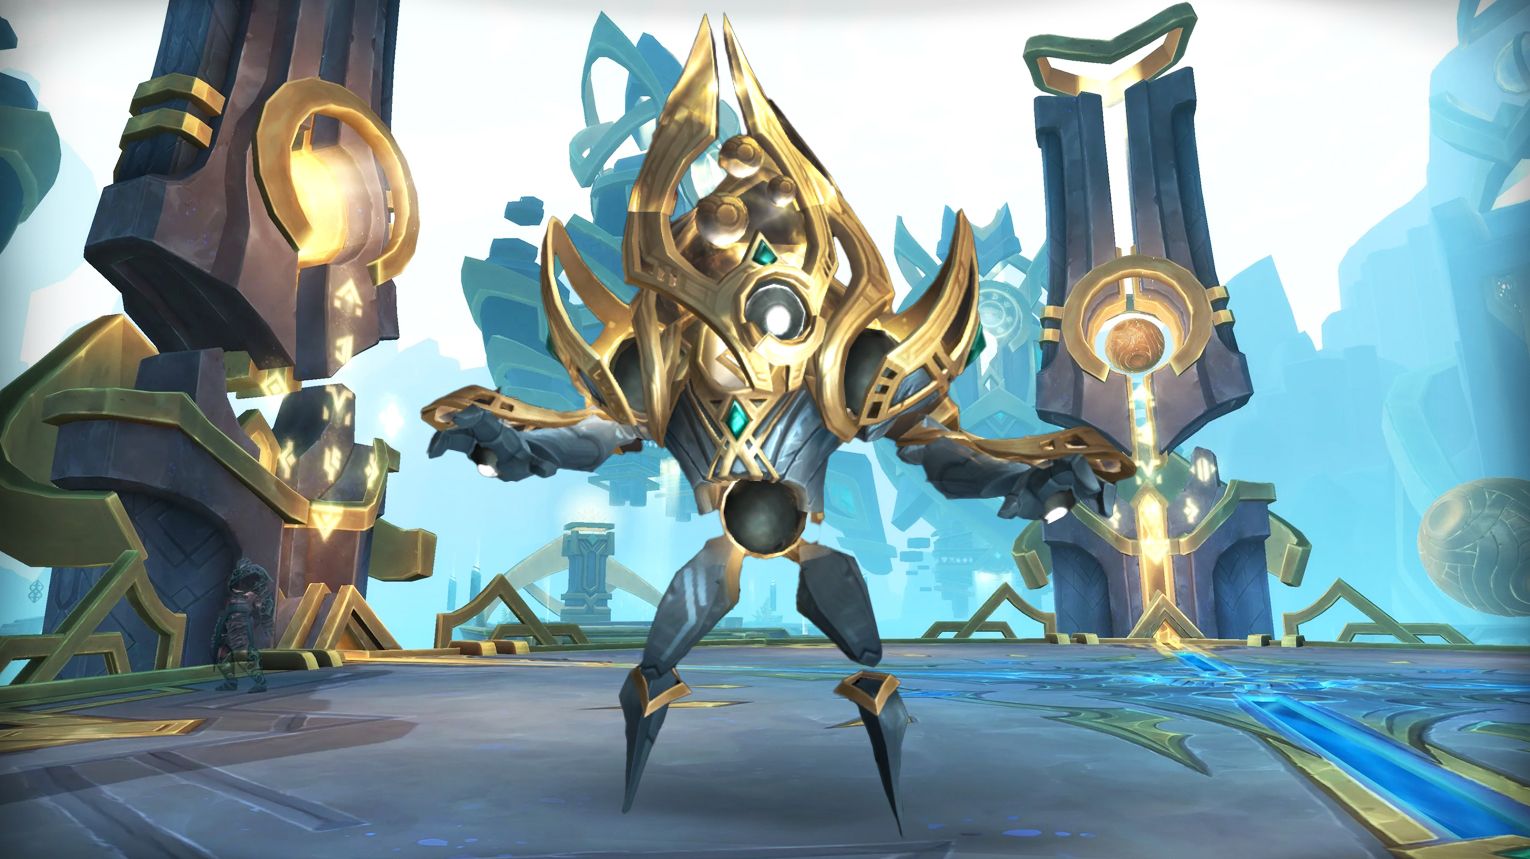
Vigilant Guardian
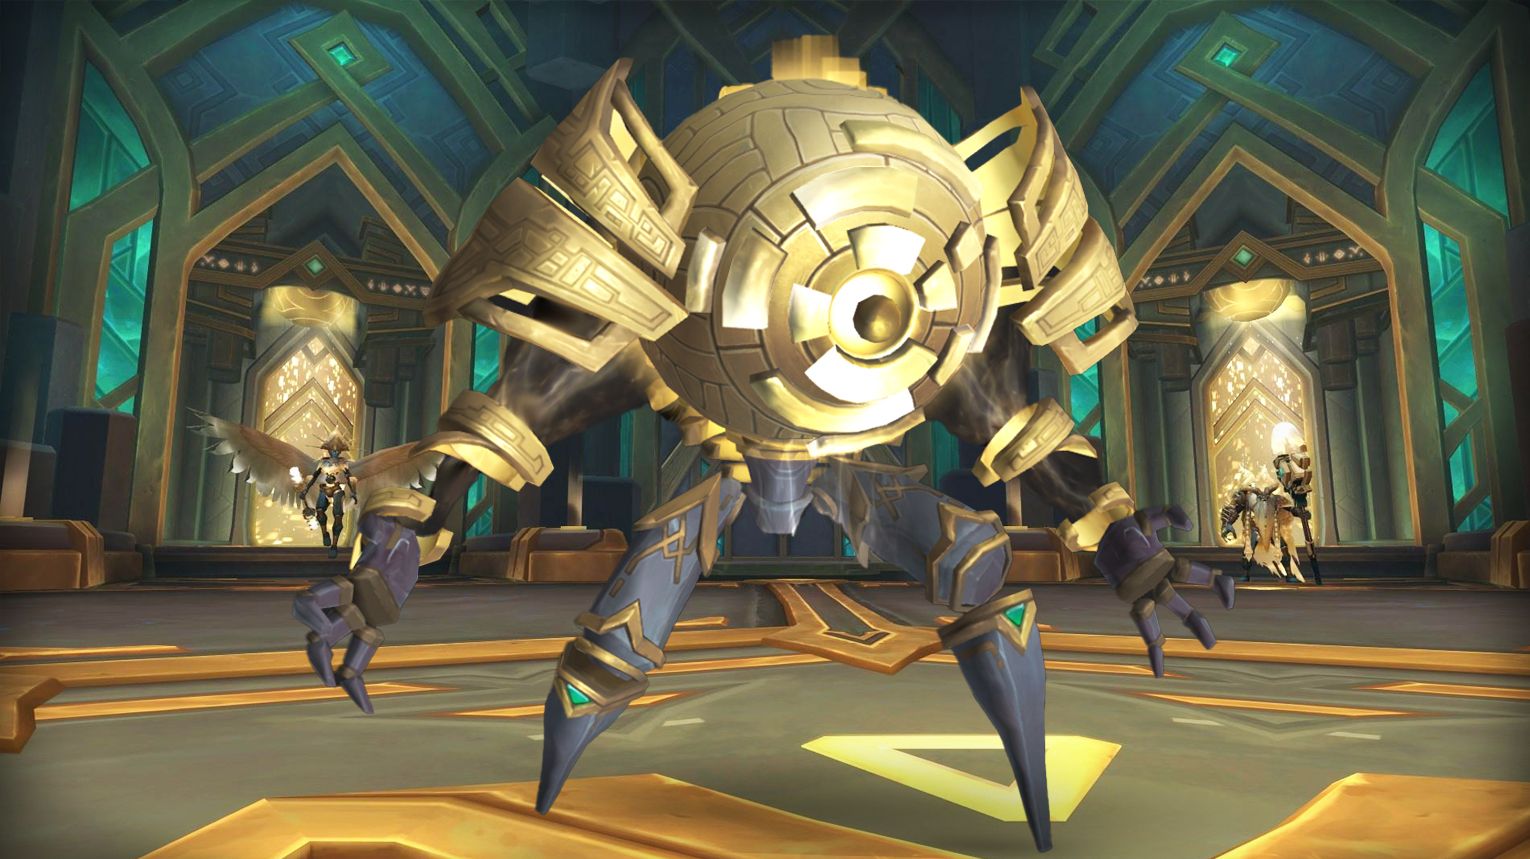
The Vigilant Guardian is the first boss encounter in the Sepulcher of the First Ones raid in World of Warcraft. This eternal guardian lies in wait, keeping a timeless vigil over the entrance to the Sepulcher of the First Ones. The fight has three phases, each with unique mechanics and challenges. In Phase One, players must deal with various automa and use their Unstable Cores to damage the boss. Phase Two involves direct combat with the Vigilant Guardian, featuring several abilities that require precise positioning and coordination. The final phase is a race against time as the boss’s damage output increases rapidly, necessitating a quick defeat.
![]() Preferred Classes:
Preferred Classes:
- Tanks: Classes with strong defensive cooldowns for Pneumatic Impact and Dissonance.
- Healers: Classes with strong raid-wide healing and cooldowns for Exposed Core and Core Overload.
- DPS: Classes with strong cleave/AoE for adds and high single-target burst for the burn phase.
![]() Tips:
Tips:
- General:
- Avoid Refracted Blast, Deresolution, and Wave of Disintegration.
- Stand in Force Field during Exposed Core to avoid lethal damage.
- Use Unstable Cores to progress to Phase 2.
- Save cooldowns for the final 15% burn phase.
- Tanks:
- Taunt swap after Pneumatic Impact in Phase 2.
- Avoid stacking Dissonance debuff.
- Healers:
- Focus on raid-wide healing during Exposed Core and Core Overload.
- Manage steady damage from Radioactive Core (Phase 1) and Fractured Core (Phase 2).
- DPS:
- Prioritize Pre-Fabricated Sentry adds while cleaving others.
- Save damage cooldowns for the sub-15% burn phase.
![]() Strategy:
Strategy:
- Phase 1 (100% – 40%)
- Activate and kill Automated Defense Matrix adds to drop Unstable Cores.
- Stand in Force Field during Exposed Core to survive.
- Use Unstable Cores to damage the boss and trigger
- Phase 2.
- Phase 2 (40% – 15%)
- Dodge Matter Dissolution orbs and Split Resolution zones.
- Tanks must taunt swap after Pneumatic Impact.
- Manage increased raid damage from Fractured Core.
- Phase 3 (15% – 0%)
- Burn the boss quickly during Core Overload.
- Chain healing and defensive cooldowns to survive the ramping damage.
![]() Bloodlust/Drums: Start of Phase 2 (when the boss activates at 40%).
Bloodlust/Drums: Start of Phase 2 (when the boss activates at 40%).
![]() Vigilant Guardian loot table:
Vigilant Guardian loot table:
| Type of Armor | Item | Loot type |
| Cloth | Ancient Materium Tassets | Legs |
| Pre-Fabricated Footpads | Feet | |
| Leather | Fractured Colossus Core | Chest |
| Helm of Solemn Vigil | Head | |
| Girdle of the First Gate | Waist | |
| Plate | Legplates of the Slumbering Sentinel | Legs |
| Unstable Giant’s Cuffs | Wrist | |
| Any | Key to the Immortal Hearth | 1H Mace |
| Modified Defense Grid | Ring | |
| Sepulcher’s Savior | Shield | |
| Auxiliary Attendant Chime | Trinket |
Skolex, the Insatiable Ravener
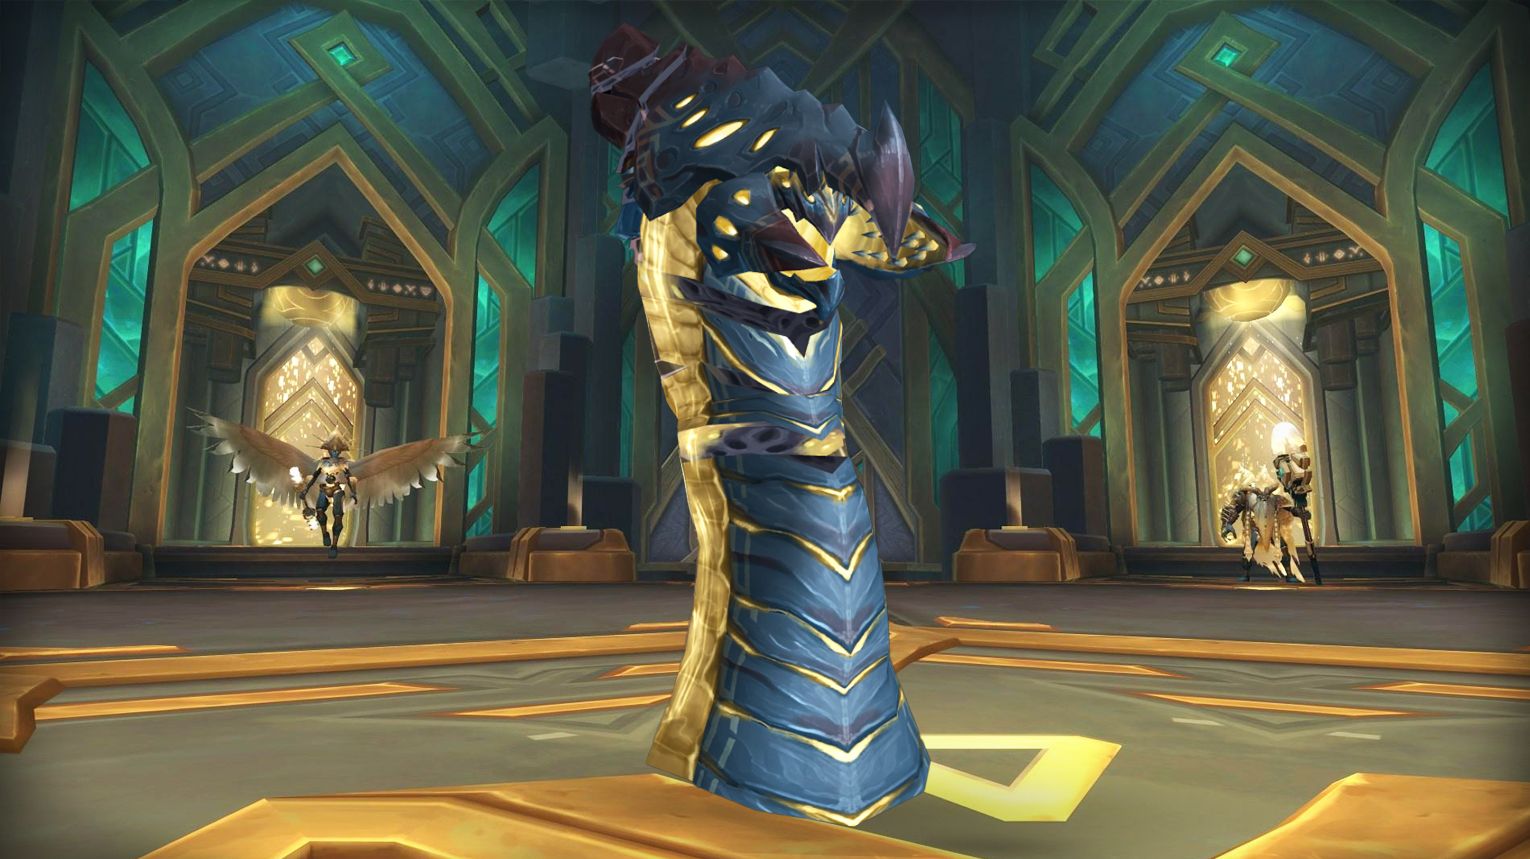
Skolex, the Insatiable Ravener, is the second boss in the Sepulcher of the First Ones raid. The fight revolves around managing Ephemera Dust stacks, a debuff applied to the raid through various abilities. The boss is stationary and cannot be moved conventionally. Key mechanics include Devouring Blood, Retch, Ravening Burrow, and a tank combo (Riftmaw and Rend).
![]() Preferred Classes:
Preferred Classes:
- Tanks: Classes with strong mitigation and mobility (e.g.,
 Protection Paladin,
  Blood Death Knight).
 - Healers: Classes with strong raid-wide healing and cooldowns (e.g.,
 Restoration Shaman,
  Holy Priest).
 - DPS: Ranged DPS are preferred due to the boss’s cleave and melee-unfriendly mechanics.
 Hunters,
  Mages, and
  Warlocks are strong choices.
![]() Tips:
Tips:
- General:
- Melee should stay behind the boss to avoid cleave damage.
- Avoid standing in Devouring Blood puddles and dodge Retch.
- Group up at ~5 stacks of Ephemera Dust to trigger Ravening Burrow.
- Tanks:
- Face the boss away from the raid.
- Stand on top of each other to avoid Wormhole Jaws hitting others.
- Taunt after the first Riftmaw cast to manage the tank combo.
- Healers:
- Use cooldowns before Ravening Burrow or when Ephemera Dust stacks are high.
- DPS:
- Avoid using cooldowns right before Ravening Burrow (boss becomes unattackable during the cast).
![]() Strategy:
Strategy:
- Ephemera Dust Management:
- Stacks are applied via Dust Flail and Dust Blast (Heroic).
- Trigger Ravening Burrow at ~5 stacks to reset the debuff.
- Positioning:
- Melee: Stay behind the boss.
- Ranged: Spread out loosely to avoid overlapping Devouring Blood.
- Tanks: Stand together to mitigate Wormhole Jaws.
- Tank Combo:
- Taunt after the first Riftmaw cast to handle the 500% damage increase.
- Spread 6-8 yards apart during the combo to avoid cleave.
- Heroic Mechanics:
- Collapsing Emptiness: Bait Ravening Burrow in different locations to avoid stacking pools.
- Dust Blast: Assign three players to alternate being the farthest to spread Ephemera Dust stacks.
![]() Bloodlust/Drums: On pull.
Bloodlust/Drums: On pull.
![]() Skolex loot table:
Skolex loot table:
| Type of Armor | Item | Loot type |
| Cloth | Ephemera-Softened Exoskeleton | Shoulder |
| Skolex’s Ravenous Skinguards | Wrist | |
| Leather | Devourer’s Sandblown Hidebinders | Wrist |
| Infinitely Collapsing Coil | Waist | |
| Mantle of the Broken Beast | Shoulder | |
| Plate | Gluttonous Gardbrace | Shoulder |
| Any | Lurking Predator’s Camouflage | Cloak |
| Crystallized Viscera Spike | Dagger | |
| Assimilated Safeguard | Shield | |
| Bells of the Endless Feast | Trinket | |
| Rift-Scarred Solcrusher | 2H Mace |
Artificer Xy’mox
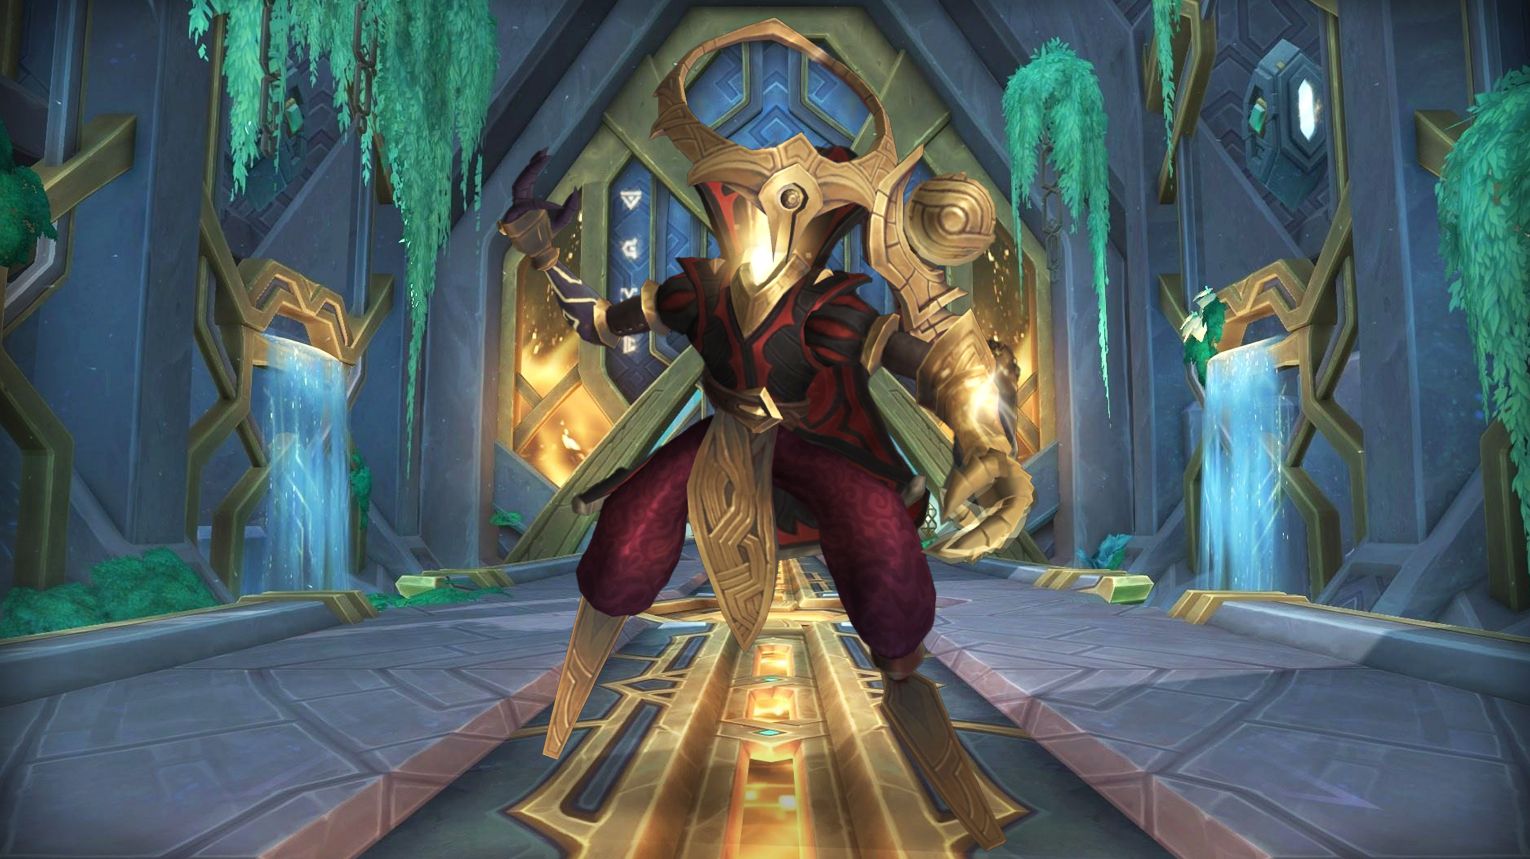
Artificer Xy’mox is a two-phase boss fight with Dimensional Tears used to dodge Genesis Rings. Tanks must manage Glyph of Relocation by taunt swapping and positioning safely, while DPS focuses on controlling and killing adds during intermissions to stop Genesis Supernova damage. Healers coordinate cooldowns for high raid damage moments. Use Bloodlust/Drums at the start or during the second intermission for optimal DPS.
![]() Preferred Classes:
Preferred Classes:
- Tanks: Classes with strong mobility and survivability to handle Glyph of Relocation.
- Healers: Classes with strong AoE healing and cooldowns to manage Hyperlight Sparknova and Genesis Supernova.
- DPS: Classes with strong AoE damage and crowd control for adds in the intermission phase.
![]() Tips:
Tips:
- Dimensional Tears:
- Place one tear near the edge of the platform and the other near the middle.
- Use tears to dodge Genesis Rings by teleporting to the opposite tear.
- Tanks:
- Taunt swap after each Glyph of Relocation.
- Position the raid safely after the grip to avoid additional damage.
- Healers:
- Assign cooldowns for Genesis Supernova during intermissions.
- Watch for Hyperlight Sparknova cleave damage.
- DPS:
- Focus on controlling and killing adds quickly during intermissions.
- Use interrupts and crowd control on Xy Acolytes and Xy Spellslingers.
![]() Strategy:
Strategy:
Phase One
- Dimensional Tears:
- Two players are marked to create tears. Place one near the edge and one near the center.
- Use tears to dodge Genesis Rings: If the ring starts in the center, use the outer tear. If the ring starts on the edge, use the inner tear.
- Glyph of Relocation: Tanks should taunt swap and move to a safe area before the grip occurs.
- Hyperlight Sparknova: Spread out to avoid cleaving damage onto other players.
- Gunship Barrage: Move away from damage indicators on the ground.
Intermission Phase (75% and 50%)
- Adds:
- Xy Acolytes: Gain energy over time. At 100 energy, they cast Hyperlight Ascension, which wipes the raid.
- Xy Spellslingers: Cast Debilitating Ray, slowing and damaging players.
- Genesis Supernova:
- Deals increasing damage every 2 seconds while adds are alive.
- Kill adds quickly to stop the damage ramp-up.
Heroic Differences
- Continuum Stasis Trap:
- Traps spawn on ranged players and stun anyone who steps on them.
- Rotate around the room to bait traps into clear areas.
- Use immunities or stun mitigation to clear traps.
![]() Bloodlust/Drums: On pull.
Bloodlust/Drums: On pull.
![]() Artificer Xy’mox loot table:
Artificer Xy’mox loot table:
| Type of Armor | Item | Loot type |
| Cloth | Stolen Nathrian Slippers | Feet |
| Illicit Artifact Holster | Waist | |
| Leather | Imported Illidari Spaulders | Shoulder |
| Unlicensed Hyperlight Handlers | Hands | |
| Plate | Veiled Auctioneer’s Vambraces | Wrist |
| Enforcer’s Containment Cinch | Waist | |
| Any | Cartel Xy’s Proof of Initiation | Amulet |
| Xy Captain’s Crossbow | Crossbow | |
| Replicated Relic Blade | 1H Sword | |
| Forerunner’s Relic Blade | 1H Sword | |
| Cache of Acquired Treasures | Trinket | |
| Pulsating Riftshard | Trinket |
Dausegne, the Fallen Oracle
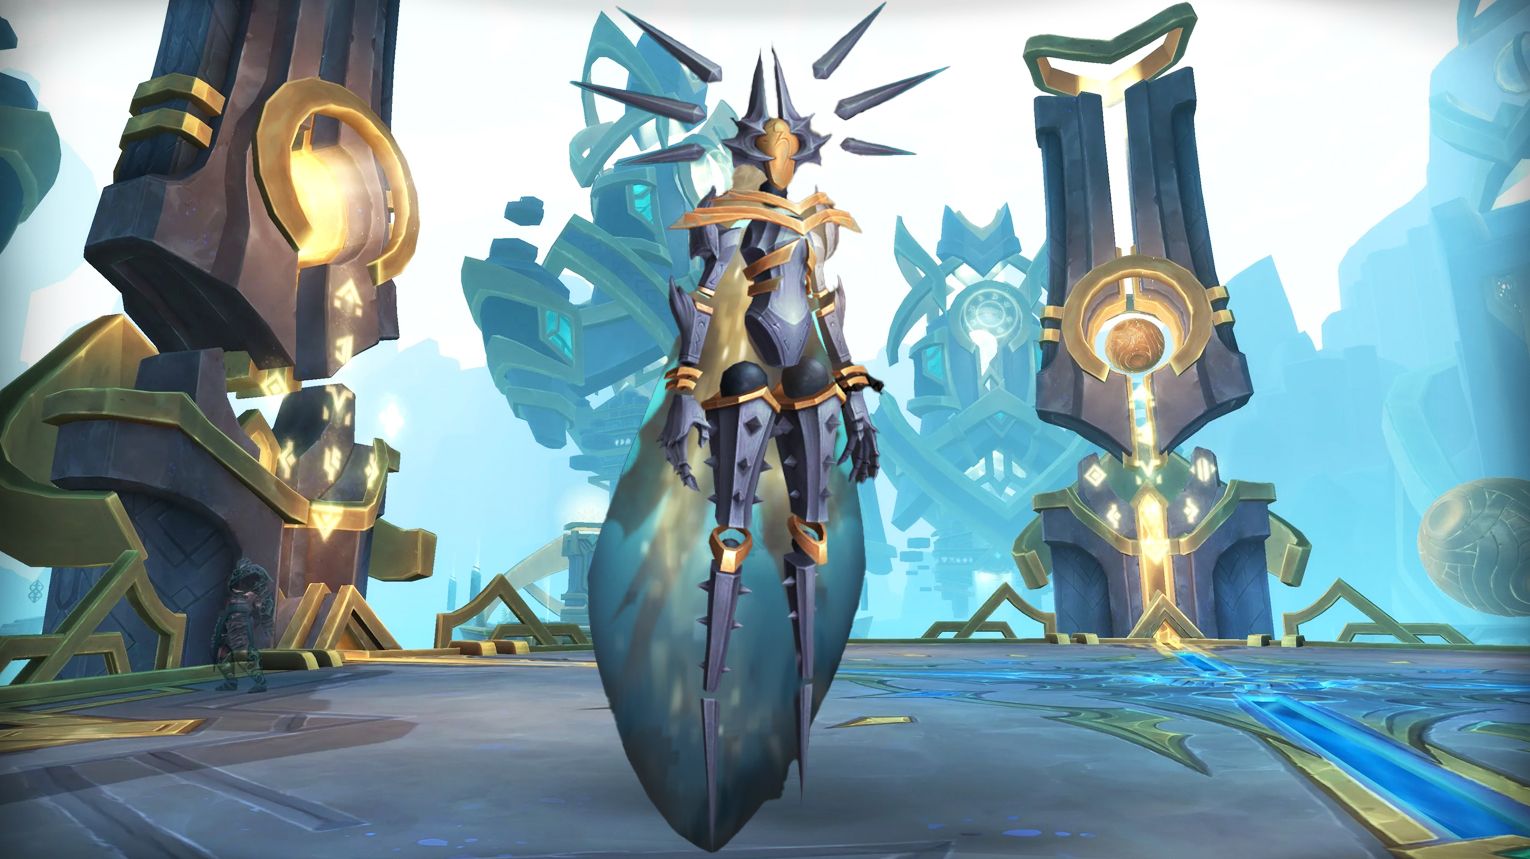
Dausegne, the Fallen Oracle is a single-phase encounter in Sepulcher of the First Ones that escalates in difficulty as she drains mana from four reservoirs. Key mechanics include avoiding Obliteration Arc, crossing Disintegration Halo rings safely, killing Domination Cores quickly, and managing Infused Strikes stacks on tanks. Use Bloodlust/Drums during Inevitable Dominion to break her Siphoned Barrier and deal significant damage. On Heroic, Staggering Barrage adds a vulnerability debuff, requiring coordinated soak groups.
![]() Preferred Classes:
Preferred Classes:
- Tanks: Classes with strong mitigation and mobility to handle Infused Strikes and reposition the boss.
- Healers: Classes with strong raid-wide healing and cooldowns to manage Unleashed Infusion and Inevitable Dominion.
- DPS: Classes with strong single-target and cleave damage to handle Domination Cores and break Siphoned Barrier quickly.
![]() Tips:
Tips:
- General:
- Avoid Obliteration Arc by moving out of its path.
- Cross Disintegration Halo rings in a staggered manner to avoid stacking the damage debuff.
- Tanks:
- Taunt swap at 4-8 stacks of Infused Strikes to manage raid-wide damage.
- Position Domination Cores near the boss for cleave damage.
- Healers:
- Monitor Infused Strikes stacks on tanks to prepare for Unleashed Infusion.
- Be ready for raid-wide damage during Inevitable Dominion.
- DPS:
- Prioritize killing Domination Cores to limit Encroaching Dominion puddles.
- Interrupt Domination Bolt casts from adds.
- Use cooldowns to break Siphoned Barrier during Inevitable Dominion.
![]() Strategy:
Strategy:
- Reservoir Management:
- Move the boss around the platform to keep undominated reservoirs clear of Encroaching Dominion puddles.
- Each drained reservoir increases the encounter’s difficulty.
- Disintegration Halo:
- Cross rings in a staggered fashion to avoid stacking the damage debuff.
- Stand near the first dominated reservoir to safely cross rings.
- Inevitable Dominion: Focus on breaking the Siphoned Barrier quickly to apply Collapsed Barrier and deal damage to the boss.
- Domination Cores:
- Kill adds quickly to minimize Encroaching Dominion puddles.
- Interrupt Domination Bolt to reduce raid damage.
- Infused Strikes: Tanks should taunt swap at 4-8 stacks to prevent excessive raid damage.
![]() Bloodlust/Drums: during Inevitable Dominion to maximize DPS and break the Siphoned Barrier quickly.
Bloodlust/Drums: during Inevitable Dominion to maximize DPS and break the Siphoned Barrier quickly.
![]() Dausegne loot table:
Dausegne loot table:
| Type of Armor | Item | Loot type |
| Cloth | Sash of the Silent Sonata | Waist |
| Haunting Hymnal Robes | Chest | |
| Leather | Clasp of Crooked Crescendos | Waist |
| Epaulets of the Ailing Aria | Shoulder | |
| Oracle’s Chromatic Cuirass | Chest | |
| Plate | Dausegne’s Dissonant Halo | Head |
| Song-Mad Sabatons | Feet | |
| Any | Drape of Mournful Melodies | Cloak |
| Final Forte | Gun | |
| Maestro’s Malice | 1H Axe | |
| Discordant Deathblade | 1H Sword | |
| Resonant Reservoir | Trinket |
Prototype Pantheon
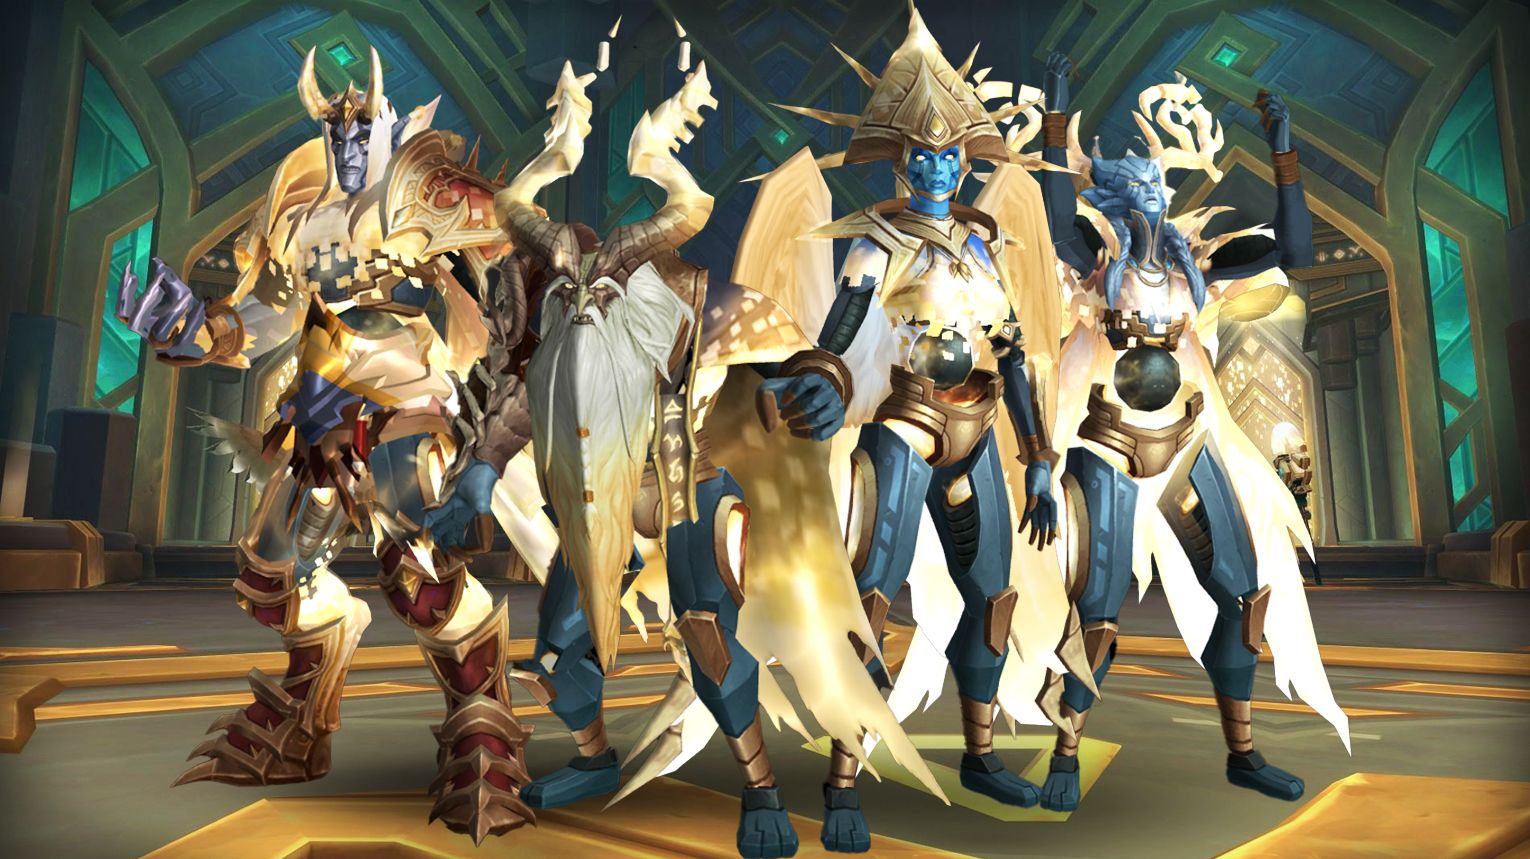
The Prototype Pantheon is a council-style fight in Sepulcher of the First Ones featuring four bosses fought in phases. Key mechanics include interrupting Gloom Bolt and Anima Bolt, managing Necrotic Ritualists, and using Bastion’s Ward to safely dispel Runecarver’s Deathtouch. In Heroic mode, all bosses must die within 20 seconds of each other, or they heal to full. Use Bloodlust/Drums in Phase Three to burn down all bosses simultaneously.
![]() Preferred Classes:
Preferred Classes:
- Tanks: Classes with strong defensive cooldowns and taunt management (e.g., Protection Paladin, Blood DK).
- Healers: Classes with strong dispels and AoE healing (e.g., Holy Priest,
 Restoration Druid).
 - DPS: Classes with strong single-target and cleave damage (e.g.,
 Fire Mage,
  Beast Mastery Hunter).
![]() Tips:
Tips:
- General:
- Avoid standing in boss mechanics like Pinning Volley, Necrosis, Animastorm, and Wild Stampede.
- Spread out after Hand of Destruction to minimize raid damage.
- Tanks:
- Taunt swap after Humbling Strikes (Phase One) and Wracking Pain (Phase Two).
- Manage debuffs carefully in Phase Three.
- Healers:
- Dispels Runecarver’s Deathtouch when players stand in Bastion’s Ward.
- Heal Withering Seeds to full to trigger Invigorating Bloom.
- DPS:
- Kill Necrotic Ritualists quickly to prevent Necrosis from spreading.
- Keep boss health relatively even, especially in Heroic mode.
![]() Strategy:
Strategy:
- Phase One (War and Duty):
- Interrupt Gloom Bolt (Prototype of War) to reduce healing absorbs.
- Kill Necrotic Ritualists to stop Necrosis.
- Use Bastion’s Ward to safely dispel Runecarver’s Deathtouch.
- Tanks must taunt swap after Humbling Strikes.
- Phase Two (Renewal and Absolution):
- Interrupt Anima Bolt (Prototype of Renewal) to avoid stacking damage.
- Heal Withering Seeds to full for raid-wide healing buffs.
- Spread out after Hand of Destruction to avoid Sinful Projection damage.
- Tanks must taunt swap after Wracking Pain.
- Phase Three (All Bosses):
- Combine mechanics from Phases One and Two.
- Focus on managing debuffs and keeping boss health even.
![]() Bloodlust/Drums: when all four bosses are active to burn them down quickly.
Bloodlust/Drums: when all four bosses are active to burn them down quickly.
![]() Prototype Pantheon loot table:
Prototype Pantheon loot table:
| Type of Armor | Item | Loot type |
| Cloth | Boots of Ceaseless Conflict | Feet |
| Leather | Moccasins of Dreadful Absolution | Feet |
| Sin-Steeped Coronet | Head | |
| Winter’s Stampeding Striders | Feet | |
| Wristwraps of Night’s Renewal | Wrist | |
| Plate | Duty’s Ascendant Breastplate | Chest |
| Any | Elysia’s Promise | Staff |
| Pursuit of Victory | Staff | |
| Elegy of the Eternals | Trinket | |
| The First Sigil | Trinket | |
| Prelude to Pride | 2H Sword |
Lihuvim, Principal Architect
Lihuvim, Principal Architect is a single-phase boss fight in Sepulcher of the First Ones focusing on space management and handling Unstable Motes and Synthesized Automa. Key mechanics include dropping motes at the edges, clearing them with Deconstructing Energy, and prioritizing Acquisitions Automa during Synthesize. On Heroic, tanks must manage Resonance combos, and DPS must quickly kill Defense Matrix Automa. Use Bloodlust/Drums during Synthesize to burn down adds efficiently.
![]() Preferred Classes:
Preferred Classes:
- Tanks: Classes with strong mitigation (e.g., Protection Paladin, Blood Death Knight) to handle Resonance combos and manage Deconstructing Energy.
- Healers: Classes with strong raid-wide healing (e.g., Restoration Shaman, Holy Priest) to manage Protoform Radiance and Cosmic Shift damage.
- DPS: Classes with strong cleave/AoE (e.g., Fire Mage,
 Havoc Demon Hunter) to quickly kill Acquisitions Automa and other adds.
![]() Tips:
Tips:
- General:
- Spread loosely to drop Unstable Motes near the edges of the room.
- Avoid being pushed into Unstable Motes by Cosmic Shift.
- Use Deconstructing Energy to clear Unstable Motes.
- Tanks:
- Manage Resonance combos with proper taunt swaps or heavy mitigation.
- Use Deconstructing Energy to clear Unstable Motes if needed.
- Healers:
- Be prepared for raid-wide damage from Cosmic Shift and Protoform Radiance.
- Prioritize healing players with Protoform Disalignment during Synthesize.
- DPS:
- Stay away from the boss’s front to avoid frontal cleaves.
- Focus on killing Acquisitions Automa before they activate.
![]() Strategy:
Strategy:
- Phase 1: Mote Management:
- Ranged DPS should drop Unstable Motes near the edges.
- Use Deconstructing Energy to clear motes before they become problematic.
- Intermission: Synthesize:
- At 100 energy, Lihuvim begins forming Automa.
- Move into the designated bay to reduce Protoform Radiance damage.
- Prioritize killing Acquisitions Automa and Defense Matrix Automa (Heroic).
- Heroic-Specific Mechanics:
- Tanks must handle Resonance combos by swapping or using strong defensives.
- Quickly kill Defense Matrix Automa to prevent damage reduction on other adds.
![]() Bloodlust/Drums: during the Synthesize phase when Acquisitions Automa spawns.
Bloodlust/Drums: during the Synthesize phase when Acquisitions Automa spawns.
![]() Lihuvim loot table:
Lihuvim loot table:
| Type of Armor | Item | Loot type |
| Cloth | Ephemera-Charged Thinking Cap | Head |
| Leather | Automa-Tender’s Tights | Legs |
| Combustible Collaboration Girdle | Waist | |
| Plate | Bracers of the Inscrutable Inventor | Wrist |
| Any | Lihuvim’s Severing Scalpel | Dagger |
| Genesis Lathe | 1H Mace | |
| Loquacious Keeper’s Peridot | Ring | |
| Architect’s Ingenuity Core | Trinket | |
| Pocket Protoforge | Trinket |
Halondrus the Reclaimer

Halondrus the Reclaimer is a three-phase boss in Sepulcher of the First Ones with unique mechanics in each phase. The raid must manage Ephemeral Motes, dodge Earthbreaker Missiles, and handle Lightshatter Beam while chasing the boss during intermissions. In Heroic, additional mechanics like Planetcracker Beam and Fractal Shell increase difficulty.
![]() Preferred Classes:
Preferred Classes:
- Tanks: Classes with strong mitigation and mobility (e.g., Protection Paladin, Blood DK).
- Healers: Classes with strong AoE healing and dispels (e.g., Restoration Druid, Holy Priest).
- DPS: Classes with strong burst damage and mobility (e.g., Fire Mage, Havoc Demon Hunter).
![]() Tips:
Tips:
- General:
- Spread out to avoid cleaving with Earthbreaker Missiles.
- Dodge Aftershocks and intercept Ephemeral Motes.
- Tanks:
- Aim Lightshatter Beam away from the raid.
- Taunt swap after each Lightshatter Beam.
- Healers:
- Dispel Crushing Prism immediately.
- Save healing cooldowns for Reclaim and Eternity Overdrive.
- DPS:
- Always attack the boss, even during movement phases.
- Use damage cooldowns during the second intermission for a faster Phase Three.
![]() Strategy:
Strategy:
- Phase One (100% – 80%):
- Reclaim: Break the boss’s shield to stop raid damage and Ephemeral Mote pulls.
- Seismic Tremors: Dodge tremors and intercept Ephemeral Motes.
- Earthbreaker Missiles: Spread out to avoid cleaving and dodge Aftershocks.
- Crushing Prism: Healers dispel immediately.
- Lightshatter Beam: Tanks taunt swap after each cast.
- Phase Two (80% – 50%):
- Relocation Form: The boss moves to the next area, triggering Quaking Steps.
- Shatter: Avoid Gleaming Spheres to prevent knockbacks.
- Planetcracker Beam (Heroic): Dodge beams and split the raid to handle Ephemeral Motes.
- Phase Three (50% – 0%):
- Eternity Overdrive: Increasing raid damage over time.
- Ephemeral Fissures: More fissures spawn, making it harder to intercept motes.
- Fractal Shell (Heroic): Use Lightshatter Beam to remove shells from motes.
![]() Bloodlust/Drums: at the start of Phase Three (50% boss health).
Bloodlust/Drums: at the start of Phase Three (50% boss health).
![]() Halondrus the Reclaimer loot table:
Halondrus the Reclaimer loot table:
| Type of Armor | Item | Loot type |
| Ephemera-Stained Sollerets | Feet | |
| Plate | Greatboots of the Roaming Goliath | Feet |
| Any | Obscured Fractal Prism | Off-hand |
| Taciturn Keeper’s Lapis | Ring | |
| Guardstaff of the Great Cycle | Staff | |
| Earthbreaker’s Impact | Trinket | |
| Reclaimer’s Intensity Core | Trinket |
Anduin Wrynn
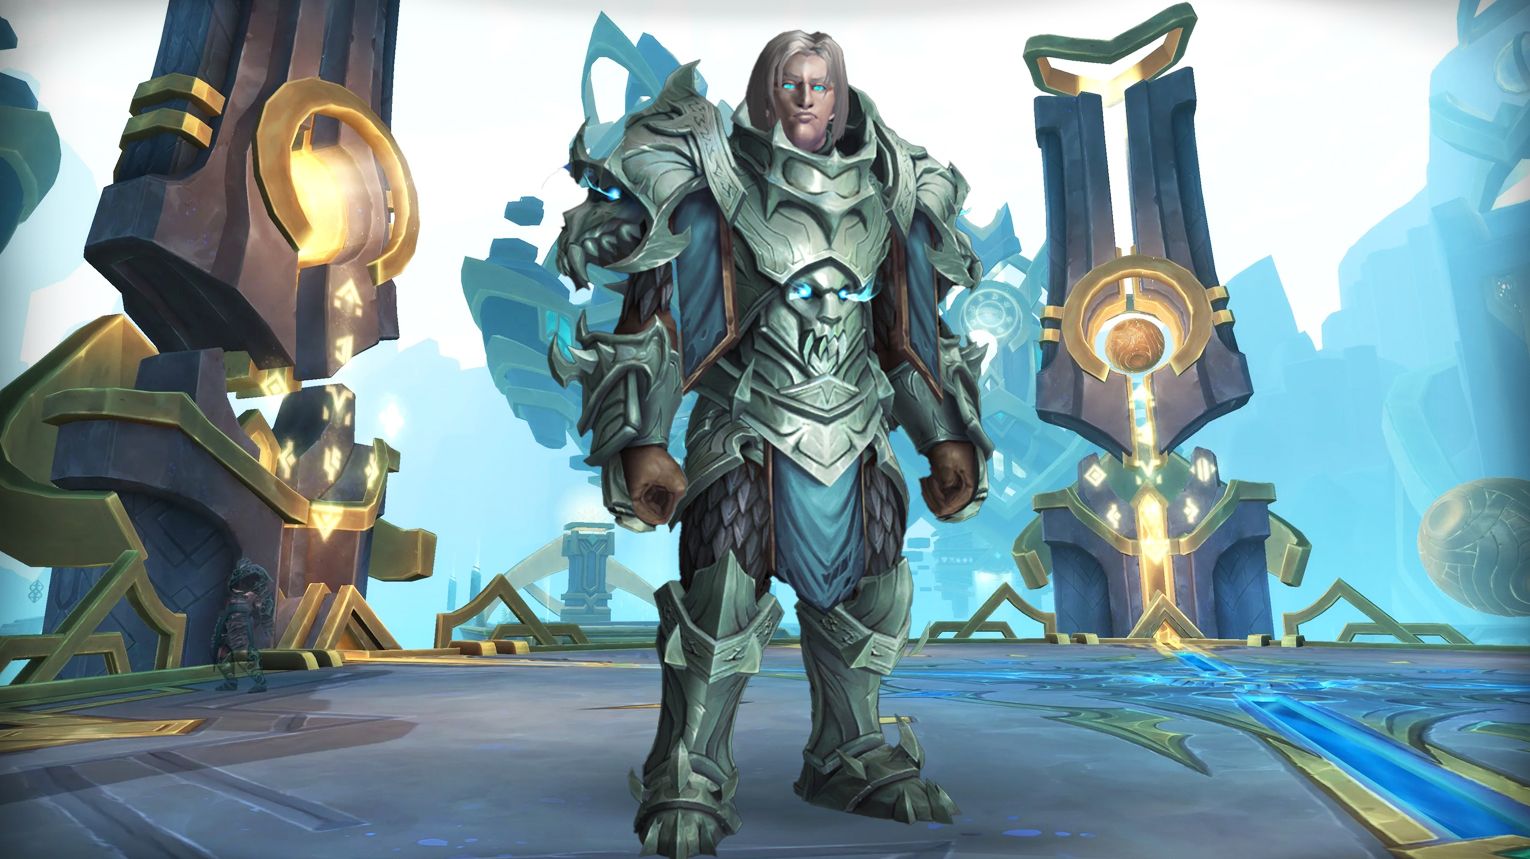
Anduin Wrynn is a multi-phase raid boss in Sepulcher of the First Ones where players must free him from the Jailer’s control. Key mechanics include managing Blasphemy debuffs, splitting the raid for the Banished Realm, and handling Befouled Barrier and Wicked Star. Use Bloodlust/Drums during intermissions for maximum damage on the Remnant of a Fallen King. Coordination is crucial for debuff management, add control, and healing, especially in Heroic mode with added mechanics like Gloom and Monstrous Soul.
![]() Preferred Classes:
Preferred Classes:
- Tanks: Classes with strong mitigation and mobility (e.g., Protection Paladin, Blood DK).
- Healers: Classes with strong AoE healing and dispels (e.g., Holy Priest, Restoration Druid).
- DPS: Classes with strong burst damage, interrupts, and crowd control (e.g., Fire Mage,
 Demon Hunter).
![]() Tips:
Tips:
- General:
- Split the raid evenly for the Banished Realm during Kingsmourne Hungers.
- Avoid Wicked Star paths and manage Blasphemy debuffs by colliding with opposite-colored players.
- Use Beacon of Hope to clear Hopelessness debuffs in Phase Five.
- Tanks:
- Taunt swap at ~20 stacks of Dark Zeal.
- Ensure one tank is always in the Banished Realm to handle Anduin’s Despair.
- Healers:
- Focus on healing players in Befouled Barrier to prevent healing absorbs.
- Assign cooldowns for Empowered Hopebreaker in Phase Three.
- DPS:
- Prioritize killing Anduin’s Despair and Anduin’s Hope in the Banished Realm.
- Use interrupts and crowd control on Grim Reflections in Phase Five.
![]() Strategy:
Strategy:
- Phase One:
- Reach 100 Willpower by killing Anduin’s Despair and healing Anduin’s Hope.
- Manage Kingsmourne Hungers by sending half the raid to the Banished Realm.
- Handle Blasphemy by pairing opposite-colored debuffs.
- Intermission (Phase Two):
- Focus damage on the Remnant of a Fallen King to transfer damage to Anduin.
- Avoid Army of the Dead adds and manage Remorseless Winter damage.
- Phase Three: Replace Blasphemy with Grim Reflections. Crowd control and interrupt Psychic Terror casts.
- Phase Four (Second Intermission): Navigate March of the Damned walls while dealing with adds.
- Phase Five:
- Manage Hopelessness debuffs by using Beacon of Hope.
- Avoid overlapping explosions by staggering debuff clears.
![]() Bloodlust/Drums: during Intermission Phases (Phase Two and Phase Four) when damage to the Remnant of a Fallen King is amplified.
Bloodlust/Drums: during Intermission Phases (Phase Two and Phase Four) when damage to the Remnant of a Fallen King is amplified.
![]() Anduin Wrynn loot table:
Anduin Wrynn loot table:
| Type of Armor | Item | Loot type |
| Cloth | Anduin’s Princely Vestments | Chest |
| Leather | Wrists of the Wicked Star | Wrist |
| King’s Wolfheart Waistband | Waist | |
| Plate | Remnant’s Blasphemous Scourgebelt | Waist |
| Any | Beacon of Stormwind | Amulet |
| Soulwarped Seal of Menethil | Ring | |
| Soulwarped Seal of Wrynn | Ring | |
| The Lion’s Roar | Trinket |
Lords of Dread

The Lords of Dread encounter in Sepulcher of the First Ones features dual bosses, Mal’Ganis and Kin’tessa, who alternate between Swarm of Decay/Darkness(heavy AoE damage) and Infiltration of Dread (disguise mechanic). Key strategies include stacking for AoE healing during swarm phases, quickly unmasking bosses during infiltration, and managing Cloud of Carrion and Slumber Cloud mechanics. Use Bloodlust/Drums during swarm phases for maximum DPS. The fight requires strong coordination, especially on Heroic and Mythic difficulties, where mechanics intensify.
![]() Preferred Classes:
Preferred Classes:
- Tanks:
- High-mitigation tanks (e.g., Protection Paladin, Blood Death Knight) to handle Leeching Claws and Opened Veins.
- Tanks must quickly unmask bosses during Infiltration of Dread to avoid Shatter Mind.
- High-mitigation tanks (e.g.,
- Damage Dealers:
- Classes with strong AoE capabilities (e.g., Fire Mage,
 Demonology Warlock) to capitalize on bosses taking increased AoE damage during Swarm of Decay/Darkness.
 - Classes with strong single-target burst for Inchoate Shadows and Infiltration of Dread phases.
- Classes with strong AoE capabilities (e.g.,
- Healers:
- High-throughput healers (e.g., Holy Priest, Restoration Druid) to manage heavy raid-wide damage from Swarm of Decay/Darknessand Cloud of Carrion.
- Healers must dispel Cloud of Carrion and manage Biting Wounds.
- High-throughput healers (e.g.,
![]() Tips:
Tips:
- Swarm Phases:
- Stack for AoE healing during Swarm of Decay/Darkness.
- Use AoE abilities to maximize damage on bosses during this phase.
- Infiltration of Dread:
- Communicate clearly to identify and defeat the disguised bosses.
- Use Moment of Clarity to reveal the correct targets.
- Cloud of Carrion:
- Avoid standing near players with Cloud of Carrion to prevent it from jumping.
- Healers should dispel it promptly to avoid stacking Biting Wounds.
- Slumber Cloud:
- Avoid Slumber Cloud to prevent being put to sleep.
- Use immunities or movement abilities to escape if necessary.
![]() Strategy:
Strategy:
- Phase 1: Swarm of Decay/Darkness:
- Tanks should position bosses close together for cleave damage.
- Raid stacks for AoE healing and damage.
- Use cooldowns to survive the heavy damage.
- Phase 2: Infiltration of Dread:
- Assign players to call out suspected infiltrators.
- Focus on unmasking and defeating the disguised bosses within 25 seconds to avoid Shatter Mind.
- Phase 3: Rampaging Swarm:
- Burn down the remaining boss quickly to end the encounter.
- Avoid overlapping mechanics (e.g., Cloud of Carrion and Slumber Cloud).
![]() Bloodlust/Drums: during Swarm of Decay/Darkness when bosses take 100% increased AoE damage. This maximizes raid DPS and shortens the phase.
Bloodlust/Drums: during Swarm of Decay/Darkness when bosses take 100% increased AoE damage. This maximizes raid DPS and shortens the phase.
![]() Lords of Dread loot table:
Lords of Dread loot table:
| Type of Armor | Item | Loot type |
| Cloth | Cuffs of the Covert Commander | Wrist |
| Leather | Grasps of Abducted Fate | Hands |
| Gauntlets of Unseen Guests | Hands | |
| Any | Shroud of the Sire’s Chosen | Cloak |
| Ruined Crest of Lordaeron | Shield | |
| Heart of the Swarm | Trinket | |
| Intrusive Thoughtcage | Trinket | |
| Alandien’s Tortured Twinblades | Warglaive |
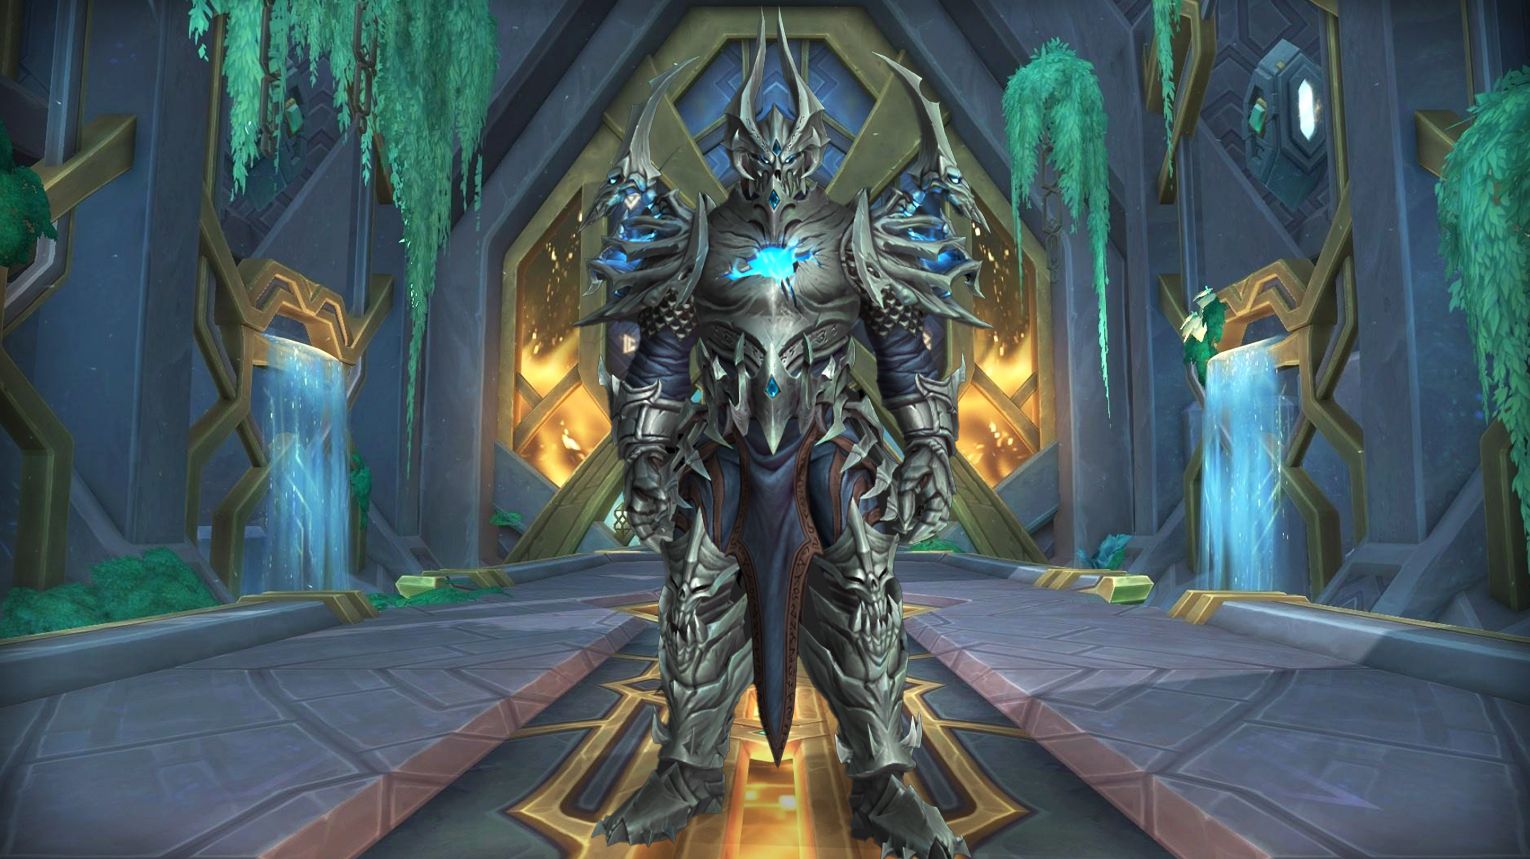
Rygelon
Rygelon is the 10th boss in Sepulcher of the First Ones, focusing on managing Cosmic Energy and The Singularity. Players must destroy Unstable Matter to survive Massive Bang and enter The Singularity, where they deal with Unstable Cores and increasing Eternal Radiation damage. Key mechanics include Collapsing Quasars, Dark Eclipse, and Cosmic Cores, requiring strong coordination and positioning. Use Bloodlust/Drums during the execute phase (below 30% health) or in The Singularity for DPS checks.
![]() Preferred Classes:
Preferred Classes:
- Tanks: Classes with strong mitigation and self-healing (e.g., Protection Paladin, Blood Death Knight) to handle Corrupted Strikes and Corrupted Wound.
- Healers: Classes with strong AoE healing and damage mitigation (e.g., Holy Priest, Restoration Shaman) to manage Dark Eclipse, Eternal Radiation, and Massive Bang.
- Damage Dealers: Classes with strong burst damage and mobility (e.g., Fire Mage, Havoc Demon Hunter) to handle Unstable Matter and Cosmic Cores efficiently.
![]() Tips:
Tips:
- Unstable Matter Management:
- Assign specific players to destroy Unstable Matter before Massive Bang.
- Ensure each player has access to an Unstable Matter Field to survive the explosion.
- The Singularity:
- Avoid stacking Eternal Radiation by rotating players in and out of The Singularity.
- Use defensive cooldowns to mitigate the increasing damage from Eternal Radiation.
- Collapsing Quasars:
- Destroy Collapsing Quasars to create Collapsing Quasar Fields, which can cleanse Dark Eclipse.
- Avoid standing in Quasar Radiation for too long to prevent stacking damage.
- Cosmic Cores:
- Kite Cosmic Cores away from the group to avoid Cosmic Ejection snaring and stacking damage.
![]() Strategy:
Strategy:
- Phase 1 (Normal Arena):
- Tanks should taunt swap to manage Corrupted Wound stacks.
- Damage dealers focus on destroying Unstable Matter and Collapsing Quasars.
- Healers prioritize players with Dark Eclipse and those affected by Quasar Radiation.
- Phase 2 (The Singularity):
- Players enter The Singularity to avoid Massive Bang.
- Focus on destroying Unstable Cores while managing Eternal Radiation stacks.
- Use personal defensives and healing cooldowns to survive the increasing damage.
- Phase 3 (Return to Normal Arena):
- Repeat Phase 1 mechanics while managing additional abilities like Manifest Cosmos and Cosmic Irregularity.
- Coordinate raid cooldowns for Massive Bang and high-damage phases.
![]() Bloodlust/Drums: during the execute phase (when Rygelon is below 30% health).
Bloodlust/Drums: during the execute phase (when Rygelon is below 30% health).
![]() Rygelon loot table:
Rygelon loot table:
| Type of Armor | Item | Loot type |
| Leather | Treads of Titanic Curiosity | Feet |
| Interdimensional Manica | Wrist | |
| Plate | Handguards of Hidden Realms | Hands |
| Any | Antumbra, Shadow of the Cosmos | Dagger |
| Observer’s Umbral Shiv | Dagger | |
| Astral Verdict | Gun | |
| Devastated Worldshard | 1H Sword | |
| Rygelon’s Heraldric Ring | Ring | |
| Grim Eclipse | Trinket |
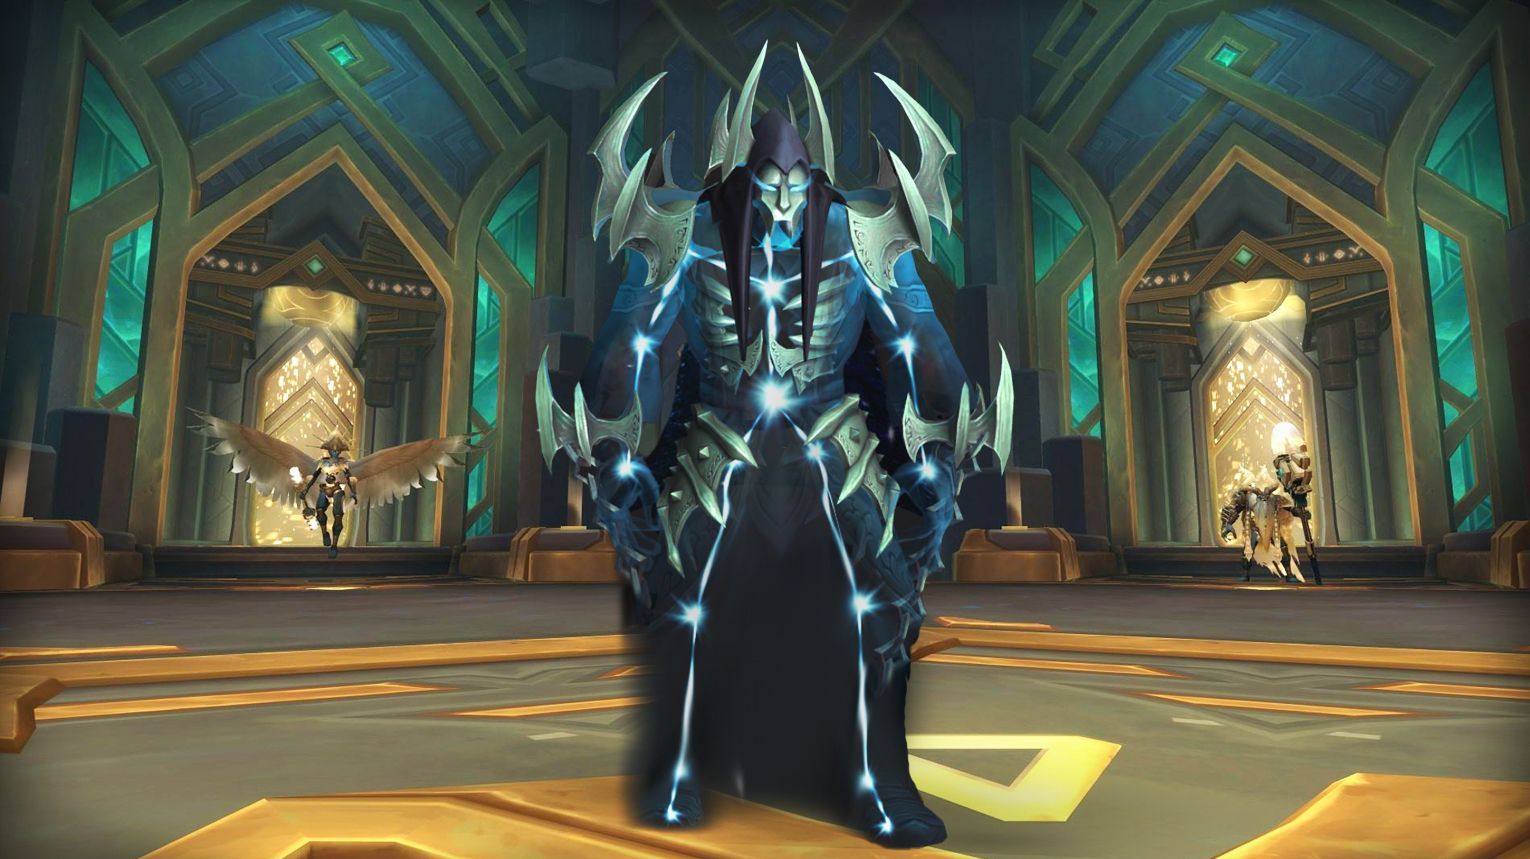
The Jailer
The Jailer, the final boss of Sepulcher of the First Ones, aims to use the Machine of Origination to remake existence, draining Azeroth’s lifeforce. The fight has three stages: Domination, Unholy Attunement, and The Unmaking, with mechanics like Chains of Anguish, Desolation, and Rune of Domination. Key strategies include managing pylons, mitigating shared damage, and using Bloodlust/Drums during Stage 3 to push DPS. Loot includes powerful items like Zovastrum, the Unmaking and class-tier sets.
![]() Preferred Classes:
Preferred Classes:
- Tanks: Classes with strong mitigation and mobility (e.g., Protection Paladin, Blood Death Knight) to handle Domination and Shattering Blast.
- Damage Dealers: High burst and mobility (e.g., Fire Mage, Havoc Demon Hunter) to handle Rune of Compulsion and Torment.
- Healers: Strong AoE healing and dispels (e.g., Holy Priest, Restoration Druid) to manage Misery and Rune of Domination.
![]() Tips:
Tips:
- Positioning: Stay spread to avoid stacking Torment and Rune of Damnation damage.
- Pylons: Use Shattering Blast to destroy pylons and delay Unholy Attunement.
- Chains of Anguish: Break chains by moving 30 yards apart to avoid shared damage.
- Desolation: Stack in the area of effect to reduce damage to Azeroth.
- Mythic Mechanics: Watch for Relentless Misery and Tainted Azerite, which significantly increase damage taken.
![]() Strategy:
Strategy:
- Stage 1: Focus on interrupting Relentless Domination and managing Chains of Oppression. Tanks must handle Martyrdom.
- Stage 2: Prioritize destroying pylons with Shattering Blast and avoid Unholy Ground. Healers must dispel Rune of Compulsion.
- Stage 3: Mitigate Desolation by stacking players. Handle Rune of Domination and Chains of Anguish carefully to avoid team wipes.
![]() Bloodlust/Drums: during Stage 3 when the Jailer begins Desolation.
Bloodlust/Drums: during Stage 3 when the Jailer begins Desolation.
![]() The Jailer loot table:
The Jailer loot table:
| Type of Armor | Item | Loot type |
| Cloth | Bindings of the Banished One | Hands |
| Leather | Runecarver’s Twisted Ward | Waist |
| Epochal Oppressor’s Greaves | Legs | |
| Plate | Legguards of the Ultimate Threat | Legs |
| Any | Fractal Cypher of the Zereth Overseer | Mount |
| Worldkiller Iris | Amulet | |
| Domination’s Deliverance | Fist Weapon | |
| Forbidden Truth | Off-hand | |
| Zovastrum, the Unmaking | Polearm | |
| Scars of Fraternal Strife | Trinket | |
| Chains of Domination | Trinket | |
| Gavel of the First Arbiter | 2H Mace |
Sepulcher of the First Ones Achievements List
| Achievement | Requirement |
| Domination’s Grasp | Defeat bosses in the wing of the SotFO. |
| Ephemeral Plains | Kill bosses within the wing of the SotFO. |
| Sepulcher of the First Ones | Slay all bosses on any difficulty. |
| Sepulcher of the First Ones Guild Run | Defeat all bosses on Normal difficulty or higher while in a guild group. |
| Heroic: Sepulcher of the First Ones | Kill all bosses on Heroic difficulty. |
| Heroic Sepulcher of the First Ones Guild Run | Slay all bosses on Heroic difficulty or higher while in a guild group. |
| Mythic: Sepulcher of the First Ones | Defeat all bosses on Mythic Difficulty. |
| Fate of the Sepulcher | Kill all bosses on any difficulty while Sepulcher of the First Ones is a Fated raid. |
| Heroic: Fate of the Sepulcher | Slay all bosses on Heroic difficulty while Sepulcher of the First Ones is a Fated raid. |
| Ahead of the Curve: The Jailer | Defeat The Jailer on Heroic difficulty or higher, before the release of the next raid tier. |
| Cutting Edge: The Jailer | Kill The Jailer on Mythic difficulty, before the release of the next raid tier. |
| Hall of Fame: The Jailer (Horde) | Among the first one hundred Horde guilds worldwide to defeat The Jailer on Mythic difficulty. |
| Hall of Fame: The Jailer (Alliance) | Among the first one hundred Alliance guilds worldwide to defeat The Jailer on Mythic difficulty. |
| Mythic: The Jailer | Defeat The Jailer on Mythic difficulty. |
| Mythic The Jailer Guild Run | Kill The Jailer on Mythic difficulty while in a guild group. |
| Mythic: Vigilant Guardian | Slay the Vigilant Guardian on Mythic difficulty. |
| Mythic: Skolex | Defeat Skolex on Mythic difficulty. |
| Mythic: Rygelon | Kill Rygelon on Mythic difficulty. |
| Mythic: Prototype Pantheon | Slay Prototype Pantheon on Mythic difficulty. |
| Mythic: Lords of Dread | Defeat the Lords of Dread on Mythic difficulty. |
| Mythic: Lihuvim | Kill Lihuvim on Mythic difficulty. |
| Mythic: Halondrus | Slay Halondrus on Mythic difficulty. |
| Mythic: Dausegne | Defeat Dausegne on Mythic difficulty. |
| Mythic: Artificer Xy’mox | Kill Artificer Xy’mox on Mythic difficulty. |
| Mythic: Anduin Wrynn | Slay Anduin Wyrnn on Mythic difficulty. |
| First Wonders | Collect an armor set from Sepulcher of the First Ones. |
| Glory of the Sepulcher Raider | Complete the Sepulcher of the First Ones raid achievements. |
| Amidst Ourselves | Defeat the Lords of Dread after finding and completing one simple task during Infiltration of Dread on Normal difficulty or higher. |
| Coming to Terms | Kill Anduin Wrynn after defeating Anduin’s Grief on Normal difficulty or higher. |
| Damnation Aviation | Slay the Jailer after collecting 6 Progenitor Orbs on Normal difficulty or higher. |
| Four Ring Circus | Defeat Dausegne, the Fallen Oracle, while a player is carrying the Afterlife Core on Normal difficulty or higher. |
| Power ON | Kill the Vigilant Guardian after defeating the Depleted Automa in the Sepulcher of the First Ones on Normal difficulty or higher. |
| The Grand Design | Descend into the pattern and confront The Jailer within the Sepulcher of the First Ones. |
| The Protoform Matrix | Slay Lihuvim after synthesizing and defeating a Reaving Automa: Neo on Normal difficulty or higher. |
| Where the Wild Corgis Are | Defeat the Prototype Pantheon after each player has petted 5 Corgis during Wild Stampede on Normal difficulty or higher. |
| Wisdom Comes From the Desert | Kill Skolex, the Insatiable Ravener after getting it to burrow under and destroy all four Memorial Pylons on Normal difficulty or higher. |
| Xy Never, Ever Marks the Spot. | Slay Xy’mox with all players under the effects of pilfered artifacts on Normal difficulty or higher. |
| We Are All Made of Stars | Defeat Rygelon with all players under the effects of Herald of the Cosmos on Normal Difficulty or higher. |
| We Are All Made of Stars (Heroic) | Kill Rygelon with all players under the effects of Herald of the Cosmos on Heroic Difficulty or higher, before the release of the next raid tier. |
| We Are All Made of Stars (Mythic) | Slay Rygelon with all players under the effects of Herald of the Cosmos on Mythic Difficulty, before the release of the next raid tier. |