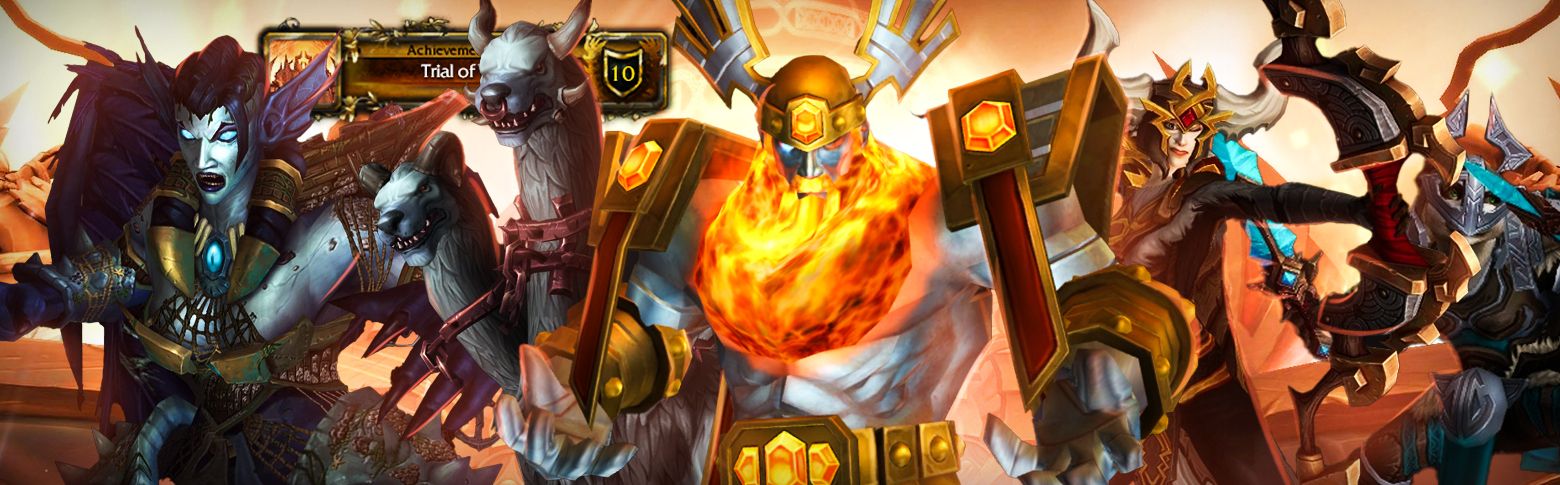
Trial of Valor, the second raid of World of Warcraft: Legion, was released on the 8th of November, 2016. It remains a valuable source of transmogs, mounts, and collectibles in The War Within. This raid in Stormheim features three bosses, including Helya, with unique armor sets, weapons, and achievements to earn.
Legacy content farming is amazing, but if you want to stay competitive, you need the newest gear. Buy WoW boosts at Gamingcy: skilled EU and US teams finish the latest PvE raid in 1–2 hours, no matter the difficulty. Hourly runs are open now: grab your spot.
![]() In this guide, we’ll cover:
In this guide, we’ll cover:
- Trial of Valor location
- Bosses and their rewards
- Available mounts, weapons, and transmogs
- Achievements you can earn
- Can you solo Trial of Valor?
![]() Whether you’re farming cosmetics, came to check the ToV raid location, or challenging yourself solo, this guide will help you get the most out of Trial of Valor in WoW Retail (The War Within).
Whether you’re farming cosmetics, came to check the ToV raid location, or challenging yourself solo, this guide will help you get the most out of Trial of Valor in WoW Retail (The War Within).
Trial of Valor Entrance and Subregions
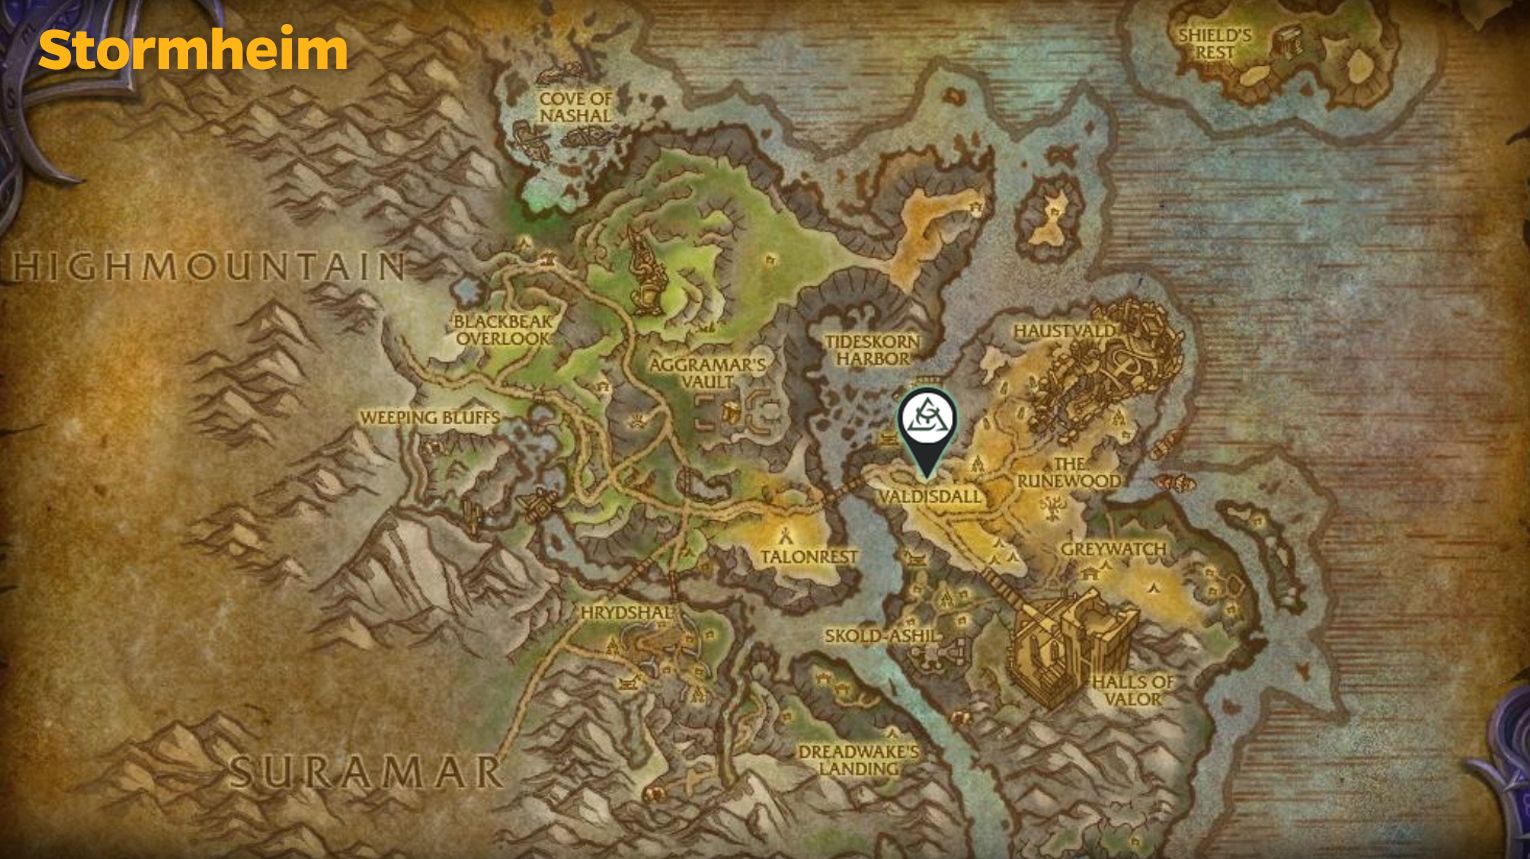
Trial of Valor is located in the Stormheim zone in World of Warcraft: Legion. To reach it, travel to Stormheim, which can be accessed via Dalaran in the Broken Isles. From there, head to the northern part of the zone, where you’ll find the entrance to the Halls of Valor.
The entrance to Trial of Valor is at 71.5, 48.5, inside the Halls of Valor dungeon. Walk through the main doors and continue until you reach the raid area. Once inside, you’ll move through different subregions as you fight your way to Helya.
![]() Trial of Valor has the following subregions:
Trial of Valor has the following subregions:
- Halls of Valor: The starting area where you face Odyn.
- The Bridge: A transitional area where you battle Guarm.
- Helheim: The final area where you confront Helya.

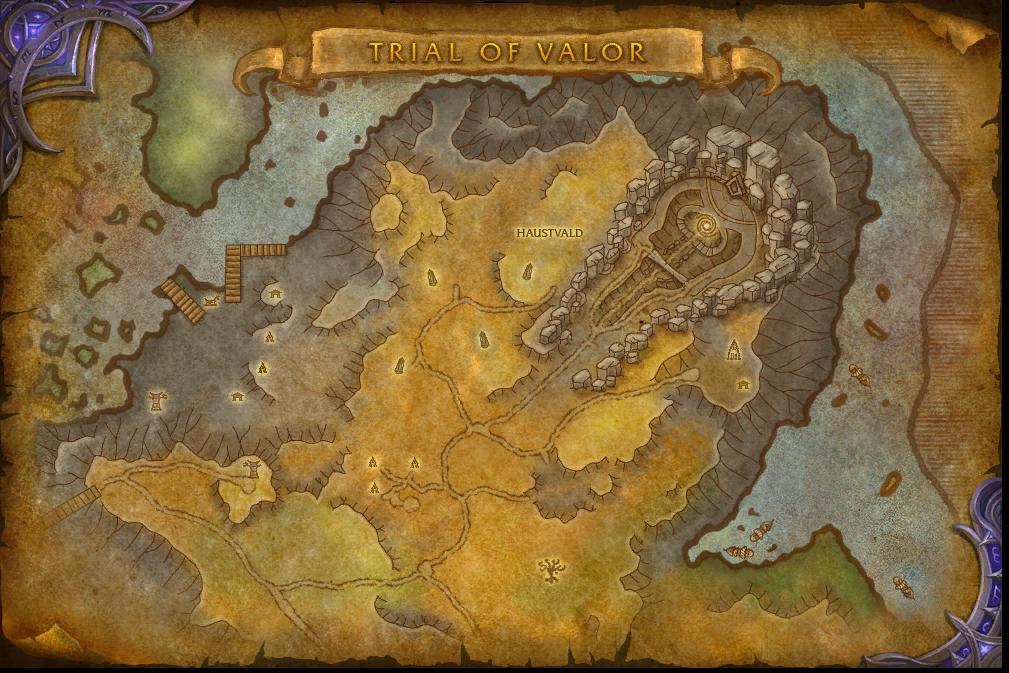
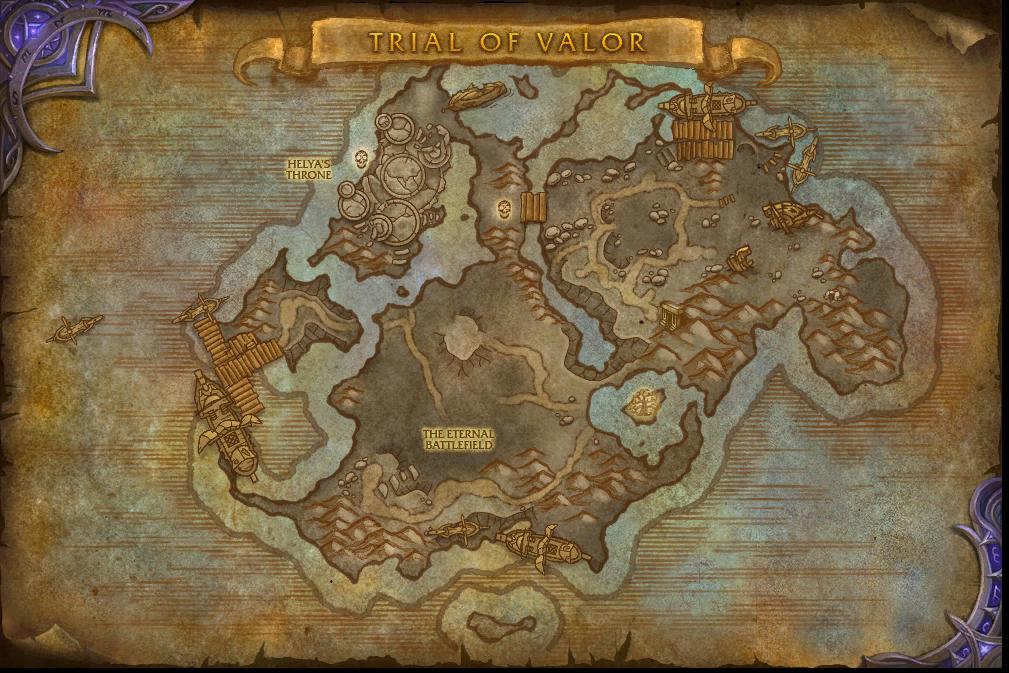
Each section has its challenges and bosses, which we’ll briefly overview below.
Trial of Valor Amirdrassil Collectibles: Mounts, Pets, Transmogs
| Collectible | Source | Obtainable / Not Obtainable |
| Trial of Valor Tier Sets | ||
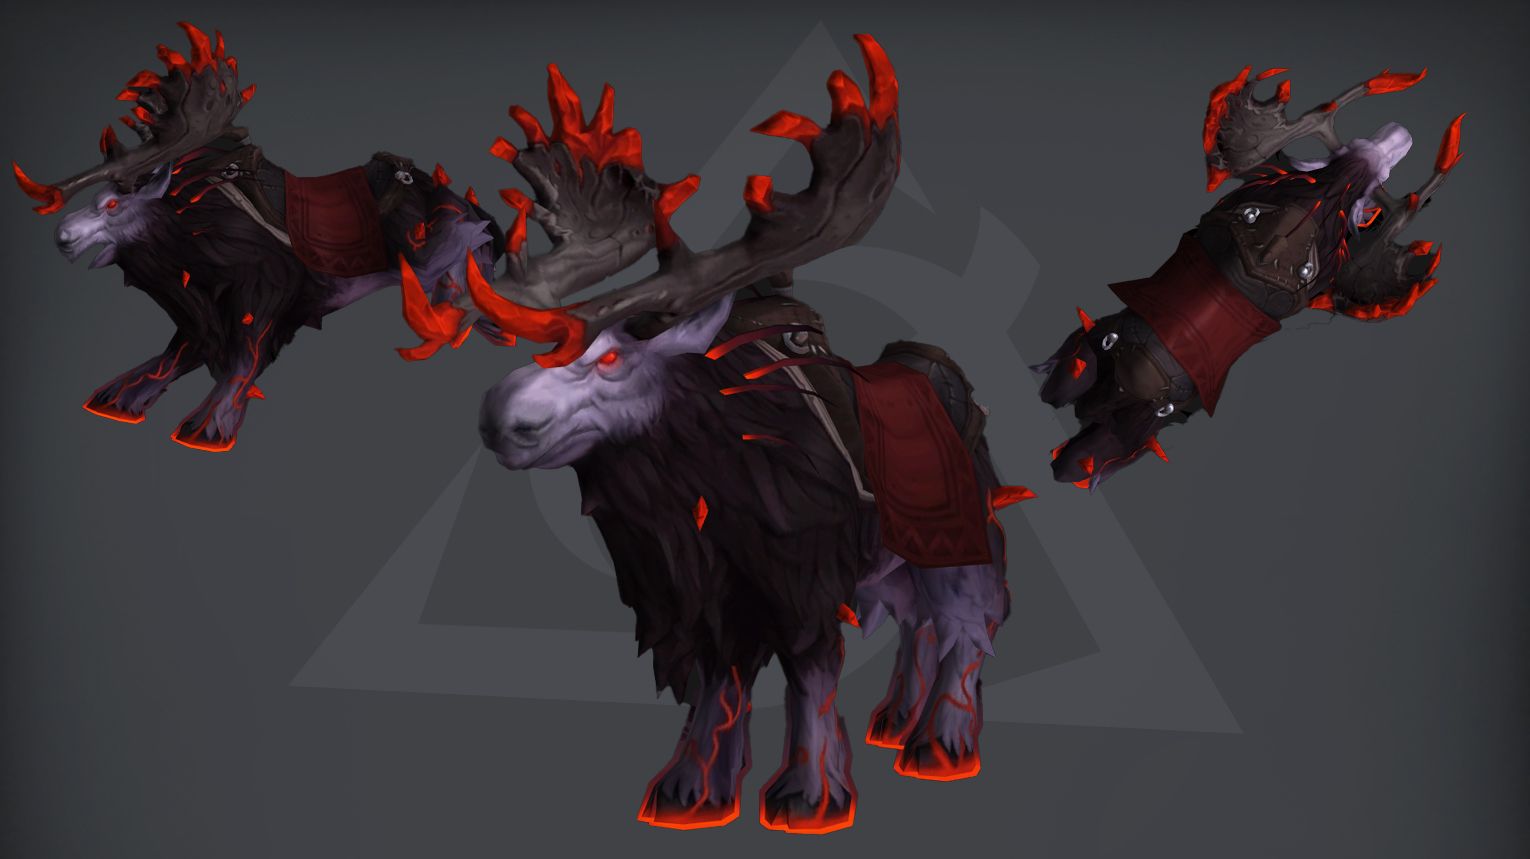
| Defiled Reins | Glory of the Legion Raider | Yes |
Trial of Valor Bosses Overview
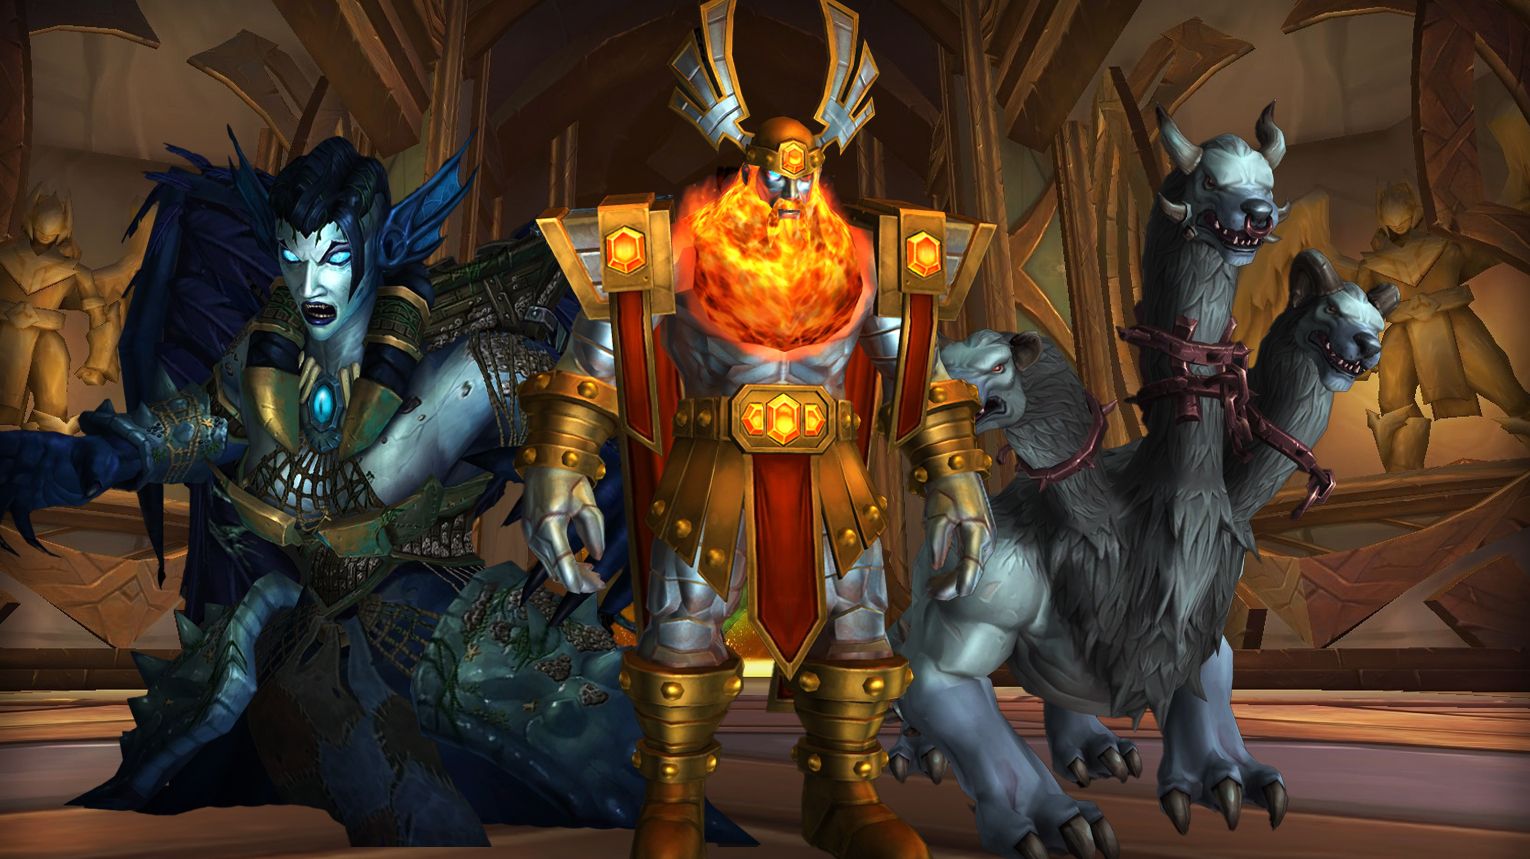
Trial of Valor is a Norse-mythology-inspired raid in World of Warcraft: Legion, where players face Odyn, Guarm, and Helya in the Halls of Valor and Helheim. The raid has three bosses, each tied to the epic themes of the zone, from Odyn, the titan keeper who tests your strength, to Guarm, a three-headed hound with devastating breath attacks. Encounters range from strategic fights like Odyn, where you battle waves of Valarjar champions, to intense damage checks against Helya, the ruler of Helheim, who summons tentacles and corrupts the battlefield. The final battle against Helya is a dramatic showdown in the depths of Helheim, where players must overcome her dark magic and prevent her from unleashing chaos.
![]() Below, we’ll overview the Trial of Valor boss fights and the loot you can get from each.
Below, we’ll overview the Trial of Valor boss fights and the loot you can get from each.
Can You Solo Trial of Valor in The War Within?

Farming Trial of Valor solo in The War Within is a good way to get transmog sets, mounts, and achievements from Legion. Older raids are easier to solo now because of better gear and scaling, but some bosses in Trial of Valor still have tricky mechanics. This guide will help you solo each boss, with tips on classes, strategies, and when to use Bloodlust or Drums of the Mountain.
Odyn

Odyn is the first boss in Trial of Valor, featuring a three-phase fight against Hymdall, Hyrja, and Odyn himself. In Phase 1, keep Hymdall and Hyrja 35 yards apart, soak Shield of Light, and bring both to 25% health simultaneously. Phase 2 focuses on Odyn, requiring tank swaps for Odyn’s Test, avoiding Spear of Light, and handling Draw Power by killing Runebearers on matching runes. Phase 3 is a DPS race with Cleansing Flame movement, Storm of Justice tornado placement, and tanks moving far for Stormforged Spear. Use Bloodlust in Phase 3 to burn Odyn before Arcing Storm overwhelms healers.
 Preferred Classes:
 Tanks: Classes with strong mobility and active mitigation (e.g.,
  Protection Paladin,
  Blood Death Knight).
 Healers: Strong AoE healers (e.g.,
  Restoration Druid,
  Holy Priest) to handle raid-wide damage.
 DPS: Balanced mix of melee and ranged DPS. Ranged DPS are particularly useful for handling mechanics like Horn of Valor and Shield of Light.
 Tips:
Tips:
- Phase 1 (Hymdall & Hyrja):
- Keep Hymdall and Hyrja 35 yards apart to avoid Valarjar’s Bond.
- Spread 5 yards apart during Horn of Valor to minimize splash damage.
- Soak Shield of Light with multiple players to reduce damage and knockback.
- Focus DPS to bring both bosses to 25% health within 10 seconds to trigger Phase 2.
- Phase 2 (Odyn):
- Tanks must taunt swap frequently to manage Odyn’s Test stacks (10-14 stacks recommended).
- Avoid Spear of Light impact zones and Glowing Fragments.
- Handle Draw Power by killing Valarjar Runebearers on their matching runes to reduce Unerring Blast damage.
- Phase 3 (Odyn’s Final Test):
- Use Bloodlust/Timewarp/Heroism during this phase for maximum DPS.
- Tanks must move far away from Odyn when afflicted with Stormforged Spear.
- Place Storm of Justice tornadoes at the edges of the room to avoid hindering movement.
- Move quickly to clear areas when Cleansing Flame shifts.
 Strategy:
Phase 1: Might of the Valarjar
- Hymdall:
- Avoid Dancing Blade and spread for Horn of Valor.
- Hyrja:
- Soak Shield of Light with multiple players.
- Move away from the group if targeted by Expel Light.
- Odyn’s Mechanic:
- Handle Draw Power by killing Valarjar Runebearers on their matching runes.
Phase 2: The Prime Designate
- Tank Mechanics:
- Taunt swap to manage Odyn’s Test stacks.
- Raid Mechanics:
- Avoid Spear of Light and Glowing Fragments.
- Continue handling Draw Power mechanics.
Phase 3: The Final Test
- Cleansing Flame: Move to clear areas every 45 seconds.
- Storm of Justice: Drop tornadoes at the edges of the room.
- Tank Mechanics: Move far away when afflicted with Stormforged Spear.
- Healing: Use cooldowns to handle increasing Arcing Storm damage.
 Bloodlust/Drums:
Phase 3, when Odyn is below 55% health.
 Odyn loot table:
| Type of Armor | Item | Loot type |
| Cloth | Cinch of Light | Waist |
| Robes of Celestial Adornment | Chest | |
| Leather | Gloves of Issued Challenge | Hands |
| Sky-Valiant’s Wristguards | Wrist | |
| Leggings of the Undaunted | Legs | |
| Radiant Soul Sabatons | Feet | |
| Plate | Gleaming Val’kyr Cuirass | Chest |
| Goldrune Legplates | Legs | |
| Any | Mantle of the Victorious Dead | Cloak |
| Ring of Ascended Glory | Ring | |
| Chains of the Valorous | Trinket |
Guarm
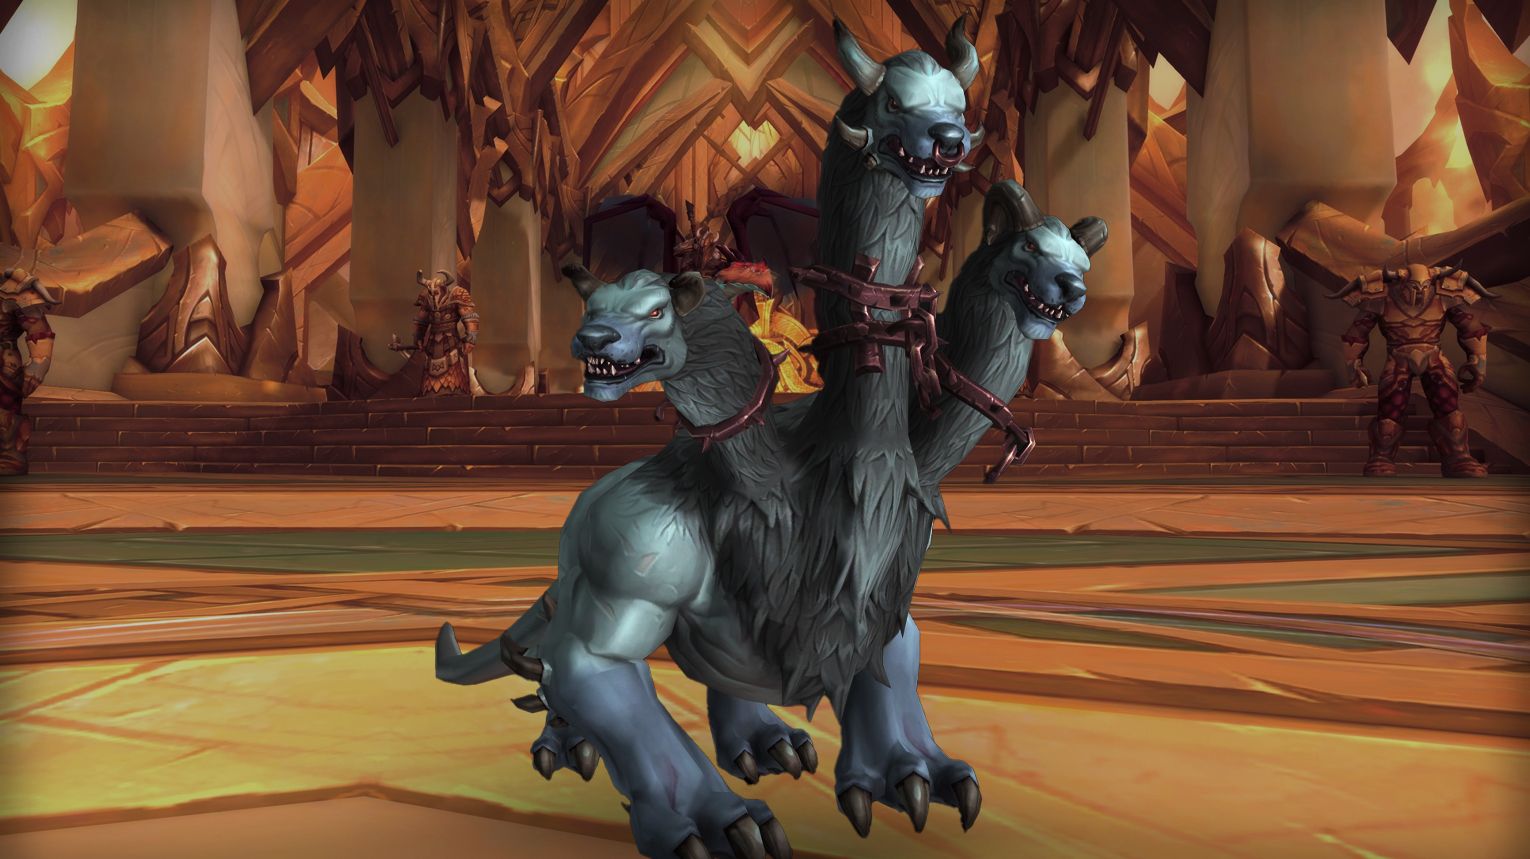
Guarm is a single-phase boss in Trial of Valor with a 5-minute enrage timer. Key mechanics include Guardian’s Breath (three elemental breaths requiring consistent soaking to avoid Frothing Rage stacks), Roaring Leap (knockback and leap onto the largest clump), and Headlong Charge (lethal charges across the room). Assign players to one breath type, spread out to manage debuffs (Flame Lick, Frost Lick, Shadow Lick), and use Bloodlust at the start for maximum DPS. Tanks must stack to split Multi-Headed damage, and healers must dispel Frost Lick while spot-healing Shadow Lick. On Mythic, manage Volatile Foam debuffs by dispelling near players with matching breath types.
Preferred Classes:
- Damage Dealers: High single-target DPS classes (e.g.,
 Warriors,
  Shadow Priests,
  Hunters) are ideal due to the tight enrage timer.
 - Healers: Strong AoE healers (e.g.,
 Holy Paladins, Restoration Druids) to handle raid-wide damage from breaths and charges.
 - Tanks: Tanks with strong mitigation and cooldowns to handle Multi-Headed attacks.
Tips:
- Breath Management: Assign players to one of the three breath types (Fire, Nature, Shadow) and ensure they stick to it for the entire fight.
- Positioning:
- Ranged DPS should stay 25+ yards away to avoid Flashing Fangs.
- Melee DPS should stack behind Guarm to minimize movement.
- Debuff Handling:
- Spread out to avoid spreading Flame Lick.
- Dispel Frost Lick immediately.
- Spot heal Shadow Lick targets.
- Headlong Charge: Use speed boosts (e.g., Stampeding Roar) to avoid charges. Assign healing cooldowns for raid-wide damage.
Strategy:
- Breath Assignment:
- Split the raid into three groups, each assigned to one breath type.
- Ensure players soak the same breath type throughout the fight to avoid debuff conflicts and Frothing Rage stacks.
- Tank Positioning:
- Tanks must stand together to split Multi-Headed damage.
- Face Guarm away from the raid to minimize Flashing Fangs damage.
- Roaring Leap:
- Keep melee DPS stacked to ensure Guarm leaps onto them, minimizing disruption to ranged DPS.
- Headlong Charge:
- Quickly identify Guarm’s charge path and move to the opposite side.
- Use healing cooldowns to mitigate raid-wide damage.
- Debuff Management:
- Spread out to avoid spreading Flame Lick.
- Dispel Frost Lick immediately.
- Heal through Shadow Lick’s healing absorption.
Bloodlust/Drums:
At the start.
Guarm loot table:
| Type of Armor | Item | Loot type |
| Cloth | Helhound Hair Bracers | Wrist |
| Leggings of the Lower Planes | Legs | |
| Leather | Helbeast Skin Tunic | Chest |
| Moccasins of Silent Passage | Feet | |
| Bite-Resistant Wristclamps | Wrist | |
| Kvaldir Exult’s Grips | Hands | |
| Plate | Lead-Soled Seabed Striders | Feet |
| Reinforced Hound-Handler’s Gauntlets | Hands | |
| Any | Windwhipped Sailcloth | Cloak |
| Eye of Guarm | Trinket |
Helya
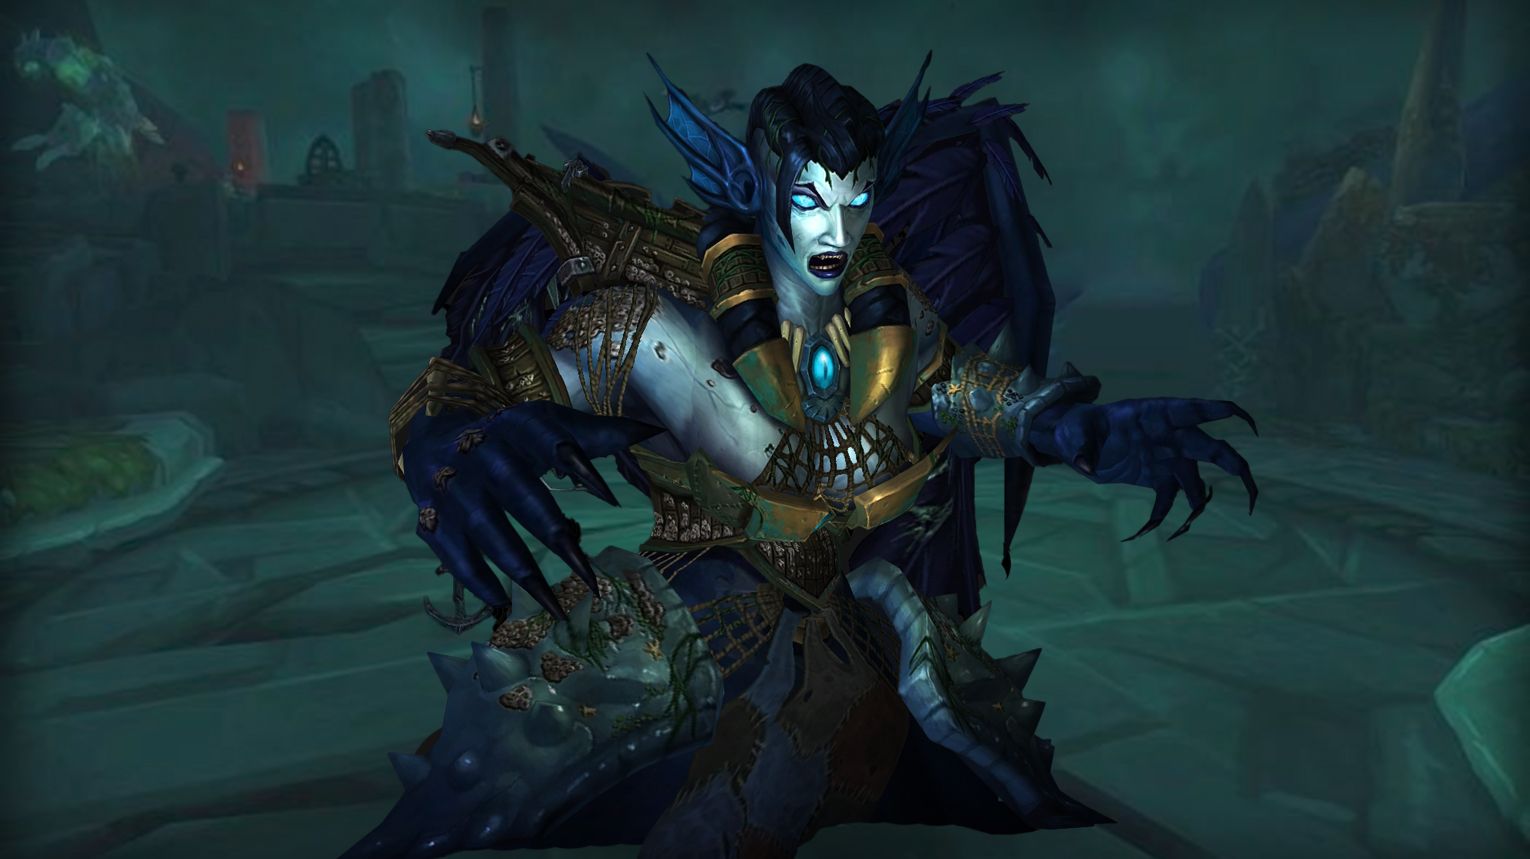
Helya, the final boss in Trial of Valor, is a three-phase fight requiring strong single-target and AoE damage, precise positioning, and quick reactions. In Phase 1, manage Orbs of Corruption, Taint of the Sea, and Bilewater Slimes while keeping a tank in melee range. Phase 2 involves destroying Gripping Tentacles, handling adds like Night Watch Mariners, and avoiding Fury of the Maw waves. Phase 3 combines mechanics from earlier phases, with a focus on kiting Orbs of Corrosion, clearing adds, and using Bloodlust to burn Helya down. Key tips include dispelling debuffs quickly, soaking Tentacle Strikes, and coordinating tank swaps for Bilewater and Corrupted Breath.
Preferred Classes:
- Tanks: Classes with strong active mitigation and mobility (e.g., Protection Paladin, Blood Death Knight) to handle Bilewater Breath and Corrupted Breath.
- Healers: Classes with strong dispels and AoE healing (e.g., Restoration Druid, Holy Priest) to manage Taint of the Sea, Fetid Rot, and raid-wide damage.
- DPS: Classes with strong cleave and burst damage (e.g.,
 Frost Death Knight,
  Destruction Warlock) to handle adds like Bilewater Slimes, Gripping Tentacles, and Night Watch Mariners.
Tips:
- Phase 1:
- Always keep a tank in melee range to avoid Corrosive Nova.
- Dispel Taint of the Sea quickly and move away from Tainted Essence explosions.
- Kite Orbs of Corruption to the edges of the room.
- Soak Tentacle Strikes as a group or use immunities (e.g., Ice Block, Aspect of the Turtle) to solo-soak.
- Focus Bilewater Slimes to minimize Bilewater Liquefaction damage.
- Phase 2:
- Move to elevated platforms during Fury of the Maw waves.
- Prioritize killing Night Watch Mariners before they cast Lantern of Darkness.
- Tank Grimelords separately and avoid Sludge Nova and Anchor Slam.
- Spread out when Fetid Rot is about to expire to prevent it from spreading.
- Group and cleave Decaying Minions to minimize Decay patches.
- Phase 3:
Strategy:
- Phase 1: Focus on managing Orbs of Corruption, Taint of the Sea, and Bilewater Slimes while keeping a tank in melee range.
- Phase 2: Destroy Gripping Tentacles while handling adds like Night Watch Mariners and Grimelords. Avoid Fury of the Maw waves by moving to elevated platforms.
- Phase 3: Combine mechanics from Phases 1 and 2. Use Bloodlust and focus on clearing adds and managing Decay patches.
Bloodlust/Drums:
In Phase 3 when Helya is at her most dangerous.
Helya loot table:
| Type of Armor | Item | Loot type |
| Cloth | Oiled Rigger’s Handwraps | Hands |
| Treads of the Drowned | Feet | |
| Leather | Strand of Whelk Shells | Waist |
| Sucker-Scarred Leggings | Legs | |
| Anchor Chain Waistguard | Waist | |
| Corroded Val’kyr Chainmail | Chest | |
| Plate | Calcareous Wristclamps | Wrist |
| Krakenbone Waistplate | Waist | |
| Any | Sea Fan Pendant | Amulet |
| Drape of the Unworthy | Cloak | |
| Brinewater Slime in a Bottle | Trinket |
Trial of Valor Achievements List
| Achievement | Requirement |
| Trial of Valor | Defeat all bosses within the Trial of Valor. |
| Trial of Valor Guild Run | Kill the bosses on Normal difficulty or higher, while in a guild group. |
| Heroic: Trial of Valor | Slay all bosses within the Trial of Valor on Heroic difficulty or higher. |
| Ahead of the Curve: Helya | Defeat Helya on Heroic difficulty or higher, before the opening of the Tomb of Sargeras. |
| Cutting Edge: Helya | Kill Helya on Mythic difficulty, before the opening of the Tomb of Sargeras. |
| The Chosen | Slay Helya on Mythic difficulty without failing the Test of the Chosen. |
| Mythic: Helya | Defeat Helya on Mythic difficulty. |
| Mythic: Helya Guild Run | Kill Helya on Mythic difficulty, while in a guild group. |
| Realm First! Helya | First guild on the realm to defeat Helya on Mythic difficulty while in a guild group. |
| Mythic: Guarm | Slay Guarm on Mythic difficulty. |
| Mythic: Odyn | Defeat Odyn on Mythic difficulty. |
| Boneafide Tri Tip | Kill Guarm after taking his Chew Toy into all three Guardian’s Breaths on Normal difficulty or higher. |
| Can I Get A Helya | Collect any class armor set from the Trial of Valor. |
| Patient Zero | Slay Helya while all raid members but one are afflicted with Fetid Rot, on Normal difficulty or higher. |
| You Runed Everything! | Defeat Odyn after gaining Runic Mastery on Normal difficulty or higher. |