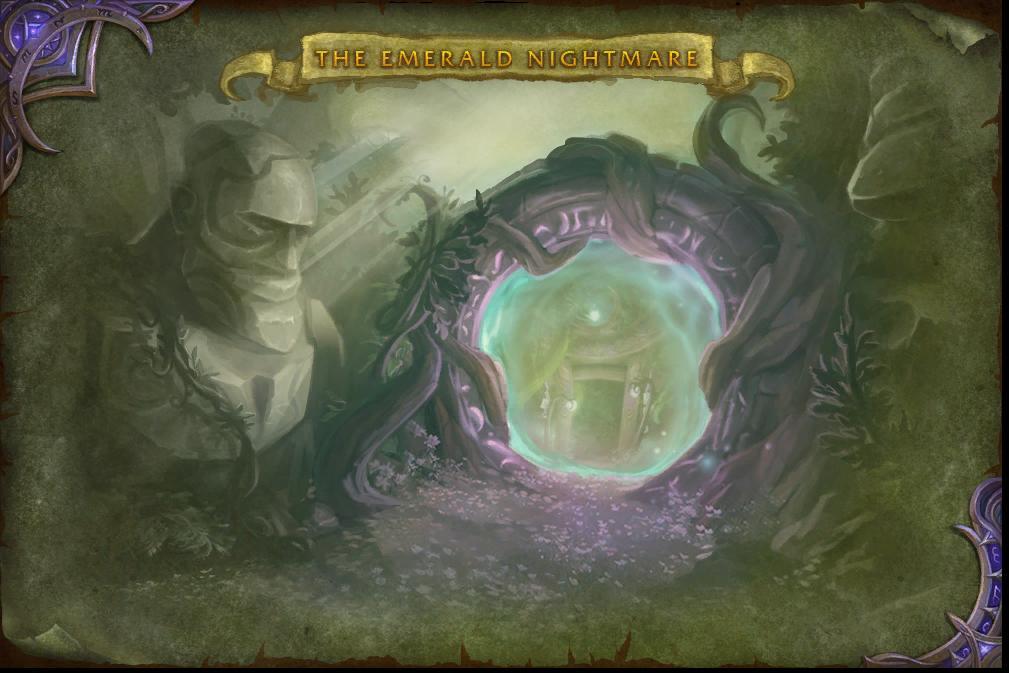
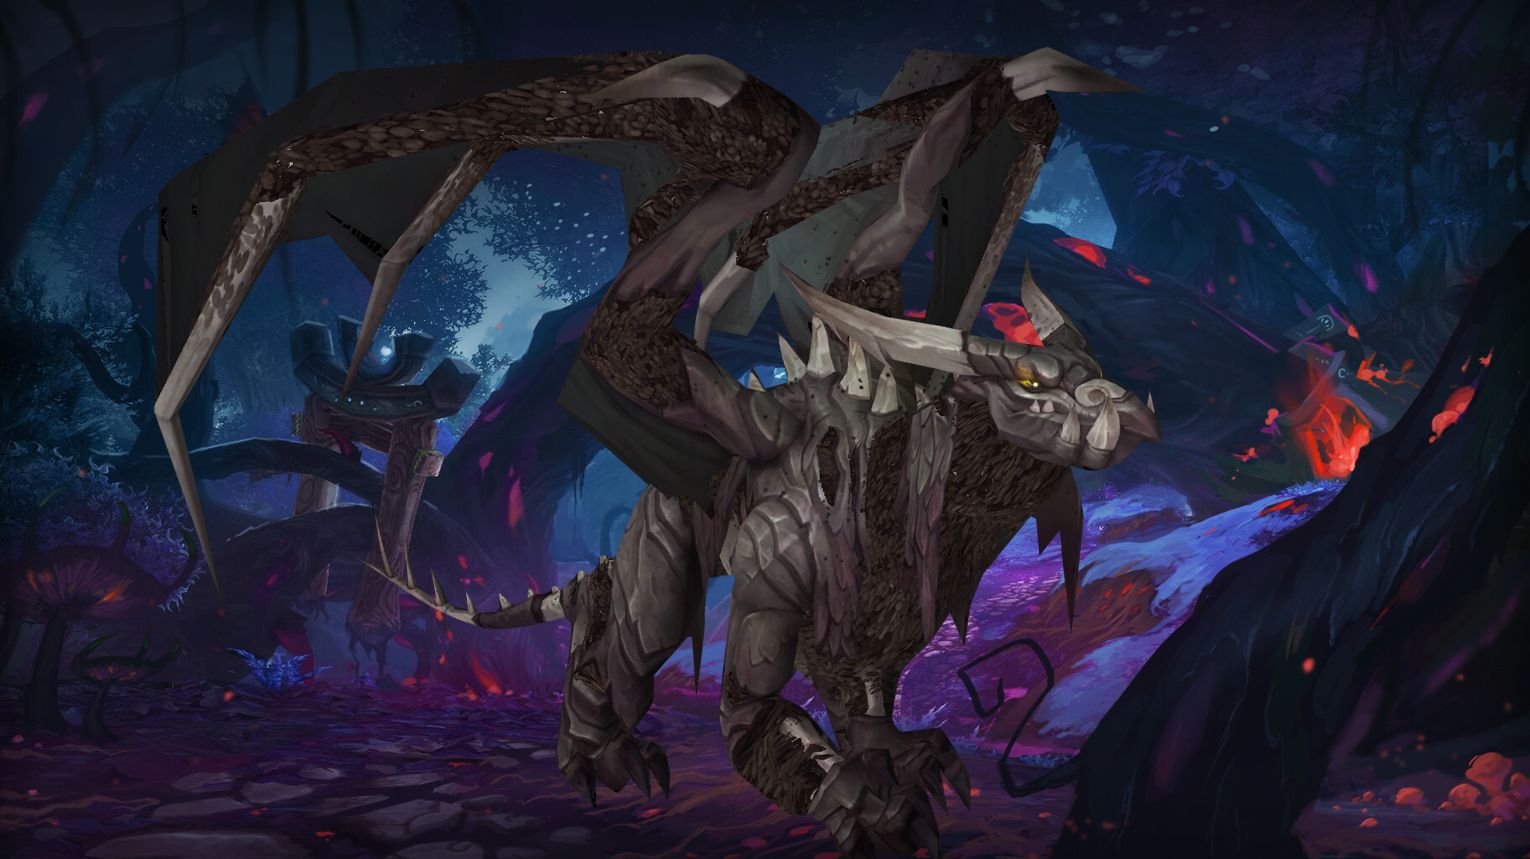
The Emerald Nightmare, the first raid in World of Warcraft: Legion, launched on September 20th 2016. This raid takes place in the corrupted Emerald Dream, a once-perfect version of Azeroth now invaded by the Legion. The Emerald Nightmare offers unique rewards like transmogs, mounts, and collectibles.
Legacy raids are fun to revisit, but the true challenge lies in endgame PvE. Our WoW raid boosting puts you ahead with powerful gear from the current patch. With top EU and US teams, the entire raid is cleared in 1–2 hours: Normal, Heroic, or Mythic. We have runs going every hour and an online PvE schedule, so you can hop in easily.
![]() Here’s what we’ll cover:
Here’s what we’ll cover:
- Emerald Nightmare location
- Bosses and their rewards
- Available mounts, weapons, and transmogs
- Achievements you can earn
- Can you solo Emerald Nightmare?
![]() This guide will help you get the most out of the Emerald Nightmare in WoW Retail (The War Within), whether you’re collecting cosmetics or challenging yourself solo.
This guide will help you get the most out of the Emerald Nightmare in WoW Retail (The War Within), whether you’re collecting cosmetics or challenging yourself solo.
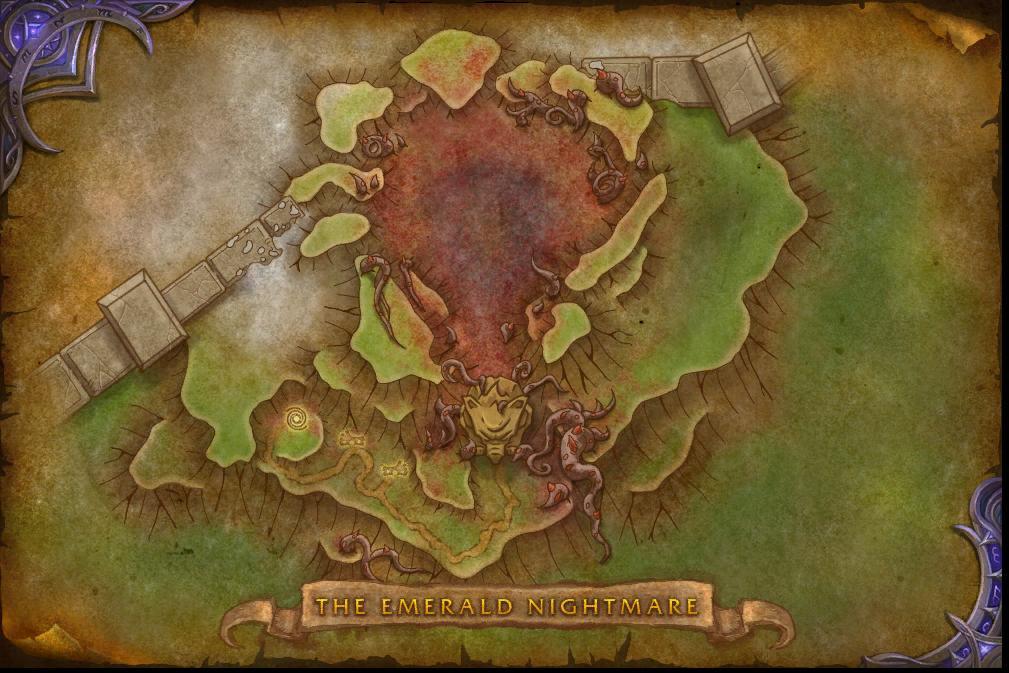
Emerald Nightmare Entrance and Subregions
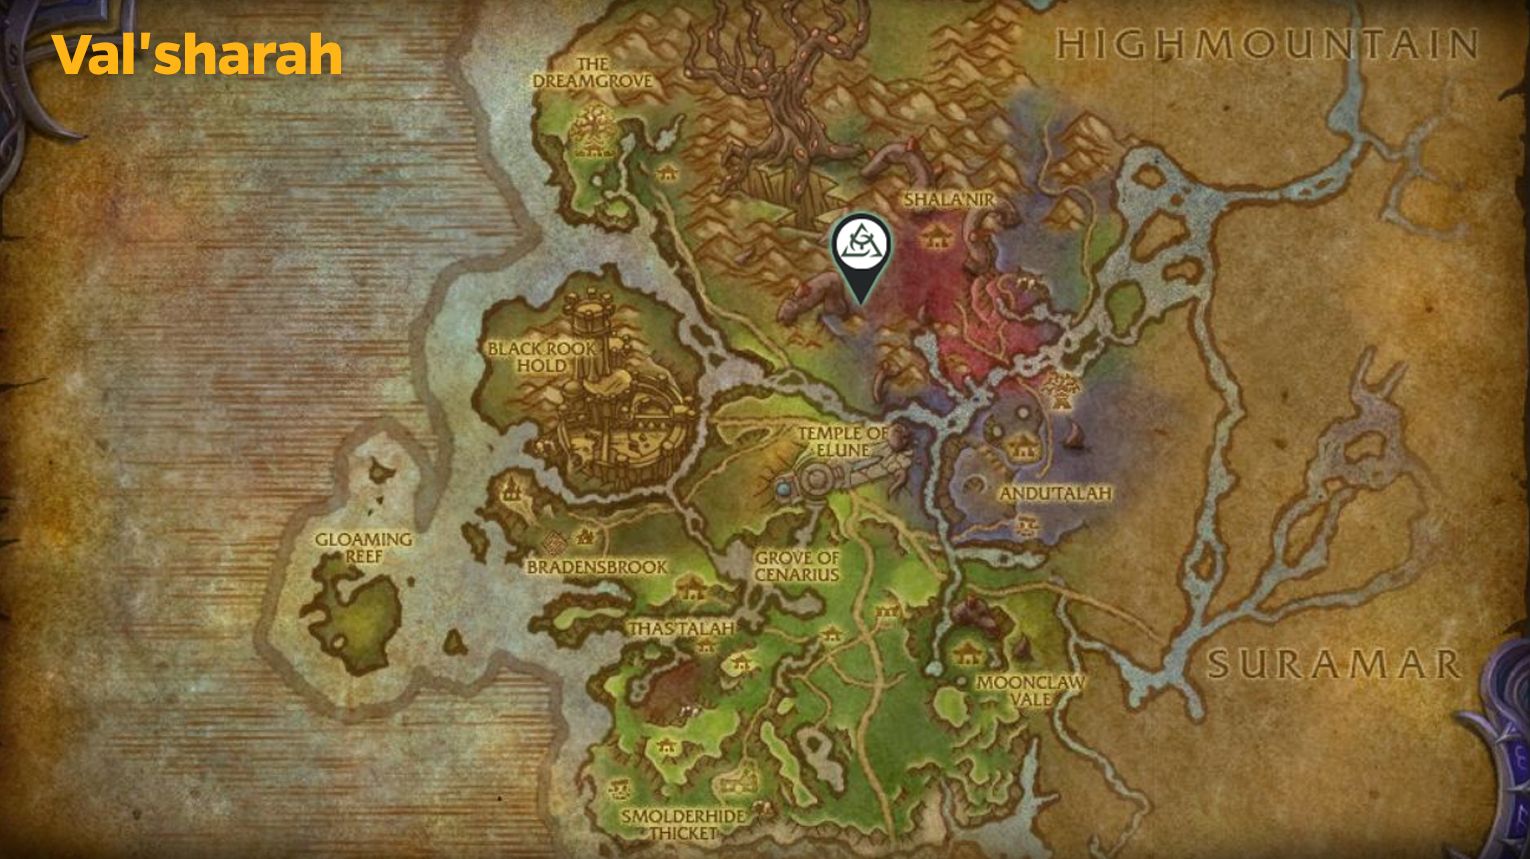
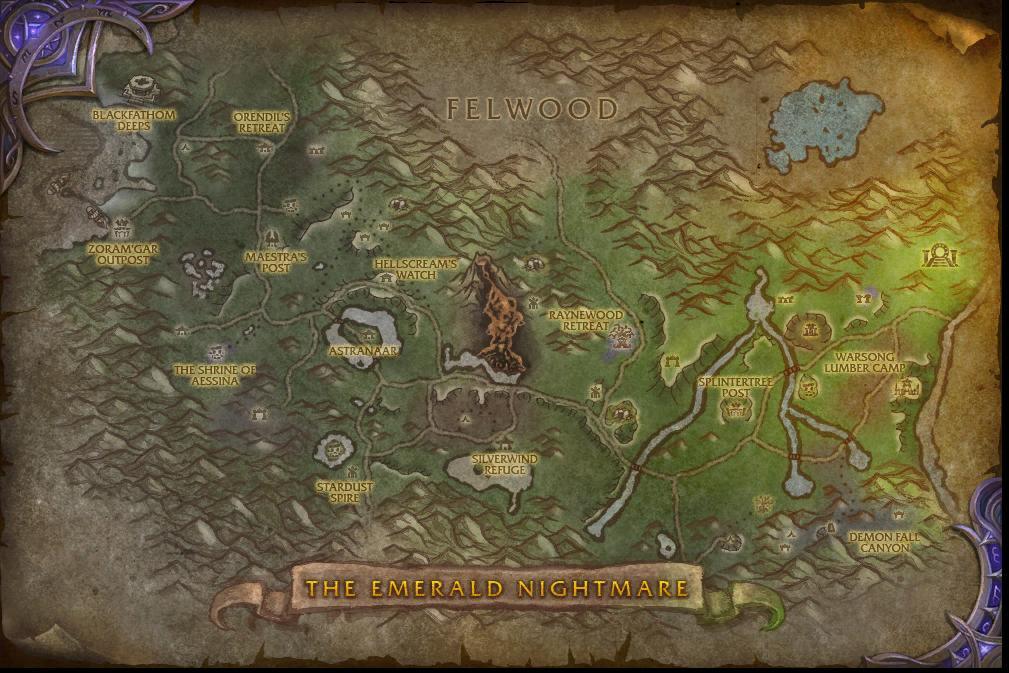
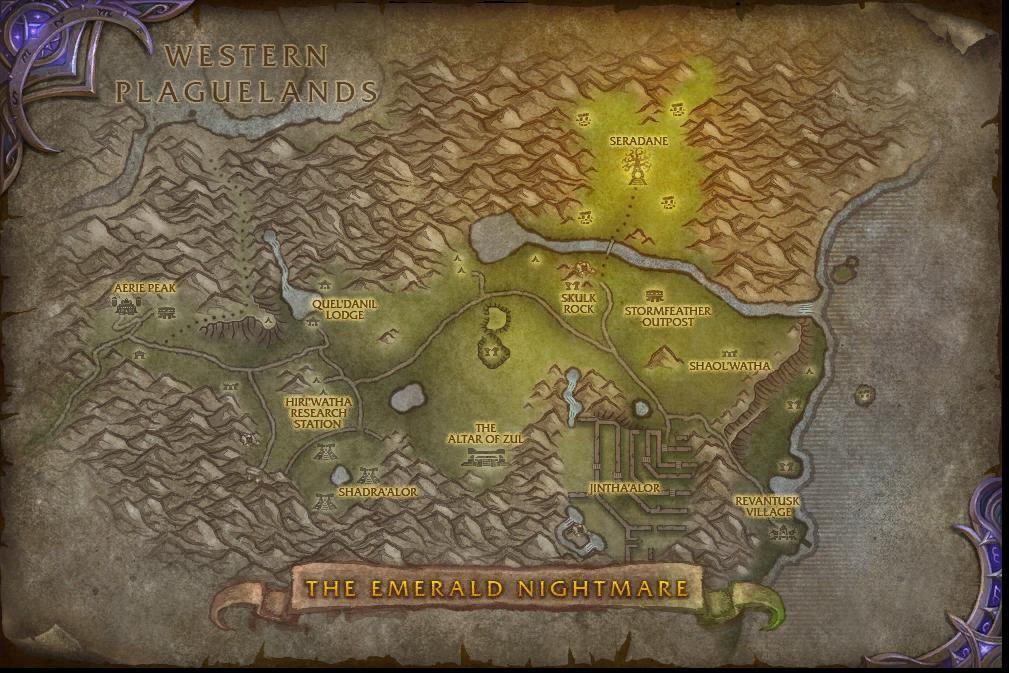
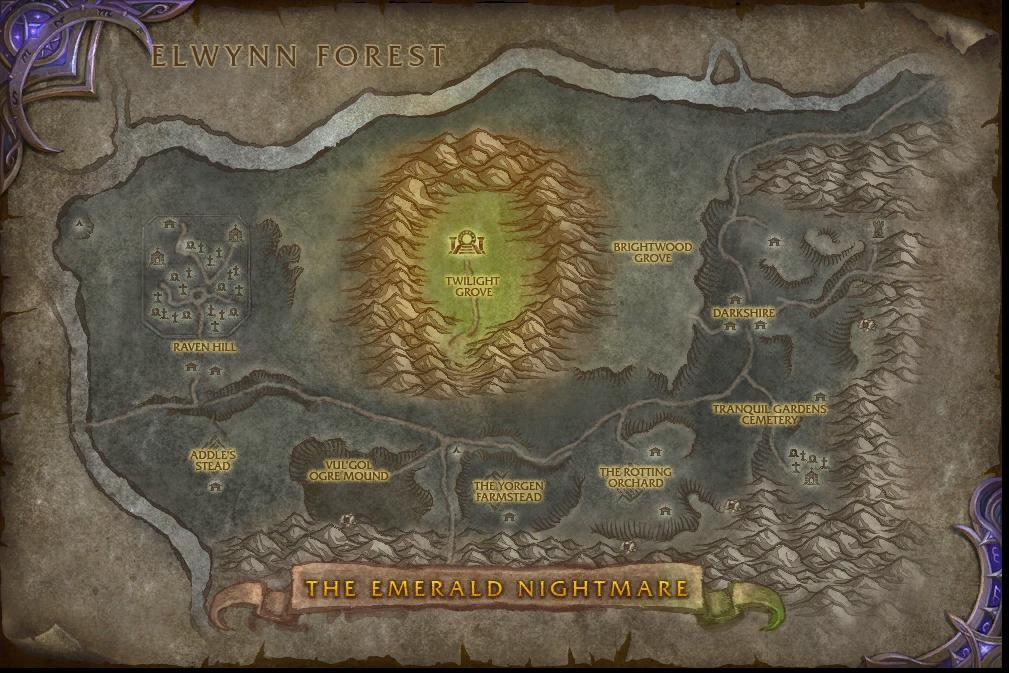
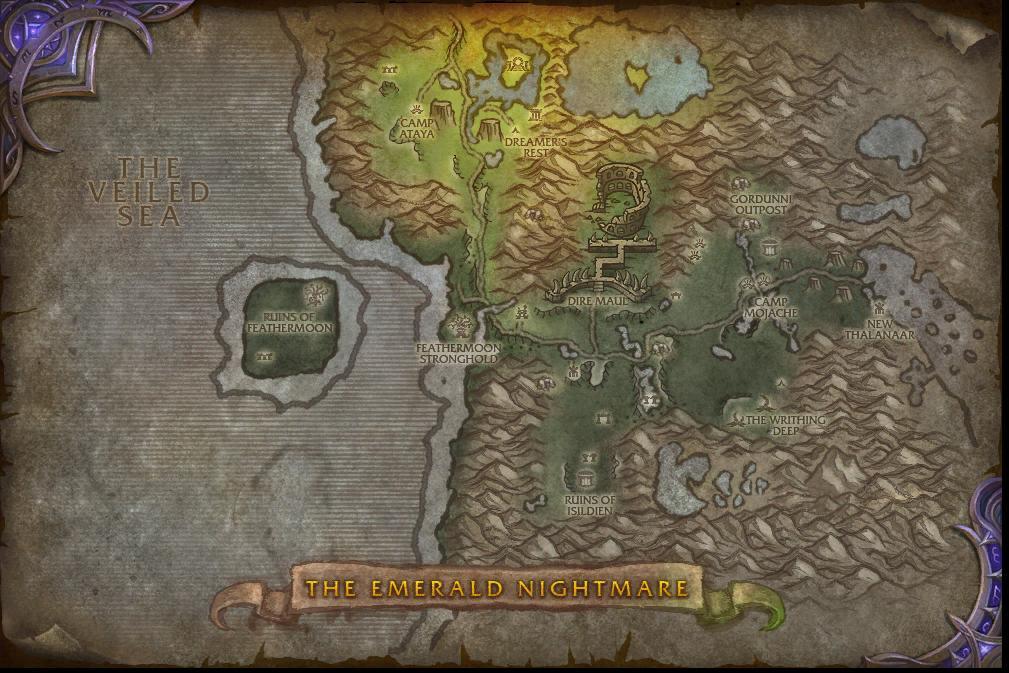
The Emerald Nightmare is located in the Val’sharah zone in World of Warcraft: Legion. To reach it, travel to Val’sharah, which can be accessed via Dalaran (Broken Isles) or through the flight paths in the Broken Isles. Once in Val’sharah, head to the coordinates 57, 37 near Shaladrassil.
The entrance to the Emerald Nightmare is at 57, 37, near Shaladrassil. Follow the path, be cautious of enemies, and you’ll reach the main gates. Once at the entrance, simply walk through the doors to enter the raid and start your adventure.
Inside, you’ll move through different subregions as you fight your way to Xavius, the final boss.
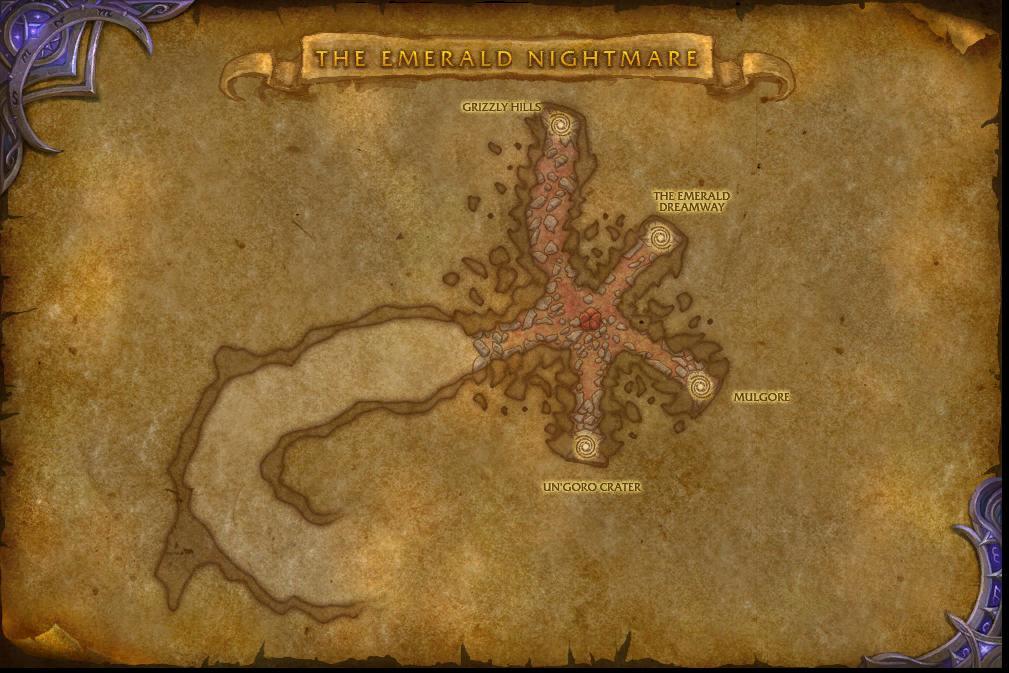
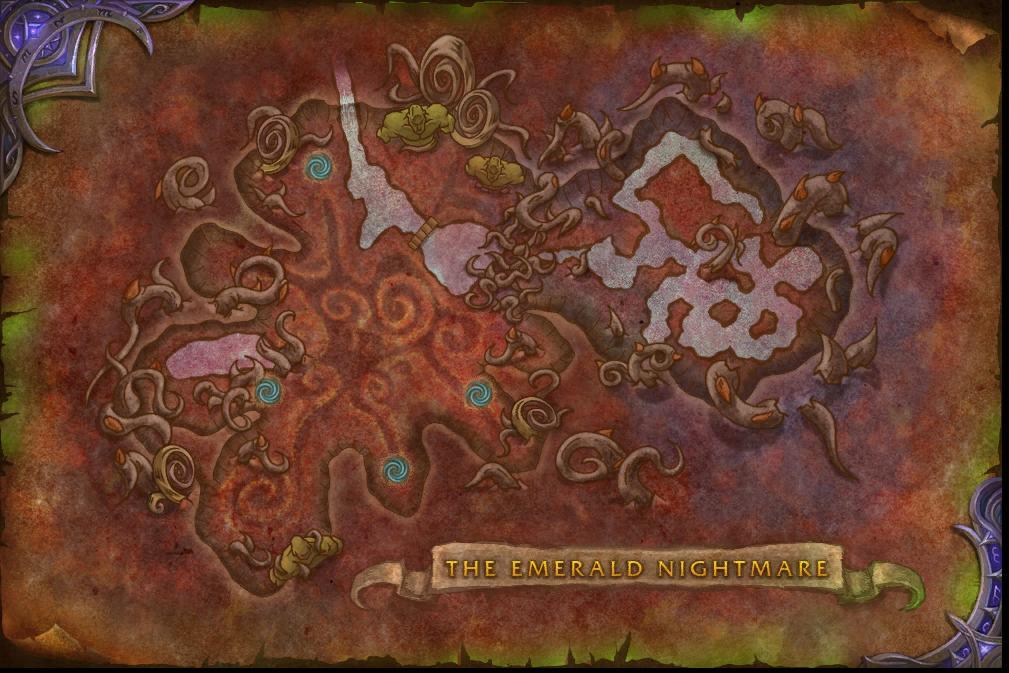
![]() The Emerald Nightmare has the following subregions:
The Emerald Nightmare has the following subregions:
- The Dreamgrove: The starting area where you face Nythendra.
- The Core of the Nightmare: A central hub with portals to other areas.
- The Tormented Guardians: Home to Ursoc and Elerethe Renferal.
- The Heart of Corruption: Where you confront Il’gynoth.
- The Dragons’ Lair: The domain of the corrupted Dragons of Nightmare.
- The Cenarius Encounter: A serene yet corrupted glade where you battle Cenarius.
- The Rift of Aln: The final area where you face Xavius.


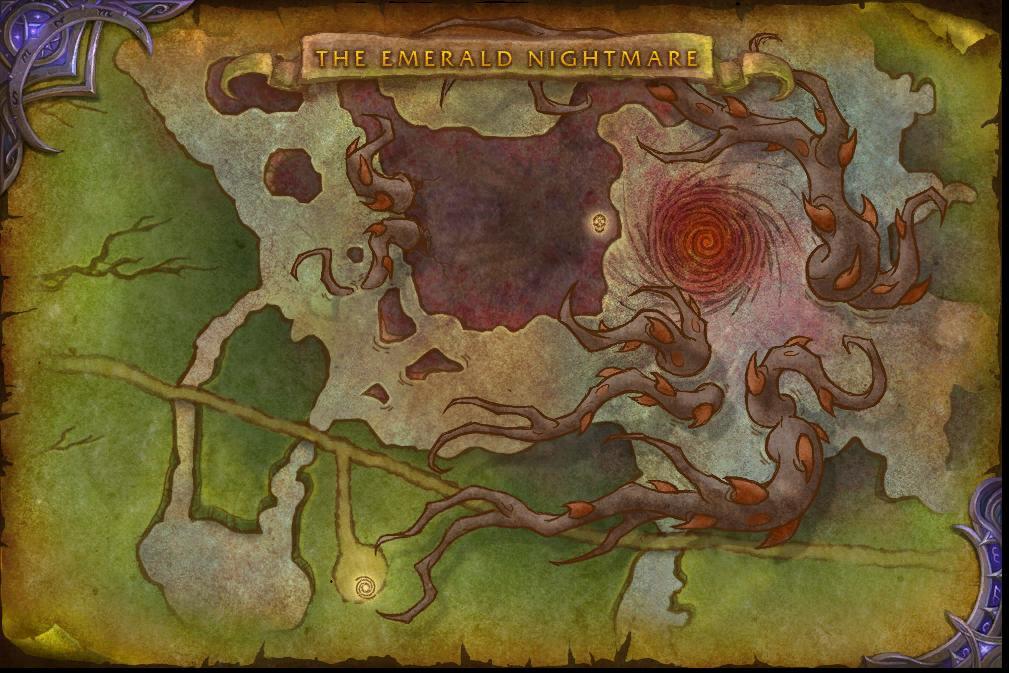
Each section has its own challenges and bosses, which we’ll briefly overview below.
Emerald Nightmare Collectibles: Mounts, Pets, Transmogs
| Collectible | Source (% drop rate) | Obtainable / Not Obtainable |
| Emerald Nightmare Tier Sets | ||
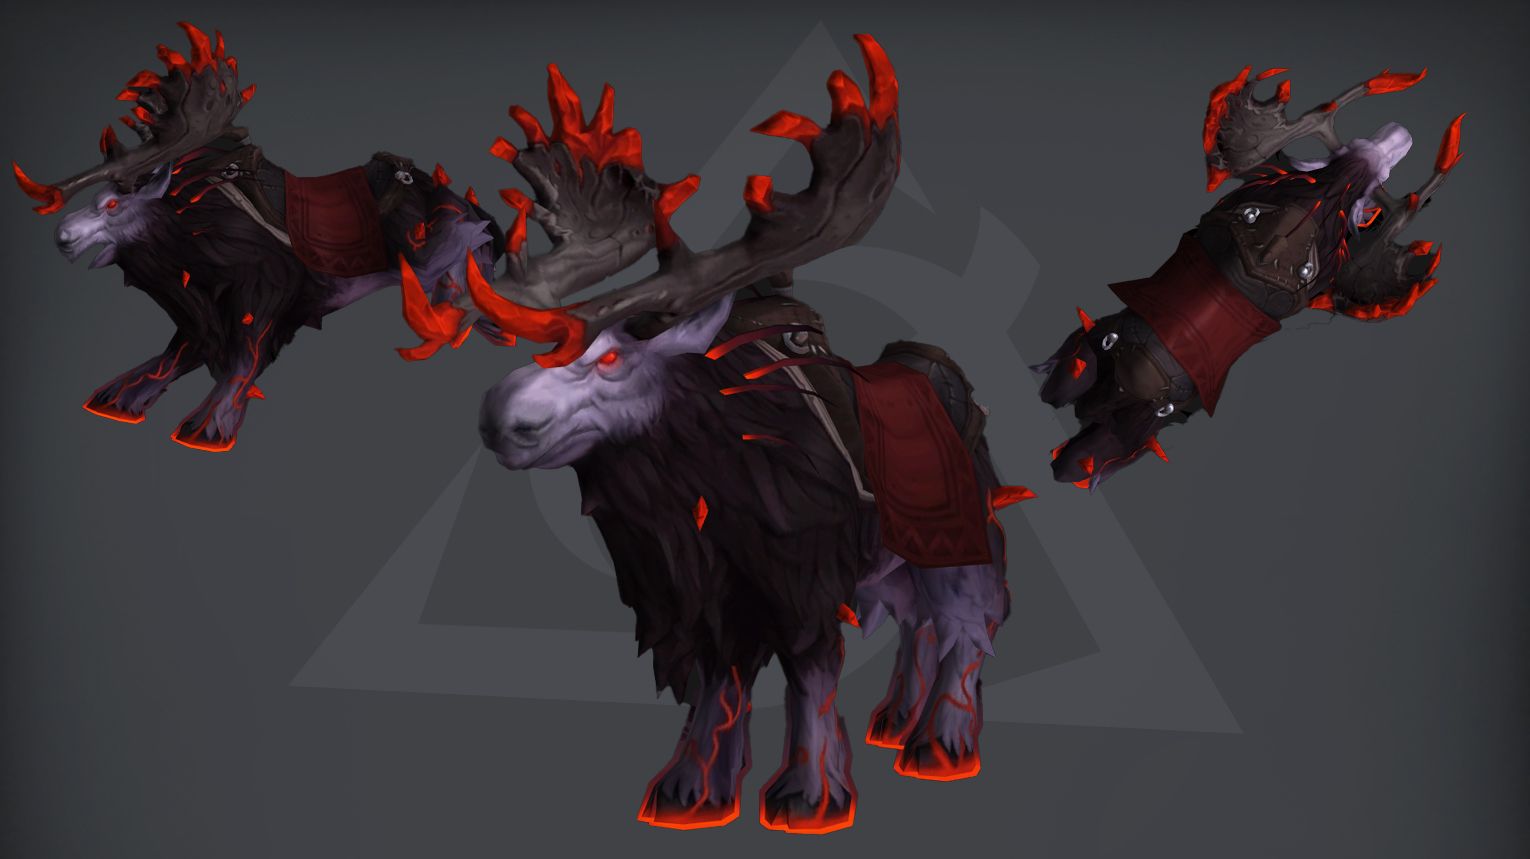
| Defiled Reins | Glory of the Legion Raider | Yes |
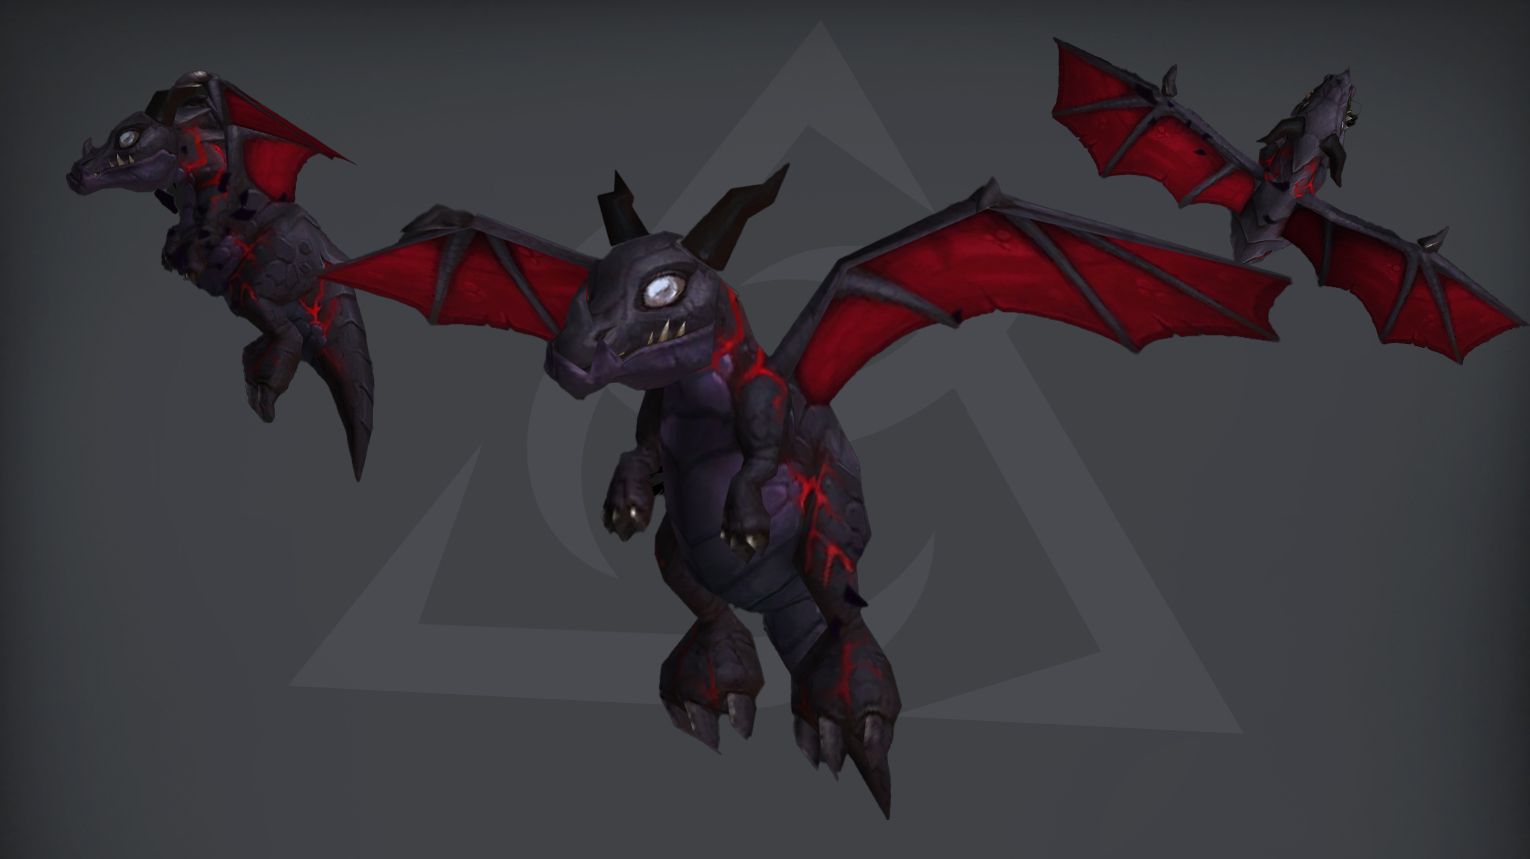
| Nightmare Whelpling | Ysondre (1%) | Yes |
Emerald Nightmare Bosses Overview
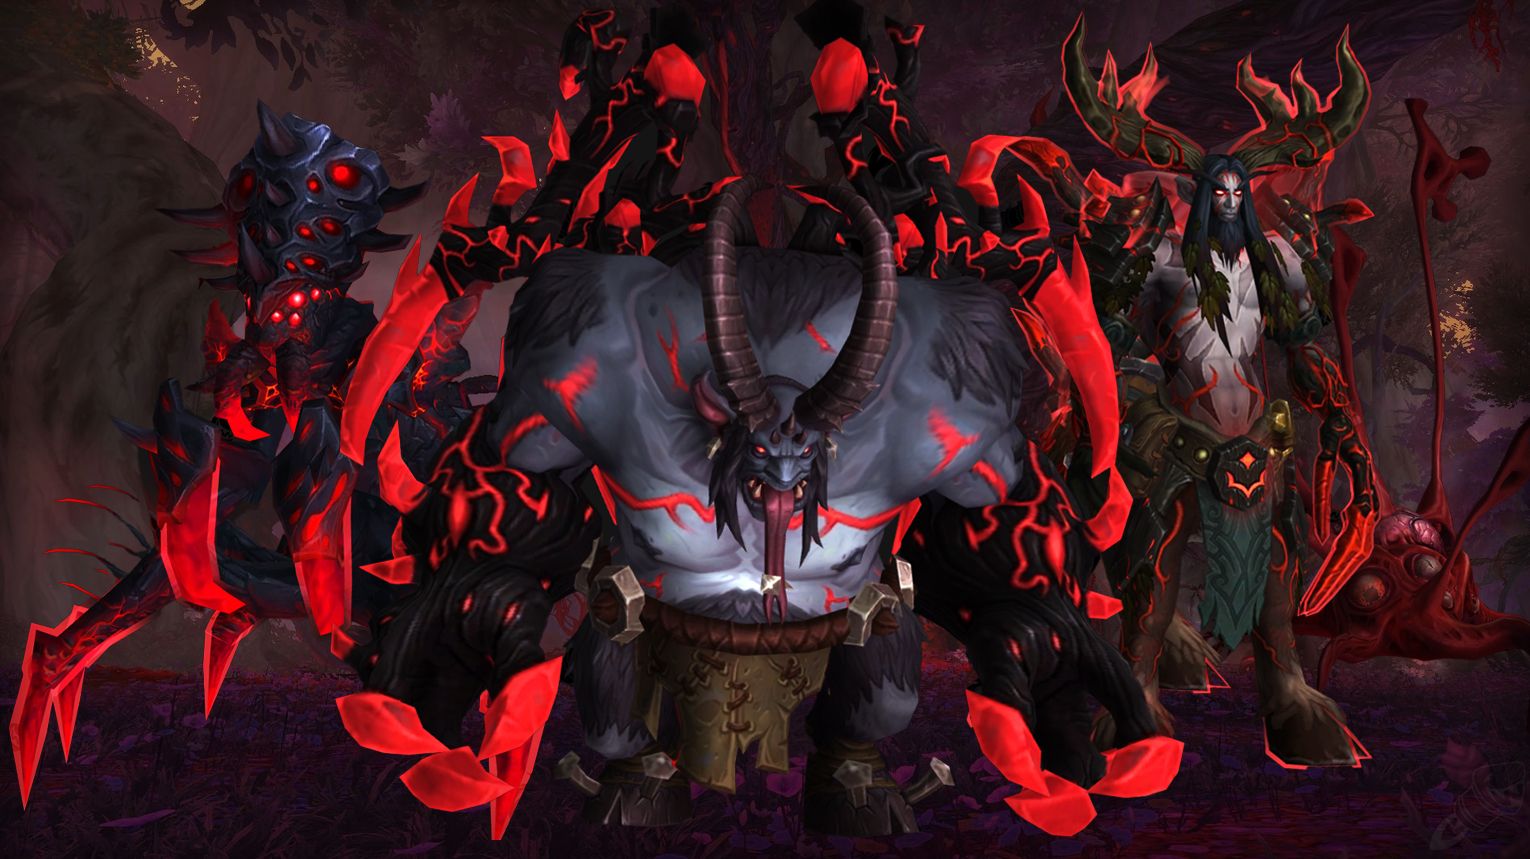
The Emerald Nightmare is a raid in World of Warcraft: Legion where players fight Xavius and his minions in a corrupted dream world. From Nythendra, a huge dragon taken over by the Nightmare, to Cenarius, the corrupted forest guardian, every fight is different. Battles range from strategic ones like Il’gynoth, where players must destroy the Heart of Corruption, to chaotic fights with the Dragons of Nightmare, who use powerful breath attacks. The final fight against Xavius in the Rift of Aln is intense, as players must overcome his illusions and corruption to defeat him.
![]() Below, we’ll look at the Emerald Nightmare raid bosses and their rewards.
Below, we’ll look at the Emerald Nightmare raid bosses and their rewards.
Can You Solo Emerald Nightmare in The War Within?
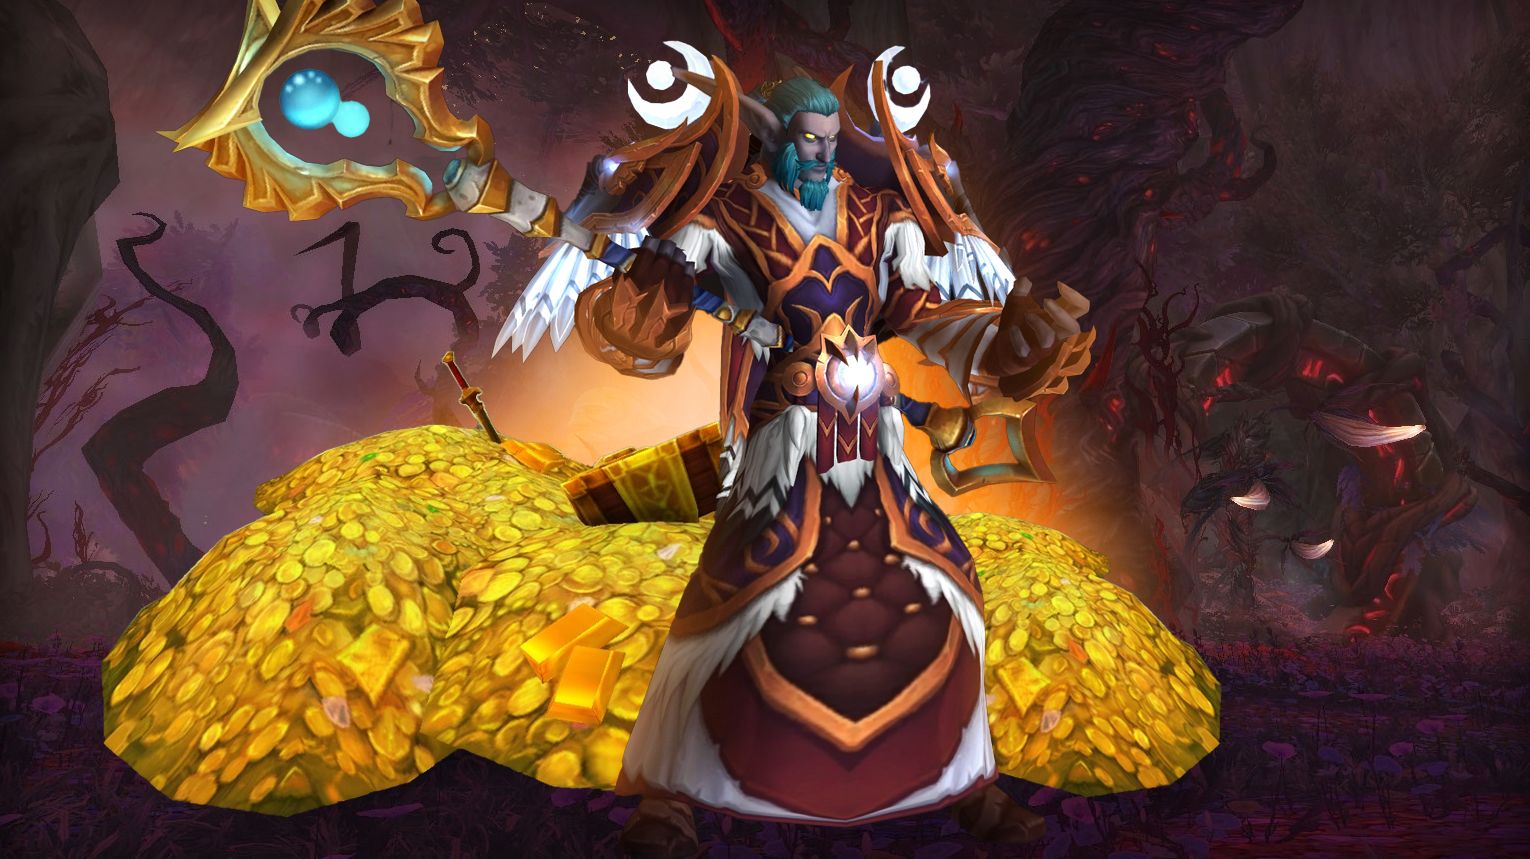
Farming the Emerald Nightmare in World of Warcraft: Legion is an excellent way to collect transmog sets, mounts, pets, and achievements. Although soloing older raids is simpler with improved gear and stats, some bosses in the Emerald Nightmare still present challenges. This guide provides strategies for soloing each boss, including recommended classes, tips, and optimal times to use Bloodlust or Drums of the Mountain.
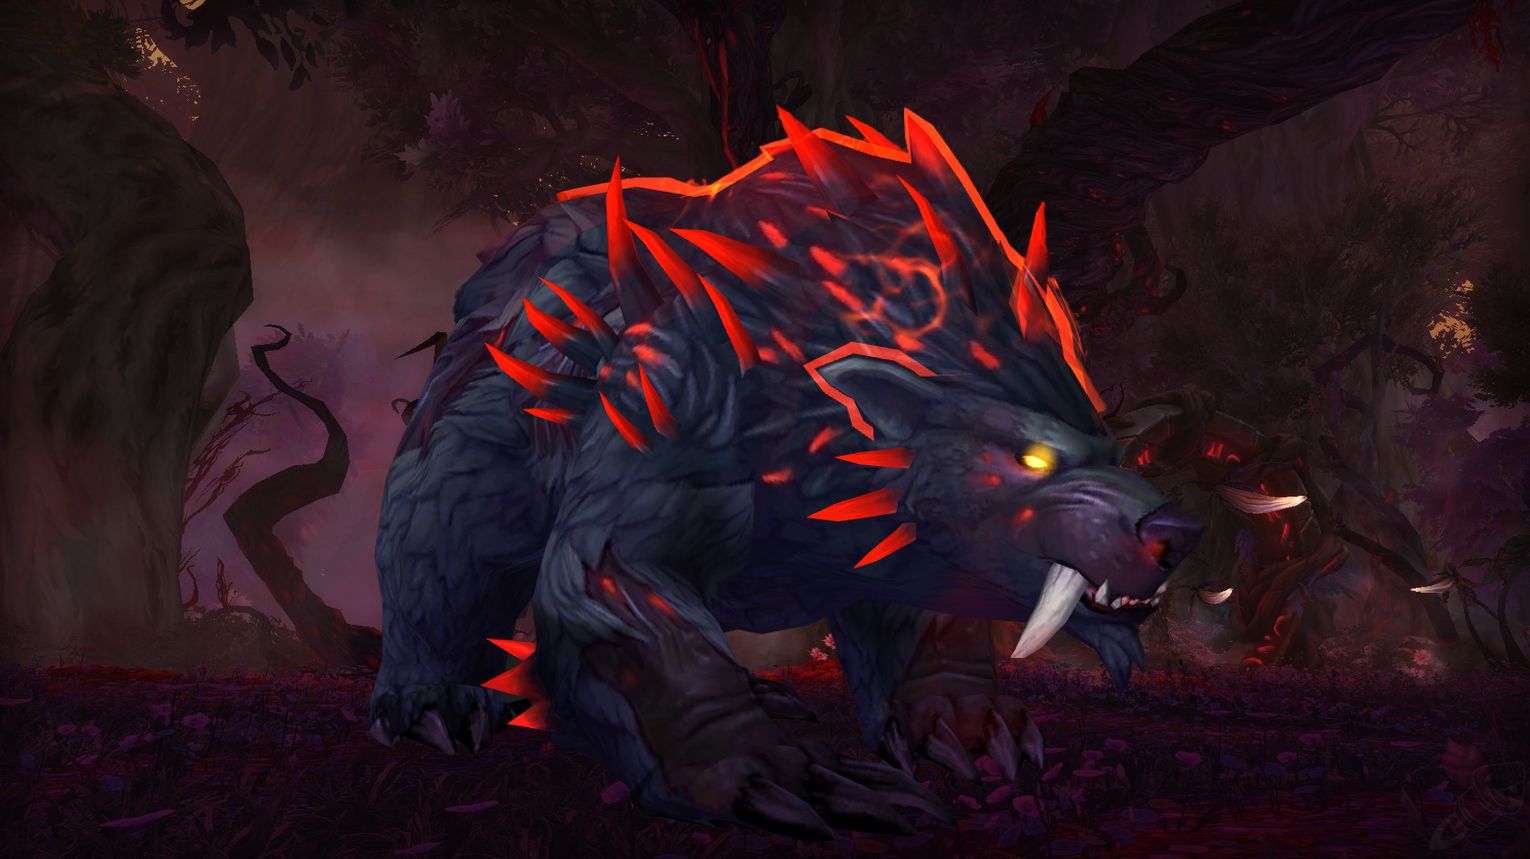
Nythendra
Nythendra is the first boss in the Emerald Nightmare, featuring two phases: Plagued Dreamer (direct attacks) and Heart of the Swarm (environmental hazards). Key mechanics include Rot (drop Infested Ground away from the group), Volatile Rot (tanks move to minimize raid damage), and Infested Breath (dodge the cone attack). Use Bloodlust/Time Warp at the start for maximum DPS. On Heroic and Mythic, manage Infested stacks and Infested Mind (mind control) carefully. Divide the room into quadrants, rotate after Infested Breath, and keep one half clear for Heart of the Swarm.
 Preferred Classes:
 Tanks: Classes with strong mitigation cooldowns (e.g.,
  Protection Paladin,
  Blood Death Knight) to handle Volatile Rot.
 Healers: Classes with strong AoE healing and dispels (e.g.,
  Restoration Druid,
  Holy Priest) to manage raid-wide damage and dispel Unstable Decay.
 DPS: High-mobility classes (e.g.,
  Demon Hunter,
  Rogue) to avoid mechanics and burst down Corrupted Vermin.
 Tips:
Tips:
- General:
- Spread out to avoid stacking Rot damage.
- Designate areas for dropping Infested Ground and Volatile Rot.
- Use movement speed abilities to avoid Infested Breath.
- Tanks:
- DPS:
- Healers:
- Prioritize healing Rot targets and tanks.
- Save major cooldowns for the third Volatile Rot explosion and Heart of the Swarm phase.
 Strategy:
- Phase 1 (Plagued Dreamer):
- Rot: Affected players run to the walls to drop Infested Ground.
- Volatile Rot: Tanks run to a designated area to minimize raid damage.
- Infested Breath: Move out of the cone and reposition the raid to a clean quadrant.
- Phase 2 (Heart of the Swarm):
- Avoid Corrupted Vermin explosions.
- Stay in a clean area of the room to avoid Infested Ground.
- Room Management:
- Divide the room into quadrants and rotate after each Infested Breath.
- Keep one half of the room clear for Heart of the Swarm.
 Bloodlust/Drums:
At the start of the fight.
 Nythendra loot table:
| Type of Armor | Item | Loot type |
| Cloth | Ancient Dreamwoven Mantle | Shoulder |
| Leather | Lifeless Buckled Girdle | Feet |
| Stained Maggot Squishers | Waist | |
| Greyed Dragonscale Coif | Waist | |
| Creeping String of Larva | Head | |
| Plate | Insect-Etched Chestplate | Chest |
| Wristclamps of Mad Dreams | Wrist | |
| Any | Grubby Silver Ring | Ring |
| Ravaged Seed Pod | Trinket | |
| Swarming Plaguehive | Trinket |
Il’gynoth, Heart of Corruption
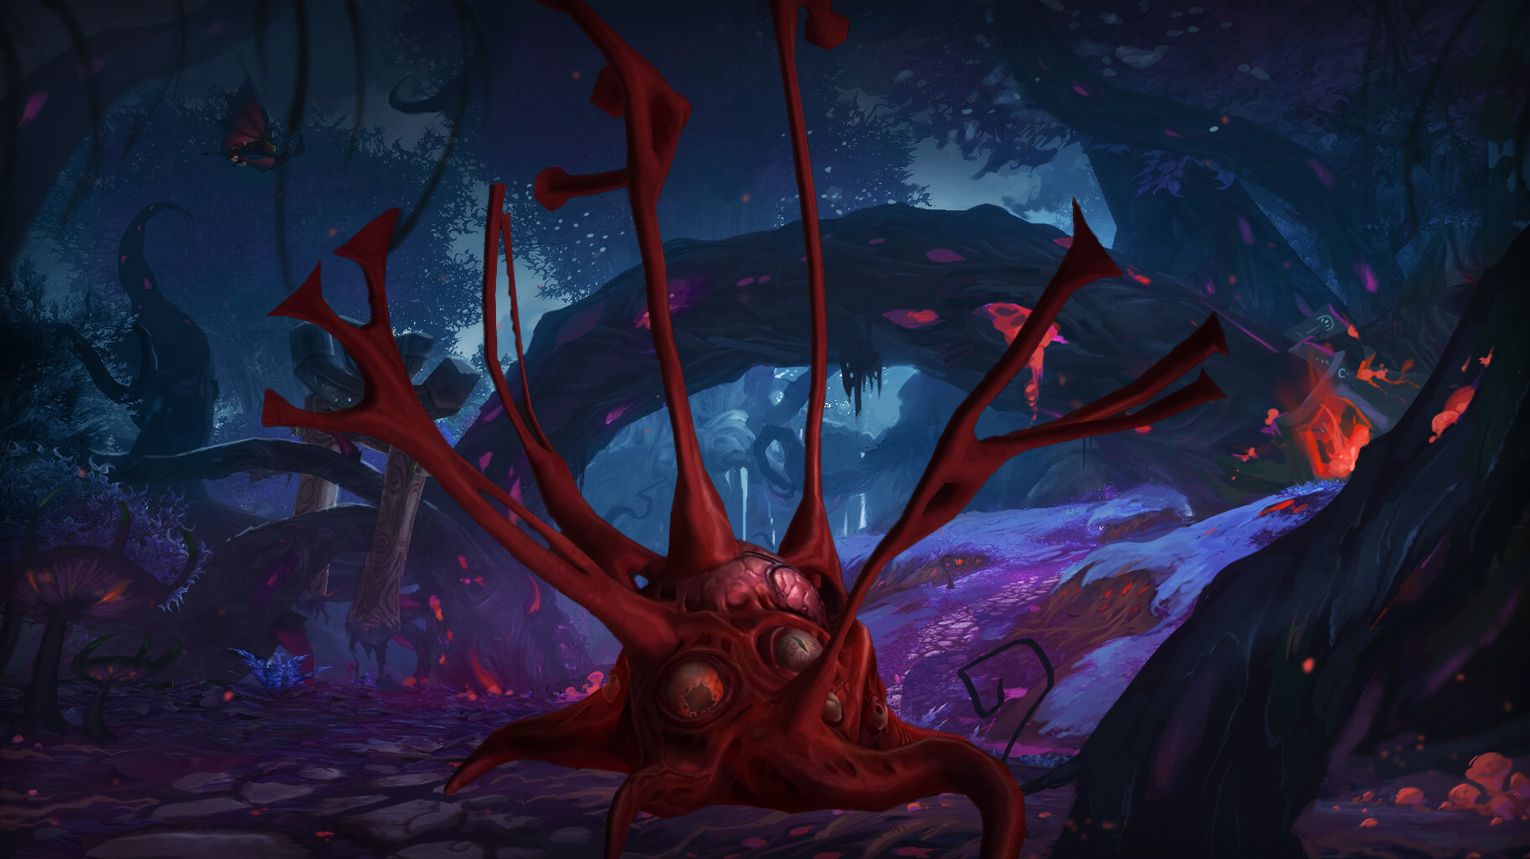
Il’gynoth is a two-phase boss in The Emerald Nightmare. In Phase 1, players defeat adds to spawn Nightmare Ichors, which must be killed near the Eye of Il’gynoth to damage it. Key mechanics include interrupting Mind Flay, tank-swapping on Eye of Fate, and kiting Spew Corruption pools to the edges. In Phase 2, players burn Il’gynoth in the heart chamber, spreading out for Cursed Blood and exiting before Dark Reconstitution kills them. Use Bloodlust in the first burn phase for maximum DPS, and on Mythic, manage Death Blossom soaks and limit Nightmare Explosion stacks.
Preferred Classes:
- Tanks: Classes with strong active mitigation (e.g., Protection Paladin, Blood Death Knight) to handle Nightmarish Fury and Eye of Fate.
- Healers: Classes with strong AoE healing and dispels (e.g., Restoration Druid, Holy Priest) to manage Touch of Corruption and Cursed Blood.
- Damage Dealers: Classes with strong AoE and single-target burst (e.g.,
 Fire Mage,
  Demon Hunter) to handle adds and burn Il’gynoth in Phase 2.
Tips:
- Phase 1:
- Kill adds to spawn Nightmare Ichors, then kite them to the Eye of Il’gynoth and kill them within 15 yards to damage the Eye.
- Interrupt Mind Flay from Deathglare Tentacles.
- Tanks must swap on 3 stacks of Eye of Fate from the Nightmare Horror.
- Players targeted by Spew Corruption should drop Nightmare Corruption pools at the edges of the room.
- Phase 2:
- Use Bloodlust/Heroism/Time Warp and major DPS cooldowns to burn Il’gynoth.
- Spread out when affected by Cursed Blood to avoid damaging other players.
- Exit the heart chamber before Dark Reconstitution completes to avoid instant death.
Strategy:
Phase 1: The Ruined Ground
- Add Priority:
- Nightmare Ichors (when in position) > Corruptor Tentacles > Deathglare Tentacles > Dominator Tentacles > Nightmare Horror.
- Key Mechanics:
- Dominator Tentacles: Tank these and dodge Ground Slam.
- Deathglare Tentacles: Interrupt Mind Flay.
- Nightmare Horror: Tank swap on 3 stacks of Eye of Fate and avoid dropping Nightmare Corruption on melee DPS.
- Corruptor Tentacles: Drop Spew Corruption pools at the edges.
- Nightmare Ichors:
- Kite them to the Eye of Il’gynoth and kill them within 15 yards to damage the Eye.
- Use slows, stuns, and knockbacks to control their movement.
Phase 2: The Heart of Corruption
- Burn Il’gynoth:
- Cursed Blood:
- Spread out to avoid damaging other players when the debuff detonates.
- Exit Before Dark Reconstitution:
- Leave the heart chamber with 5 seconds remaining on the cast to avoid instant death.
Bloodlust/Drums:
At the start of the first burn phase.
Il’gynoth loot table:
| Type of Armor | Item | Loot type |
| Cloth | Celestially Aligned Hood | Head |
| Clasp of Cosmic Insignificance | Wrist | |
| Leather | Otherworldy Leather Mantle | Shoulder |
| Dreamsculptor’s Gloves | Hands | |
| Singular Chain Leggings | Legs | |
| Gauntlets of Malevolent Intent | Hands | |
| Plate | Waistplate of Nameless Horror | Waist |
| Pauldrons of Shifting Runes | Shoulder | |
| Any | Dreadful Cyclopean Signet | Ring |
| Spontaneous Appendages | Trinket | |
| Wriggling Sinew | Trinket | |
| Goblet of Nightmarish Ichor | Trinket |
Elerethe Renferal
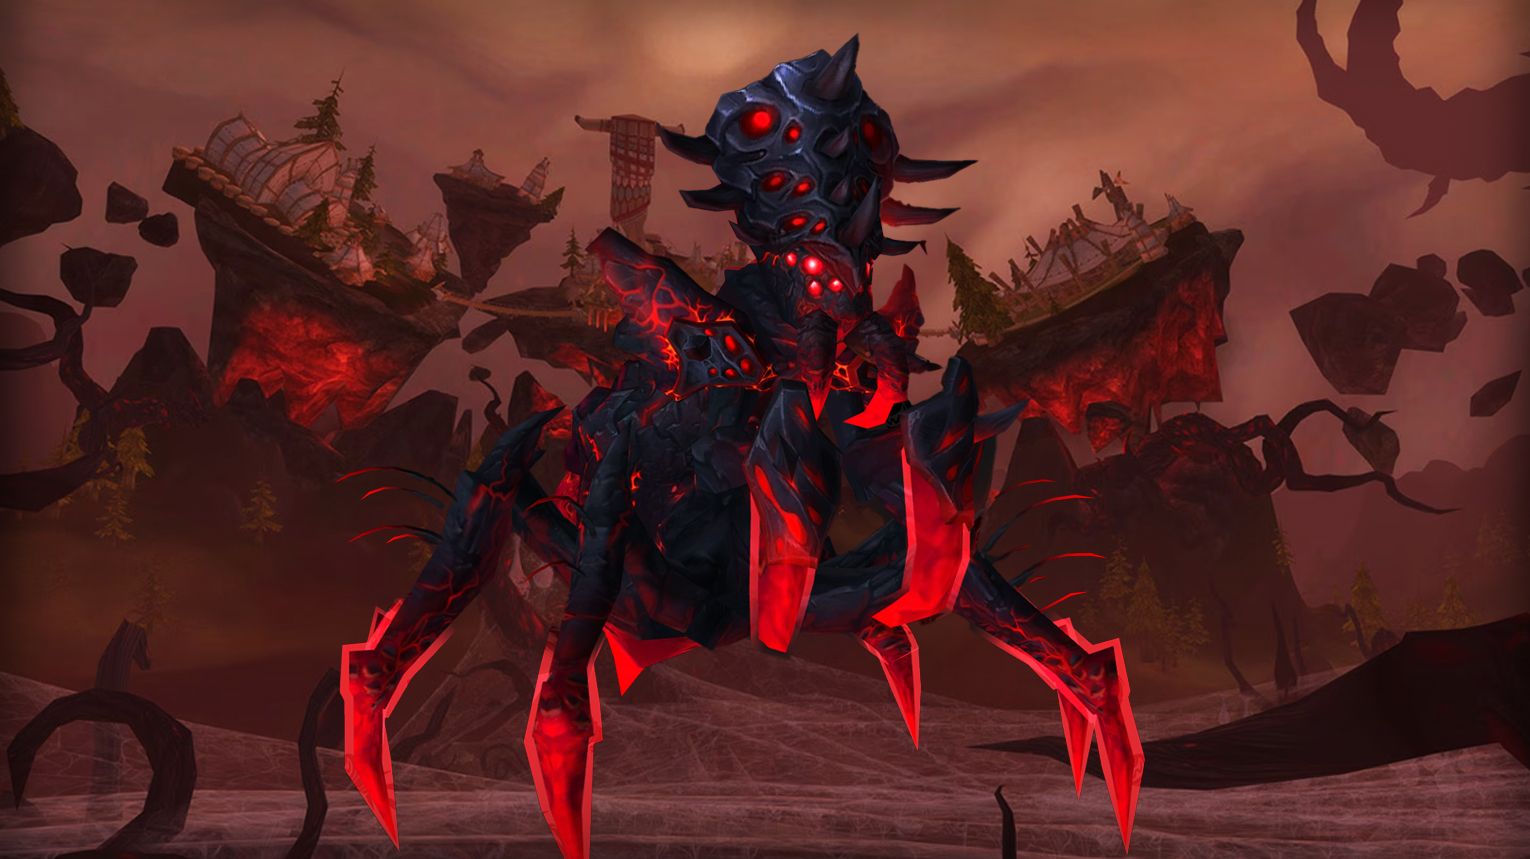
Elerethe Renferal is a two-phase boss in The Emerald Nightmare, alternating between Spider and Roc forms. In Spider form, manage Web of Pain, drop Venomous Pools from Necrotic Venom, and avoid Vile Ambush. In Roc form, handle Twisting Shadows, use Shimmering Feathers to cross platforms, and taunt-swap during Raking Talons. On Mythic, watch for Tangled Webs, Violent Winds, and Nightmare Spawn mechanics. Use Bloodlust at the start for maximum DPS, and prioritize clearing Venomous Pools and avoiding Pulsing Egg Sacs throughout the fight.
Preferred Classes:
- Tanks: Classes with strong active mitigation and cooldowns (e.g., Protection Paladin, Blood DK).
- Healers: Classes with strong raid-wide healing and cooldowns (e.g., Restoration Druid, Holy Priest).
- DPS: Classes with high mobility and strong AoE/cleave (e.g., Demon Hunter,
 Mage,
Mage,  Hunter).
Tips:
- Spider Form:
- Spread out during Necrotic Venom to avoid overlapping Venomous Pools.
- Move to the opposite side of the platform during Vile Ambush.
- Tanks should taunt-swap for Dripping Fangs on Spiderlings.
- Roc Form:
- Use Shimmering Feathers to cross platforms quickly and kill Spiderlings.
- Avoid Twisting Shadows tornadoes and Venomous Pools.
- Tanks must taunt-swap during Raking Talons to mitigate damage.
- General:
Strategy:
- Spider Form:
- Web of Pain: Linked players (tanks and random DPS/healers) must stay within 20 yards to avoid extra damage.
- Necrotic Venom: Targeted players should move to the edge of the platform to drop Venomous Pools.
- Vile Ambush: The raid should move to the opposite side of the platform to avoid heavy damage.
- Roc Form:
- Twisting Shadows: Targeted players should clear Venomous Pools and drop tornadoes in safe areas.
- Gathering Clouds: Healers should use cooldowns to mitigate raid-wide damage.
- Shimmering Feathers: Assign 1 tank, 1 healer, and 7 DPS to use feathers and kill Spiderlings.
- Raking Talons: Tanks must taunt-swap to avoid taking double damage.
- Platform Transitions:
- Avoid Venomous Pools and Twisting Shadows while crossing web bridges.
- Use movement speed boosts carefully to avoid falling or triggering Pulsing Egg Sacs.
Bloodlust/Drums:
At the start of the fight during Spider form.
Elerethe Renferal loot table:
| Type of Armor | Item | Loot type |
| Cloth | Pliable Spider Silk Cinch | Waist |
| Ragged Horrorweave Leggings | Legs | |
| Leather | Mask of Multitudinous Eyes | Head |
| Wristwraps of Broken Trust | Wrist | |
| Patient Ambusher’s Hauberk | Chest | |
| Black Venom Sabatons | Feet | |
| Plate | Venom-Fanged Barbute | Head |
| Storm-Battered Legplates | Legs | |
| Any | Gossamer-Spun Greatcloak | Cloak |
| Twisting Wind | Trinket | |
| Cocoon of Enforced Solitude | Trinket |
Ursoc
Ursoc is a single-target boss in the Emerald Nightmare raid with moderate movement requirements. Key mechanics include Focused Gaze, where players must soak Momentum charges to reduce raid damage, and tank debuffs (Overwhelm and Rend Flesh) that require frequent taunt swaps. Save Bloodlust/Heroism for the Blood Frenzy phase (below 30% health), where Ursoc deals significantly increased damage. In Heroic and Mythic, Nightmare Images spawn during Roaring Cacophony, creating Miasma zones and requiring additional tanking and DPS focus. Proper positioning, soaking, and cooldown management are essential for success.
Preferred Classes:
- Tanks: Classes with strong active mitigation (e.g., Protection Paladin, Blood Death Knight) to handle Overwhelm and Rend Flesh debuffs.
- Healers: Classes with strong AoE healing (e.g., Restoration Druid, Holy Priest) to manage raid-wide damage from Roaring Cacophony and Barreling Impact.
- DPS: High single-target damage dealers (e.g., Fire Mage,
 Affliction Warlock) to burn Ursoc quickly, especially in Mythic where Nightmare Images must be killed.
Tips:
- Soaking Momentum:
- Focused Gaze:
- The targeted player should run to a marked spot in the center of the room.
- Soakers should stand between Ursoc and the Focused Gaze target to reduce Barreling Impact damage.
- Tank Debuffs:
- Tanks must avoid having both Overwhelm and Rend Flesh simultaneously. Use frequent taunts to manage debuffs.
- Blood Frenzy:
Strategy:
- Positioning:
- Tank Ursoc against a wall to minimize movement.
- The raid should stack loosely within 25 yards of Ursoc to split Roaring Cacophony damage.
- Soaking:
- Assign two soak groups to alternate soaking Momentum charges.
- Soakers should stand behind Ursoc, in line with the Focused Gaze target.
- Tank Management:
- Tanks must taunt swap to manage Overwhelm and Rend Flesh debuffs.
- Use strong cooldowns during Blood Frenzy to survive increased damage.
- Healing:
- Healers should use cooldowns after each Barreling Impact and Roaring Cacophony.
- Save major cooldowns for the Blood Frenzy phase.
- DPS:
- Focus on maximizing single-target damage.
- Use personal defensives during Roaring Cacophony and Barreling Impact.
Bloodlust/Drums:
When Ursoc reaches 30% health and enters Blood Frenzy.
Ursoc loot table:
| Type of Armor | Item | Loot type |
| Cloth | Crimson Wool-Lined Slippers | Feet |
| Ragged Fur Wristwraps | Wrist | |
| Leather | Scarred Ragefang Chestpiece | Chest |
| Splotched Bloodfur Leggings | Legs | |
| Matted Fur Pauldrons | Shoulder | |
| Scored Ironclaw Sabatons | Feet | |
| Plate | Primal Gauntlets of Rage | Hands |
| Trampling Warboots | Feet | |
| Any | Cursed Beartooth Necklace | Amulet |
| Unbridled Fury | Trinket | |
| Bloodthirsty Instinct | Trinket | |
| Ursoc’s Rending Paw | Trinket |
Dragons of Nightmare
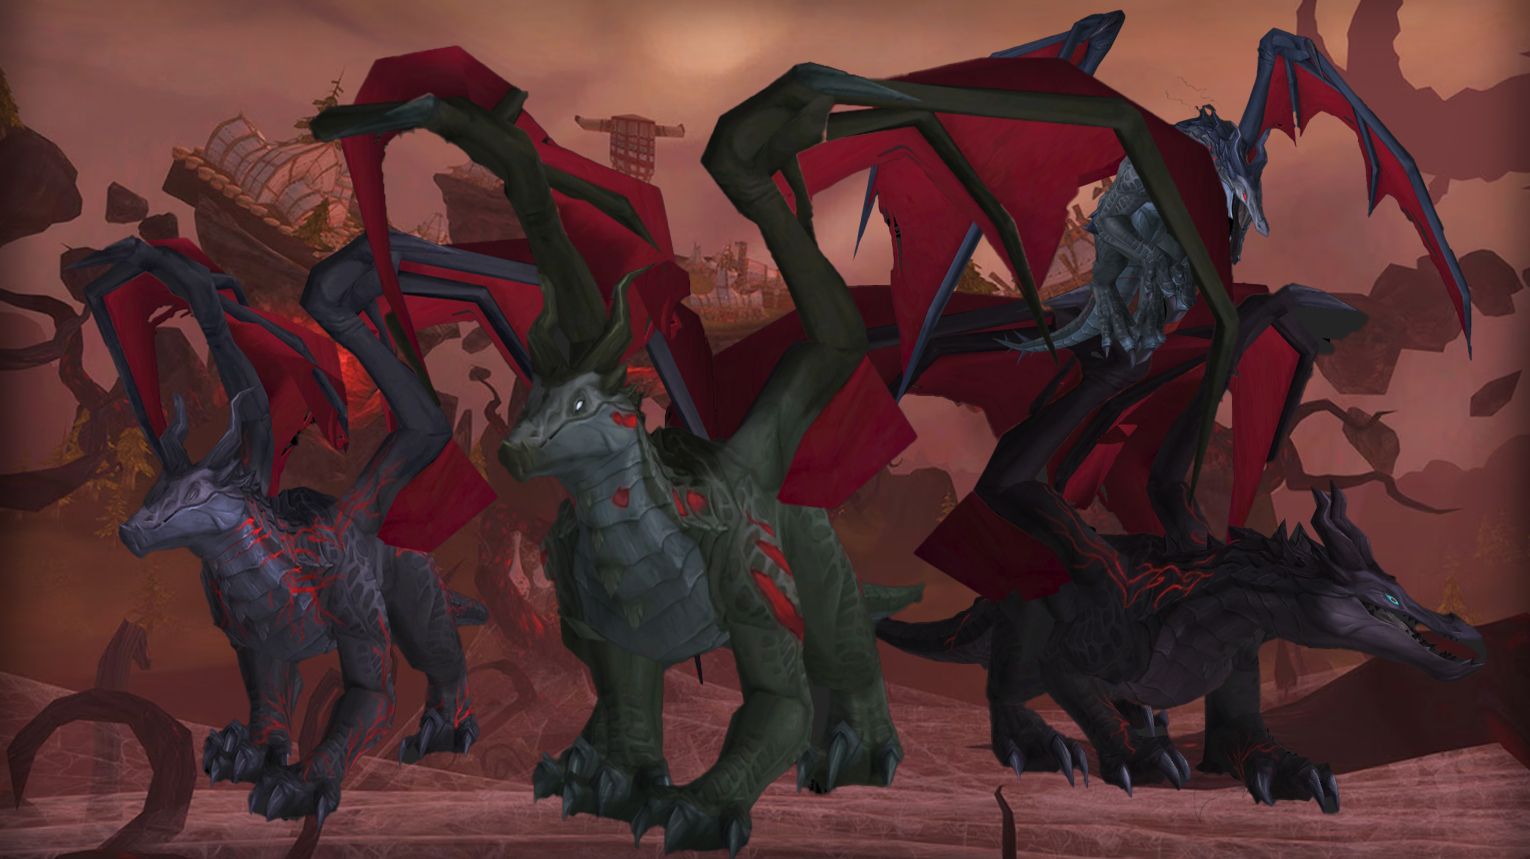
The Dragons of Nightmare encounter in the Emerald Nightmare raid features Ysondre and two randomly selected dragons (or all four on Mythic). Players must manage Mark of the Dragon debuffs by splitting into two groups and swapping tanks at 6-8 stacks. Key mechanics include soaking Nightmare Blooms, dispelling Defiled Vines, and prioritizing adds like Essence of Corruption and Spirit Shades. Use Bloodlust at the start for maximum DPS. On Heroic and Mythic, flying dragons gain additional abilities, and Mythic introduces Lumbering Mindgorgers that require a portal team to prevent a raid wipe.
Preferred Classes:
- Tanks: Classes with strong cooldowns for mitigating Corrupted Breath and handling multiple adds (e.g., Paladins, Death Knights).
- Healers: Classes with strong dispels and AoE healing (e.g., Restoration Druids,
 Holy Paladins)
 - DPS: Classes with strong single-target burst for adds and interrupts (e.g., Rogues, Mages, Hunters).
Tips:
- Mark of the Dragon:
- Players within 45 yards of a dragon gain a stacking debuff. At 10 stacks, they are stunned for 30 seconds.
- Split the raid into two groups, each handling one dragon. Tanks should swap dragons at 6-8 stacks to avoid Slumbering Nightmare.
- Nightmare Blooms:
- Soak Nightmare Blooms to prevent Dread Horrors from spawning.
- Use defensive cooldowns if soaking while taking other damage.
- Adds:
- Prioritize killing adds like Essence of Corruption, Spirit Shades, and Shades of Taerar.
- Use crowd control (CC) and interrupts to manage adds effectively.
- Ground Effects:
- Avoid Gloom, Seeping Fog, and Corrupted Burst by moving out of their areas.
- Dispels:
- Healers must dispel Defiled Vines and Seeping Fog quickly to prevent raid damage and crowd control effects.
Strategy:
- Raid Composition:
- Split the raid into two groups, each with a tank, healers, and DPS.
- Assign each group to one side of the room.
- Tank Responsibilities:
- Face dragons away from the raid to avoid Corrupted Breath.
- Swap dragons at 6-8 stacks of the debuff.
- Pick up adds like Shades of Taerar and Dread Horrors.
- DPS Responsibilities:
- Focus on adds and interrupts.
- Soak Nightmare Blooms and avoid ground effects.
- Healer Responsibilities:
- Dispels are critical for Defiled Vines and Seeping Fog.
- Prioritize healing players soaking Nightmare Blooms or affected by Volatile Infection.
Bloodlust/Drums:
At the start of the encounter to burn down the dragons quickly and reduce the number of mechanics in the first phase.
Dragons of Nightmare loot table:
| Type of Armor | Item | Loot type |
| Cloth | Handwraps of Delusional Power | Hands |
| Dreamscale Inlaid Vestments | Chest | |
| Prideful Gladiator’s Mooncloth Robe | Chest | |
| Leather | Dragonspur Wristguards | Wrist |
| Cowl of Fright | Head | |
| Malignant Sabatons | Feet | |
| Gauntlets of the Demented Mind | Hands | |
| Plate | Dragonbone Wristclamps | Wrist |
| Horror Inscribed Chestguard | Chest | |
| Any | Nightmare Whelpling | Ring |
| Mindrend Band | Trinket | |
| Unstable Horrorslime | Trinket | |
| Vial of Nightmare Fog | Trinket | |
| Phantasmal Echo | Trinket |
Cenarius

Cenarius is the sixth boss in The Emerald Nightmare raid, located in the Tormented Guardians wing. Players must defeat Nythendra and all four Core of the Nightmare bosses to access him. The encounter takes place in a Nightmare-corrupted Moonglade.
Preferred Classes:
- Tanks: Classes with strong cooldowns for Spear of Nightmares and Nightmare Blast (e.g., Protection Paladin, Blood Death Knight).
- Damage Dealers: Classes with strong AoE for Corrupted Wisps and Twisted Sisters (e.g., Fire Mage, Demon Hunter, Affliction Warlock).
- Healers: Classes with strong raid-wide healing and cooldowns for Creeping Nightmares and Desiccating Stomp (e.g., Holy Priest, Restoration Druid).
Tips:
- Creeping Nightmares:
- Reset stacks at 15-20 by stepping into Cleansed Ground.
- Avoid dragging Cenarius into Cleansed Ground, as it shrinks the pool.
- Forces of Nightmare:
- Prioritize killing adds: Corrupted Wisps > Twisted Sister > Rotten Drake > Nightmare Ancient.
- Use Malfurion’s Cleansed Ground to turn one add into a friendly Ally of Nature.
- Nightmare Brambles:
- Kite the Bramble Swarm away from the raid.
- Use immunities (e.g., Divine Shield, Cloak of Shadows) to clear Nightmare Brambles patches.
- Phase Transition:
- Avoid pushing Cenarius to 35% health if adds are still alive or if Forces of Nightmare is about to spawn.
Strategy:
Phase 1: Forces of Nightmare
- Tanks:
- Keep Cenarius 20+ yards away from adds to avoid Aura of Dread Thorns.
- Swap adds tanking to manage Creeping Nightmares stacks.
- Damage Dealers:
- Focus on adds in priority order.
- Interrupt Twisted Touch of Life from Twisted Sisters.
- Kite Corrupted Wisps and kill them quickly.
- Healers:
- Use raid cooldowns for Desiccating Stomp and Nightmare Buffet.
- Dispel Nightmare Brambles roots.
Phase 2: Your Nightmare Ends
- Tanks:
- Swap for Spear of Nightmares and use cooldowns to minimize Nightmares pool size.
- Move Cenarius along the edge of the platform to conserve space.
- Damage Dealers:
- Use Bloodlust/Heroism/Time Warp at the start of Phase 2.
- Focus on Cenarius while avoiding Nightmares pools.
- Healers:
- Use raid cooldowns for high Creeping Nightmares stacks.
- Free Malfurion from Entangling Nightmares quickly.
Bloodlust/Drums:
At the start of Phase 2 (35% health) to burn Cenarius before Nightmares covers the entire platform.
Cenarius loot table:
| Type of Armor | Item | Loot type |
| Cloth | Mantle of Perpetual Bloom | Shoulder |
| Cozy Dryad Hoof-Socks | Feet | |
| Leather | Forest-Lord’s Waistwrap | Chest |
| Grove Keeper’s Robe | Waist | |
| Laughing Sister’s Pouch-Chain | Shoulder | |
| Thorny Bramblemail Pauldrons | Waist | |
| Plate | Fitted Ironbark Gauntlets | Head |
| Crown of Steely Brambles | Hands | |
| Any | Evergreen Vinewrap Drape | Cloak |
| Horn of Cenarius | Trinket | |
| Nature’s Call | Trinket |
Xavius
Xavius is the final boss of The Emerald Nightmare raid in World of Warcraft. He is located in the Rift of Aln, a surreal chamber beneath the Nightmare-corrupted Shaladrassil world tree. Players access this area by speaking to Malfurion, who turns them into sprites and hurls them into the vortex at the heart of the Moonglade. Xavius is the sole boss in the Rift of Aln wing of the Emerald Nightmare Raid Finder.
Preferred Classes:
- Tanks: 2-3 tanks recommended. Classes with strong cooldowns and active mitigation (e.g., Protection Paladin, Blood Death Knight) are ideal.
- Healers: Healers with strong raid-wide healing and dispels (e.g., Holy Priest, Restoration Druid) are preferred.
- DPS: Classes with strong single-target and cleave/AoE damage (e.g., Fire Mage, Affliction Warlock,
 Fury Warrior) are optimal for handling adds and burning Xavius.
Tips:
- Corruption Management:
- Avoid unnecessary Corruption gains by dodging mechanics like Nightmare Blades and Corruption Meteor.
- Use Dream Simulacrum players to soak Corruption-heavy mechanics.
- At 100 Corruption, players gain a 20-second damage buff (Descent into Madness) before being mind-controlled. Use this to burn Xavius in Phase 3.
- Dream Simulacrum:
- Dreaming players should handle mechanics like Tormenting Infection, Tainted Discharge, and tank debuff dispels.
- Cooldowns used in the Dream are refunded upon awakening.
- Add Control:
- Phase Transitions:
- Avoid pushing Xavius into the next phase with adds still alive.
- Clear Tainted Discharge pools before Phase 3 to prevent add respawns.
Strategy:
Phase 1 (100%-65% Health)
- Key Mechanics:
- Lurking Terrors: Kite them into Dreaming players to soak Tormenting Infection.
- Corruption Horror: Tank it away from the raid and burn it quickly.
- Nightmare Blades: Targeted players must move out of the raid to avoid hitting others.
- Darkening Soul: Tanks swap at 3-4 stacks and move away for dispels.
- Strategy:
- Spread out to avoid Lurking Eruption splash damage.
- Dreaming players handle Tormenting Infection and dispel tank debuffs.
- Focus DPS on Corruption Horrors when they spawn.
Phase 2 (65%-30% Health)
- Key Mechanics:
- Inconceivable Horrors: Kill them quickly and soak Tainted Discharge pools to prevent respawns.
- Corruption Meteor: Dreaming players help split the damage.
- Bonds of Terror: Linked players must move close together to break the bond.
- Blackening Soul: Tanks swap at 3-4 stacks and move away for dispels.
- Strategy:
- Ranged DPS and healers split into two groups to handle Corruption Meteor.
- Dreaming players soak Tainted Discharge and help with dispels.
- Use slows and CC to keep Inconceivable Horrors away from Xavius.
Phase 3 (30%-0% Health)
- Key Mechanics:
- Nightmare Tentacles: Spawn every 20 seconds, casting Nightmare Bolt that increases Corruption.
- Nightmare Blades and Corruption Meteor continue.
- Blackening Soul: Tanks swap at 3-4 stacks.
- Strategy:
Bloodlust/Drums:
At the start of Phase 3 (30% health).
Xavius loot table:
| Type of Armor | Item | Loot type |
| Cloth | Maddening Robe of Secrets | Chest |
| Hood of Darkened Visions | Head | |
| Leather | Repulsive Leathery Pants | Legs |
| Boots of Endless Betrayal | Feet | |
| The First Satyr’s Spaulders | Shoulder | |
| Disjointed Linkage Leggings | Legs | |
| Manacles of the Nightmare Colossus | Wrist | |
| Plate | Midnight Herald’s Pauldrons | Shoulder |
| Eon-Tempered Waistplate | Waist | |
| Any | Twice-Warped Azsharan Signet | Ring |
| Bough of Corruption | Trinket | |
| Grotesque Statuette | Trinket |
Emerald Nightmare Achievements List
| Achievement | Requirement |
| Tormented Guardians | Defeat corrupted protectors. |
| Use the Force(s) | Kill Cenarius without cleansing each of the following Forces of Nightmare on Normal difficulty or higher. |
| The Emerald Nightmare Guild Run | Slay the bosses of The Emerald Nightmare on Normal difficulty or higher, while in a guild group. |
| Rift of Aln | Defeat Xavius. |
| Ahead of the Curve: Xavius | Kill Xavius on Heroic difficulty or higher, before the opening of the Nighthold. |
| Cutting Edge: Xavius | Slay Xavius on Mythic difficulty, before the opening of the Nighthold. |
| Mythic: Xavius | Defeat Xavius on Mythic difficulty. |
| Mythic: Xavius Guild Run | Kill Xavius on Mythic difficulty, while in a guild group. |
| Realm First! Xavius | First guild on the realm to defeat Xavius on Mythic difficulty while in a guild group. |
| Mythic: Cenarius | Slay Cenarius on Mythic difficulty. |
| Mythic: Dragons of Nightmare | Defeat the Dragons of Nightmare on Mythic difficulty. |
| Mythic: Elerethe Renferal | Kill Elerethe Renferal on Mythic difficulty. |
| Mythic: Il’gynoth | Slay Il’gynoth, the Heart of Corruption, on Mythic difficulty. |
| Mythic: Nythendra | Defeat Nythendra on Mythic difficulty. |
| Mythic: Ursoc | Kill Ursoc on Mythic difficulty. |
| Buggy Fight | Slay Nythendra after squishing 15 Glow Bugs on Normal difficulty or higher. |
| Darkbough | Defeat the following bosses within the clutches of The Emerald Nightmare. |
| I Attack the Darkness | Kill a Creature in the Dark during each of phase of the encounter with Xavius on Normal difficulty or higher. |
| Imagined Dragons World Tour | Slay Ysondre while all members of the raid have Dream Essences from all four gateway locations on Normal difficulty or higher. |
| Scare Bear | Defeat Ursoc while keeping Tur Ragepaw alive on Normal difficulty or higher. |
| Took the Red Eye Down | Kill Il’gynoth after inflicting 20 Nightmare Explosions on the Eye of Il’gynoth within 10 seconds on Normal difficulty or higher. |
| Webbing Crashers | Slay Elerethe Renferal after destroying all her Pulsing Egg Sacs during the encounter on Normal difficulty or higher. |