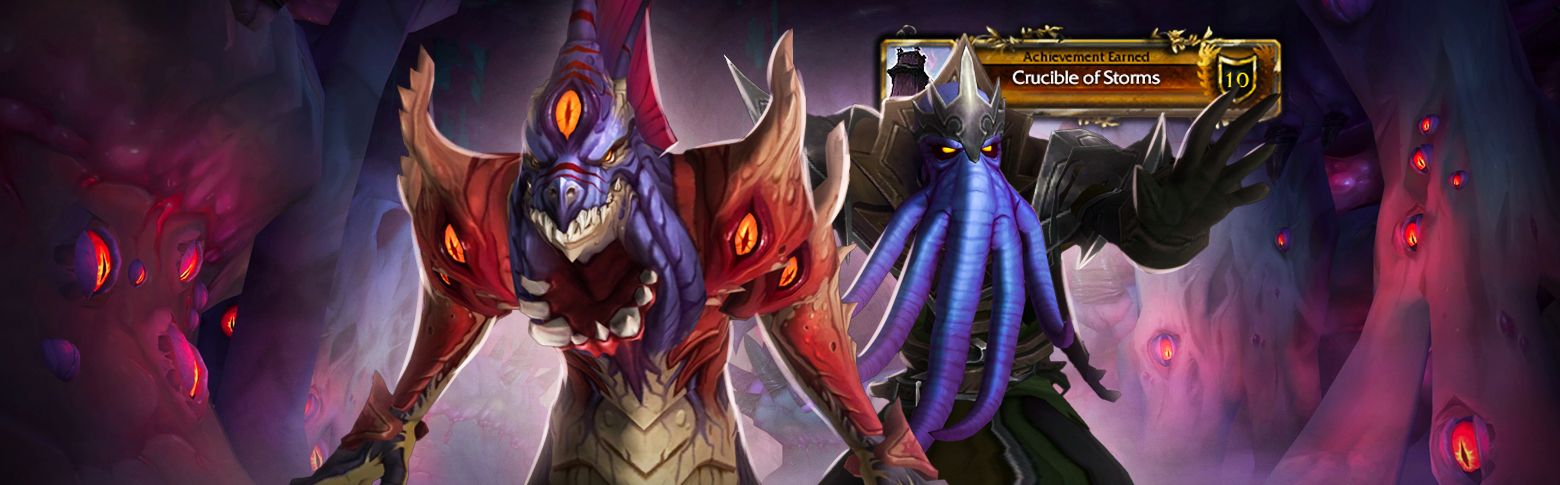
Crucible of Storms, the third raid of World of Warcraft: Battle for Azeroth, was released on April 16th, 2019. This raid focuses on the Old God N’Zoth and is the second raid launched during the Tides of Vengeance content patch. Crucible is a short raid, similar to Trial of Valor in Legion, featuring two bosses with themes centered around the Old Gods.
![]() In this guide, we’ll cover:
In this guide, we’ll cover:
- Crucible of Storms location
- Bosses and their rewards
- Available mounts, weapons, and transmogs
- Achievements you can earn
- Can you solo Crucible of Storms?
![]() This guide is your go-to resource for maximizing your experience in Crucible of Storms in WoW Retail (The War Within), whether you’re aiming to collect cosmetics or challenge yourself solo.
This guide is your go-to resource for maximizing your experience in Crucible of Storms in WoW Retail (The War Within), whether you’re aiming to collect cosmetics or challenge yourself solo.
Crucible of Storms Entrance and Subregions
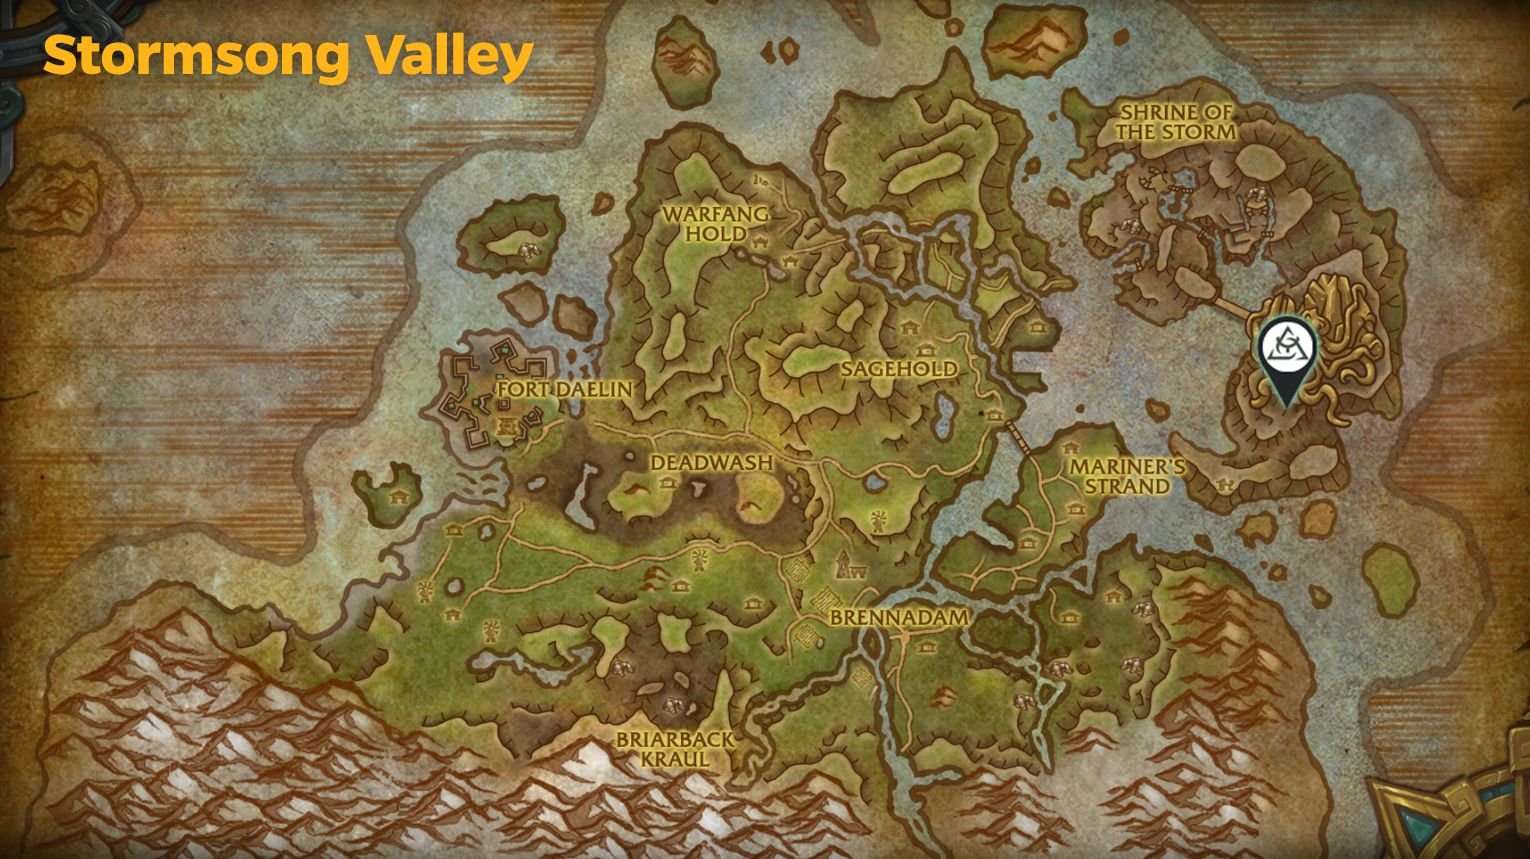
Crucible of Storms is located in Stormsong Valley, Kul Tiras, in World of Warcraft: Battle for Azeroth. To reach it, travel to Stormsong Valley and head to the Precipice of Oblivion, a small island off the coast. The closest flight paths are Mildenhall Meadery for Alliance players and Ironmaul Overlook for Horde players. From there, mount up or swim to the island and follow the path to the raid entrance at 66.5, 25.5.
Once inside, you’ll descend into the depths beneath the Shrine of the Storm, where the Old God N’Zoth’s influence is strongest. The raid is compact but intense, with two challenging bosses waiting to test your skills.
![]() Crucible of Storms features the following key areas (check the gallery below):
Crucible of Storms features the following key areas (check the gallery below):
- The Abyssal Breach: The starting area, where you face the Restless Cabal.
- The Depths of Oblivion: The final chamber, home to Uu’nat, Harbinger of the Void.
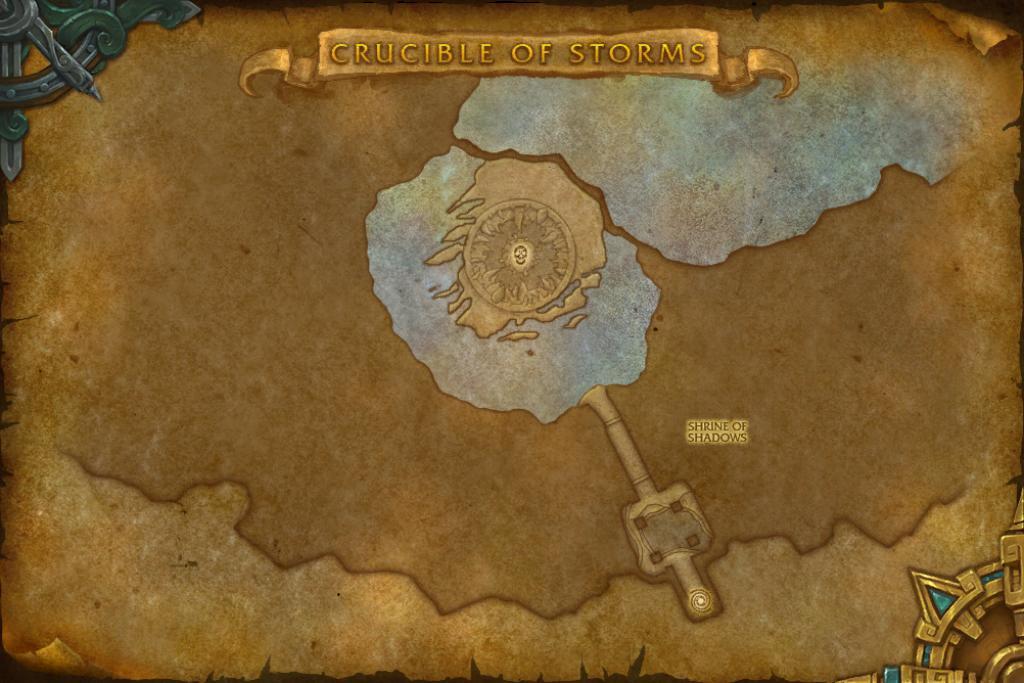
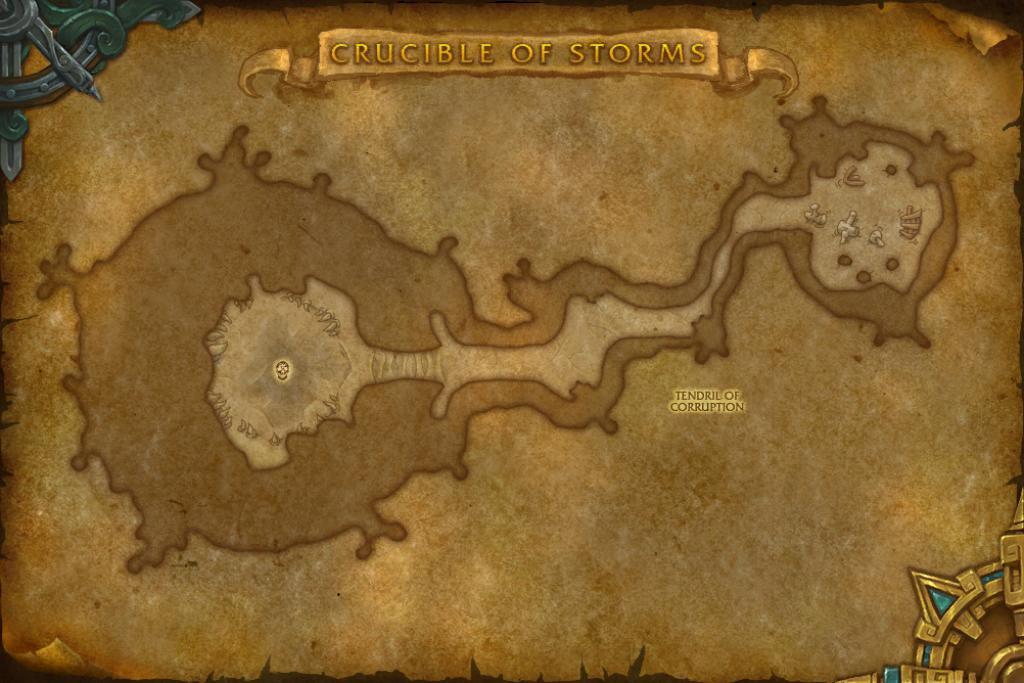
Each area is filled with eerie, Old God-themed visuals and mechanics that reflect the dark power of N’Zoth. Below, we’ll briefly overview the bosses and their challenges.
Crucible of Storms Bosses Overview
Crucible of Storms is a dark, Old God-themed raid in World of Warcraft: Battle for Azeroth, where players face the growing influence of N’Zoth beneath the Shrine of the Storm. The raid has two bosses, each tied to the eerie, corrupted atmosphere of the zone.
The first boss, Restless Cabal, is a council-style fight where players must manage shared health pools and powerful abilities. The encounter requires coordination to handle mechanics like Void Stone manipulation and psychic attacks.
The second boss, Uu’nat, Harbinger of the Void, is a more complex and challenging fight. Players must deal with mechanics like Mind Control, Void Rifts, and the constant threat of being overwhelmed by N’Zoth’s dark power. The battle is a test of skill and teamwork, culminating in a dramatic showdown against one of the Old God’s strongest servants.
![]() Below, we’ll overview the Crucible of Storms boss fights and their loot tables.
Below, we’ll overview the Crucible of Storms boss fights and their loot tables.
Can You Solo Crucible of Storms in The War Within?

Farming Crucible of Storms solo in The War Within is a good way to get rare transmogs, weapons, and achievements from Battle for Azeroth. Stat scaling and better gear make older raids easier, but some fights in Crucible of Storms can still be tricky.
This guide shows how to beat each boss with simple tips on the best classes, strategies, and when to use abilities like Bloodlust or Drums of Fury.
With good planning and the right approach, you can farm Crucible of Storms without much trouble for its special rewards.
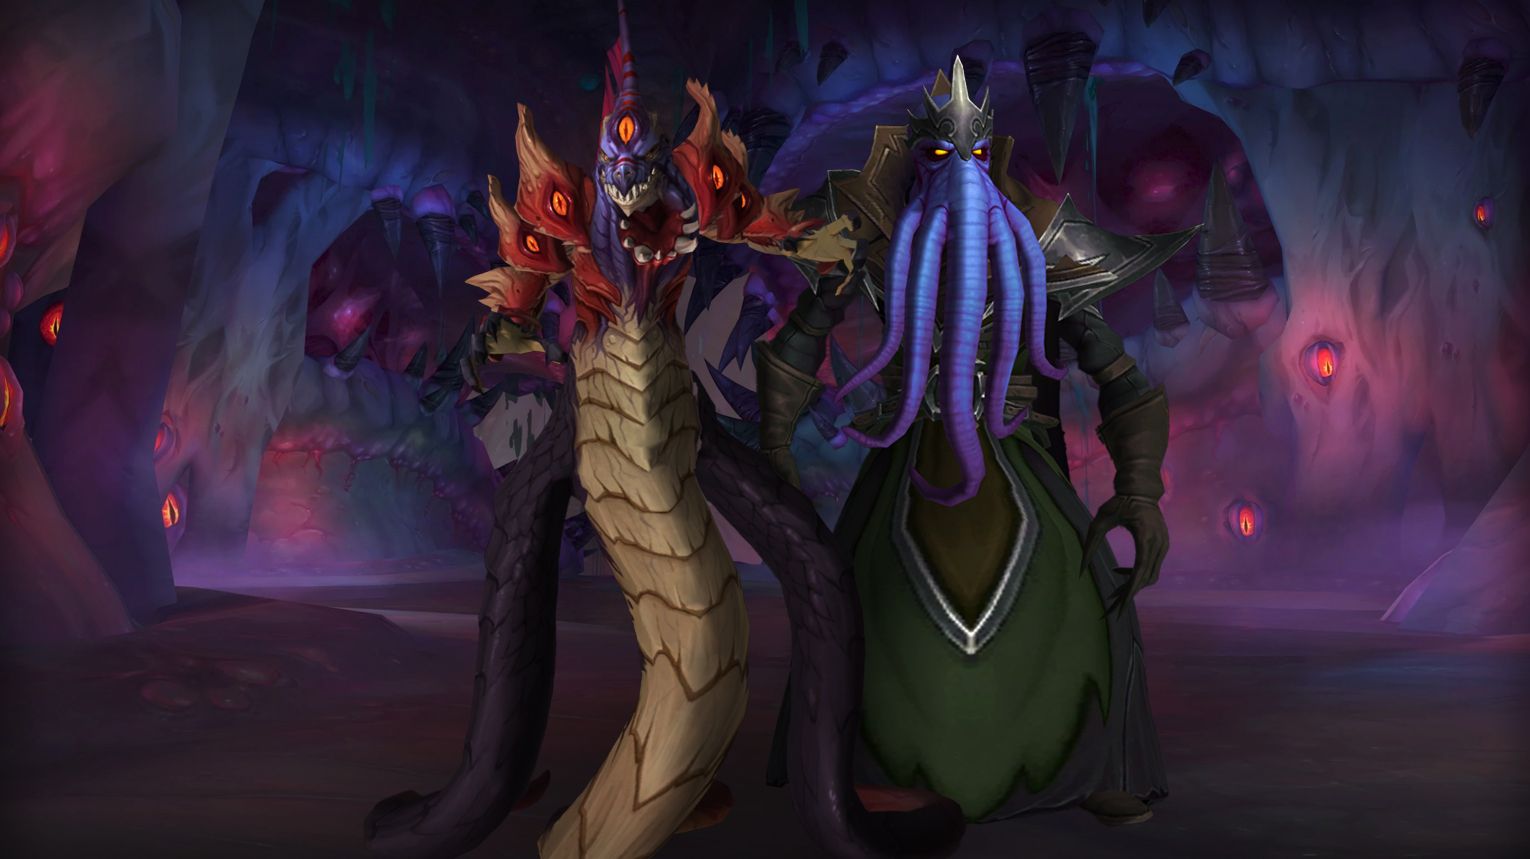
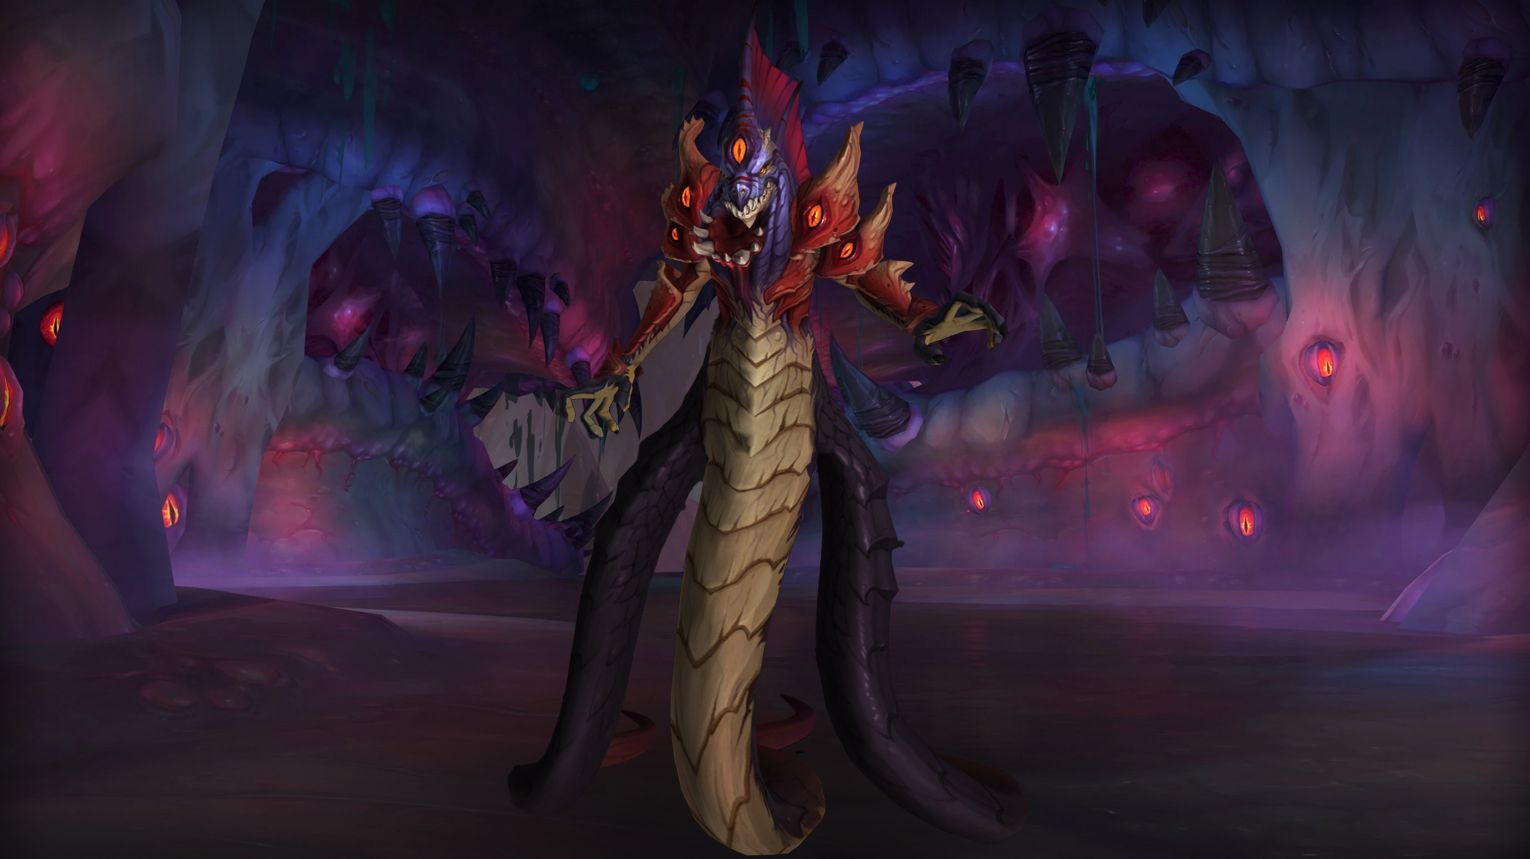
The Restless Cabal
The Restless Cabal is a two-boss encounter in Crucible of Storms, requiring precise coordination. Two tanks handle Fa’thuul, while a ranged DPS tanks Zaxasj using Aphotic Blast. Key mechanics include managing Void Crash, Crushing Doubt, and Promises of Power stacks for damage boosts. Three relics (Void Stone, Trident of Deep Ocean, Tempest Caller) activate at 75%, 50%, and 25% health, introducing unique challenges. Both bosses must reach 1 HP within 20 seconds to prevent a heal, and Bloodlust is best used early for maximum DPS.
 Preferred Classes:
 Tanks: Two tanks for Fa’thuul the Feared.
 Ranged DPS: One ranged DPS (e.g.,
  Balance Druid,
  Hunter) to tank Zaxasj the Speaker using Aphotic Blast.
 Healers: Strong AoE healers (e.g.,
  Holy Paladin,
  Restoration Druid) to handle raid-wide damage.
- DPS: Classes with strong single-target and cleave damage (e.g.,
 Warlocks,
  Shadow Priests) to manage adds and relics.
 Tips:
Tips:
- Tanking:
- Tanks must taunt Fa’thuul when Shear Mind stacks reach 3-4.
- Ranged DPS should maintain threat on Zaxasj using Aphotic Blast and stay 5+ yards from others.
- Void Crash:
- Avoid until it shrinks twice, then have one player soak it.
- Tanks or healers without Promises of Power should soak it to avoid one-shots.
- Crushing Doubt:
- Affected players must move 25-30 yards away from the raid to minimize explosion damage.
- Overlap dispels with other mechanics (e.g., Witness the End) to optimize cooldowns.
- Promises of Power:
- Gain stacks from Dark Herald for a damage boost but dispel before high-damage mechanics (e.g., Crushing Doubt, Tempest Caller).
- Shadow Priests and Warlocks can self-dispel, making them ideal for managing stacks.
- Relics:
- Activate relics in a staggered order to avoid overlapping high-damage phases.
- Save Tempest Caller for last to minimize Storm Essence spawns.
 Strategy:
- Phase 1 (100%-75%):
- Focus on positioning and managing Crushing Doubt and Void Crash.
- Assign one ranged DPS to tank Zaxasj.
- Phase 2 (75%-50%):
- Activate the first relic (e.g., Void Stone or Trident of Deep Ocean).
- Handle Eldritch Abominations by staggering Witness the End interrupts.
- Phase 3 (50%-25%):
- Activate the second relic.
- Focus on Visage from Beyond to prevent Terrifying Echo.
- Phase 4 (25%-0%):
- Activate the final relic (preferably Tempest Caller).
- Bring both bosses to 1 HP within 20 seconds to prevent Pact of the Restless.
 Bloodlust/Drums:
At the start of the fight, after the first Crushing Doubt expires (around 4-5 stacks of Promises of Power).
 The Restless Cabal loot table:
| Type of Armor | Item | Loot type |
| Cloth | Fathom Dredgers | Hands |
| Zaxasj’s Deepstriders | Feet | |
| Leather | Gloves of the Undying Pact | Hands |
| Leggings of the Aberrant Tidesage | Legs | |
| Fa’thuul’s Floodguards | Legs | |
| Insurgent’s Scouring Chain | Waist | |
| Plate | Abyssal Speaker’s Gauntlets | Hands |
| Mindthief’s Eldritch Clasp | Waist | |
| Any | Pillar of the Drowned Cabal | Staff |
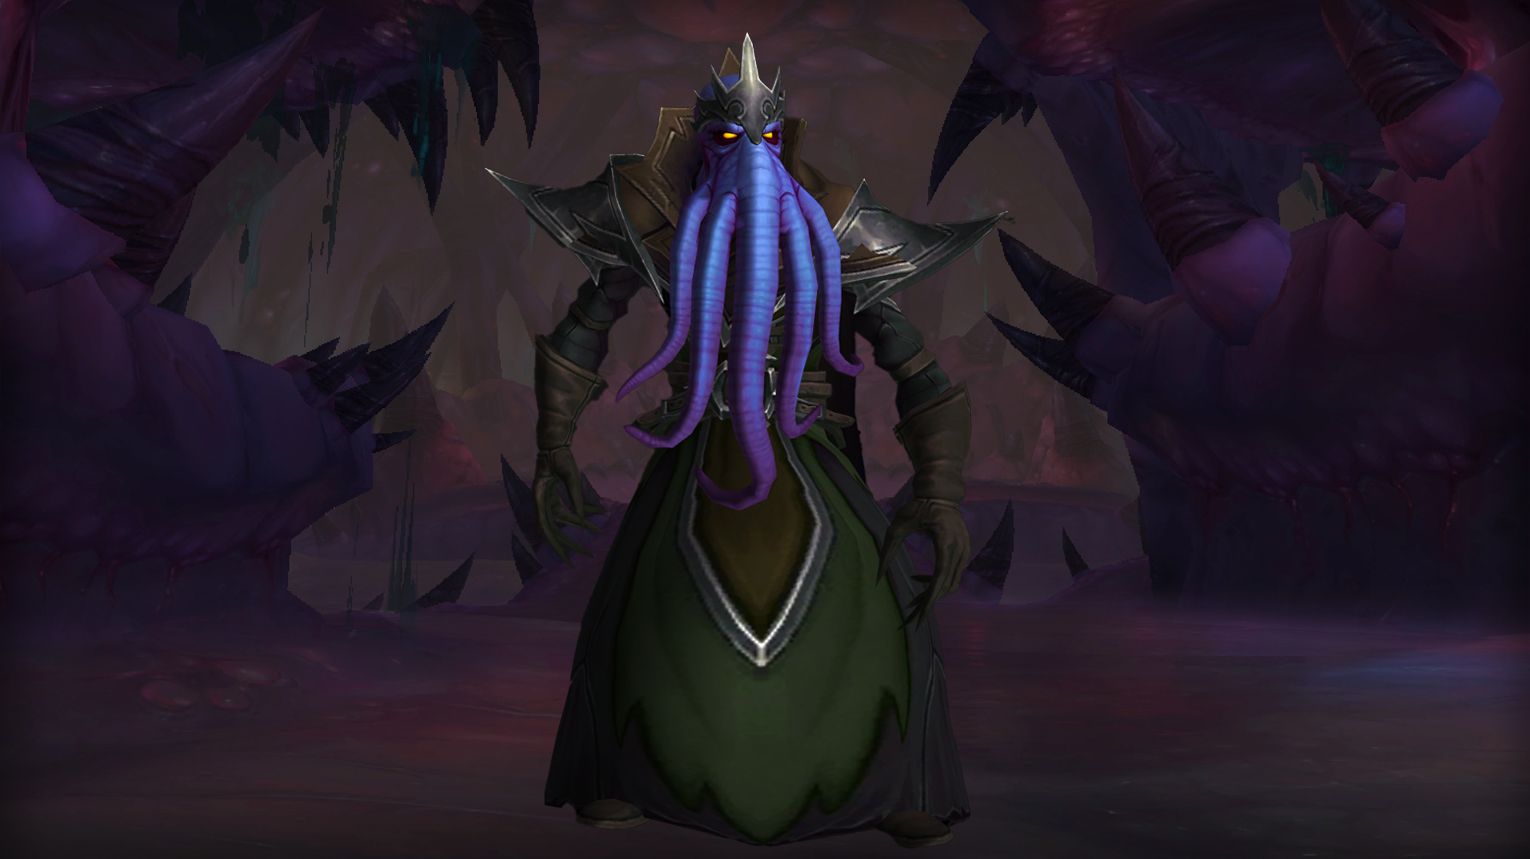
Uu’nat, Harbinger of the Void
Uu’nat, the final boss in Crucible of Storms, is a three-phase encounter requiring precise use of Relics of Power: Trident of Deep Ocean (tanks), Void Stone (healers), and Tempest Caller (DPS). Key mechanics include avoiding Oblivion Tears (heals the boss), managing Undying Guardians (keep them away from Uu’nat), and handling Insatiable Torment (stack to siphon health). In Mythic, Unstable Resonance forces players to stand on matching relics to avoid lethal explosions. Use Bloodlust at the start of Phase 3 for maximum DPS. Coordination, positioning, and relic timing are critical for success.
Preferred Classes:
- Tanks: Classes with strong survivability and mobility (e.g.,
 Protection Paladin,
  Blood Death Knight).
 - Healers: Classes with strong AoE healing and cooldowns (e.g., Holy Paladin,
 Restoration Shaman).
 - DPS: Classes with strong cleave, multi-dot, and interrupt capabilities (e.g., Warlock,
 Mage,
Mage,  Rogue).
Tips:
- Relic Usage:
- Tanks: Use Trident of Deep Ocean to mitigate raid damage during high-damage phases.
- Healers: Use Void Stone to block boss healing during Oblivion Tears or Gift of N’Zoth: Hysteria.
- DPS: Use Tempest Caller to kill adds below 25% health, but ensure the raid is healthy before activation.
- Positioning:
- Keep Undying Guardians and Uu’nat 10+ yards apart to avoid damage reduction.
- Stand near the edge of the room to place Oblivion Tears away from the center.
- Phase Transitions:
- Use Tempest Caller to clear adds during phase transitions.
- Reset Oblivion Tears using Void Stone at the start of Phase 2 and Phase 3.
- Mythic-Specific:
- Spread for Unstable Resonance and move to the correct relic to avoid lethal explosions.
- Prioritize killing adds quickly to avoid Hunger for the End stacks.
Strategy:
Phase 1 (100%-70%):
- Key Mechanics:
- Oblivion Tears: Avoid standing in them to prevent boss healing.
- Piercing Gaze of N’Zoth: Move through one beam, wait for the debuff to drop, then move through the other.
- Maddening Eyes of N’Zoth: Find safe zones to avoid becoming hostile to allies.
- Undying Guardians: Keep them away from Uu’nat and cleave them down.
- Relic Usage:
- Save Tempest Caller for Phase 2 to kill Undying Guardians.
- Use Trident of Deep Ocean during high raid damage.
Phase 2 (70%-45%):
- Key Mechanics:
- Primordial Mindbenders: Interrupt their Consume Essence casts and kill them quickly.
- Unknowable Terror: Move out of the dark blue zone to avoid fear.
- Gift of N’Zoth: Hysteria: Kill adds before this ability heals them.
- Relic Usage:
- Use Tempest Caller to kill Primordial Mindbenders and Swarming Voidspawns.
- Use Void Stone to clear Oblivion Tears.
Phase 3 (45%-0%):
- Key Mechanics:
- Insatiable Torment: Stack with debuffed players to allow health siphoning.
- Gift of N’Zoth: Lunacy: Avoid damaging allies during the 5-second hostile period.
- Undying Guardians: Cleave them down and use Tempest Caller to finish them off.
- Relic Usage:
- Use Tempest Caller to kill Undying Guardians and debuffed players.
- Use Trident of Deep Ocean during high raid damage.
Bloodlust/Drums:
At the start of Phase 3 (45%-0%).
Uu’nat loot table:
| Type of Armor | Item | Loot type |
| Cloth | Malformed Herald’s Legwraps | Legs |
| Leather | Stormglide Steps | Feet |
| Grips of Forsaken Sanity | Hands | |
| Plate | Legplates of Unbound Anguish | Legs |
| Any | Trident of Deep Ocean | Polearm |
| Idol of Indiscriminate Consumption | Trinket | |
| Void Stone | Trinket | |
| Lurker’s Insidious Gift | Trinket | |
| Harbinger’s Inscrutable Will | Trinket |
Crucible of Storms Achievements List
| Achievement | Requirement |
| Crucible of Storms | Defeat all bosses within Crucible of Storms. |
| Crucible of Storms Guild Run | Kill all bosses on Normal difficulty or higher, while in a guild group. |
| Ahead of the Curve: Uu’nat, Harbinger of the Void | Slay Uu’nat, Harbinger of the Void on Heroic difficulty or higher, before the release of the next raid tier. |
| Cutting Edge: Uu’nat, Harbinger of the Void | Defeat Uu’nat, Harbinger of the Void on Mythic difficulty, before the release of the next raid tier. |
| Mythic: Uu’nat, Harbinger of the Void | Kill Uu’nat, Harbinger of the Void on Mythic difficulty. |
| Mythic: Uu’nat, Harbinger of the Void Guild Run | Slay Uu’nat, Harbinger of the Void on Mythic difficulty while in a guild group. |
| Mythic: The Restless Cabal | Defeat the Restless Cabal on Mythic difficulty. |
| Hall of Fame: Uu’nat, Harbinger of the Void (Alliance) | Among the first one hundred Alliance guilds worldwide to defeat Uu’nat, Harbinger of the Void on Mythic difficulty. |
| Hall of Fame: Uu’nat, Harbinger of the Void (Horde) | Among the first one hundred Horde guilds worldwide to defeat Uu’nat, Harbinger of the Void on Mythic difficulty. |
| A Good Eye-dea | Kill Uu’nat, Harbinger of the Void without allowing N’Zoth to see your movement in Normal Difficulty or higher. |
| Gotta Bounce | Slay the Restless Cabal after having at least 10 Void Crashes active simultaneously in Normal Difficulty or higher. |