
In Path of Exile 2 0.4.0, a strong Witch build can carry you from your first levels all the way into tough endgame maps and bosses. This guide shows the best Witch setup to use while leveling, what to upgrade after the campaign, and how to scale your damage and defenses so you can handle harder content as you progress.
![]() Quick summary:
Quick summary:
- Best Witch leveling builds: Cold/Freeze caster and Minion Witch — both are easy to play, level quickly, and stay safe with strong crowd control or disposable frontline minions.
- Best Witch endgame builds: Chaos DoT Witch, Crit/Hit-based Elemental Witch, Minion endgame Witch, Ignite/Fire DoT Witch, and Cast-on-Crit Witch — each focuses on a clear damage plan and scales well with the right gear, while still leaving room to build solid defenses for maps and bosses.
![]() This tier list ranks the best Witch builds in Path of Exile 2, so you can go from early leveling to strong endgame mapping and boss fights. Each top build includes the key skills to use, the gear mods to look for, your main stat priorities, and a simple gameplay plan. Pick the Witch style you like—spells, minions, or curses—and use this guide to build a character that scales smoothly into harder content.
This tier list ranks the best Witch builds in Path of Exile 2, so you can go from early leveling to strong endgame mapping and boss fights. Each top build includes the key skills to use, the gear mods to look for, your main stat priorities, and a simple gameplay plan. Pick the Witch style you like—spells, minions, or curses—and use this guide to build a character that scales smoothly into harder content.
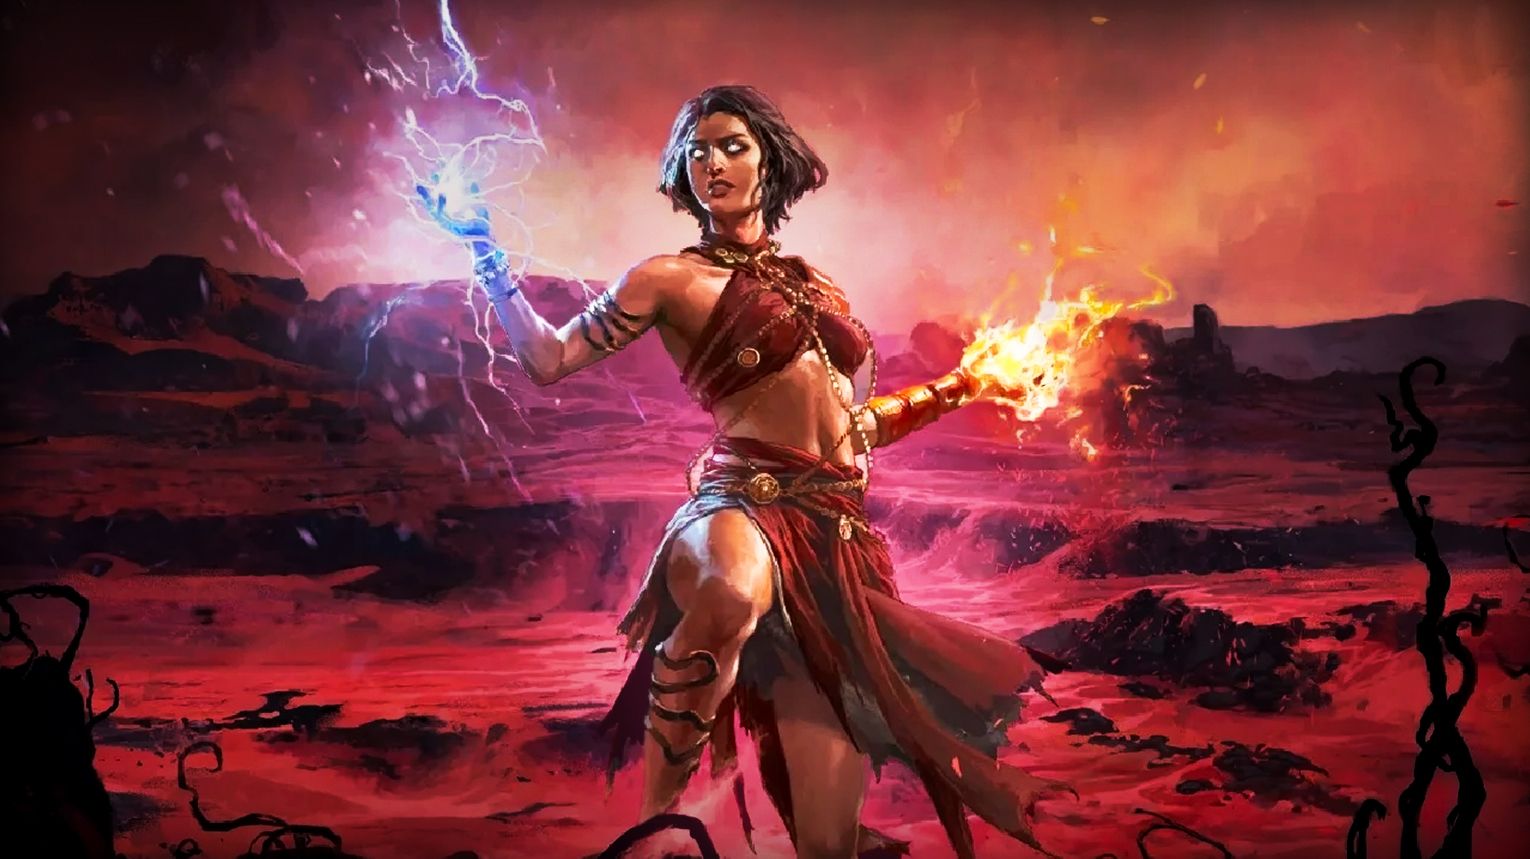
Best Witch Build in Poe2(0.4.0)
Path of Exile 2 can feel overwhelming at the start, but the Witch is one of the easiest classes to get comfortable with. She can fight from a safe distance, stack damage with spells and debuffs, and let minions take the hits. When it works, it feels smooth: enemies get softened up, a pack collapses fast, and you stay out of danger.
The Witch’s strong points are clear speed, solid boss damage with the right setup, and lots of build options (minions, chaos damage over time, or a mix). Her weak points are that she can be fragile if you misstep, and some builds feel bad if your skills don’t work well together.
That’s why choosing the right build matters. A good Witch build should match how you like to play—fast and hands-on, or slower and safer—so leveling doesn’t turn into a struggle. In this guide, we’ll break down the best leveling builds to get through the early acts (including simple, low-gear setups), and the best endgame builds for mapping and tougher content.
Best Witch Builds for Leveling
A Witch leveling build in Path of Exile 2 is “good” when it does a few simple things well: it clears packs fast, beats bosses without perfect gear, and stays safe while you move. Different Witch builds do this in different ways (minions, Chaos damage over time, elemental spells, or hybrids), but the logic behind a strong leveling setup is usually the same.
![]() What makes a Witch leveling build good (no matter the archetype)
What makes a Witch leveling build good (no matter the archetype)
- One main damage plan: Pick one main way to kill things and build around it. Good builds don’t split damage across too many unrelated skills. You can still use extra skills, but they should support your main plan (buffs, debuffs, crowd control, or utility).
- Reliable damage while moving. Leveling is faster and safer when your damage keeps working even if you reposition. This can be minions attacking for you, damage-over-time effects, or skills that don’t force you to stand still for long.
- A clear answer for Bosses Many builds clear packs fine and then struggle on bosses. A good Witch leveling build has a simple boss plan:
- a single-target skill or setup,
- a way to keep damage going during mechanics,
- and enough defenses to survive short mistakes.
- Good “uptime” on your power, whatever your build relies on (minions, buffs, curses, temporary summons, or timed effects), it should be easy to keep running. If your power drops off every few seconds, leveling starts to feel slow and messy.
- Defense, you can actually feel which builds can be fragile if you ignore defense. A good leveling setup includes at least some mix of:
- life/energy shield investment,
- resistances,
- a defensive skill,
- and smart positioning tools.
- Low gear pressure early. Strong leveling builds work with normal drops. They don’t require rare items to “turn on.” Gear should improve the build, not enable it.
![]() What to focus on while leveling your Witch (general tips)
What to focus on while leveling your Witch (general tips)
- Decide your playstyle early. Ask yourself what you want:
- safer and lower effort (often minion-focused),
- faster and more active casting,
- or a balanced hybrid. Your build should match how you like to play, or you’ll get bored or frustrated.
- Keep your setup simple. Use a small number of skills that do clear jobs: one main damage skill, one boss tool (if needed), one defensive option, and one movement/reposition tool.
- Scale the stats that match your build. Don’t chase random damage stats. Focus on what your archetype actually scales with (for example: minion stats for minion builds, spell scaling for caster builds, and the right resource/Spirit setup if your build needs it).
- Upgrade in steps, not all at once. A smooth leveling build improves through small upgrades: better supports, better passives, and clearer skill roles. Avoid big mid-campaign rewrites unless you truly need them.
- Test your build on rares and bosses. If you delete normal packs but struggle on tanky rares, your single-target plan is weak. Fix that early so later acts don’t feel like a wall.
In short: a strong Witch leveling build in PoE 2 is built around one clear damage plan, steady uptime, a boss solution, and basic defenses, while staying simple and gear-friendly.
Below, we’ll briefly overview and rate the most popular PoE 2 Witch leveling builds.
Minion Army Infernalist: S-tier

This is a Witch minion build for Path of Exile 2 that you can play from the first acts and keep using into the endgame. You summon waves of minions, add a few debuffs, and let your army clear while you stay safe behind Energy Shield, block chance, and recovery.
What makes it special
- Very low stress gameplay: your minions take most hits and do most damage.
- Strong leveling flow: it starts working early and upgrades in clear steps (Acts 1–3, then Spectres, then Reavers later).
- Gear-friendly: it does not require Uniques to function, but several common Uniques are nice upgrades.
![]() How the build works (core idea)
How the build works (core idea)
You scale power through:
- More and stronger minions (and better minion skill levels)
- More Spirit (so you can keep your army up)
- Debuffs and exposure to make enemies take more damage
- Defenses based on Energy Shield + block
![]() How to level with it (simple plan)
How to level with it (simple plan)
Early campaign (Act 1–2)
Your main loop looks like this:
- Cast Volcano to summon Raging Spirits (keep them up, especially on bosses).
- Use Skeletal Sniper command skill for strong AoE and good single-target when enemies are set up.
- Unearth corpses to spawn extra minions and keep pressure up.
- Debuff with Elemental Weakness and Frost Bomb (Exposure).
- Use Pain Offering to buff minion damage.
Key early gems to grab first: Skeletal Sniper and Volcano.
A strong early combo is igniting enemies (via Volcano/Raging Spirits setup) and then using the Sniper command to explode ignited targets with the gas arrow.
End of Act 3 (big swap)
At the end of Act 3, you pivot:
- Vaal Guard Spectres become your main damage.
- You stop relying on Raging Spirits / Volcano / Skeletal Snipers as your core.
Later progression (Reaver synergy)
When you get Tecrod’s Revenge, you switch to Skeletal Reavers for a strong synergy spike and keep pushing into endgame.
![]() Path of Building (POB): https://pobb.in/XApuiM02wUrb
Path of Building (POB): https://pobb.in/XApuiM02wUrb
![]() Endgame transition (what changes)
Endgame transition (what changes)
In endgame, the build becomes more “set and sustain”:
- You invest more into maximum Energy Shield, Energy Shield recovery, and block.
- You keep upgrading minion skill levels and “presence” style bonuses that boost allies/minions.
- You may do a few small passive respecs (normal and expected) as your gear and minion package changes.
![]() Gear and stat priorities (what to look for)
Gear and stat priorities (what to look for)
Minion damage upgrades to look for
- If you’re upgrading a minion build, +Levels to Minion Skills is usually the best place to start. It tends to beat most other damage rolls for the cost.
- After that, prioritize +Spirit and % increased Spirit. More Spirit generally makes the whole setup feel smoother and pushes your minion damage higher.
- For direct scaling, “Allies in your Presence deal increased damage” is a strong, reliable mod that boosts everything fighting near you.
- If you can fit extra stats, added damage for allies in your Presence and attack speed for allies in your Presence are great bonuses.
- Defensive priorities
- Before anything else, cap your resistances. Aim for 75% Fire, Cold, and Lightning, then work on Chaos resistance when you have the gear space.
- Energy Shield: flat ES and % increased ES
- Energy Shield recovery and/or faster recharge rate
- High block chance shield (if your setup can use one)
- Enough Life so random spikes don’t kill you instantly
Attribute Basics
- Get enough Intelligence and Dexterity for your gems and gear
- Put extra points into Strength for more Life
- You can respec attributes later if your gear requirements change
Useful Uniques (optional, not required)
These are common upgrades if you can get them during the campaign or early maps:
- Enfolding Dawn (big Spirit boost option)
- Bones of Ullr (helps reservation efficiency for undead minions)
- Trenchtimbre (more damage option if you prefer damage over block)
- Waveshaper (level 51) (solid defensive alternative to Enfolding Dawn)
Tip: if you drop valuable currency like Chaos Orbs or Exalted Orbs while leveling, using them to buy these common Uniques can speed up your build a lot.
crafting style upgrades (general)
For this build, your best upgrades usually come from:
- Rare items with Spirit + resistances + Energy Shield
- Weapons/amulets with +minion skill levels
- Anything that boosts allies/minions in your presence
Who this build is best for
This build is optimal if you want:
- A safe, beginner-friendly Witch that doesn’t need perfect aim or fast reflexes
- A leveling build that scales smoothly into endgame
- A playstyle where you command minions and manage debuffs instead of face-tanking
It’s less optimal if you prefer:
- A very active “caster DPS” playstyle where your spells do most of the killing
- Fast, high-risk speed farming with constant manual skill uptime
If you want, I can turn this into a clean page layout next (skills by act, exact gem links, and a short shopping list for each gear slot).
Essence Drain Lich: A-tier

The Essence Drain Lich is a chaos damage-over-time caster that clears packs by chaining Essence Drain + Contagion. Essence Drain applies a strong chaos DoT to one target, and Contagion spreads that DoT across nearby enemies, so whole screens collapse with very little aiming. It levels fast from early campaign, then becomes a tanky endgame mapper by stacking Energy Shield and swapping to a Low Life setup during Atlas progression.
![]() How to make the build (core setup)
How to make the build (core setup)
Main damage combo
- Essence Drain (your main DoT and single-target tool)
- Contagion (spreads your chaos DoTs for clear)
Boss and single-target tools
- Chaos Bolt to build and maintain Wither stacks (enemies take more chaos damage)
- Despair curse for -Chaos resistance
- Dark Effigy totem for extra damage against enemies already affected by chaos DoTs
- Sigil of Power (from level 25+) for a big damage boost when fighting inside it Tip: the guide uses a second weapon set for Sigil/curse management.
Defensive and control layer
- Early: Life + Energy Shield + positioning
- Mid-campaign: Blasphemy Temporal Chains to slow nearby enemies and make dodging easier
- Late: high Energy Shield with Lich mechanics that turn “damage bypassing Energy Shield” into effective damage reduction when Eternal Life is online
![]() Path of Building (POB): https://pobb.in/HYdaNgr7PQl5
Path of Building (POB): https://pobb.in/HYdaNgr7PQl5
Ascendancy path (Lich) and why it works
- Eldritch Empowerment: more damage when you sacrifice Energy Shield, so you want solid ES and good recharge to keep it safe.
- Soulless Form: big mana regen and a source of % damage taken bypasses Energy Shield.
- Eternal Life: the key defensive node. As long as you have Energy Shield, bypass modifiers become a form of pseudo damage reduction, and it supports Low Life play.
- Crystalline Phylactery: doubles the effect of a socketed jewel (a simple % maximum Energy Shield jewel is already good).
![]() Gear and stat priorities
Gear and stat priorities
Offense (best upgrades first)
- +Levels to skills (this is your main scaling)
- +Level of Chaos Spell Skills
- +Level of Spell Skills
- +Level of Projectile Skills
- % increased Chaos Damage / Spell Damage
- Cast Speed
- Withered magnitude and Curse magnitude
- “Enemies you curse have -x% to Chaos Resistance.”
- Skill effect duration (DoT uptime + Wither uptime)
Defense (what keeps you alive in maps)
- Cap Fire/Cold/Lightning resistances to 75%
- Maximum Energy Shield (flat + %)
- Faster start of Energy Shield recharge (very noticeable)
- % damage taken bypasses Energy Shield (gets better once Eternal Life is active)
- Curse magnitude (also buffs the slow from Blasphemy Temporal Chains)
- Maximum Life is still useful because you can get “Gain % of maximum Life as extra maximum Energy Shield.”
Uniques (optional)
PoE 2 doesn’t use “legendaries” in the usual ARPG sense. This build works on rares, and most of your power comes from +skill levels and Energy Shield gear.
That said, it benefits from common uniques:
- Atziri’s Disdain – A major endgame pickup and a common target when you transition into a Low Life setup.
- Doedre’s Tenure – Strong early value, especially in trade leagues.
- Visage of Ayah – A solid upgrade option that’s often worth checking, but it’s more dependent on what’s available and what it costs at the time.
![]() How to level (simple plan)
How to level (simple plan)
- Level 1–5: use early skills like Unearth and the Act 1 single-target combo (Skeletal Snipers + Flame Wall) if you want extra boss damage.
- From level 6: swap into your main setup: Essence Drain → Contagion, then use Chaos Bolt to stack Wither.
- Level 25+: add Sigil of Power before boss damage windows.
- Level 31+: add Despair and Dark Effigy for much better single-target.
- Keep upgrading any wand/focus/amulet with +levels to chaos/spell/projectile skills, plus movement speed boots and basic life/ES/resists.
Endgame transition (Atlas progression)
- First maps: cap resistances, then replace leveling gear with high Energy Shield bases.
- Add more maximum Energy Shield passives and take Eternal Life as your third ascendancy point.
- Swap to Low Life once your Energy Shield is strong enough to feel stable.
- Start optimizing the “two weapon sets” approach:
- Weapon Set 1 for your damage skills
- Weapon Set 2 for curse focus/curse nodes
- Endgame upgrades are mostly: more +skill levels, more Energy Shield, and more curse/withering scaling.
What makes it special
- Top-tier clear with two buttons: Contagion spreading Essence Drain is one of the cleanest AoE systems in the game.
- Safe mapping style: you apply DoTs, move, and let enemies die while you reposition.
- Strong scaling without rare uniques: +skill levels and ES gear carry the build.
- Low Life Lich defense: Eternal Life plus bypass mechanics gives a tanky feel once set up.
![]() Who this build is best for
Who this build is best for
Optimal for:
- Players who want fast, safe mapping with simple rotations
- Anyone who likes damage-over-time and “cast then move” gameplay
- League starters who want a build that scales well on cheap rare gear
Not ideal for:
- Players who want big direct-hit crit gameplay
- Players who dislike DoT ramp (boss damage improves as Wither/DoTs stack)
- Anyone who doesn’t want to manage curses and a few extra setup skills for bosses
This is a fast, flashy caster build where you spend your own life to cast spells, then instantly refill it through Blood Mage tools. The main loop is simple: put Living Bomb on enemies to generate Fire Infusions, then use Fireball and Frost Wall shatters to fill the screen with purple explosions and overlapping projectiles. In 0.4.0 the endgame “life-cost scaling” version was nerfed (Atalui’s Bloodletting capped and Sacrifice of Blood sustain reduced), so the best late scaling now leans more toward a Cast on Critical + Comet direction instead of pure Bloodletting abuse.
Fireball Blood Mage: B-tier

 How to make the build (core pieces)
1) Level with Essence Drain + Contagion first
Witch early game is rough until level 6, so this build uses one of the strongest campaign setups:
- Start with Unearth: This skill provides early damage while also generating corpse minions, which can help you in your initial levels.
- First Uncut Gem: Use your first uncut gem to acquire Contagion. This skill is effective for spreading damage over time and helps manage large packs of enemies.
- Transition at Level 6: Once you reach level 6, switch to using Essence Drain in combination with Contagion. This duo will serve as your main strategy for both clearing mobs and tackling bosses.
- Boss Strategy: Keep Contagion active on bosses to spread damage. Utilize any early single-target skills you have access to, such as Gas Arrow from the Skeletal Sniper if you’ve opted for that choice. Additionally, make sure to spam Chaos Bolt from the Withered Wand ability to stack your damage effectively.
2) Swap to Fireball in maps
After the campaign and once your gems/gear are ready, you transition into the real build:
- Fireball becomes your main clear skill
- Living Bomb drives Infusions and chained explosions
- Frost Wall is placed and shattered with Fireball to shotgun packs and bosses
- You run Life Remnants (from Sanguimancy) as your core sustain engine
3) Endgame direction after the 0.4.0 nerfs
Because Bloodletting scaling is much weaker now, the clean endgame path is:
- Build more crit chance and crit damage
- Move toward Cast on Critical and pair it with Comet for better scaling
![]() Path of Building (POB): https://pobb.in/NrqTGlg1y-mj
Path of Building (POB): https://pobb.in/NrqTGlg1y-mj
Ascendancy progression (Blood Mage)
- Sanguimancy (mandatory first): all skills cost life + mana, but you gain Life Remnants that heal you and can overflow your life (big sustain + safety).
- Grasping Wounds: turns part of direct damage into delayed damage, which feels much safer with Life Remnants recovery.
- Whispers of the Flesh (temporary): makes cursed enemies easier to kill early, then you respec later.
- Sunder the Flesh (when you swap to Fireball): big power spike because it raises Fireball’s base crit (makes crit scaling realistic).
- Crimson Power: wants a high Energy Shield chest and converts that into a huge life boost.
- Vitality Siphon: spell leech, which helps sustain life costs later (especially paired with instant leech sources).
![]() Gear and stat priorities
Gear and stat priorities
Defensive priorities (do these first)
- Cap resistances at 75% (Fire/Cold/Lightning)
- Maximum Life (your skills cost life, so this matters a lot)
- High Energy Shield chest (it also becomes life through Crimson Power)
- Chaos resistance where possible (not mandatory early, but very helpful)
- Recovery layers:
- Instant leech (example: Heart of the Well)
- Block while using a Focus (example: Stone of Lazhwar)
Offensive priorities (what scales damage)
- +Levels to Fire / Spell / Projectile skill gems Important: chaos gem levels do not help Fireball.
- Spell Damage
- Chaos Damage (still relevant if you are using the Blackflame Covenant approach)
- Critical strike chance and critical spell damage bonus (even more important if you go Cast on Crit)
- Cast speed (big quality of life and smoother mapping)
- “Gain damage as extra” stats (chaos/cold/lightning/fire) as upgrades
![]() Uniques
Uniques
This build works on rare gear, but a few uniques are strong upgrades:
- Stone of Lazhwar (amulet): strong defense early because it gives block chance while using a Focus.
- Heart of the Well: enables instant leech and helps you keep up with life costs.
- Sire of Shards: only if you insist on leveling with Fireball (not recommended, but it can make it workable).
- Undying Hate (unique jewel): tied to the Blood Sacrifice setup used for life-spend sustain in the old endgame version.
Also keep an eye out for an offhand like Effigy of Cruelty if you are building around crit and want more crit-driven debuffs.
![]() How to level (quick plan)
How to level (quick plan)
- Level 1–5: Unearth + Contagion as soon as possible, use simple supports (Swift Affliction early).
- Level 6+: Essence Drain + Contagion becomes your main engine.
- Use Despair for bosses, place Dark Effigy for extra single-target, and maintain DoTs.
- While leveling, prioritize life, resists, movement speed boots, and buy vendor wands/foci with +spell or +chaos skill levels when they appear.
Endgame transition checklist (when to swap to Fireball)
Swap once you have:
- Resists capped and a stable life pool
- A decent wand/focus/amulet with +spell and/or +projectile levels
- Enough sustain from Life Remnants links (pickup range + power)
- Your crit base online (respec into Sunder the Flesh)
- A plan for late scaling: Cast on Crit + Comet is the recommended 0.4.0 direction
What makes it special
- High speed, high feedback gameplay: you are constantly spending life, refilling it, and chaining explosions.
- Great screen clear: Living Bomb + Fire Infusions plus Frost Wall shatters creates dense projectile overlap.
- Smooth campaign path: leveling with Essence Drain + Contagion avoids the weak early Witch feeling.
- Flexible gearing: rare gear with the right gem levels and defenses works fine.
Who this build is optimal for
Best for:
- Players who want a fast mapping caster with lots of visual action
- People who like “combo” gameplay (setup → explode → move)
- Players are comfortable managing life costs and staying active
Not ideal for:
- Players who want a calm, low-button build from start to finish
- Hardcore-style players who dislike risk from life-spend mechanics
- Anyone expecting the old Bloodletting endgame power level after the 0.4.0 nerfs
Best Endgame Witch Builds
A strong endgame Witch build in Path of Exile 2 is one that balances clear speed, survivability, and consistent boss damage. The best setups let you clear high-tier maps efficiently, farm currency without slowing down, and handle endgame bosses even when fights get messy. Good Witch builds are built around three key elements: damage uptime, defenses, and utility. You want damage that keeps working while you move, a real defensive plan so you don’t get one-shot, and helpful tools like curses, exposure, or crowd control that make every fight smoother. The most reliable Witch archetypes in endgame are usually minion builds, spell caster builds, and curse/debuff-focused builds, because they cover both fast area clear and strong single-target while scaling well with better gear and more passive points. While leveling your Witch, focus on one main damage plan (don’t split your build across too many skills), keep a clear boss plan for single-target damage, and start building defenses early by keeping elemental resistances capped and investing into a consistent defensive layer (often Energy Shield on Witch). After the campaign, while leveling a Witch, pick one main way to deal damage and stick to it—don’t spread your points and gems across too many skills. Have a simple, reliable setup for bosses, and start thinking about survival early: keep your elemental resistances capped and build around one steady defensive layer (Energy Shield is a common choice).
After the campaign, get your character stable first. Cap your resists again, strengthen your main defense and recovery, then scale damage with upgrades that match your core setup—often +++levels to your main skill, plus the right supporting stats.
After that, tighten your skill links and passive choices so your Witch keeps scaling into harder maps and boss fights.
Once that’s done, finish the endgame version by cleaning up skill links and passive choices so your Witch keeps scaling for tougher maps and bosses.
Lightning Spear Bleed Blood Mage: S-Tier
![]() What makes it special
What makes it special
- Elemental skill that bleeds: Blood Barbs lets Lightning Spear inflict Bleeding, so you scale bleed damage while still using a fast projectile skill.
- Fast, safe clear: Rhoa Mount + Lightning Spear lets you kill packs from range without eating the normal movement penalty.
- Big one-hit bleed setup: When unmounted, you can force a massive bleed with Disengage (Shocked Ground) → Infernal Cry → Rake from max range.
- Early defenses “built in”: Grasping Wounds (delayed damage) plus Crimson Power (big life bonus based on Energy Shield on chest) makes the character tanky early for an endgame build.
- Cheap gearing: You mainly want added elemental/physical damage to attacks plus crit, which is easy to buy/craft.
![]() Core skills and how the build plays
Core skills and how the build plays
Main clear (mounted):
- Ride Rhoa Mount
- Spam Lightning Spear to bleed multiple targets safely from range
Boss plan (simple):
- Stay mounted and circle the boss with Lightning Spear
- When the boss has more Blood Loss than life, use Blood Hunt to “pop” the damage and finish fast
If you get dismounted (max damage combo):
- Disengage to create Shocked Ground
- Infernal Cry to empower your next hit
- Back up and use Rake from maximum distance for the biggest bleed bonus. Repeat when needed, then remount when it’s safe.
Frenzy charges:
- Herald of Blood generates Frenzy charges through Resonance (with Armour Demolisher II / Armour Break III in your setup).
![]() Path of Building (POB): https://pobb.in/zVYcOPXqna8r
Path of Building (POB): https://pobb.in/zVYcOPXqna8r
Ascendancy progression (Blood Mage)
- Sanguimancy (now free): enables Life Remnants and Overflow life as your first strong defense layer.
- Blood Barbs: the key node that makes elemental attacks cause Bleeding (enables Lightning Spear bleed).
- Grasping Wounds: defense through delayed damage.
- Crimson Power: huge life scaling based on Energy Shield on chest.
- Sanguine Tides last: more damage and a steady supply of life flask charges.
![]() Gear and stat priorities
Gear and stat priorities
Defensive priorities (do these first in endgame)
- Cap elemental resistances at 75% (spread across all gear; no single slot is mandatory).
- Maximum Life on as many pieces as possible.
- Strength (extra life) after you meet gem and gear requirements.
- High Energy Shield chest for Crimson Power:
- Aim for 500+ Energy Shield if possible.
- A cheap trick: buy a high-ES chest with no runes and add two Greater Iron Runes (plus quality like Armourer’s Scrap) to push ES higher.
Offensive priorities (what actually scales damage)
- Added damage to attacks is the biggest upgrade:
- Adds Physical/Cold/Fire/Lightning Damage to Attacks (rings + gloves are the highest impact).
- Crit to boost bleed magnitude:
- Critical Strike Chance (try to get very high, close to 100% if possible)
- Critical Damage Bonus
- This build gets a large part of its damage from Magnitude of Damaging Ailments from Critical Hits, so crit chance is not optional.
- Magnitude of Ailments / Magnitude from Crits on jewels, tree, and runes.
- +Levels to Projectile or Lightning skills (example: amulet with +Level of Projectile Skills).
- Useful “generic” increases: projectile damage, elemental damage, spear damage, area damage, one-handed damage, attack damage.
![]() Recommended uniques (optional, not required)
Recommended uniques (optional, not required)
The build works fine on rares, but these are common upgrades:
- Tangletongue: prioritize a high Critical Hit Chance roll (helps you reach high crit for ailment magnitude).
- Ingenuity: strong belt slot damage boost.
- High-end clear option (usually expensive): Palm of the Dreamer.
Other early shopping tips mentioned in the notes:
- Heart of the Well with “Gain % of Damage as Extra Cold/Fire/Lightning” and “Lightning damage with skills is Lucky” style modifiers (great scaling).
- Guiding Palm Shrine Sceptres can be a strong early damage spike.
![]() Leveling plan (simple and practical)
Leveling plan (simple and practical)
This endgame setup is meant to start around level 68 after the campaign. The clean way to level is:
- Level with a campaign-friendly Blood Mage skill setup (the source suggests a Fireball Blood Mage leveling approach).
- Don’t chase perfect bleed gear while leveling—focus on life + resistances and a weapon that feels good.
- After campaign, switch into:
- Lightning Spear as your main clear
- Rhoa Mount for speed and safety
- Add the unmounted combo tools (Disengage, Infernal Cry, Rake) as you get the gems/supports online.
Endgame transition checklist (when you swap and feel strong)
- You are resistance capped (75%)
- You have a high crit spear (or Tangletongue)
- Rings/gloves have strong added damage to attacks
- You have a high Energy Shield chest to activate Crimson Power value
- Your boss finisher (Blood Hunt) is ready for “Blood Loss > life” moments
- You understand mount safety: watch your stun meter while mounted; dismount with dodge roll if you’re about to get heavy-stunned and use Disengage to escape
![]() Who this build is best for
Who this build is best for
Optimal for:
- Players who want fast mapping with a mostly one-button main skill
- Players who like safe ranged gameplay and strong sustain
- Anyone who wants an endgame-ready build that doesn’t need uniques
Not ideal for:
- Players who dislike mount management (watching stun and remount windows)
- Players who want a fully “stand still and facetank” style (you still play around range and movement)
- Players who don’t want to build around crit (crit is core to the bleed scaling here)
Doedre’s Undoing Lich: A-tier
Doedre’s Undoing Lich is a map-blasting Witch built around a single button: cast Despair and let Doedre’s Undoing do the damage. The goal is screen-wide clear, very high movement speed, and a big Energy Shield pool for safety. Patch 0.4.0 introduced big nerfs to curse area scaling, so the build is now more about hitting key breakpoints (curse radius, faster curse activation, and curse gem levels) than raw “stack one stat and win.”
![]() How to make the build (core setup)
How to make the build (core setup)
Main skill (1-button clear)
- Despair is your only real “spam” skill in maps.
- Link it to Doedre’s Undoing so casting Despair triggers the hazard/explosions.
The important support links
A typical main link looks like:
- Despair → Doedre’s Undoing → Spell Cascade → Execute → Controlled Destruction → Zenith
Spell Cascade is the big multiplier. If your curse radius is high enough, all three Cascade zones overlap and hit the same spot, which massively boosts single-target and clear.
Boss extras (only when needed)
- Sigil of Power for extra damage on bosses
- Ball Lightning to proc Mana Remnants if your mana engine needs it
![]() Path of Building (POB): https://pobb.in/m7NgNa-JoevP
Path of Building (POB): https://pobb.in/m7NgNa-JoevP
![]() Key mechanics and required breakpoints
Key mechanics and required breakpoints
1) Curse radius (the Spell Cascade overlap)
- The “perfect” breakpoint is 5.0m curse radius so Spell Cascade overlaps cleanly.
- Around 4.9m can still work (especially with a controller), but mouse aiming becomes picky.
Because curse area scaling was nerfed in 0.4.0, reaching 5.0m is harder, so curse level scaling matters more than before.
2) Faster Curse Activation (cast speed for curses)
Curses have an activation delay. You want it almost gone, but not fully gone:
- At 100%+ Faster Curse Activation, curses can bug out and fail.
- The target is 98%.
This build typically gets:
- 70% from the passive cluster (Impending Doom and small nodes)
- 28% from Crystalline Phylactery + a jewel with exactly 14% Faster Curse Activation (Phylactery doubles the jewel effect)
That “exactly 14%” jewel is a real requirement if you want the build to feel smooth.
3) Spirit + Threaded Light (damage engine)
This build needs Threaded Light to get started. With enough Spirit, Threaded Light turns Spirit into a huge chunk of spell damage. Most Spirit comes from your sceptre, then amulet/body armour as upgrades.
A common comfort target before respeccing is 300–350+ Spirit so you can run all your persistent buffs.
4) Low Life (speed + damage reduction)
The build uses Low Life for:
- damage reduction via “% of damage taken bypasses Energy Shield” + Eternal Life
- damage from Execute
- movement speed from Tecrod’s Gaze
Ascendancy (Lich) priorities
- Soulless Form: strong mana regen and a source of “damage bypasses Energy Shield.”
- Eternal Life: makes bypass act like damage reduction as long as you have Energy Shield, and enables Low Life play.
- Crystalline Phylactery: doubles a jewel effect; this is where the 14% Faster Curse Activation jewel goes.
- Rupture the Soul: adds cursed-enemy explosions for better clear and gives helpful curse area on the way to it.
![]() Gear and stat priorities
Gear and stat priorities
Offense priorities
Because of the 0.4.0 changes, don’t rely on one stat only. Prioritize:
- Supported Curse gem levels (now a major scaling route for Doedre’s Undoing)
- Spirit (to scale Threaded Light)
- Mana + mana regeneration (to scale Archmage and keep casting comfortable)
- Intelligence / All Attributes (still great if you’re scaling flat damage and meeting requirements)
- Cast speed, spell damage, chaos damage
- “Gain % of damage as extra” (fire/cold/lightning/chaos) as premium upgrades
Defense priorities
- Cap elemental resists at 75%
- Maximum Energy Shield (big hit pool)
- Faster start of Energy Shield recharge (huge quality of life)
- % of damage taken bypasses Energy Shield (best once Eternal Life is active)
Uniques and high-value items (optional vs required)
Required to function well
- Threaded Light (core damage scaling with Spirit)
- Crystalline Phylactery setup with a jewel that effectively gives the right Faster Curse Activation plan (the guide’s requirement is a jewel with 14% Faster Curse Activation in the Phylactery socket)
Common/strong upgrades
- Atziri’s Disdain (budget starter helm option mentioned for early setup)
- Against the Darkness (big scaling piece in higher investment)
- From Nothing (used for specific passive routing and scaling setups)
- Megalomaniac (late optimization)
- Headhunter (luxury mapping belt; not required)
How to level (recommended)
Doedre’s Undoing is not recommended for campaign leveling. The normal path is:
- Level through the campaign with Essence Drain + Contagion (smooth, cheap, reliable).
- Finish campaign, start early maps, and gather the required breakpoints and gear.
Endgame transition (when to respec)
A practical swap point is around level 80, once you have:
- resists capped and solid Energy Shield gear
- Threaded Light equipped
- a sceptre with roughly 180+ Spirit (or as close as you can get)
- enough total Spirit (often 300–350+) to run buffs comfortably
- curse radius investment aimed toward the Spell Cascade overlap breakpoint
- your Faster Curse Activation plan ready (ending near 98%, not 100%)
If you cannot get close to the curse radius breakpoint after the 0.4.0 nerfs, expect worse single-target and less “screen-wide” feel.
What makes it special
- True 1-button mapping: Despair does almost everything.
- Huge clear coverage: when curse radius and Spell Cascade overlap are working, packs disappear instantly.
- Very fast mapper: low life speed tech + high movement speed gearing.
- Big Energy Shield defenses: you’re built to survive while you sprint through maps.
![]() Who this build is optimal for
Who this build is optimal for
Best for
- Players who want a dedicated mapping/blasting build
- People who enjoy optimizing breakpoints (curse radius, activation speed, Spirit)
- Trade-league players who can realistically acquire the key uniques and specific jewel rolls
Not ideal for
- New players (too many breakpoints, and 0.4.0 nerfs make it harder to “just work”)
- Players who want a simple, cheap bossing build
- Anyone who dislikes respec-heavy endgame swaps and gear checks
Conclusion
In Path of Exile 2, the Witch is at her best when your build has one clear damage plan, good uptime while moving, and real defenses like capped resistances and a solid Life or Energy Shield base. For leveling, keep it simple: one main skill, one boss tool, and a few support skills that add safety or speed. For endgame, focus on builds that scale well with gear and passive points, such as minion setups for safe progression or Lightning Spear Bleed Blood Mage for fast ranged clear and strong boss finishing. Upgrade in a steady order: resistances and survivability first, then damage stats that match your build. Pick the setup that fits your playstyle, and the Witch will stay strong from early acts to high-tier maps.