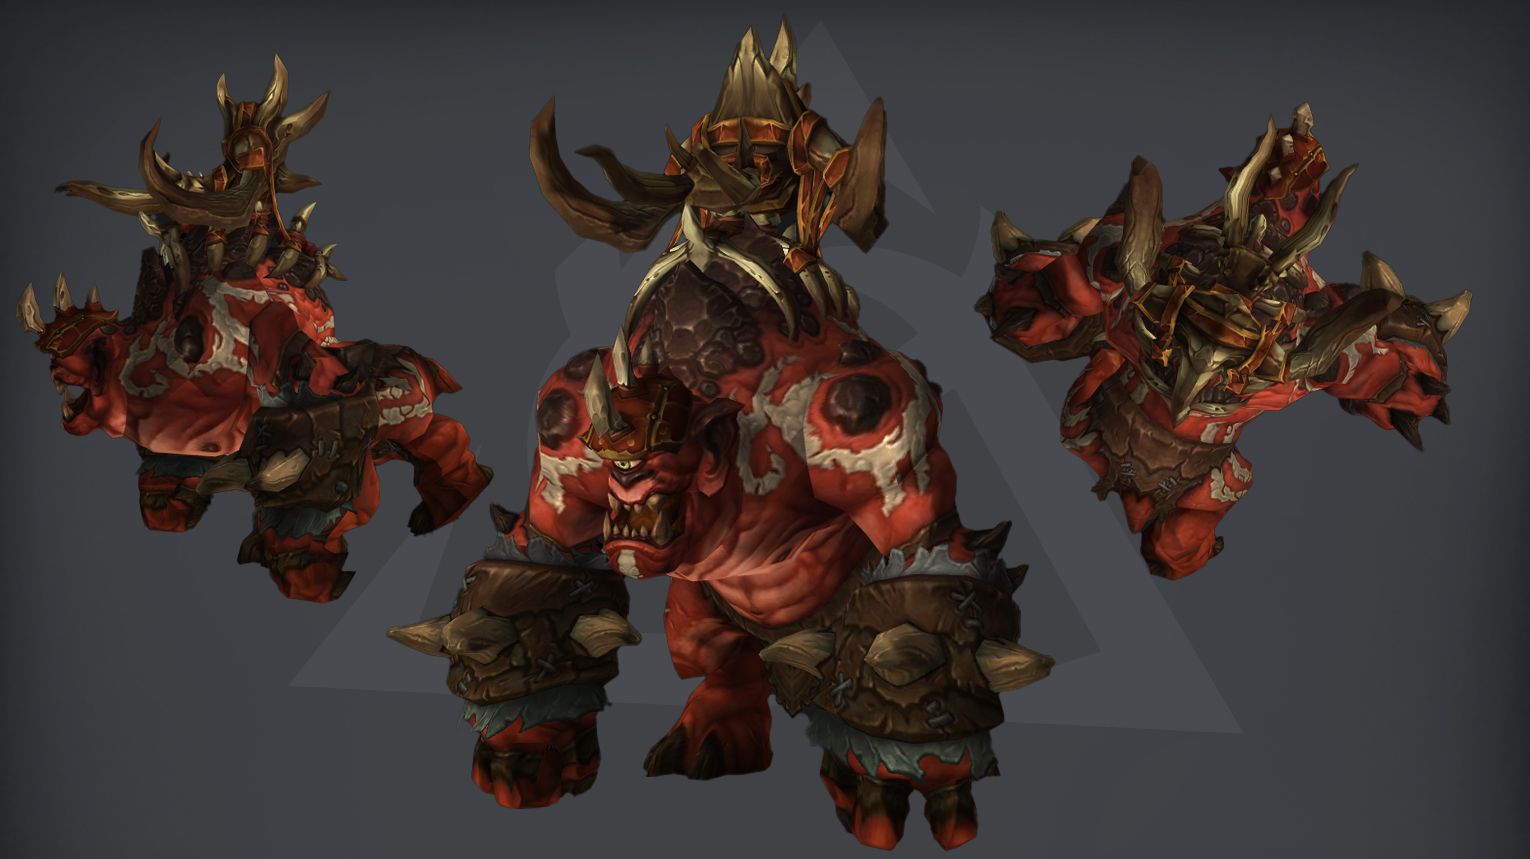
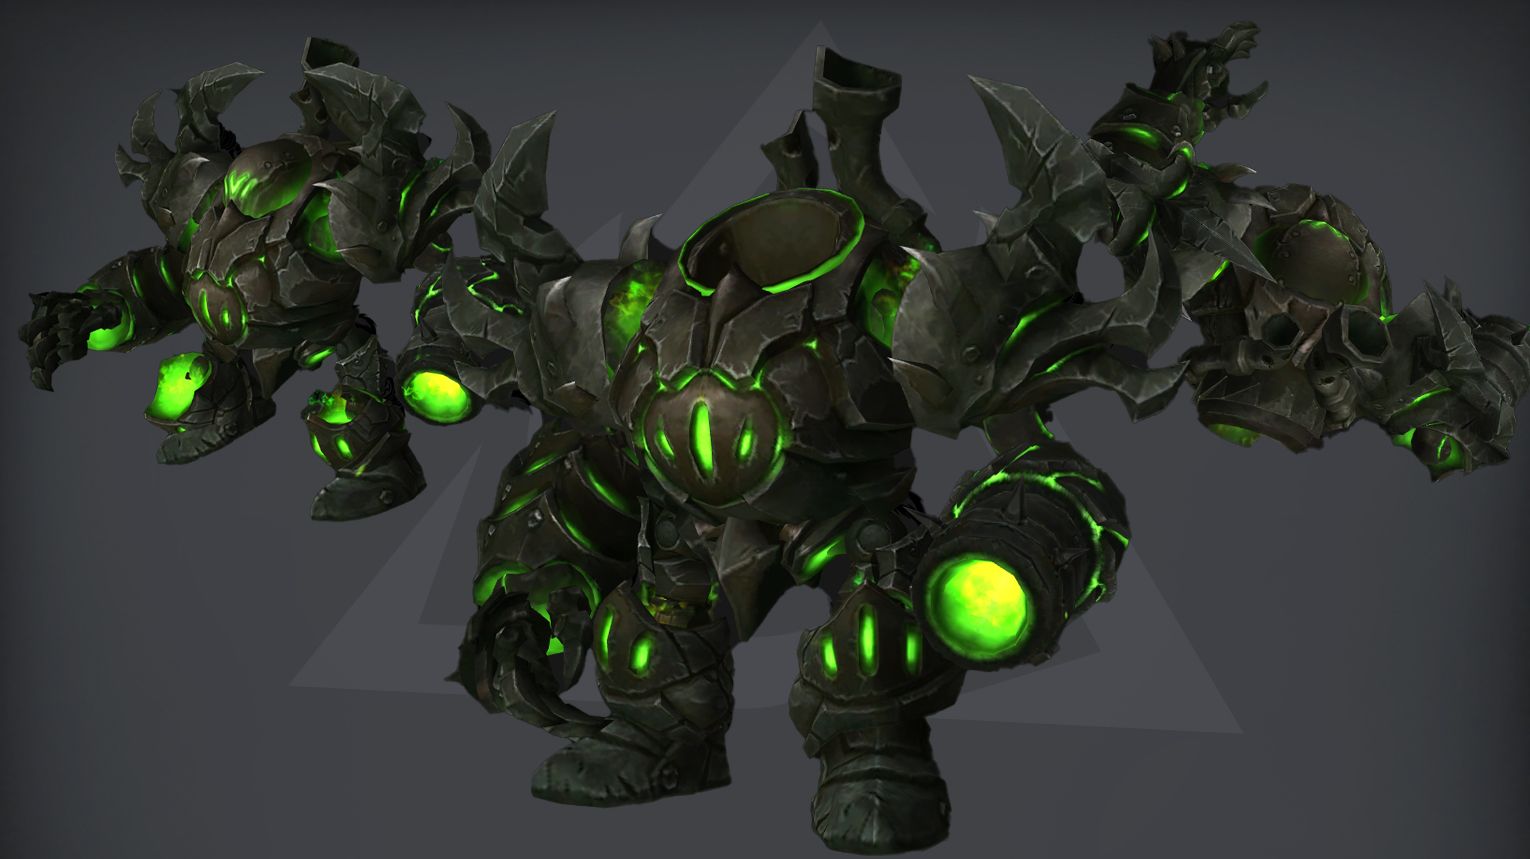
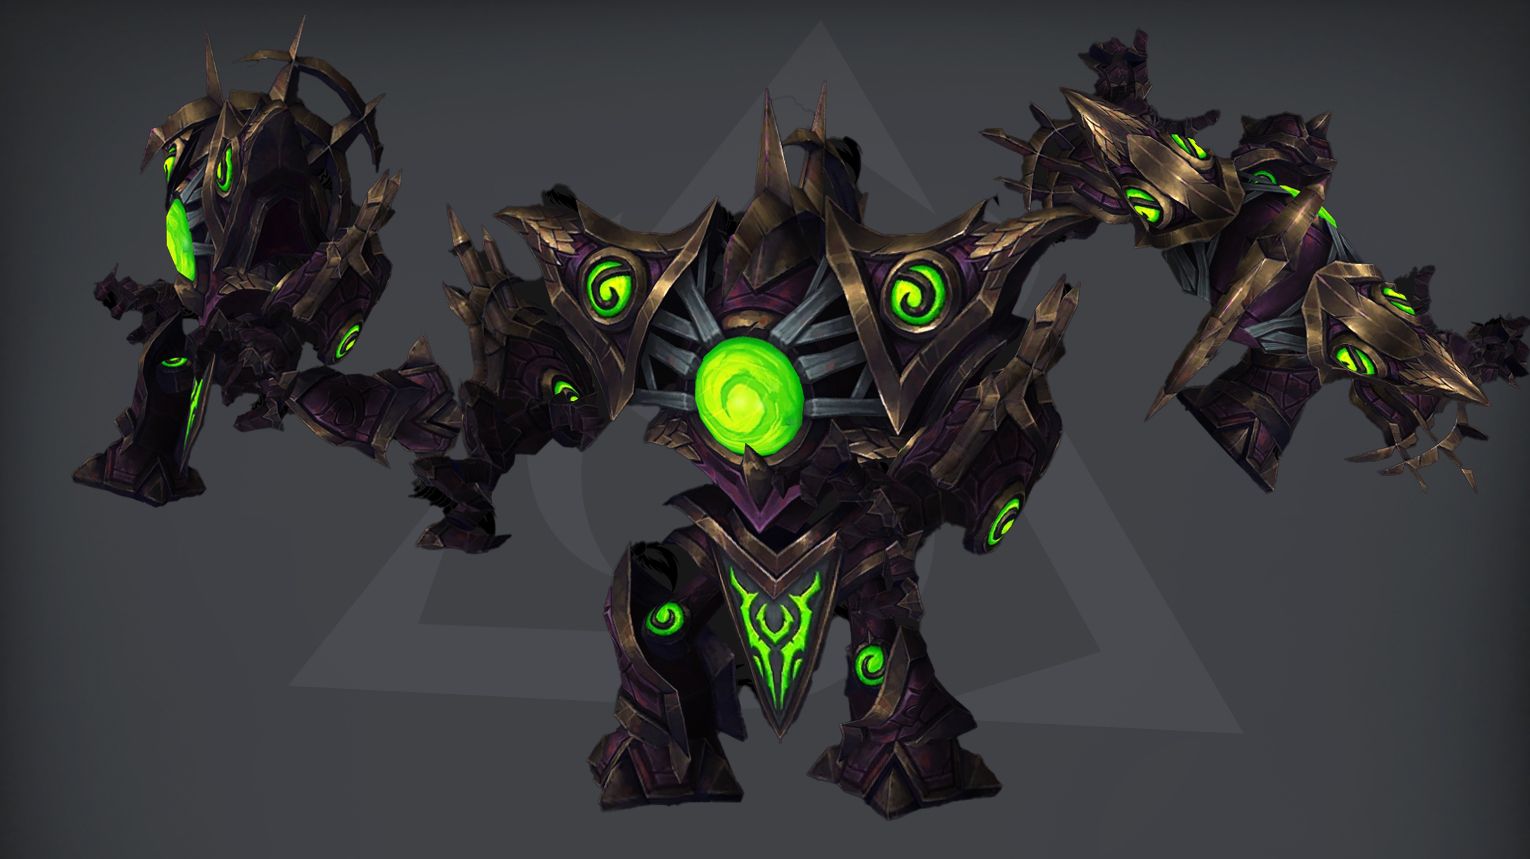
Hellfire Citadel, the final raid of Warlords of Draenor, remains a great source of transmogs, mounts, and achievements in The War Within. This massive demon stronghold in Tanaan Jungle has 13 bosses, including Archimonde, with unique rewards like the Felsteel Annihilator mount and Tier 18 armor sets.
Every new patch brings new BIS PvE (and PvP) gear—and you don’t want to fall behind. Gamingcy’s WoW Mythic raid boost is the best and the fastest way to get the most powerful weapons and armor that exist in the current game patch. We partner with elite teams from the EU and the US who clear the raid on all difficulties in 1–2 hours. Runs start hourly, so getting perfectly geared has never been easier.
This guide includes:
- Hellfire Citadel location
- Bosses and their rewards
- Available mounts, weapons, and transmogs
- Achievements you can earn
- Can you solo Hellfire Citadel?
If you’re farming HFC cosmetics or challenging yourself solo, or just want to check the raid location, this guide will help you get the best out of Hellfire Citadel in WoW Retail.
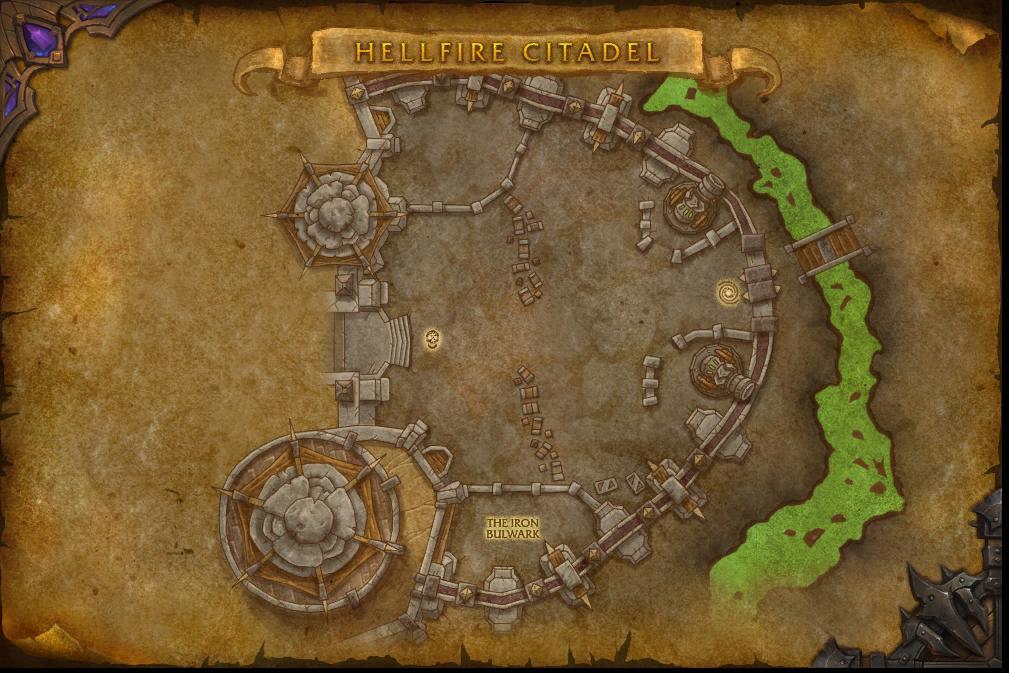
Hellfire Citadel Entrance and Subregions

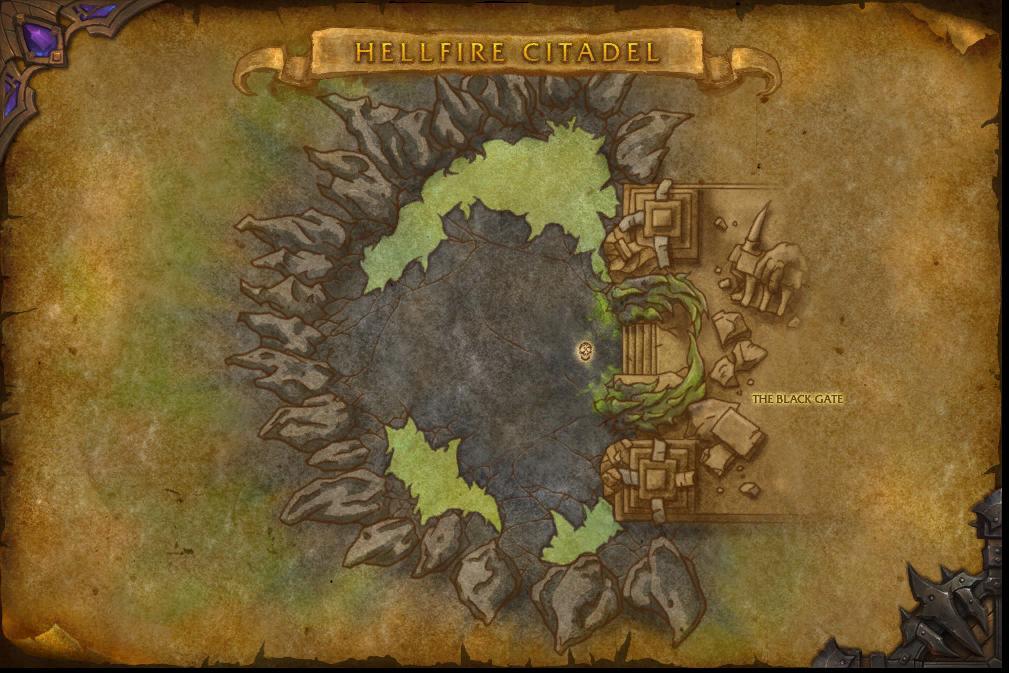
Hellfire Citadel is located in Tanaan Jungle, the main zone of Warlords of Draenor. To get there, you must first unlock Tanaan Jungle by completing the Shipyard questline in your garrison. Once unlocked, fly to the center of the zone—the raid entrance sits atop a massive fortress at 46.5, 53.0.
The entrance is hard to miss—a giant demonic gate guarded by Fel orcs and siege engines. Walk inside, and you’ll begin the raid in Hellbreach, the first of several distinct sections.
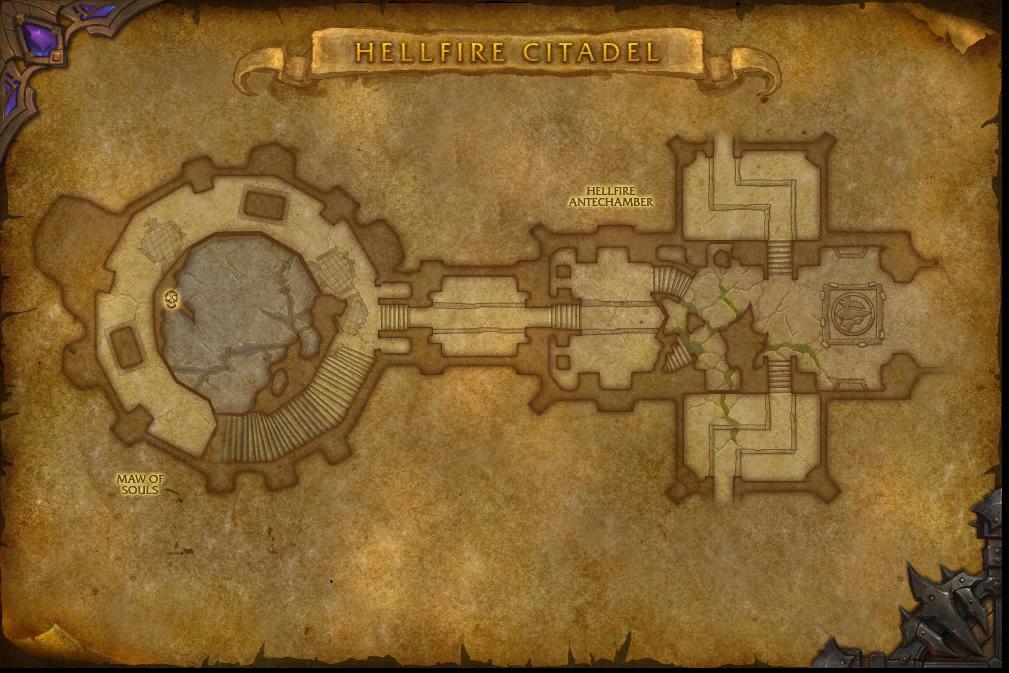
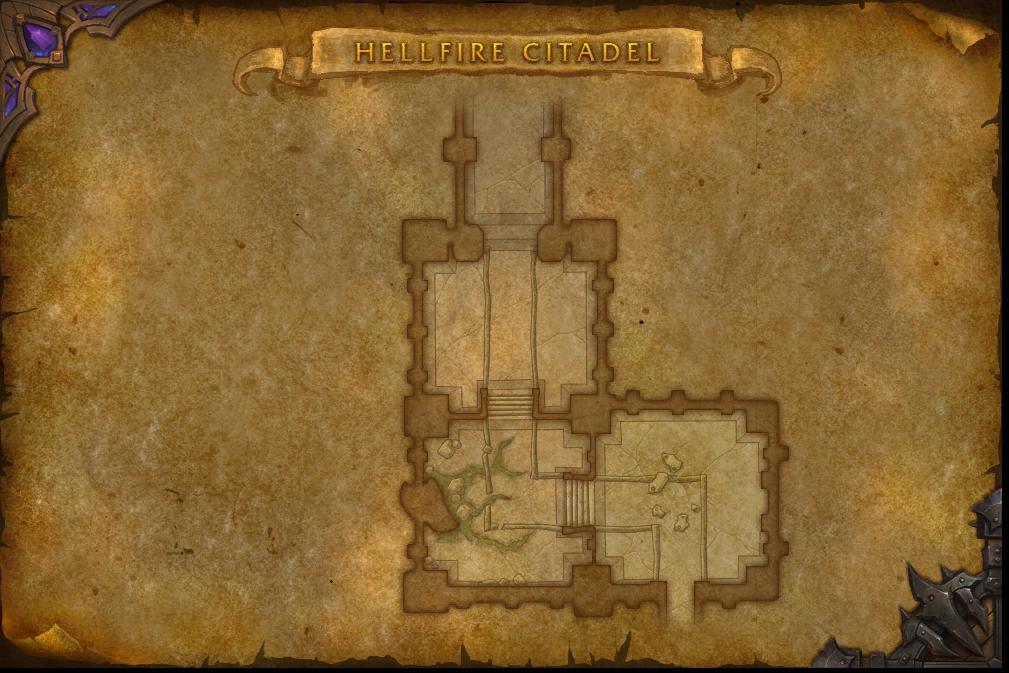
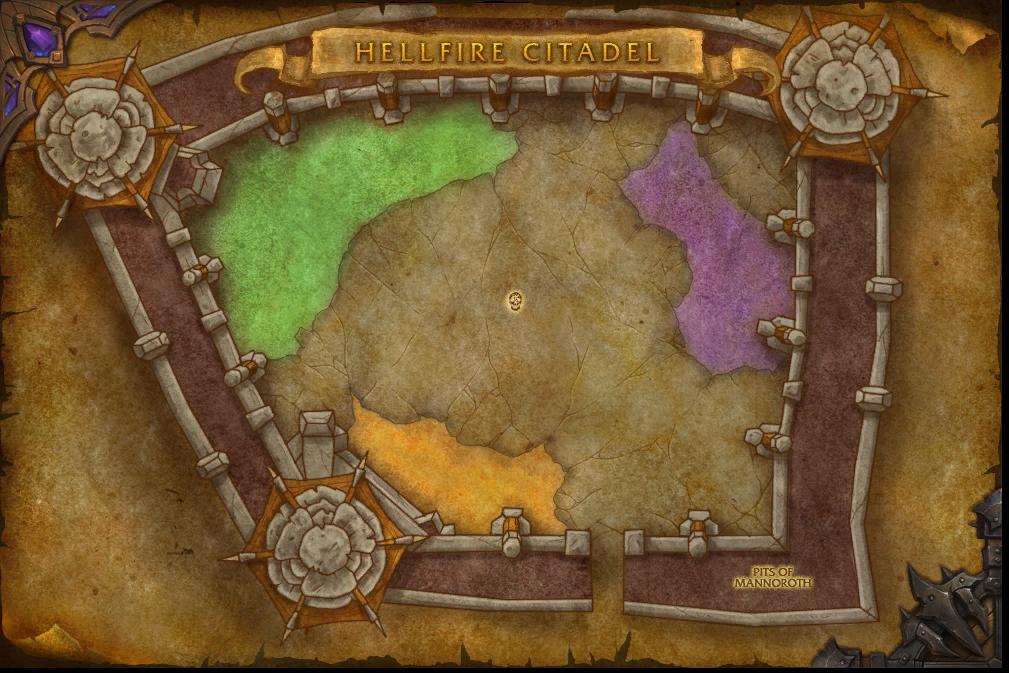
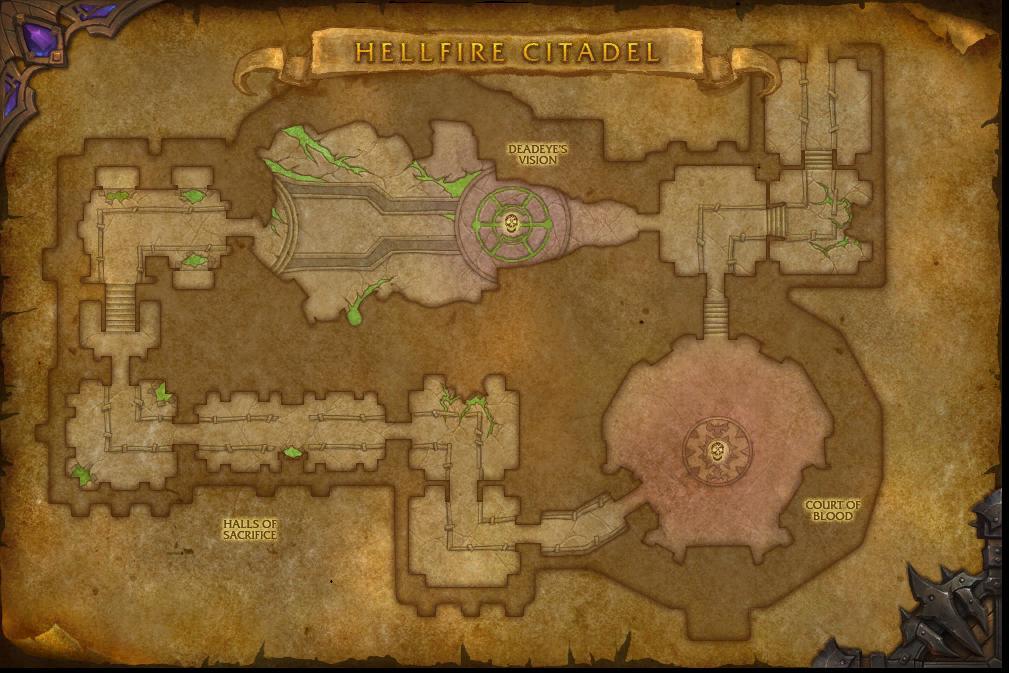
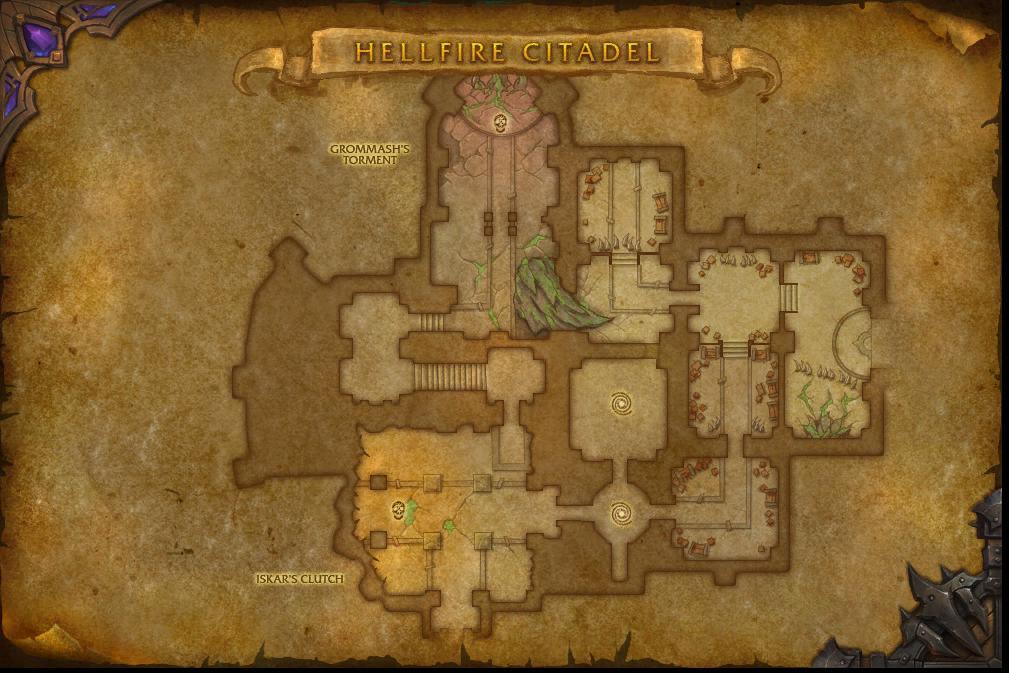
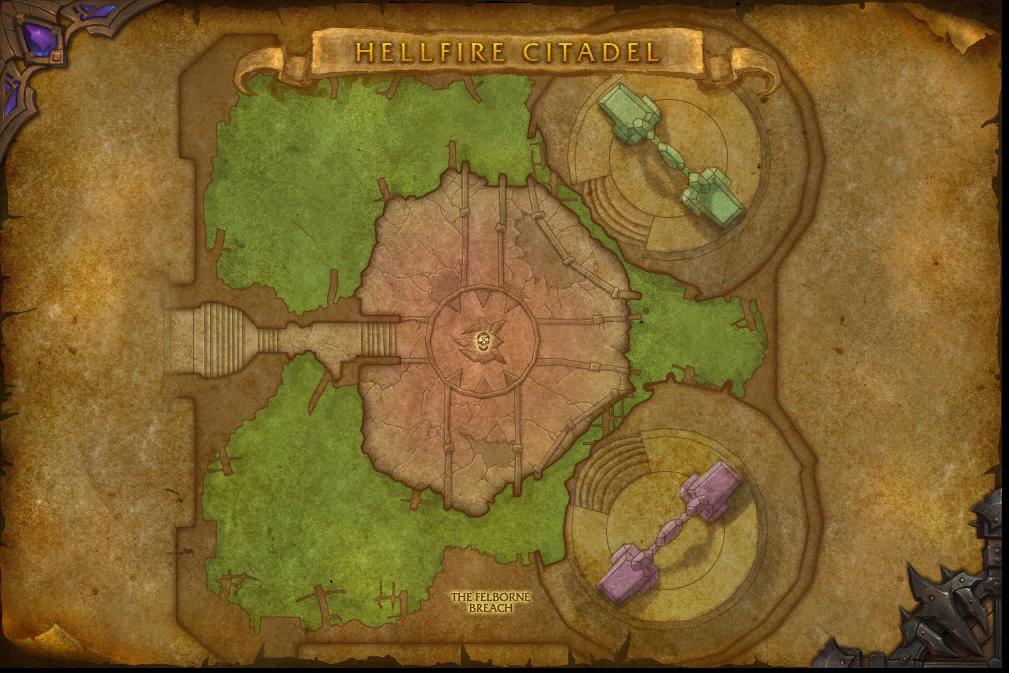
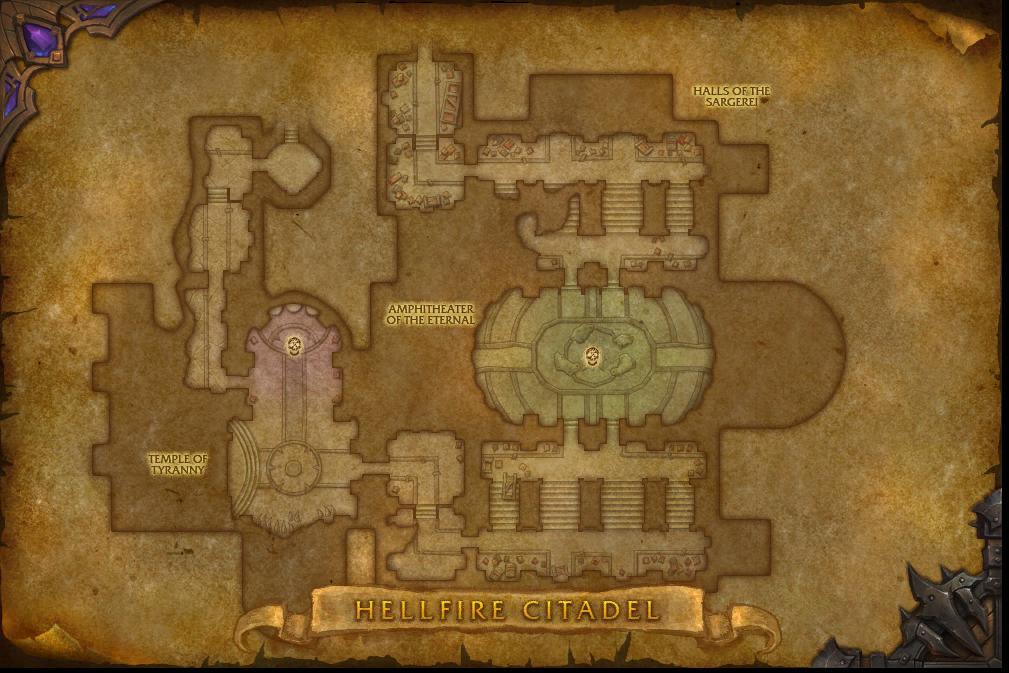
Hellfire Citadel is divided into the following areas:
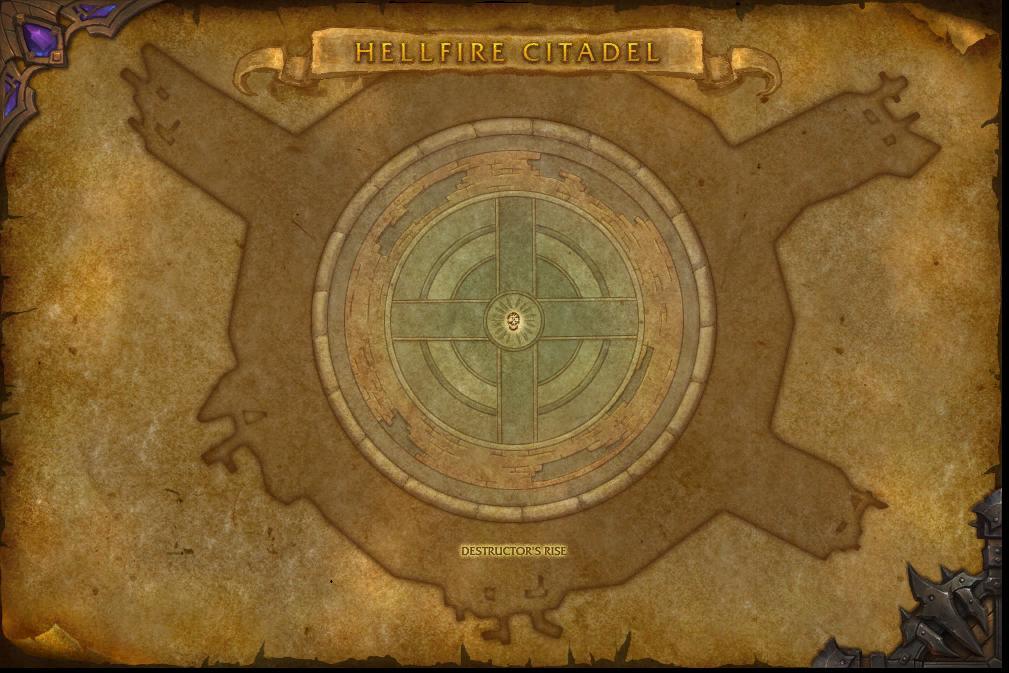
- Hellbreach (Hellfire Assault, Iron Reaver, Kormrok)
- Halls of Blood (Hellfire High Council, Kilrogg Deadeye, Gorefiend)
- Bastion of Shadows (Shadow-Lord Iskar, Socrethar, Tyrant Velhari)
- Destructor’s Rise (Fel Lord Zakuun, Xhul’horac, Mannoroth)
- The Black Gate (Archimonde)
Each area has its own bosses, mechanics, and loot. We’ll cover them in detail below.
Hellfire Citadel Collectibles: Mounts, Pets, Transmogs
| Collectible | Source (% drop rate) | Obtainable / Not Obtainable |
| Hellfire Citadel Tier Sets | ||
| Gorestrider Gronnling | Glory of the Draenor Raider | Yes |
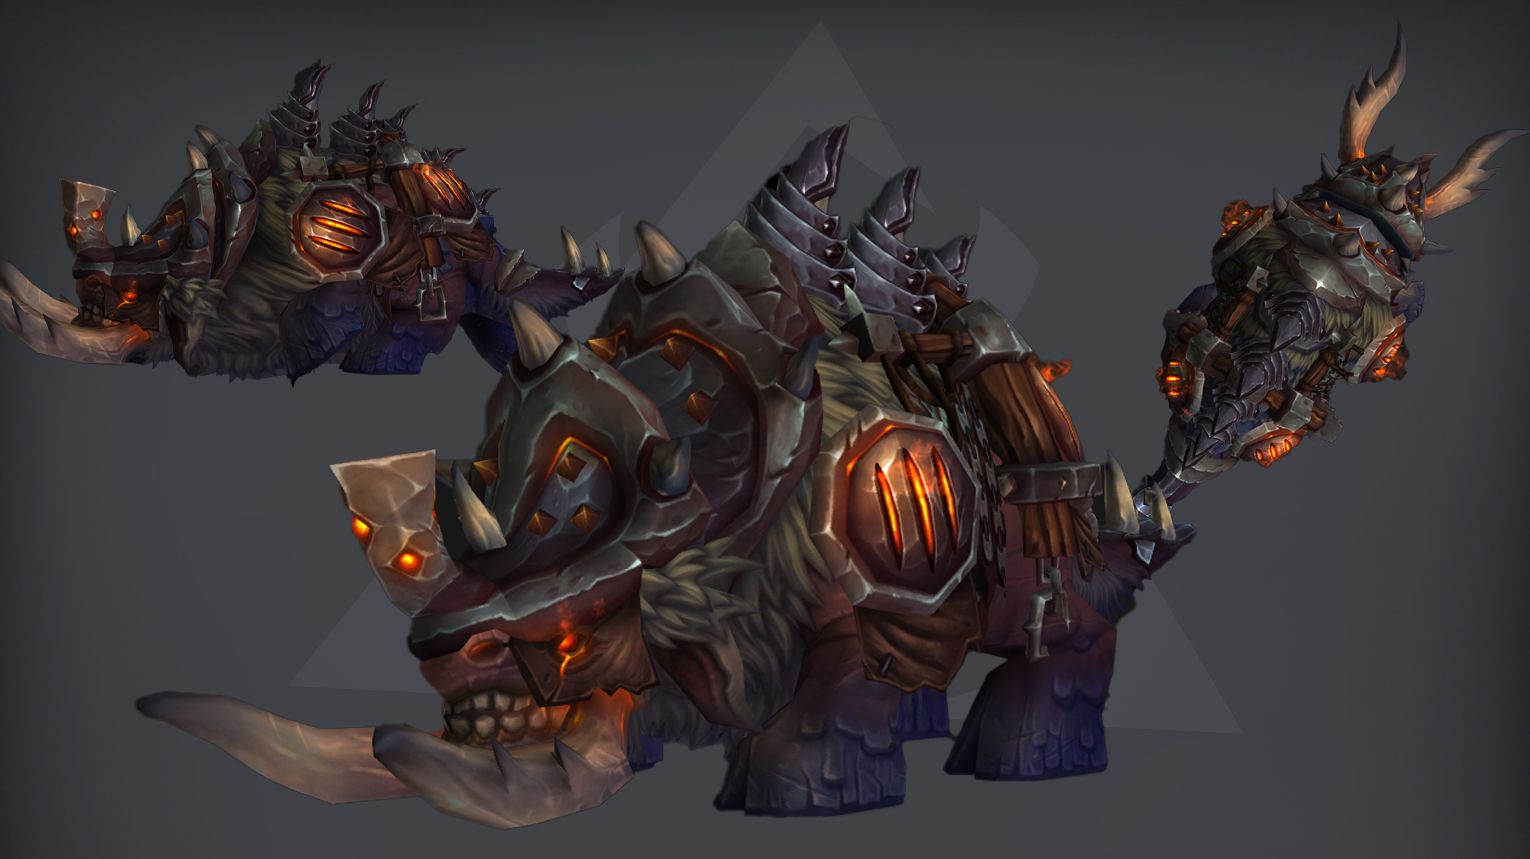
| Felsteel Annihilator | Archimonde (3%) | Yes |
| Corrupted Nest Guardian | Shadow-Lord Iskar (6%) | Yes |
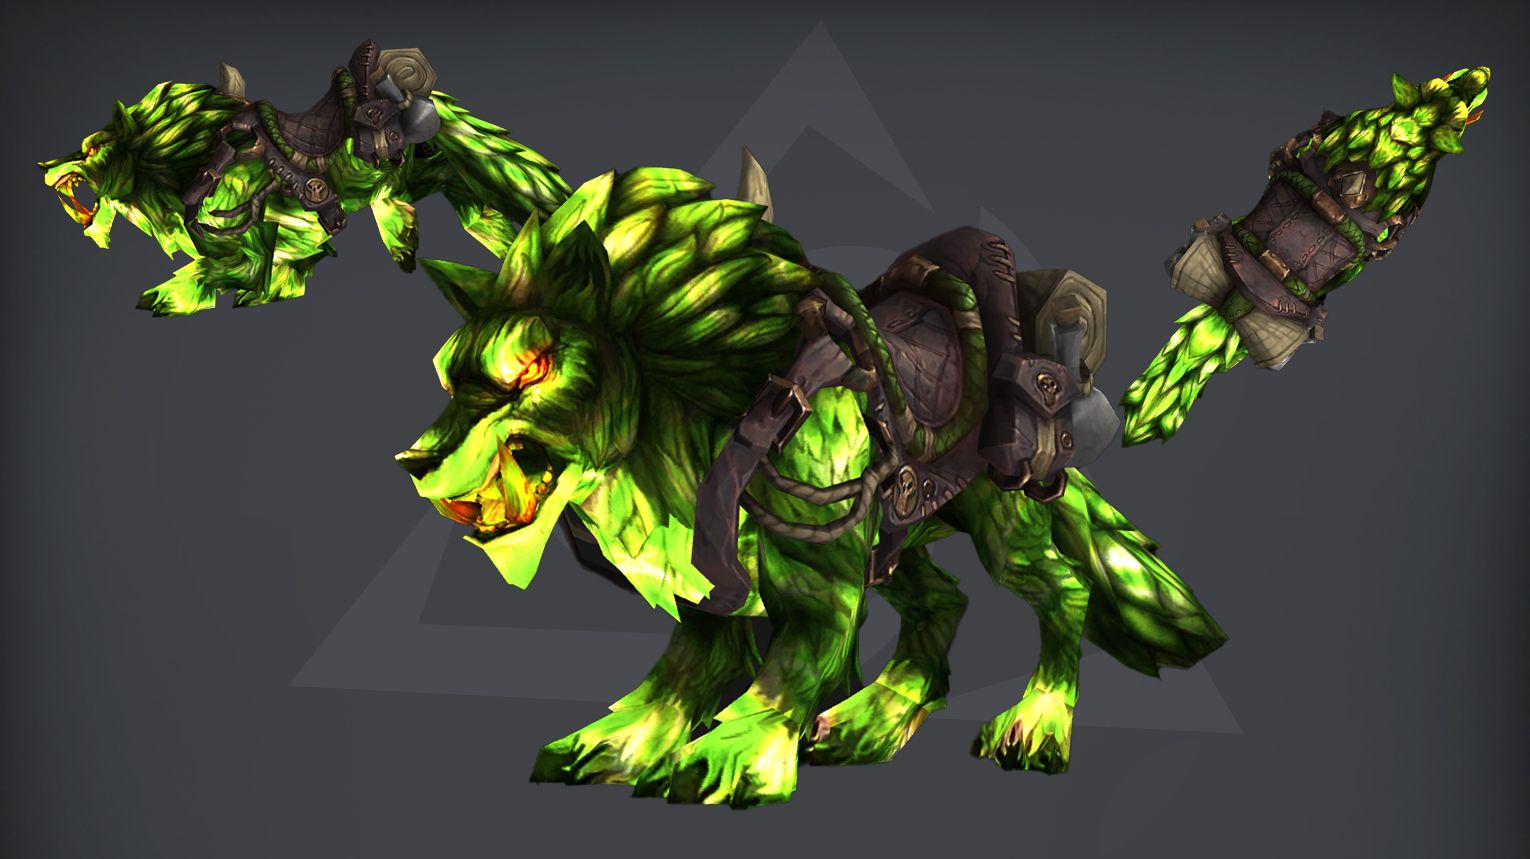
| Infernal Direwolf | Glory of the Hellfire Raider | Yes |
Hellfire Citadel Bosses Overview

Hellfire Citadel is the brutal final raid of Warlords of Draenor, where players assault the Legion’s stronghold in Tanaan Jungle. The raid features 13 demonic bosses, starting with the chaotic Hellfire Assault and ending with an epic showdown against Archimonde himself.
Fights range from massive battles like the Iron Reaver, a flying siege engine that bombards players, to twisted encounters like Gorefiend, who drags players into a nightmare realm. The Hellfire High Council forces players to juggle multiple deadly foes at once, while Mannoroth brings back the iconic pit lord fight with devastating new abilities. The final battle against Archimonde is a multi-phase war across time and space, where players must survive his world-ending magic.
Each boss fits the demonic invasion theme, from the corrupted orc Kilrogg Deadeye to the fel-powered Xhul’horac. The encounters test all raid skills – positioning, target switching, and precise execution.
Below we’ll break down each Hellfire Citadel boss fight and their rewards.
Can You Solo Hellfire Citadel in The War Within?

Farming Hellfire Citadel solo in The War Within is a great method to gather transmog sets, mounts, pets, and achievements from the Warlords of Draenor expansion.
- Level & Gear Requirements:
- You must be at least level 60+ (though level 80 makes it trivial).
- Gear from The War Within will make fights extremely easy.
- Some mechanics may still require attention (e.g., knockbacks, insta-kills).
- Difficulty Selection:
- Normal/Heroic: Easily soloable.
- Mythic: Mostly soloable, but some bosses (e.g., Archimonde) may have mechanics that require strategy.
- Class Considerations:
- Self-healing (e.g., Paladin, Death Knight, Demon Hunter) helps.
- Mobility is useful for dodging mechanics.
- Burst DPS lets you skip phases.
- Loot & Mounts
- Felsteel Annihilator (Mythic-only mount) drops from Mythic Archimonde (~1% drop rate).
- Transmog gear (Tier 18 sets, weapons).
- Achievements for Glory of the Hellfire Raider (Infernal Direwolf mount).
Hellfire Assault
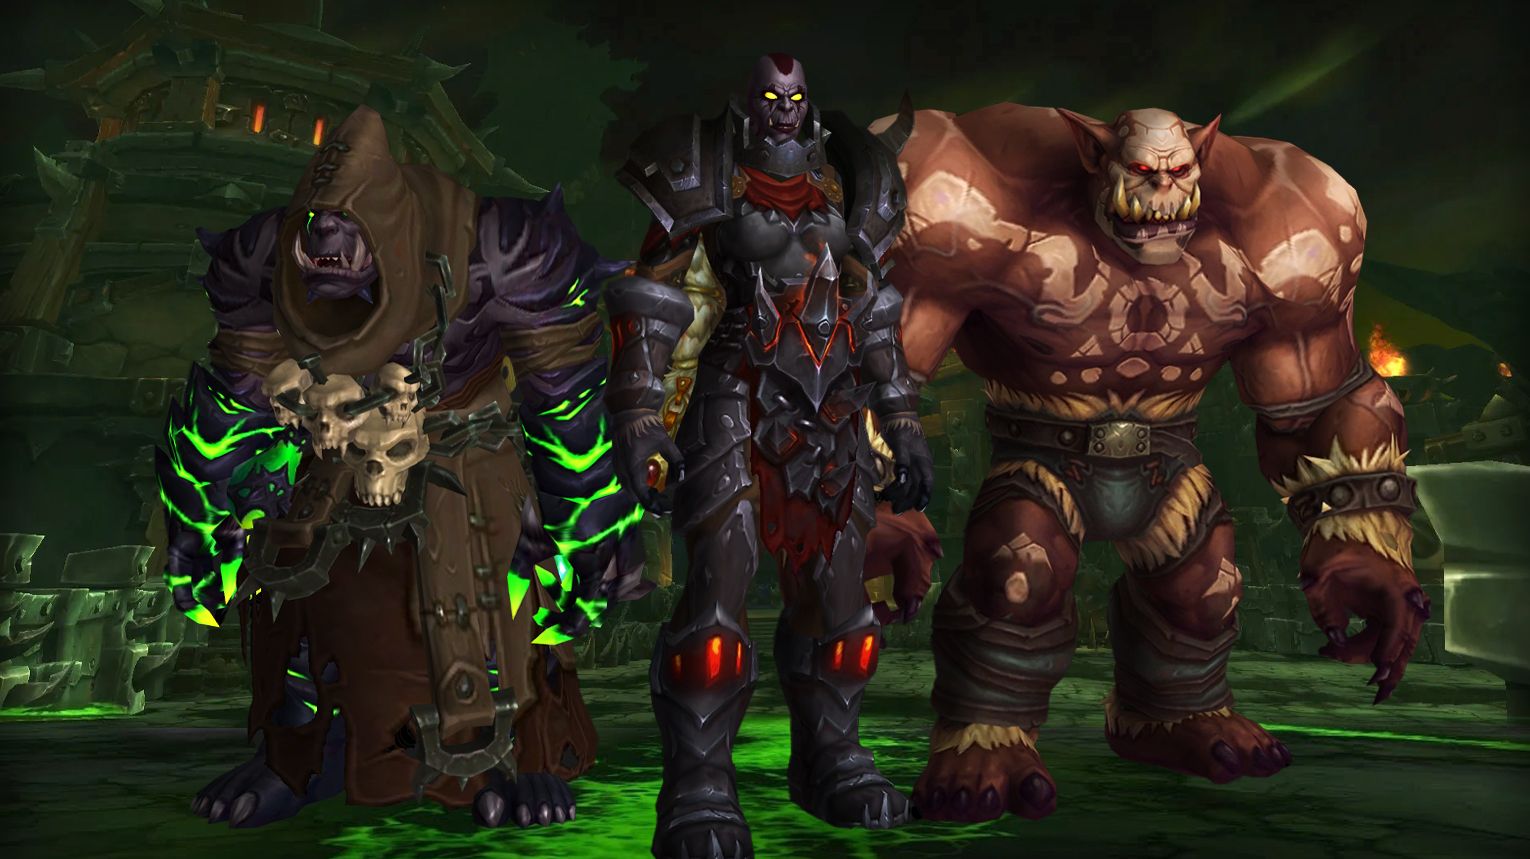
Hellfire Assault is a chaotic add-control fight where players defend two Hellfire Cannons while collecting Felfire Munitions from Siege Weapons to destroy a fortified door. Prioritize killing Gorebound Terrors (transformed Felcasters) and Felfire Crushers (insta-kill Cannons). Tanks must swap on Hulking Berserkers (2–3 Slam stacks), while DPS focus Siege Weapons and mobile players ferry munitions. Use Bloodlust early to push boss Mar’tak to 50% (she flees). Mythic adds dual Siege Waves and mini-bosses (U’rogg/Grute), requiring split raids and timed cooldowns.
 Preferred Classes:
 Tanks: Strong active mitigation (e.g.,
  DKs,
DKs,  Paladins) for Slam stacks from Berserkers.
 DPS:
DPS:
- High AoE (e.g.,
 Mages,
  Warlocks) for add waves.
 - High mobility (e.g.,
 Hunters,
  Rogues) to ferry Felfire Munitions.
- High AoE (e.g.,
 Healers: Strong raid healing (e.g.,
  Druids,
  Shamans) for Felfire Volley from Terrors.
 Tips:
Tips:
- Prioritize Adds:
- Kill Gorebound Terrors (transformed Felcasters) immediately.
- Swap tanks on Hulking Berserkers at 2–3 Slam stacks.
- Munitions: Assign mobile players to carry Felfire Munitions; they last 90s, so clear adds first.
- Siege Weapons: Focus Felfire Crushers (they insta-kill Cannons) > Artillery > Flamebelchers.
- Avoid Mechanics:
- Spread for Howling Axe (Mar’tak).
- Dodge Shockwave, Burn (Crusher), and Siege Nova (Demolisher).
 Strategy:
- Phase 1 (Mar’tak):
- Burst Mar’tak to 50% (she flees, removing her mechanics).
- Kill her adds (Berserkers > Felcasters > Engineers).
- Phase 2 (Siege Waves):
- Split raid to handle simultaneous Siege Weapons (Mythic).
- Control Felcaster damage to avoid multiple Terrors.
- Mythic-Specific:
- Stack for U’rogg burn, then split for Grute (tank swaps + dodge Cannonball).
 Bloodlust/Drums:
Start to burn Mar’tak + early adds.
 Hellfire Assault loot table:
| Type of Armor | Item | Loot type |
| Cloth | Felgrease-Smudged Robes | Chest |
| Powder-Singed Bracers | Wrist | |
| Leather | Gorebound Wristguards | Wrist |
| Rangefinder’s Spaulders | Shoulder | |
| Hand Loader Gauntlets | Hands | |
| Iron Dragoon’s Pantaloons | Legs | |
| Plate | Blastproof Legguards | Legs |
| Flamebelcher’s Insulated Mitts | Hands | |
| Shell-Resistant Stompers | Feet | |
| Any | Bolt-Latched Felsteel Gorget | Amulet |
| Faulty Detonator Cord | Amulet | |
| Forward Observer’s Camouflage Cloak | Cloak | |
| Sparkburnt Welder’s Cloak | Cloak | |
| Blackfuse Company Utility Knife | Dagger | |
| Felfire Munitions Launcher | Gun | |
| Mar’tak’s Rugged Seal | Ring | |
| Sootstained Felsworn Signet | Ring | |
| Smoldercore Bulwark | Shield | |
| Flickering Felspark | Trinket |
Iron Reaver
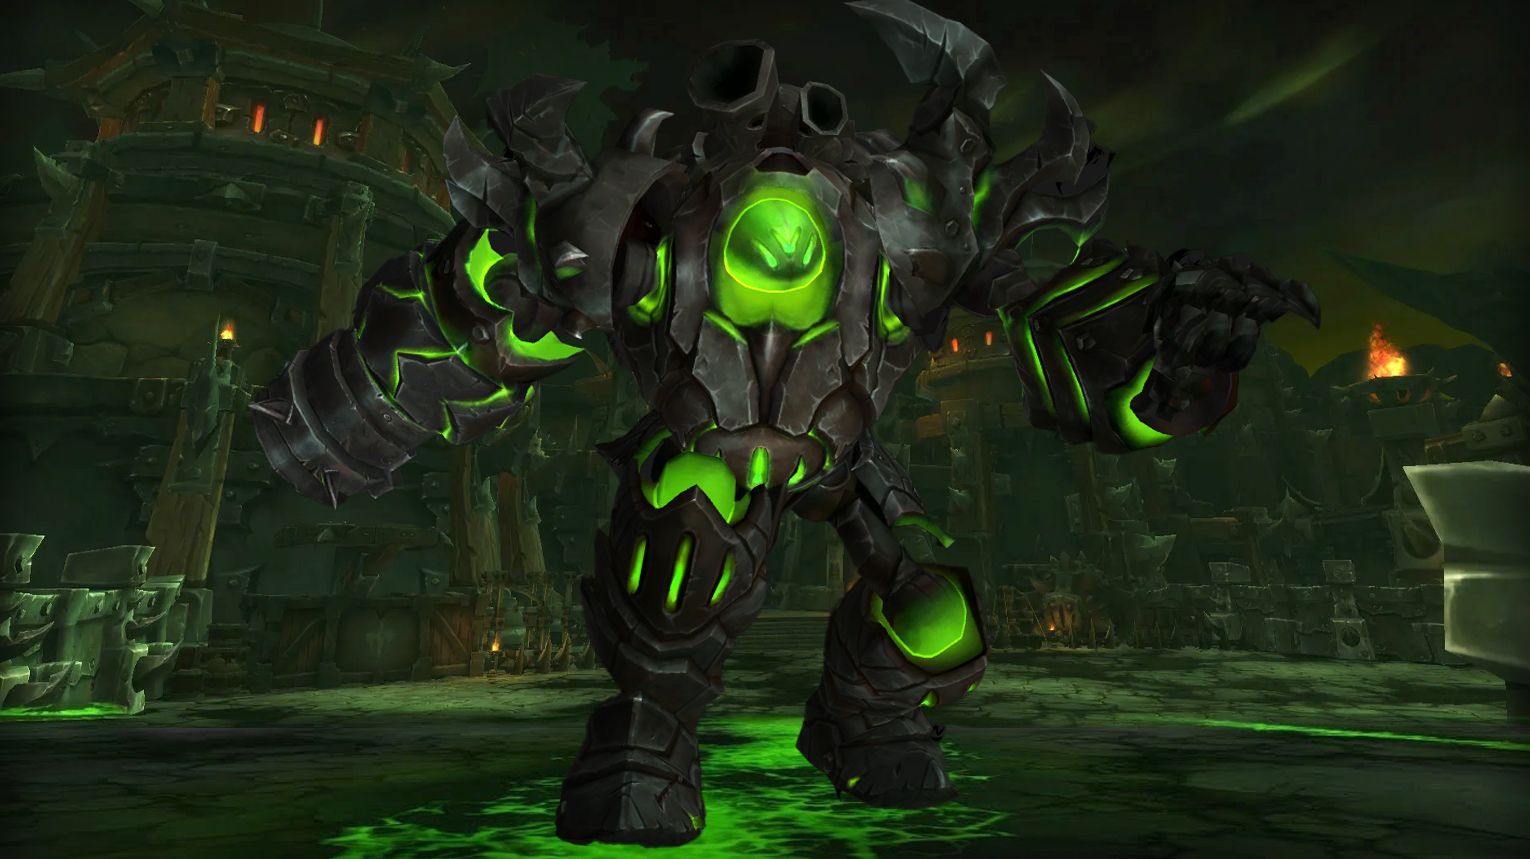
Iron Reaver is a two-phase boss in Hellfire Citadel (WoD 6.2). In Ground Phase, dodge Barrage (watch her left foot), swap tanks on Artillery, and spread for Unstable Orbs. During Air Phase, kill Volatile Firebombs (25s fuse) and avoid Fuel Streaks while marked players run far for Artillery. Use Bloodlust on pull and save raid CDs for Pounding. Mythic adds 4 bomb types (prioritize Quick-Fuse > Reactive > Burning > Reinforced).
 Preferred Classes:
 Tips:
Tips:
- Ground Phase:
- Tanks: Swap on Artillery; run 40+ yards away to minimize raid damage.
- Ranged: Spread 8+ yards to avoid Unstable Orb splashes.
- All: Watch Reaver’s left foot to dodge Barrage; avoid Blitz path.
- Air Phase:
- Firebombs: Kill Volatile Firebombs ASAP (25-second fuse).
- Artillery Targets: Run to edges (40+ yards from others).
- Fuel Streaks: Avoid flames after Flash Fire.
 Strategy:
- Positioning:
- Tank Reaver center; ranged spread in a semicircle.
- Designate edges for Artillery detonations.
- Cooldowns:
- Mythic Adjustments:
 Bloodlust/Drums:
Opening Ground Phase (maximize single-target damage before Air Phase).
 Iron Reaver loot table:
| Type of Armor | Item | Loot type |
| Cloth | Pilot’s Pauldrons | Shoulder |
| Pedal-Pushing Sandals | Feet | |
| Leather | Rivet-Studded Leggings | Legs |
| Spiked Irontoe Slippers | Feet | |
| Insulated Wirer’s Gloves | Hands | |
| Torch-Brazed Waistguard | Waist | |
| Die-Cast Ringmail Sabatons | Feet | |
| Plate | Stamped Felsteel Chestplate | Chest |
| Hot-Rolled Iron Bracers | Wrist | |
| Any | Voltage Regulation Diode | Amulet |
| Ironthread Greatcloak | Cloak | |
| Iron Skullcrusher | 1H Mace | |
| Flanged Gasket | Ring | |
| Felforged Aegis | Shield | |
| Fel-Spring Coil | Trinket | |
| Iron Reaver Piston | Trinket |
Kormrok
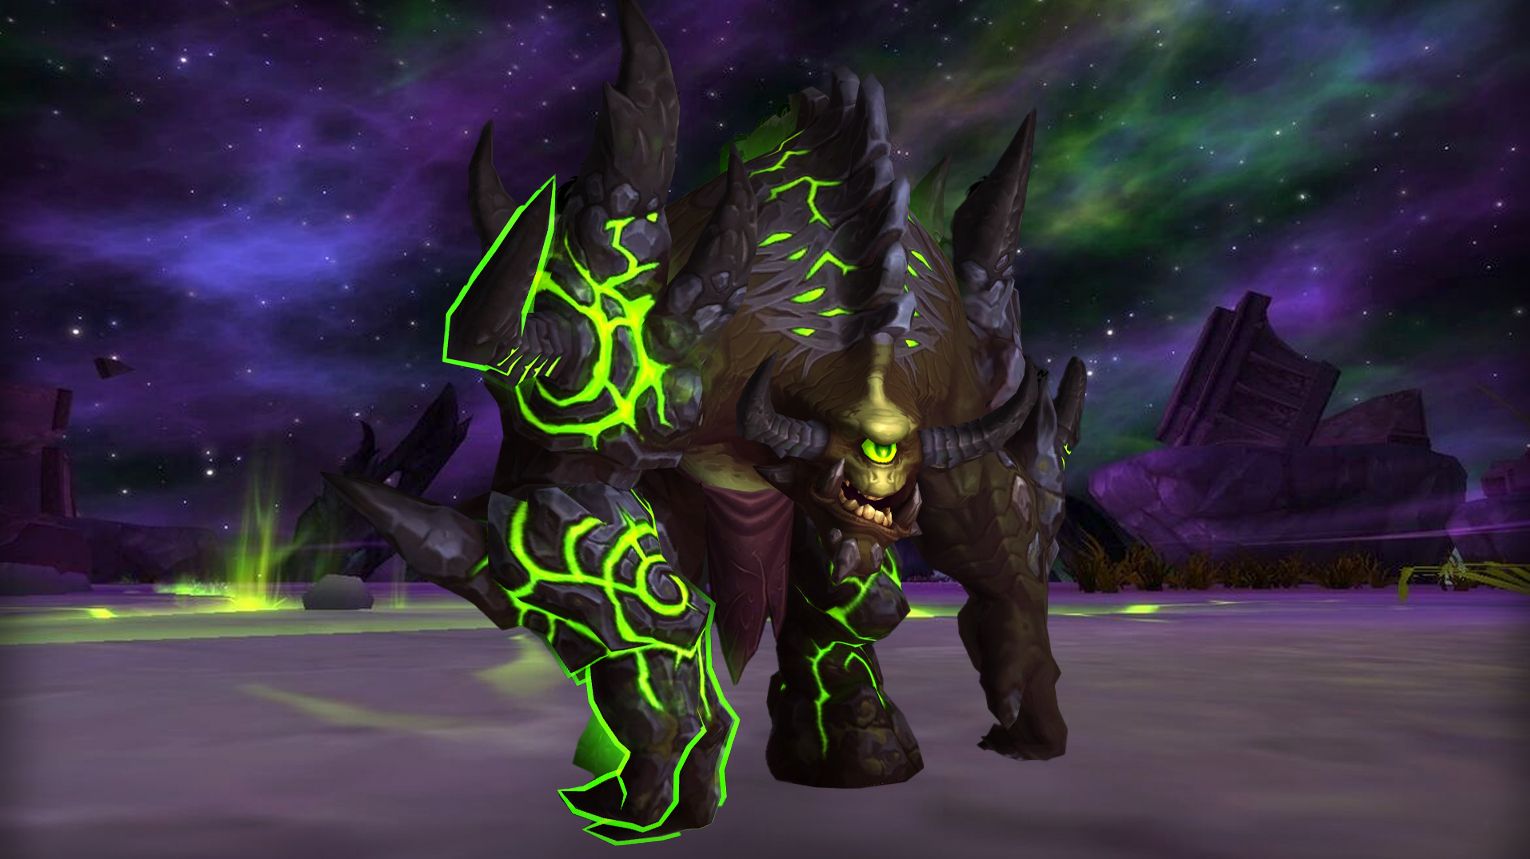
Kormrok is a boss in Hellfire Citadel (WoD 6.2) with three key mechanics tied to pools (Fiery, Foul, Shadow), empowering his abilities like Explosive Runes (trigger or wipe), Grasping Hands (AoE adds), and Fel Outpouring (dodge waves). Tanks must swap after empowered attacks (Swat, Explosive Burst, Foul Crush), while DPS prioritize adds. Raid stacks loosely for Pound and tightly for Grasping Hands. Use Bloodlust on pull for maximum uptime. On Mythic, Residue pools limit safe zones after each leap.
 Preferred Classes:
 Tanks: Strong mitigation for Swat/knockbacks (e.g.,
  DK anti-magic,
  Paladin bubble).
 DPS:
DPS:
- High AoE (e.g.,
 Fire Mage,
  Affliction Warlock) for Grasping Hands.
 - Mobile classes (e.g.,
 Hunters) for Empowered Fel Outpouring.
- High AoE (e.g.,
 Healers: Strong raid CDs (e.g.,
  Holy Priest,
  Resto Druid) for Pound + Hands overlaps.
 Tips:
Tips:
- Pool Order: Fiery (Explosive) → Foul (Grasping) → Shadow (Fel) to minimize Empowered Fel Outpouring overlaps.
- Explosive Runes:
- Assign 2–3 players with damage-reduction CDs to trigger runes.
- Mythic: Aim Empowered Runes toward the center to overlap/despawn.
- Grasping Hands:
- Stack in small groups (4–5 players) pre-cast for efficient AoE.
- Heroic/Mythic: Prioritize adds over boss.
- Fel Outpouring:
- Stand near one pool to simplify dodging.
- Empowered: Move through gaps early, then micro-dodge.
 Strategy:
 Tanks:
- Swap after Swat/Explosive Burst/Foul Crush.
- Position boss near next desired pool.
 DPS:
DPS:
- Burst AoE Grasping/Dragging Hands.
- Save CDs for Hands + legendary ring explosion.
 Healers:
- CDs for Pound + Hands overlaps.
- Pre-heal Explosive Rune triggers.
 Bloodlust/Drums:
On pull to maximize DPS before Enrage.
 Kormrok loot table:
| Type of Armor | Item | Loot type |
| Cloth | Cowl of the Arcanic Conclave | Head |
| Craggy Gloves of Grasping | Hands | |
| Deathrattle Mask | Head | |
| Pious Cowl | Head | |
| Sludge-Soaked Waistband | Waist | |
| Leather | Felblade Hood | Head |
| Ferroleather Hood | Head | |
| Mask of the Hurricane’s Eye | Head | |
| Oathclaw Helm | Head | |
| Tunic of Reformative Runes | Chest | |
| Crown of the Living Mountain | Head | |
| Hood of the Savage Hunt | Head | |
| Rugged Stoneshaped Pauldrons | Shoulder | |
| Plate | Demongaze Helm | Head |
| Faceguard of Iron Wrath | Head | |
| Fel-Inscribed Shoulderplates | Shoulder | |
| Helm of the Ceaseless Vigil | Head | |
| Any | Glowing Firestone | Amulet |
| Shadowgorged Iron Choker | Amulet | |
| Polymorphic Cloak of Absorption | Cloak | |
| Runic Magnaron Tooth | Dagger | |
| Runeaxe of the Breaker | 1H Axe | |
| Rune-Infused Spear | Polearm | |
| Pit-Extracted Stone Signet | Ring | |
| Imbued Stone Sigil | Trinket | |
| Rumbling Pebble | Trinket |
Hellfire High Council
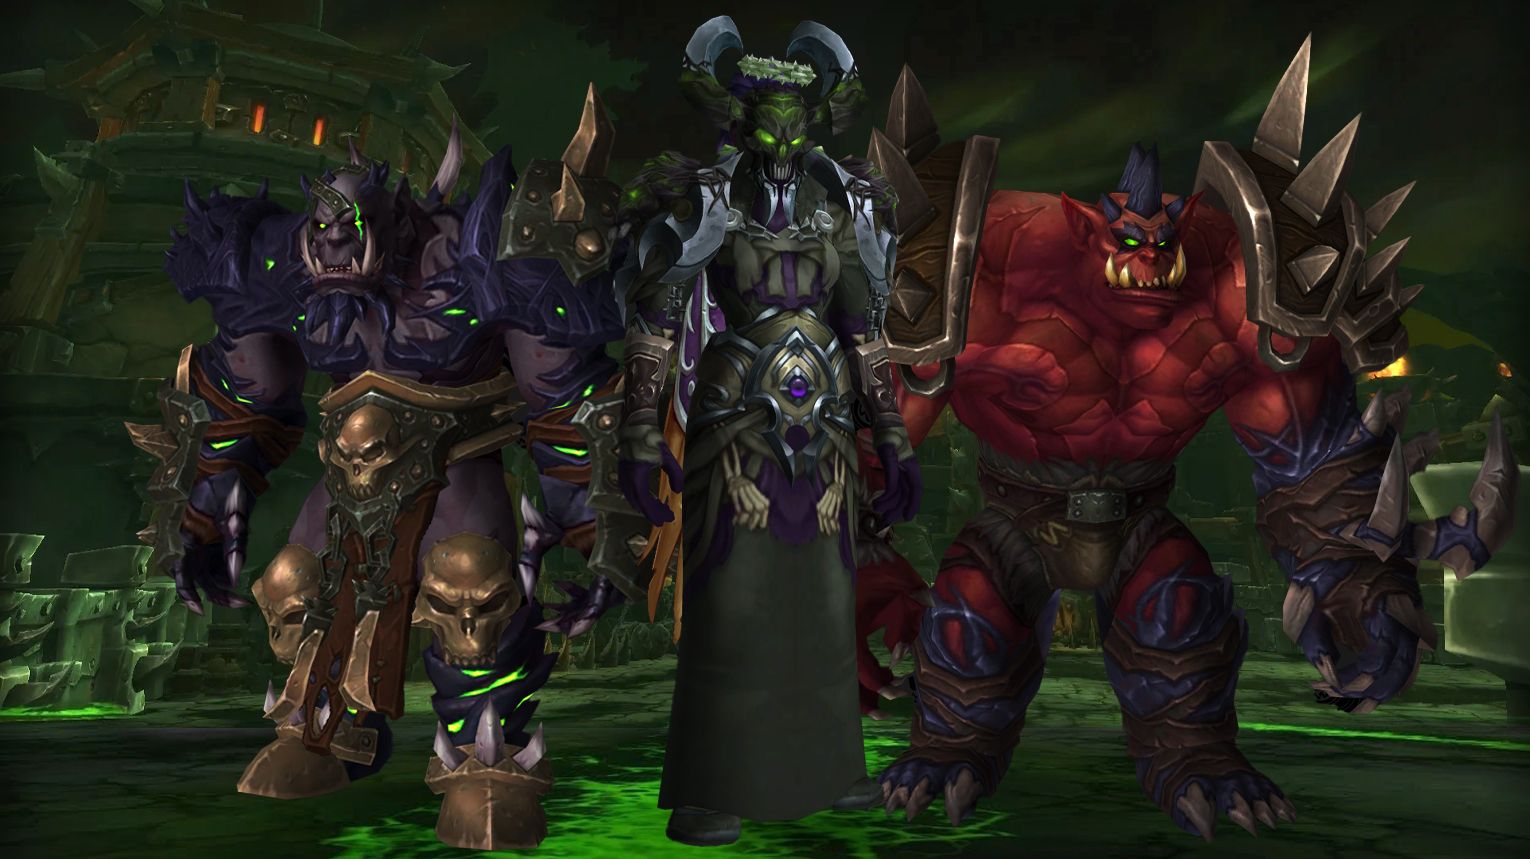
The Hellfire High Council is a 3-boss fight in Hellfire Citadel where you face Dia Darkwhisper, Gurtogg Bloodboil, and Blademaster Jubei’thos simultaneously. Kill them in order: Gurtogg → Jubei’thos → Dia to manage their deadly 30% “Final Hour” abilities. Key mechanics include dodging Fel Blade, kiting Fel Rage, and spreading Mark of the Necromancer before Reap. Use Bloodlust during Gurtogg’s 30% phase to minimize Tainted Blood stacks. On Mythic, assign ranged groups to soak Bloodboil and save raid CDs for Dia’s final phase.
 Preferred Classes:
 Tanks: Strong survivability for Dia’s Nightmare Visage and Gurtogg’s Acidic Wound.
 DPS:
DPS:
- Cleave/AoE for Jubei’thos’s Mirror Images during Windwalk.
- Enrage dispels (e.g., Soothe) for Gurtogg’s Fury.
 Healers: Strong dispels (e.g., Cleanse) for Dia’s Mark of the Necromancer.
 Tips:
Tips:
 Tanking:
- Keep Dia far from others to avoid Void Haze (makes bosses immune).
- Gurtogg’s tank should kite during Fel Rage to drop Acidic Wound stacks.
 DPS:
DPS:
- Focus Gurtogg first; cleave Jubei’thos but avoid over-DoTting Dia.
- Kill Mirror Images quickly during Windwalk.
 Healers:
- Dispels: Prioritize red Mark of the Necromancer or debuffs on tanks.
- Raid CDs: Use during “ultimate” abilities (Wailing Horror, Demolishing Leap).
 Strategy:
- Phase 1 (100–30%):
- Gurtogg: Fel Rage target should kite him 25–30 yards away.
- Jubei’thos: Dodge Fel Blade (watch green arrow).
- Dia: Players with Mark of the Necromancer run out before Reap.
- Phase 2 (<30%):
- Burn Gurtogg fast to minimize Tainted Blood stacks.
- Dia’s Mark spreads to half the raid; dispel aggressively.
 Bloodlust/Drums:
During Gurtogg’s Final Hour (30%) to kill him before Tainted Blood stacks overwhelm.
 Hellfire High Council loot table:
| Type of Armor | Item | Loot type |
| Cloth | Cursed Blood Bracers | Wrist |
| Dia’s Nightmarish Leggings | Legs | |
| Leather | Blood-Tanned Pauldrons | Shoulder |
| Gurtogg’s Discarded Hood | Head | |
| Bloody Berserker’s Bracers | Wrist | |
| Kilt of Self-Reflection | Legs | |
| Plate | Acid-Etched Legplates | Legs |
| Girdle of Savage Resolve | Waist | |
| Any | Spiked Bloodstone Pendant | Amulet |
| Rugged Bloodcaked Drape | Cloak | |
| Windswept Wanderer’s Drape | Cloak | |
| Blazing Demonhilt Sword | 1H Sword | |
| Mindbender’s Flameblade | 1H Sword | |
| Shimmering Voidstone Band | Ring | |
| Desecrated Shadowmoon Insignia | Trinket | |
| Mirror of the Blademaster | Trinket | |
| Fel-Burning Blade | 2H Sword |
Kilrogg Deadeye
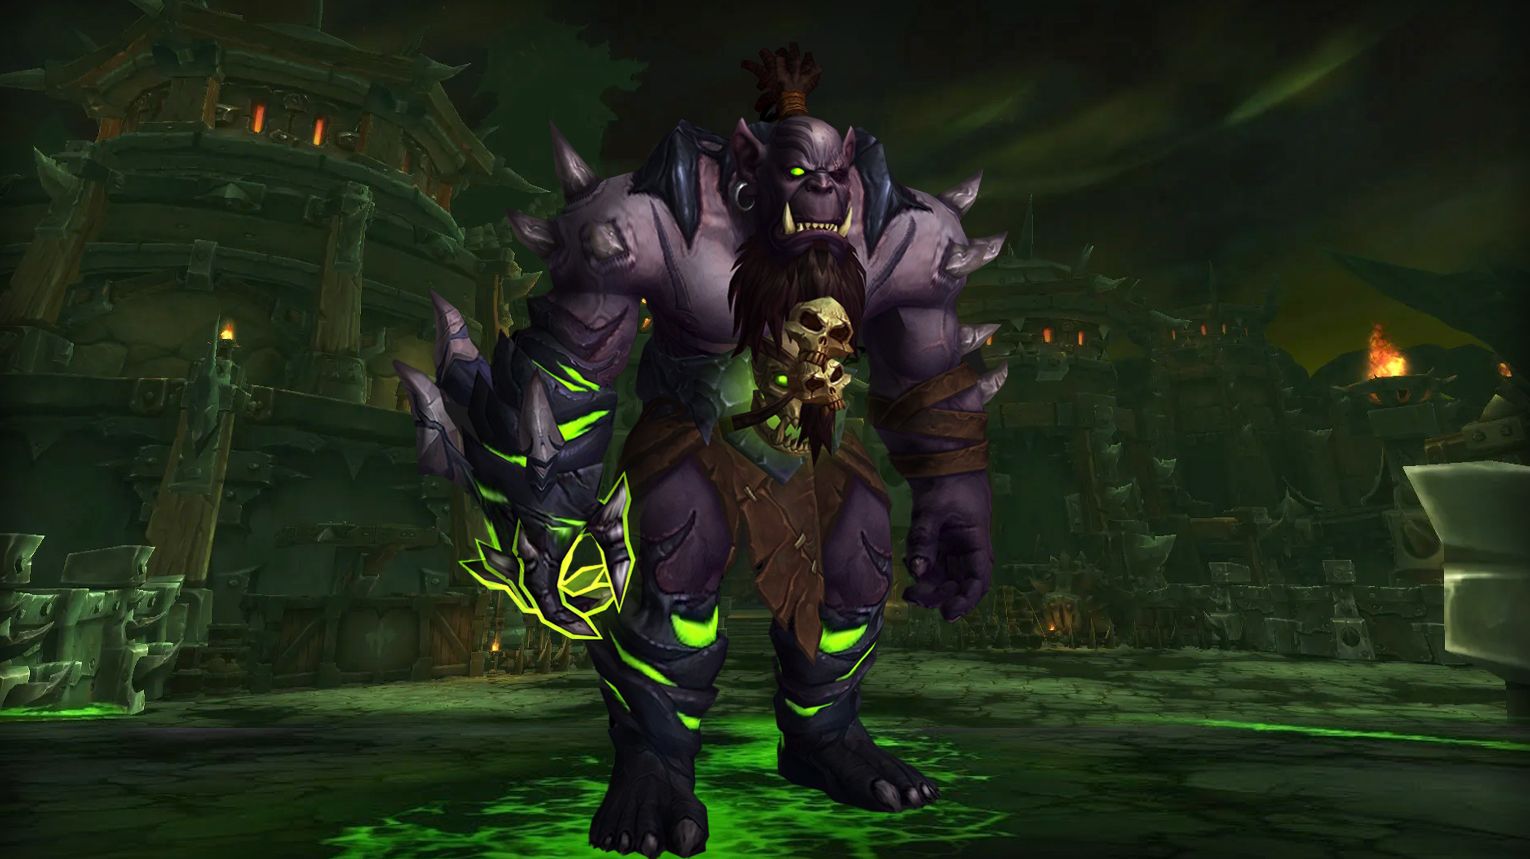
Kilrogg Deadeye is an add-heavy fight in Hellfire Citadel, where players must prioritize killing Salivating Bloodthirsters (before they transform into Hulking Terrors) and Blood Globules (spawned by Heart Seeker). Key mechanics include managing Fel Corruption stacks (avoid Demonic Possession), soaking Vision of Death runes for damage/healing buffs, and mitigating Death Throes raid damage. Tanks must swap on Hulking Terrors and use active mitigation for Shred Armor. Use Bloodlust on pull and assign teams for visions. On Heroic/Mythic, Heart Seeker becomes a line-AOE, and Mythic adds Fel Puddle soaking.
 Preferred Classes:
 Tanks: Classes with strong active mitigation (e.g.,
  Warrior,
  Paladin) to handle Shred Armor.
 DPS:
DPS:
- Ranged: Prioritize killing Blood Globules and Bloodthirsters (e.g.,
 Hunters,
  Mages).
 - Melee: Focus on Hulking Terrors and interrupts (
 Rogues,
  DKs).
DKs).
- Ranged: Prioritize killing Blood Globules and Bloodthirsters (e.g.,
 Healers: Strong AoE healers (e.g.,
  Resto Druid,
  Holy Priest) for Death Throes.
 Tips:
Tips:
- Add Priority:
- Kill Bloodthirsters before they reach fel pools.
- Interrupt Hulking Terrors’ Rending Howl.
- Heart Seeker:
- Targeted players should run far from Kilrogg to delay globule movement.
- Avoid standing in the arrow path (Heroic+).
- Vision of Death:
- Assign 2 teams (2 DPS + 1 healer) to enter runes.
- Maximize stacks of Undying Resolve/Salvation by killing demons in the vision.
- Fel Corruption:
- Tanks swap after each Hulking Terror to manage stacks.
- Healers with Undying Salvation can reduce corruption.
 Strategy:
- Phase 1 (100–40%):
- Focus adds > boss. Use Undying Resolve buffs on Kilrogg.
- Stack for Death Throes (use raid CDs).
- Phase 2 (<40%):
- Heart Seeker targets 2 players (Heroic+). Position carefully.
- Burn boss; ignore adds if possible.
 Bloodlust/Drums:
Opening pull (to maximize early DPS on boss/adds).
 Kilrogg Deadeye loot table:
| Type of Armor | Item | Loot type |
| Cloth | Velvet Bloodweaver Gloves | Hands |
| Ancient Gorestained Wrap | Chest | |
| Leather | Toxicologist’s Treated Boots | Feet |
| Bloodcult Bracers | Wrist | |
| Jungle Flayer’s Chestguard | Chest | |
| Pauldrons of Rapid Coagulation | Shoulder | |
| Plate | Stompers of Brazen Terror | Feet |
| Helm of Precognition | Head | |
| Crimson Throatgrabbers | Hands | |
| Any | Heartseeking Skull Pendant | Amulet |
| Shawl of Sanguinary Ritual | Cloak | |
| Illusion: Mark of the Bleeding Hollow | Illusion | |
| Fallen Warlord’s Mindcarver | Dagger | |
| Ruinous Gutripper | Dagger | |
| Congealed Globule Loop | Ring | |
| Bite of the Bleeding Hollow | Staff | |
| Warlord’s Unseeing Eye | Trinket | |
| Intuition’s Gift | Trinket |
Gorefiend

Gorefiend is a two-phase boss in Hellfire Citadel. In Phase 1, players are sent into his stomach via Shadow of Death to handle adds (DPS kill constructs, healers heal essences, tanks tank spirits). Escaped adds must be managed outside. Phase 2 (Feast of Souls) is a burn phase where Gorefiend takes 100% more damage; the raid soaks Unstable Souls to extend it. Use Bloodlust in Phase 2 for maximum damage. Key mechanics include spreading for Surging Shadows, kiting constructs, and (on Heroic/Mythic) stacking for Shared Fate.
 Preferred Classes:
 Tanks: Strong survivability for Gorebound Spirits (e.g.,
  DKs for self-healing).
 Healers: High throughput (e.g.,
  Holy Priests,
  Resto Druids) for raid-wide damage.
 DPS:
DPS:
- Ranged: Prioritized for killing Corrupted Soul fragments (Mythic) and kiting constructs.
- Melee: Help burst Gorebound Spirits/Constructs.
 Tips:
Tips:
- Phase 1 (Shadow of Death):
- DPS: Focus adds > boss. Dot Shadowy Constructs in stomach.
- Healers: Spread for Surging Shadows; dispel Corrupted Blood (trash).
- Tanks: Swap Gorebound Spirits at 10 Fel Flames stacks.
- Phase 2 (Feast of Souls):
- Stack for healing, soak Unstable Souls with defensives.
- Use Bloodlust + DPS cooldowns here.
- Stomach Exit: Run to the center before Digest expires (40s timer).
 Strategy:
- Add Priority: Gorebound Spirit > Essence > Construct > Gorefiend.
- Positioning:
- Spread 5+ yards to avoid Surging Shadows splash.
- Touch of Doom targets run to edges to drop Doom Wells.
- Heroic/Mythic Adjustments:
- Shared Fate: 3-4 players must stack to break chains.
- Mythic: Kill Corrupted Soul fragments to free stomach players.
 Bloodlust/Drums:
First Feast of Souls phase (~2 minutes in).
 Gorefiend loot table:
| Type of Armor | Item | Loot type |
| Cloth | Cowl of a Thousand Hungers | Head |
| Deathrattle Leggings | Legs | |
| Pantaloons of the Arcanic Conclave | Legs | |
| Pious Leggings | Legs | |
| Leather | Chestguard of Gnawing Desire | Chest |
| Felblade Leggings | Legs | |
| Ferroleather Leggings | Legs | |
| Legwraps of the Hurricane’s Eye | Legs | |
| Oathclaw Leggings | Legs | |
| Leggings of the Living Mountain | Legs | |
| Leggings of the Savage Hunt | Legs | |
| Mitts of Eternal Famishment | Hands | |
| Plate | Demongaze Legplates | Legs |
| Greaves of the Ceaseless Vigil | Legs | |
| Legplates of Iron Wrath | Legs | |
| Ravenous Girdle | Waist | |
| Soulgorged Pauldrons | Shoulder | |
| Any | Choker of Forbidden Indulgence | Amulet |
| Cloak of Insatiable Greed | Cloak | |
| Drape of Gluttony | Cloak | |
| Gibbering Madness | Off-hand | |
| Voracious Souleater | 1H Axe | |
| Serrated Demontooth Ring | Ring | |
| Spur of the Great Devourer | Staff | |
| Unending Hunger | Trinket |
Shadow-Lord Iskar
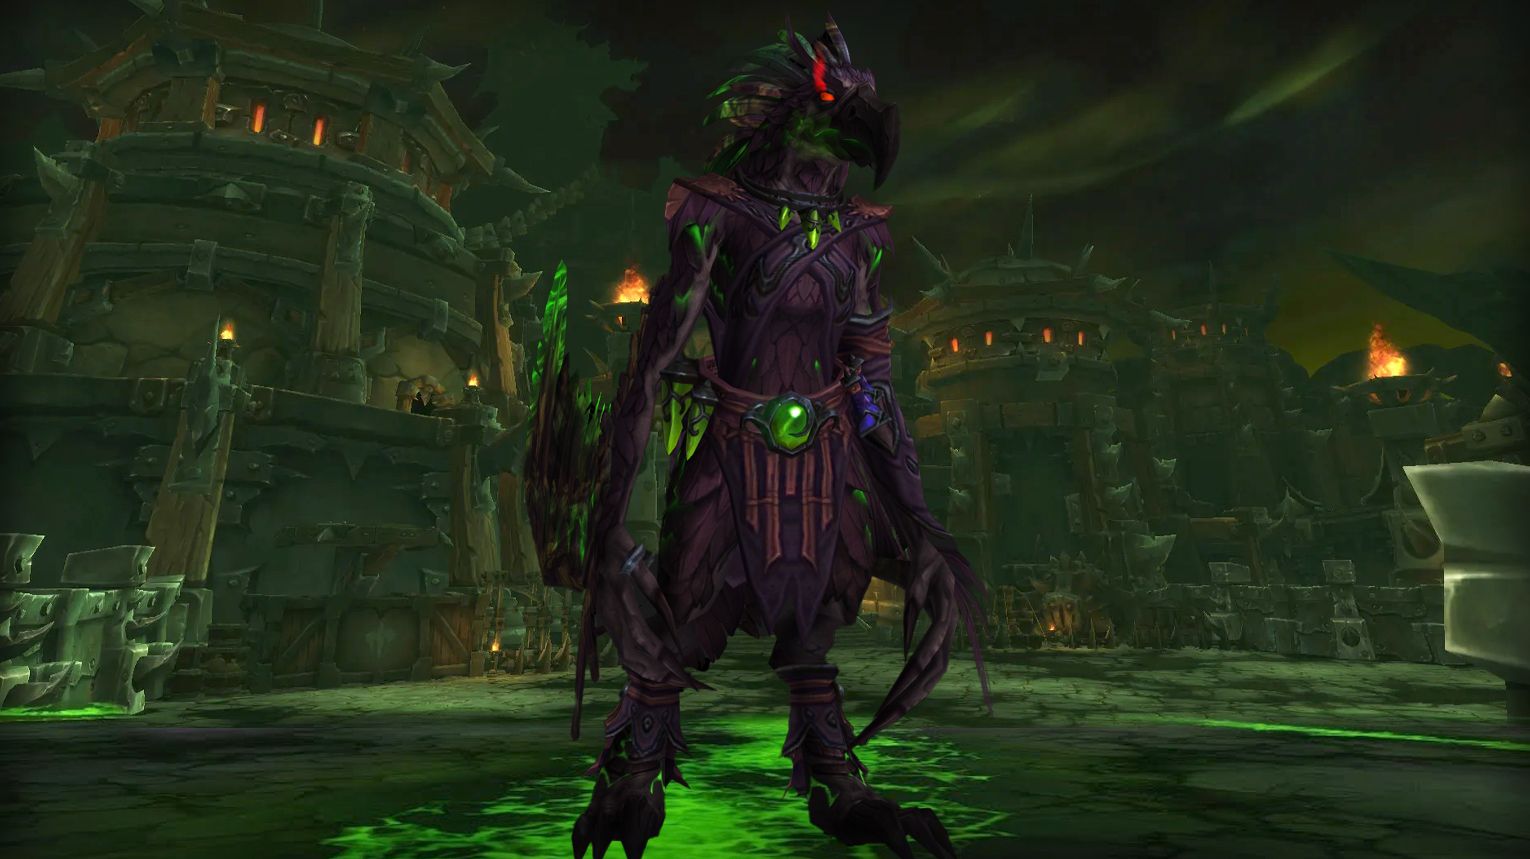
Shadow-Lord Iskar is a mechanics-heavy boss in Hellfire Citadel (WoD) where players must manage the Eye of Anzu to counter illusions. The fight alternates between grounded phases (dodge Fel Chakram, dispel Phantasmal Winds) and add phases (prioritize killing Corrupted Talonpriest). Key mechanics include passing the Eye to interrupt Fel Conduit, dispel Fel Bomb, and (on Mythic) resolve Dark Bindings. Use Bloodlust during the final add phase (20% HP) for a clean kill. Loot includes strong trinkets like Anzu’s Cursed Plume and a battle pet (Corrupted Nest Guardian).
 Preferred Classes:
 Tanks: Classes with strong mobility (e.g.,
  Druid,
  Monk) to handle Fel Chakram kiting.
 Healers:
  Priests (mass dispel utility) and
  Resto Druids (HoTs for Phantasmal Wounds).
 DPS: Ranged with cleave (e.g.,
  Mage,
Mage,  Warlock) for add phases; melee with interrupts (e.g.,
  Rogue,
  Warrior) for Fel Conduit.
 Tips:
Tips:
- Eye of Anzu:
- Use the macro to pass it efficiently:
/target [@mouseover]
/click ExtraActionButton1
/targetlasttarget - Priority for passing: Tanks > Healers > Melee > Ranged.
- Use the macro to pass it efficiently:
- Fel Chakram: Stand at assigned markers (tank/melee/ranged) to minimize raid damage.
- Add Phases: Kill Corrupted Talonpriest first (dispels Fel Bomb), then Shadowfel Warden (interrupt Fel Conduit).
 Strategy:
- Grounded Phase:
- Stack loosely to avoid Fel Incineration beams.
- Use Eye to dispel Phantasmal Winds (prevents knockbacks).
- Adds Phase:
- 70%: Focus Talonpriest → Outcasts.
- 45%: Interrupt Warden’s Fel Conduit while killing Talonpriest.
- 20%: Tank holding Eye avoids Phantasmal Corruption from Fel Raven.
 Bloodlust/Drums:
During the final adds phase (20%) to burn down high-priority adds quickly.
 Shadow-Lord Iskar loot table:
| Type of Armor | Item | Loot type |
| Cloth | Raiment of Divine Clarity | Chest |
| Amice of Phantasmal Power | Shoulder | |
| Leather | Belt of Misconceived Loyalty | Waist |
| Helm of Imagined Horrors | Head | |
| Surefooted Chain Treads | Feet | |
| Vestment of Illusory Might | Chest | |
| Coif of Untrue Sight | Head | |
| Plate | Chestguard of Ill Fate | Chest |
| Wristplate of the Wretched | Wrist | |
| Any | Corrupted Talonguard Pendant | Amulet |
| Cloak of Desperate Temerity | Cloak | |
| Corrupted Nest Guardian | Battle Pet | |
| Shadowrend Talonblade | 1H Sword | |
| Band of Enthralling Delusion | Ring | |
| Filigreed Loop of Zealotry | Ring | |
| Ring of Foul Temptation | Ring | |
| Unblinking Gaze of Sethe | Trinket | |
| Anzu’s Cursed Plume | Trinket | |
| Deceiver’s Felbeak Wand | Wand |
Socrethar the Eternal
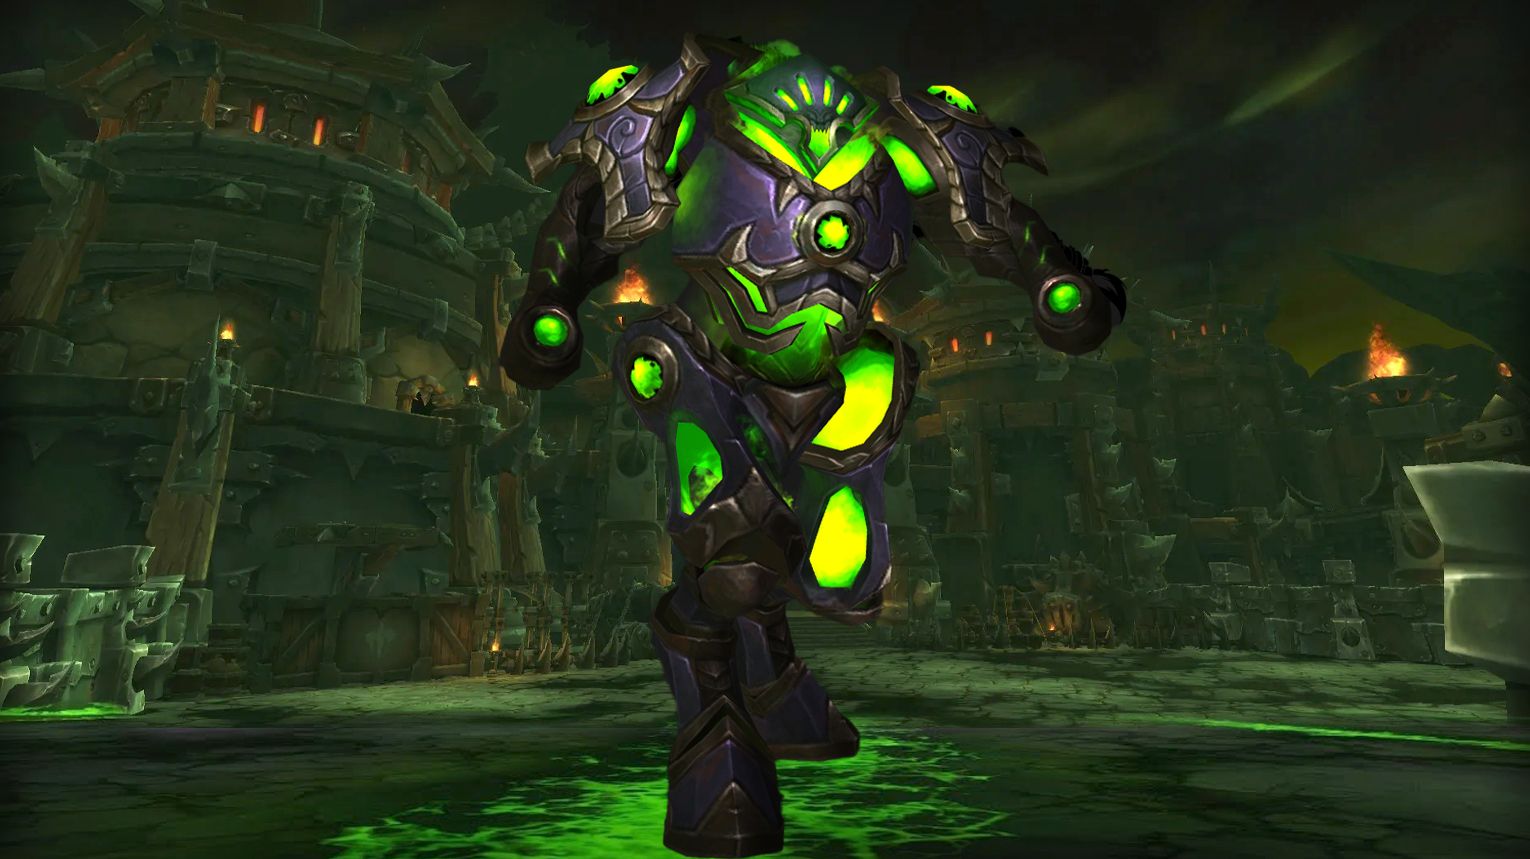
Socrethar is a two-phase boss in Hellfire Citadel. Phase 1 focuses on damaging the Soulbound Construct while managing Shattered Defenses (split stacks via stacking) and avoiding Fel Prisons/Felblaze Residue. In Phase 2, a player pilots the Construct to fight Socrethar, interrupting Exert Dominance while killing adds (Dominators first). Use Bloodlust in Phase 2 for maximum Construct damage. On Mythic, dodge Apocalyptic Felburst and kite/trap Soulstalkers.
 Preferred Classes:
 Tanks:
- 2–3 tanks (3 recommended for Mythic to manage Shattered Defenses).
- One tank pilots the Construct in Phase 2 (preferably a
 DK/
DK/  Warrior for mobility).
 DPS:
DPS:
- Ranged:
 Hunters/
  Mages for kiting Haunting Souls and bursting Dominators.
 - Melee:
 Rogues/
  DKs for interrupts (Exert Dominance).
- Ranged:
 Healers: Strong AoE healers (
 Holy Priest,
  Resto Druid) for Reverberating Blow/Apocalypse.
 Tips:
Tips:
- Phase 1:
- Stack for Reverberating Blow to split Shattered Defenses evenly.
- Tanks with high stacks use cooldowns.
- Kite Felblaze Charge away from the raid.
- Phase 2:
- Construct Pilot: Drop Fel Prisons near portals to trap Haunting Souls.
- Interrupts: Assign 3+ players to rotate Exert Dominance interrupts.
- Add Priority: Dominators > Shadowcallers > Haunting Souls.
 Strategy:
- Phase 1:
- Tanks swap after 2–3 Reverberating Blow stacks.
- Dodge Fel Prisons; explode Volatile Fel Orbs away from the group.
- Phase 2:
- Construct Pilot: Use Felblaze Charge to slow adds; spam Reverberating Blow on Socrethar.
- Raid: Stack mid, kite Haunting Souls over Felblaze Residue.
- Burn Dominators ASAP to remove Fel Barrier.
 Bloodlust/Drums:
Phase 1 to burn the Construct quickly (ideal for weaker groups).
 Socrethar the Eternal loot table:
| Type of Armor | Item | Loot type |
| Cloth | Deathrattle Gloves | Hands |
| Gloves of the Arcanic Conclave | Hands | |
| Pious Handwraps | Hands | |
| Pristine Man’ari Cuffs | Wrist | |
| Leather | Felblade Gloves | Hands |
| Ferroleather Gloves | Hands | |
| Fistwraps of the Hurricane’s Eye | Hands | |
| Oathclaw Gauntlets | Hands | |
| Tunic of the Soulbinder | Chest | |
| Chain Wristguards of the Stricken | Wrist | |
| Gauntlets of the Living Mountain | Hands | |
| Gloves of the Savage Hunt | Hands | |
| Plate | Casque of Foul Concentration | Head |
| Demongaze Gauntlets | Hands | |
| Gauntlets of Iron Wrath | Hands | |
| Gauntlets of the Ceaseless Vigil | Hands | |
| Any | Contained Fel Orb Locket | Amulet |
| Drape of Beckoned Souls | Cloak | |
| Soulbinder’s Greatcloak | Cloak | |
| Felcrystal Impaler | Crossbow | |
| Felstricken Sha’tari Crystalsword | 1H Sword | |
| Saber of Twisted Virtue | 1H Sword | |
| Seal of the Traitorous Councilor | Ring | |
| Soulwarped Tower Shield | Shield | |
| Demonic Phylactery | Trinket | |
| Soul Capacitor | Trinket |
Fel Lord Zakuun
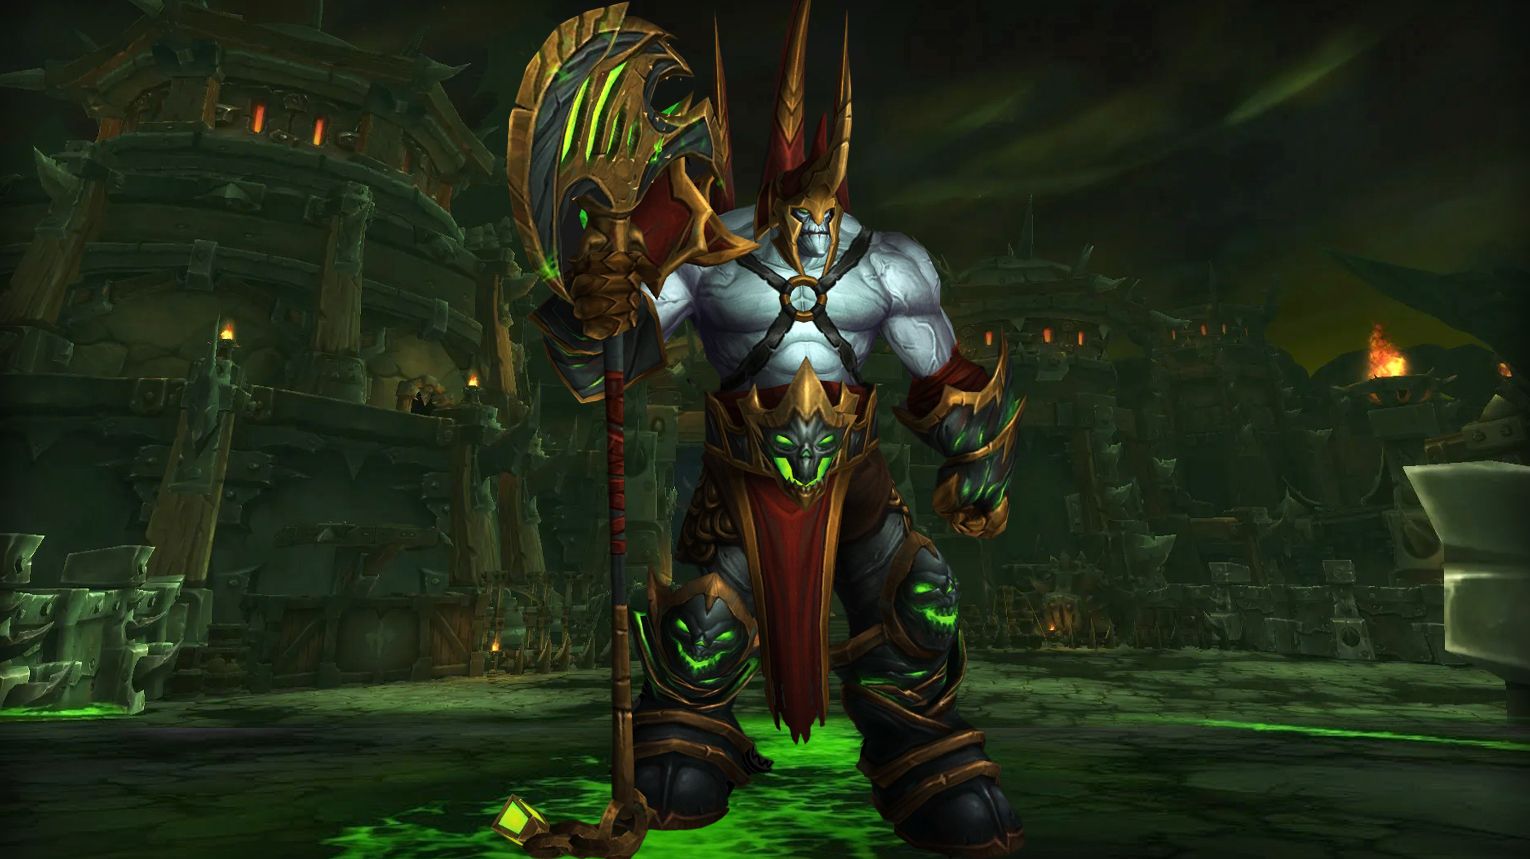
Fel Lord Zakuun is the first boss of the Destructor’s Rise wing of Hellfire Citadel LFR in the 6.2 Warlords of Draenor expansion. He is accessible from the Nexus of Souls by following the corridor east to Grommash’s Torment or after defeating Shadow-Lord Iskar by taking the door in the northeast corner of Iskar’s Clutch.
 Preferred Classes:
 Tanks: High-mobility classes (e.g.,
  Druid,
  Monk) to dodge Shadow Realm mechanics.
 Healers: Strong single-target healers (
 Paladin,
  Disc Priest) for Befouled and tank survival.
 DPS: Ranged preferred for Seed of Destruction positioning; melee must manage Befouled carefully.
 Tips:
Tips:
- Rumbling Fissures: Soak all but one (farthest from boss) to control Fel Crystal spawns.
- Latent Energy: Avoid Wake of Destruction waves if debuffed; intercept them if not.
- Shadow Realm: Tanks must dodge Wake/Ring of Destruction; failure triggers Unleashed Energy (raid damage).
- Seed of Destruction: Spread out; stand still after debuff expires to avoid self-inflicted waves.
 Strategy:
- Phase 1 (Armed):
- Tanks swap on Soul Cleave; banished tank dodges Shadow Realm mechanics.
- Assign groups to soak Rumbling Fissures (markers help).
- Position boss away from Fel Crystals to ease Wake of Destruction interception.
- Phase 2 (Disarmed):
- Tanks stack tightly to split Heavy Handed damage.
- Use raid/tank CDs for Fel Explosion and Seed of Destruction.
- Enrage:
- Lust/Bloodlust here. Prioritize killing boss before Latent Energy overwhelms raid.
 Bloodlust/Drums:
During Enrage Phase (30% HP) for maximum burst.
 Fel Lord Zakuun loot table:
| Type of Armor | Item | Loot type |
| Cloth | Bloody Dagger-Heeled Pumps | Feet |
| Sash of Unending Anguish | Waist | |
| Leather | Leggings of Eternal Terror | Legs |
| Manacles of the Multitudes | Wrist | |
| Girdle of the Legion General | Waist | |
| Ringmail of Madness Accordant | Chest | |
| Plate | Legguards of Grievous Consonances | Legs |
| Any | Chain of Lidless Eyes | Amulet |
| Choker of Whispered Promises | Amulet | |
| Cloak of Hideous Unity | Cloak | |
| Mindscythe of the Legion | Fist Weapon | |
| Demonblade Eviscerator | Fist Weapon | |
| Zakuun’s Signet of Command | Ring | |
| Discordant Chorus | Trinket | |
| Hellrender | 2H Axe |
Xhul’horac
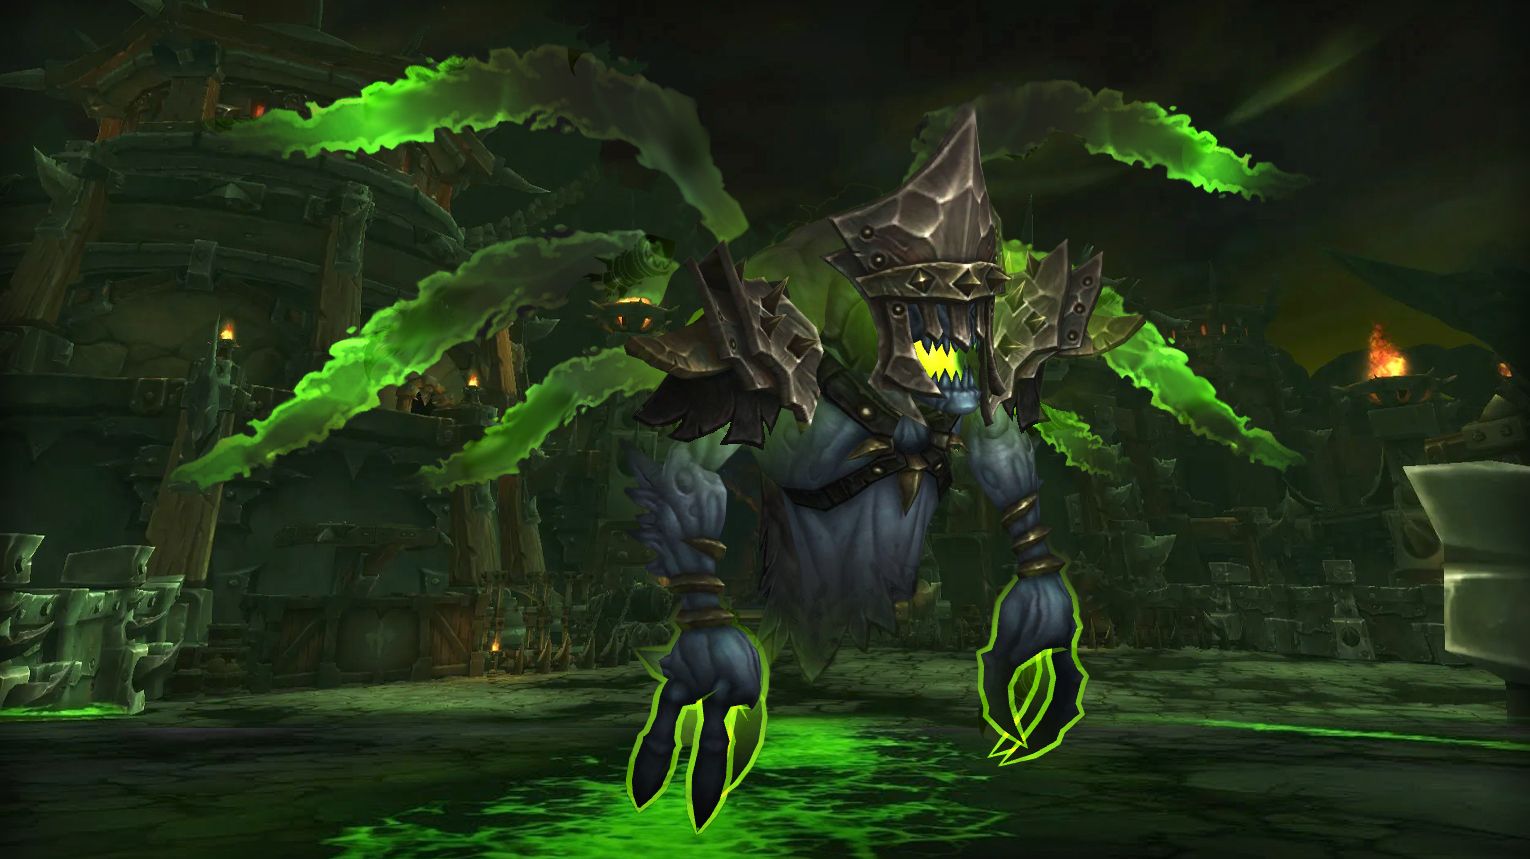
Xhul’horac alternates between Fel (Fire) and Void (Shadow) phases, summoning adds like Wild Pyromaniacs and Unstable Voidfiends that must die first. Avoid mixing Feltouched (Fire) and Voidtouched (Shadow) debuffs to prevent deadly Shadowfel Annihilation explosions. Tanks swap for Fel Strike/Void Strike**, while DPS prioritize adds. In the final phase (<20%), use Bloodlust to burn the boss before Overwhelming Chaos stacks wipe the raid. Key mechanics include spreading for Void Surge and collapsing Black Holes safely.
 Preferred Classes:
 Tanks: Strong active mitigation (e.g.,
  Paladin,
  DK) to handle heavy hits.
 DPS:
DPS:
- High burst for adds (Wild Pyromaniacs/Voidfiends).
- Classes with stuns/interrupts (
 Rogues,
  Mages) for Pyromaniacs.
 - Ranged for spreading during Void Glare.
 Healers: Strong raid cooldowns (
 Disc Priest,
  Holy Pala) for Black Hole/burst phases.
 Tips:
Tips:
- Debuff Management:
- Feltouched (Fire) and Voidtouched (Shadow) last 15s. Avoid taking the opposite damage type.
- Use Shadowfel Annihilation strategically to clear fire/void patches.
- Add Priority: Wild Pyromaniacs > Unstable Voidfiends > Boss adds (Akkelion/Omnus) > Boss.
- Movement:
- Spread for Void Surge/stack for Fel Surge.
- Dodge Volatile Voidstep (purple swirls).
 Strategy:
- Phase 1 (Fel):
- Tank boss near Fel Portal. Stack raid behind.
- Interrupt/stun Pyromaniacs. Kill Vanguard Akkelion to push phase.
- Phase 2 (Void):
- Tank boss near Void Portal. Spread loosely.
- Assign players to collapse Black Holes (use immunities).
- Phase 3 (Hybrid):
- Tank swaps: One tank takes Fel Strike, the other Void Strike.
- Clear middle area with controlled Shadowfel Annihilations.
- Phase 4 (Final):
- Lust at 20%. Focus boss; ignore remaining adds.
- Minimize Shadowfel Annihilations (overlaps with Overwhelming Chaos).
 Bloodlust/Drums:
Final phase (<20%) to burn boss before Overwhelming Chaos stacks overwhelm.
 Xhul’horac loot table:
| Type of Armor | Item | Loot type |
| Cloth | Countenance of the Revenant | Head |
| Mantle of the Arcanic Conclave | Shoulder | |
| Deathrattle Shoulderpads | Shoulder | |
| Pious Mantle | Shoulder | |
| Leather | Hood of Unknowable Secrets | Head |
| Felblade Spaulders | Shoulder | |
| Mantle of the Hurricane’s Eye | Shoulder | |
| Oathclaw Mantle | Shoulder | |
| Ferroleather Spaulders | Shoulder | |
| Sinister Felborne Helmet | Head | |
| Pauldrons of the Living Mountain | Shoulder | |
| Pauldrons of the Savage Hunt | Shoulder | |
| Plate | Breach-Scarred Wristplates | Wrist |
| Shoulderplates of the Ceaseless Vigil | Shoulder | |
| Pauldrons of Iron Wrath | Shoulder | |
| Demongaze Pauldrons | Shoulder | |
| Any | Vial of Immiscible Liquid | Amulet |
| Void Lord’s Wizened Cloak | Cloak | |
| Hammer of Wicked Infusion | 1H Mace | |
| Fiendsbreath Warmace | 1H Mace | |
| Portal Key Signet | Ring | |
| Loop of Beckoned Shadows | Ring | |
| Voidcore Greatstaff | Staff | |
| Unstable Felshadow Emulsion | Trinket |
Tyrant Velhari
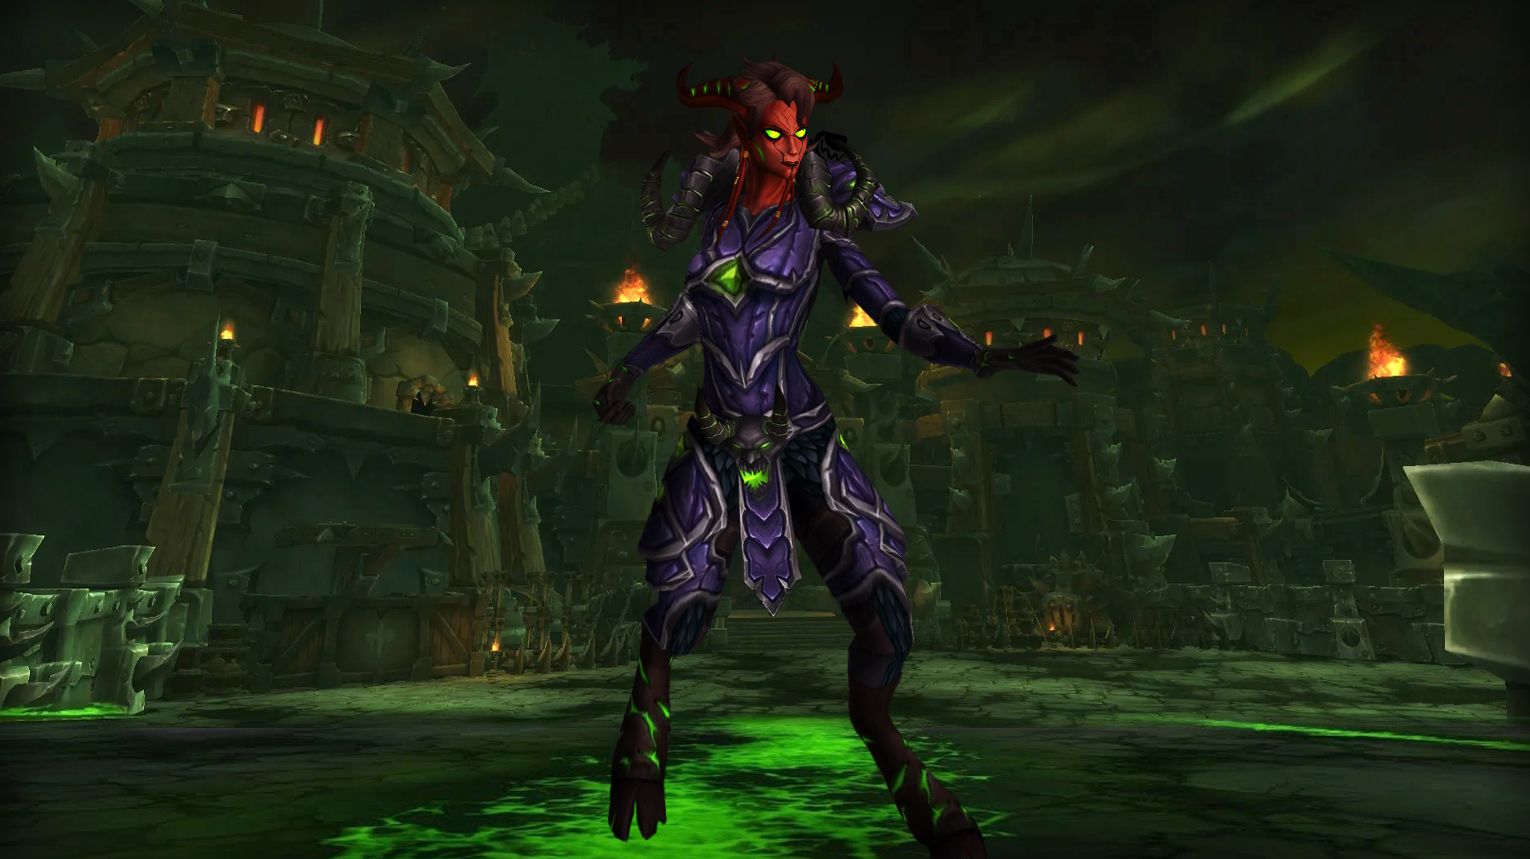
Tyrant Velhari is a three-phase boss in Hellfire Citadel (WoD 6.2), each with a unique Aura (movement damage, heal cap, or increased damage). She gains Corrupt Power via phase-specific abilities (e.g., Annihilating Strike, Tainted Shadows) and spends it on deadly spells like Infernal Tempest. Adds spawn at 90%, 60%, and 30% health—prioritize killing the Harbinger (interrupt heals) and Sovereign (removes damage reduction). Key mechanics: Stack for Edict of Condemnation, heal Touch of Harm absorbs, and minimize movement in Phase 1. Use Bloodlust in Phase 3 (or Phase 2 on Mythic) for a clean burn.
 Preferred Classes:
 Tanks: Strong active mitigation (e.g.,
  DKs,
DKs,  Paladins) for Seal of Decay swaps.
 Healers:
  Priests (dispels),
  Druids (HoTs for Aura of Contempt),
  Paladins (burst healing for Touch of Harm).
 DPS:
DPS:
- Phase 1: Ranged favored (minimize movement for Aura of Oppression).
- Phase 2/3: Strong cleave/AoE for adds (Harbinger/Sovereign).
- Interrupts: Critical for Harbinger’s Mending (assign Mages, Rogues, etc.).
 Tips:
Tips:
- Phase 1 (Oppression):
- Annihilating Strike: Targeted players move to open areas to avoid hitting others.
- Infernal Tempest: Minimize movement—let two Searing Blazes overlap before stepping out.
- Push to 70% before 2-minute mark to avoid overlapping Infernal Tempest + Edict of Condemnation.
- Phase 2 (Contempt):
- Font of Corruption targets stack in pre-assigned spots for efficient healing.
- Kill Harbinger ASAP—interrupt Harbinger’s Mending (use stuns/dispels if needed).
- Phase 3 (Malice):
- Bulwark of the Tyrant: Tanks/players drop Despoiled Ground in a controlled area; kite boss gradually.
- Kill Sovereign immediately to remove Sovereign’s Ward (90% damage reduction on Velhari).
 Strategy:
 Tanks: Swap at 2-3 stacks of Seal of Decay. Face Enforcer away from raid.
 DPS: Prioritize adds in P2/P3. Save CDs for Harbinger/Sovereign.
 Healers:
- Touch of Harm: Heal through the absorb shield; only dispel if player will die.
- Use raid CDs (e.g., Power Word: Barrier) for Edict of Condemnation.
 Bloodlust/Drums:
Use in Phase 3 to burn Sovereign and Velhari.
 Tyrant Velhari loot table:
| Type of Armor | Item | Loot type |
| Cloth | Contemptuous Wristguards | Wrist |
| Satin Gloves of Injustice | Hands | |
| Leather | Oppressor’s Merciless Treads | Feet |
| Haughty Chain Legguards | Legs | |
| Pauldrons of Contempt | Shoulder | |
| Spiked Throatcrusher Boots | Feet | |
| Plate | Gauntlets of Derision | Hands |
| Any | Choker of Sneering Superiority | Amulet |
| Loathful Encrusted Band | Ring | |
| Pompous Ceremonial Ring | Ring | |
| Fallen Defender of Argus | Shield | |
| Malicious Censer | Trinket | |
| Tyrant’s Decree | Trinket | |
| Maul of Tyranny | 2H Mace | |
| Warhammer of Arrogance | 2H Mace |
Mannoroth
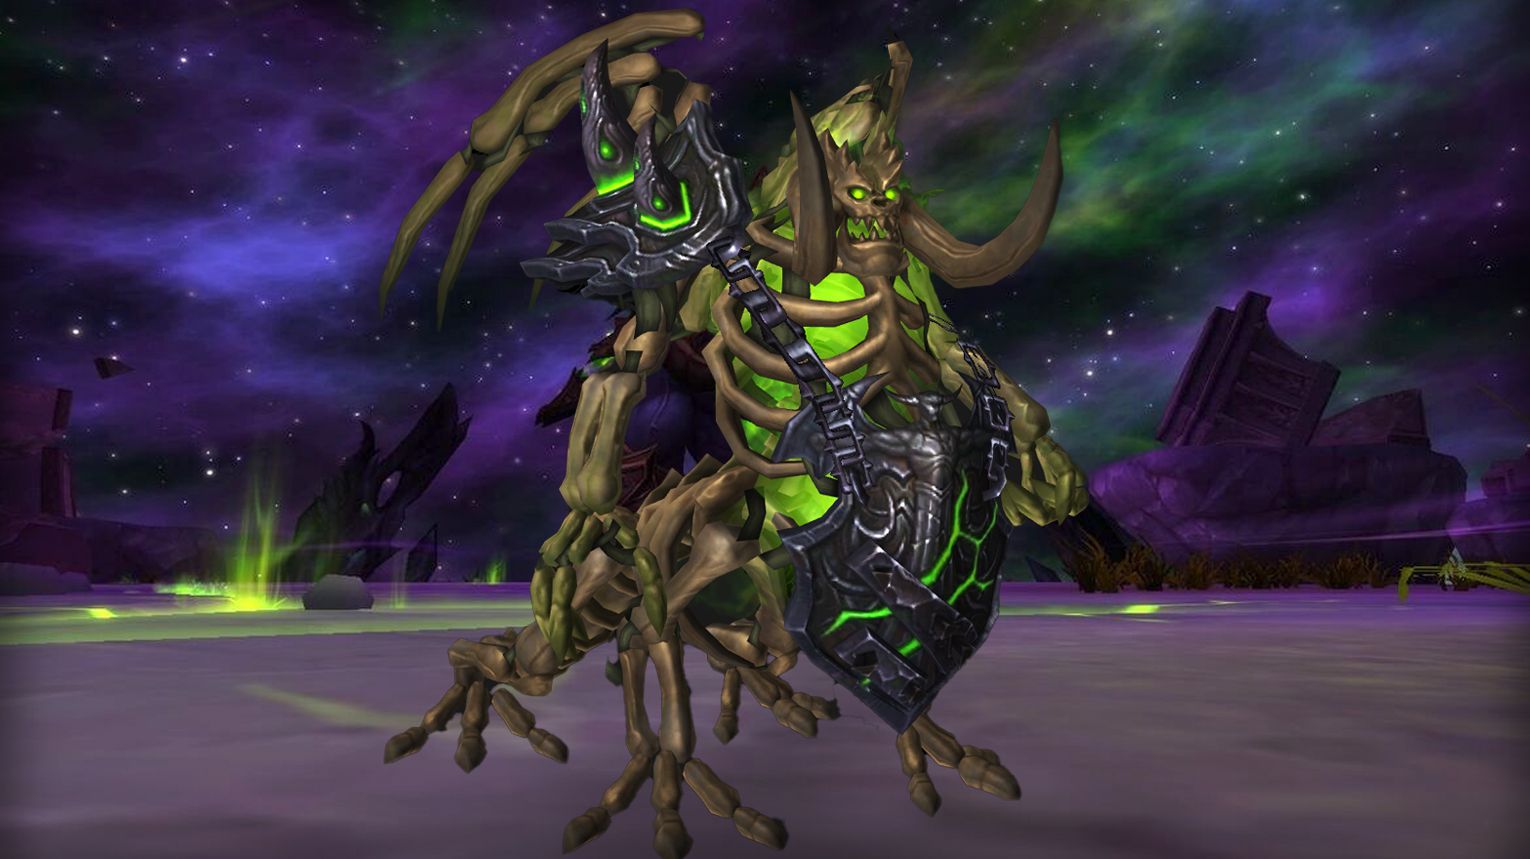
Mannoroth is a multi-phase fight in Hellfire Citadel where players first kill Fel Iron Summoners to stop demon adds (Doom Lords, Fel Imps, Dread Infernals). In Phase 2, Gul’dan resurrects Mannoroth, who uses Glaive Combos (tank swaps required) and Fel Hellstorm (avoidable AoE). Phase 3 adds Shadowforce, pushing players back—strafe to avoid falling. Final Phase 4 empowers all abilities; use Bloodlust here and manage Gazing Shadows (soak in pairs). Key mechanics: prioritize adds, dodge ground effects, and position carefully for knockbacks.
 Preferred Classes:
 Tanks: Strong active mitigation (e.g.,
  Paladin,
  DK) for Glaive Combo.
 Healers: Strong AoE healing (
 Druid,
  Holy Priest) for raid-wide damage.
 DPS:
DPS:
- Ranged: Prioritize Infernals/Imps (
 Hunters,
  Mages).
 - Melee: Burst for Doom Lords/Imps (
 Rogues,
  Warriors).
- Ranged: Prioritize Infernals/Imps (
 Tips:
Tips:
- Phase 1: Kill Summoners in order: Red (Doom Lords) → Green (Infernals) → Purple (Imps).
- Mark of Doom: Run out, stand in Blood of Mannoroth to trigger safe explosion.
- Shadowforce (Phase 3+): Strafe to avoid being knocked off; use speed boosts after debuff ends.
- Gazing Shadows (Phase 4): Soak Empowered Mannoroth’s Gaze in pairs to minimize pool size.
 Strategy:
 Tanks:
- Face Mannoroth toward green Fel Spire (Phases 2–3) to avoid knockback.
- Swap during Glaive Combo (1st tank takes Thrust + Blast, 2nd takes 2nd Thrust).
 DPS:
DPS:
- Priority: Adds > Boss. Interrupt Shadow Bolt Volley (Doom Lords).
- Stack for Fel Imp-losion to group Imps.
 Healers:
- Focus tanks during Glaive Combo.
- Dispel Curse of the Legion near tanks to spawn Doom Lords safely.
 Bloodlust/Drums:
After first Empowered Shadowforce (to maximize DPS uptime).
 Mannoroth loot table:
| Type of Armor | Item | Loot type |
| Cloth | Pious Raiment | Chest |
| Robe of the Arcanic Conclave | Chest | |
| Deathrattle Robe | Chest | |
| Leggings of the Iron Summoner | Legs | |
| Leather | Oathclaw Vestment | Chest |
| Empowered Demonskin Kilt | Legs | |
| Robe of the Hurricane’s Eye | Chest | |
| Felblade Chestguard | Chest | |
| Ferroleather Chestguard | Chest | |
| Hauberk of the Savage Hunt | Chest | |
| Bracers of Fel Empowerment | Wrist | |
| Robe of the Living Mountain | Chest | |
| Plate | Annihilan’s Waistplate | Waist |
| Cuirass of the Ceaseless Vigil | Chest | |
| Breastplate of Iron Wrath | Chest | |
| Demongaze Chestplate | Chest | |
| Any | Locket of Unholy Reconstitution | Amulet |
| Cursed Demonbone Longbow | Bow | |
| Cloak of Tangible Dread | Cloak | |
| Fang of the Pit | Dagger | |
| Thumping Demonheart Fetish | Off-hand | |
| Xu’tenash, Glaive of Ruin | Polearm | |
| Mannoroth’s Calcified Eye | Ring | |
| Prophecy of Fear | Trinket | |
| Empty Drinking Horn | Trinket |
Archimonde

Archimonde is the final boss of Hellfire Citadel (WoD 6.2), featuring three phases with escalating mechanics like Doomfire kiting, Shackled Torment (break tethers carefully), and Twisting Nether realm portals. Prioritize killing adds (Doomfire Spirits, Infernals) over the boss. Use Bloodlust in the final phase (sub-25%) to burn Infernals and Archimonde. Tanks must swap on Death Brand/Shadow Blast, while healers mitigate raid-wide damage from Unleashed Torment. Heroic adds Wrought Chaos beams and Living Shadows. Loot includes the Grove Warden mount (pre-Legion) and Eredar-themed transmog.
 Preferred Classes:
 Tanks: Strong cooldowns for Death Brand/Shadow Blast (e.g.,
  DKs,
DKs,  Paladins).
 Melee DPS: High burst for Overfiends/Infernals (
 Warriors,
  Rogues).
 Ranged DPS: Mobile for Doomfire kiting (
 Hunters,
  Mages).
 Healers: Raid-wide cooldowns for Unleashed Torment (
 Druids,
  Holy Priests).
 Tips:
Tips:
- Doomfire: Kite spirits away; stack for Allure of Flames baiting.
- Shadowfel Burst: Spread before launch, stack to split damage.
- Shackled Torment: Break tethers one by one to avoid raid wipe.
- Twisting Nether: Assign 3+ players (incl. healer) to kill Shadowed Netherwalker.
- Infernals (Phase 3): Burst down, CC to prevent Eternal Flame healing.
 Strategy:
- Priority Targets: Doomfire Spirits > Hellfire Deathcallers > Overfiends > Archimonde.
- Phase 1: Tank boss near edge; rotate Desecrate pillars for Light of the Naaru.
- Phase 2: Stack loosely for Wrought Chaos (Heroic); interrupt Overfiends.
- Phase 3: Spread >6yd for Demonic Feedback; focus Infernals during Bloodlust.
 Bloodlust/Drums:
Final phase (sub-25%) during Infernal spawns.
 Archimonde loot table:
| Type of Armor | Item | Loot type |
| Cloth | Demon Prince’s Ascendant Crown | Head |
| Demonbuckle Sash of Argus | Waist | |
| Mantle of the Eredar Lord | Shoulder | |
| Leather | Felfinger Runegloves | Hands |
| Waistwrap of Banishment | Waist | |
| Eredar Fel-Chain Gloves | Hands | |
| Plate | Treads of the Defiler | Feet |
| Doomcrier’s Shoulderplates | Shoulder | |
| Any | Felsteel Annihilator | Mount |
| Choker of the Great Betrayer | Amulet | |
| World Ender’s Gorget | Amulet | |
| Cloak of Incendiary Wrath | Cloak | |
| Gavel of the Eredar | 1H Mace | |
| Edict of Argus | Staff | |
| Talisman of the Master Tracker | Trinket | |
| Bleeding Hollow Toxin Vessel | Trinket | |
| Core of the Primal Elements | Trinket | |
| Etching of Sargeras | Trinket | |
| Fragment of the Dark Star | Trinket | |
| Libram of Vindication | Trinket | |
| Reaper’s Harvest | Trinket | |
| Repudiation of War | Trinket | |
| Sacred Draenic Incense | Trinket | |
| Seed of Creation | Trinket | |
| Tome of Shifting Words | Trinket | |
| Worldbreaker’s Resolve | Trinket | |
| Calamity’s Edge | 2H Sword |
Hellfire Citadel Achievements List
| Achievement | Requirement |
| Bastion of Shadows | Defeat the bosses in the upper reaches of Hellfire Citadel. |
| Destructor’s Rise | Kill the bosses in the upper reaches of Hellfire Citadel. |
| Halls of Blood | Slay the bosses in the depths of Hellfire Citadel. |
| Hellbreach | Defeat the bosses at the entrance to Hellfire Citadel. |
| The Black Gate | Kill Archimonde. |
| Ahead of the Curve: The Black Gate | Slay Archimonde on Heroic difficulty or higher, before the release of patch 7.0. |
| Cutting Edge: The Black Gate | Defeat Archimonde on Mythic difficulty, before the release of patch 7.0. |
| Mythic: Archimonde | Kill Archimonde on Mythic difficulty. |
| Mythic: Archimonde Guild Run | Slay Archimonde on Mythic difficulty, while in a guild group. |
| Realm First! Archimonde | First guild on the realm to defeat Archimonde on Mythic difficulty while in a guild group. |
| Mythic: Fel Lord Zakuun | Defeat Fel Lord Zakuun on Mythic difficulty. |
| Mythic: Gorefiend | Kill Gorefiend on Mythic difficulty. |
| Mythic: Hellfire Assault | Complete the Hellfire Assault encounter on Mythic difficulty. |
| Mythic: Hellfire High Council | Slay the Hellfire High Council on Mythic difficulty. |
| Mythic: Iron Reaver | Defeat the Iron Reaver on Mythic difficulty. |
| Mythic: Kilrogg Deadeye | Kill Kilrogg Deadeye on Mythic difficulty. |
| Mythic: Kormrok | Defeat Kormrok on Mythic difficulty. |
| Mythic: Mannoroth | Kill Mannoroth on Mythic difficulty. |
| Mythic: Shadow-Lord Iskar | Slay Shadow-Lord Iskar on Mythic difficulty. |
| Mythic: Socrethar the Eternal | Defeat Socrethar the Eternal on Mythic difficulty. |
| Mythic: Tyrant Velhari | Kill Tyrant Velhari on Mythic difficulty. |
| Mythic: Xhul’horac | Slay Xhul’horac on Mythic difficulty. |
| Extreme Makeover: Fel Edition | Collect any class armor set from Hellfire Citadel. |
| Glory of the Hellfire Raider | Complete the Hellfire Citadel raid achievements. |
| A Race Against Slime | Defeat Kilrogg Deadeye with Ariok surviving the encounter on Normal difficulty or higher. |
| Bad Manner(oth) | Kill a Doom Lord using Empowered Felseeker, then defeat Mannoroth on Normal difficulty or higher. |
| Don’t Fear the Reaper | Slay all 3 members of the Hellfire High Council within 10 seconds of each other on Normal difficulty or higher. |
| Echoes of Doomfire | Defeat Archimonde with Doomfire still active on Normal difficulty or higher. |
| Get In My Belly! | Kill Gorefiend after killing the Soul of the Crone on Normal difficulty or higher. |
| I’m a Soul Man | Slay Socrethar the Eternal after killing 20 Haunting Souls within 10 seconds on Normal difficulty or higher. |
| Nearly Indestructible | Complete the Hellfire Assault encounter while keeping the Hellfire Cannons above 90% health on Normal difficulty or higher. |
| Non-Lethal Enforcer | Defeat Tyrant Velhari without killing the Ancient Enforcer on Normal difficulty or higher. |
| Pro Toss | Kill Shadow-Lord Iskar without anyone holding the Eye of Anzu for more than 5 seconds in a row, on Normal difficulty or higher. |
| This Land Was Green and Good Until… | Slay Fel Lord Zakuun without absorbing any Rumbling Fissures on Normal difficulty or higher. |
| Turning the Tide | Kill 10 Hellfire Guardians, then defeat the Iron Reaver on Normal difficulty or higher. |
| Waves Came Crashing Down All Around | Defeat Kormrok without taking damage from any of the waves on Normal difficulty or higher. |
| You Gotta Keep ’em Separated | Kill Xhul’horac without triggering any Shadowfel Annihilations on Normal difficulty or higher. |

