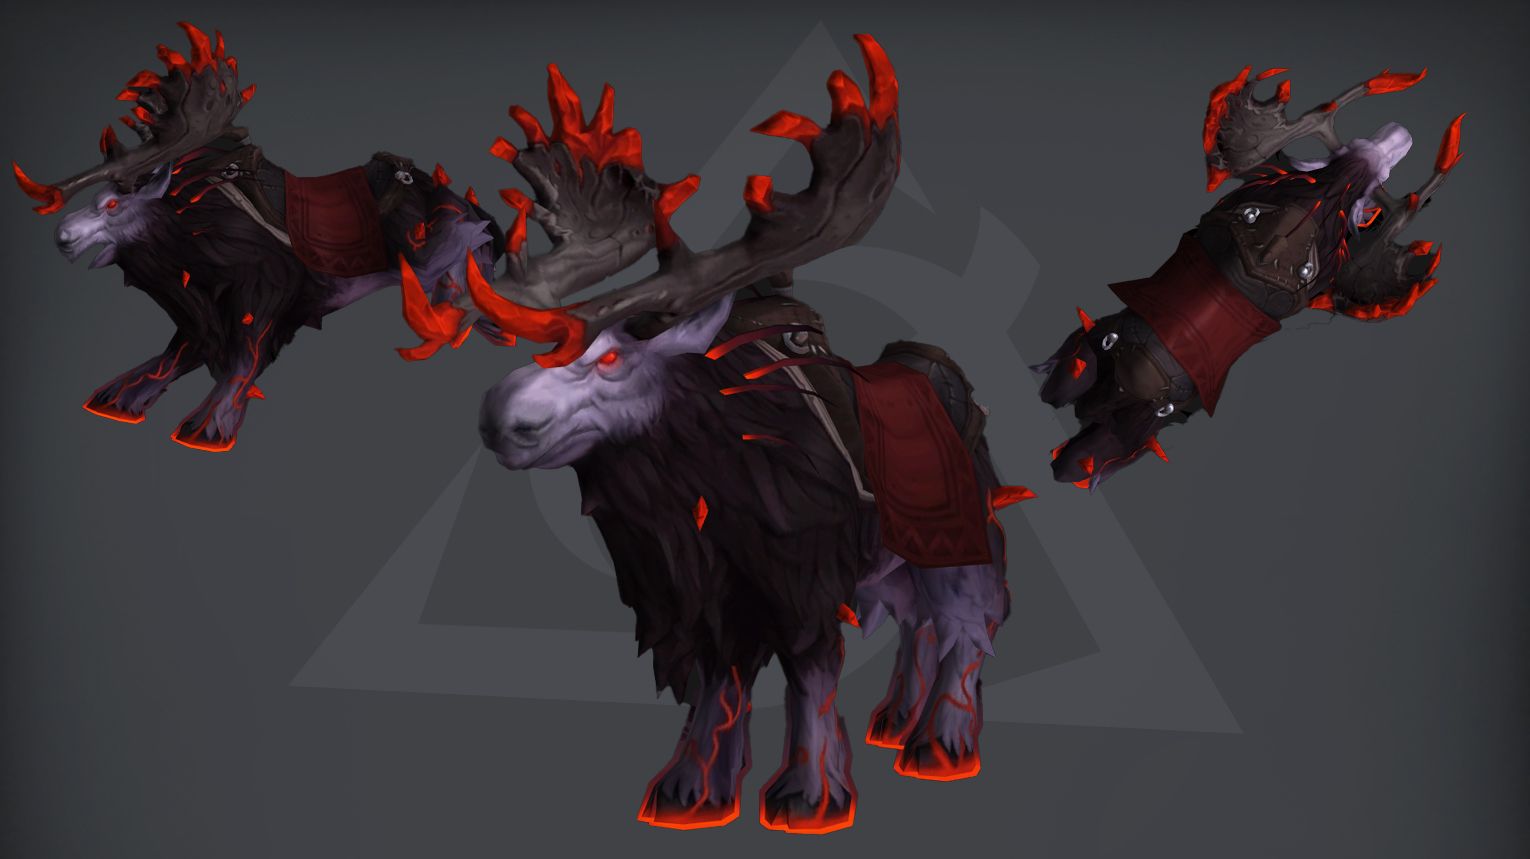
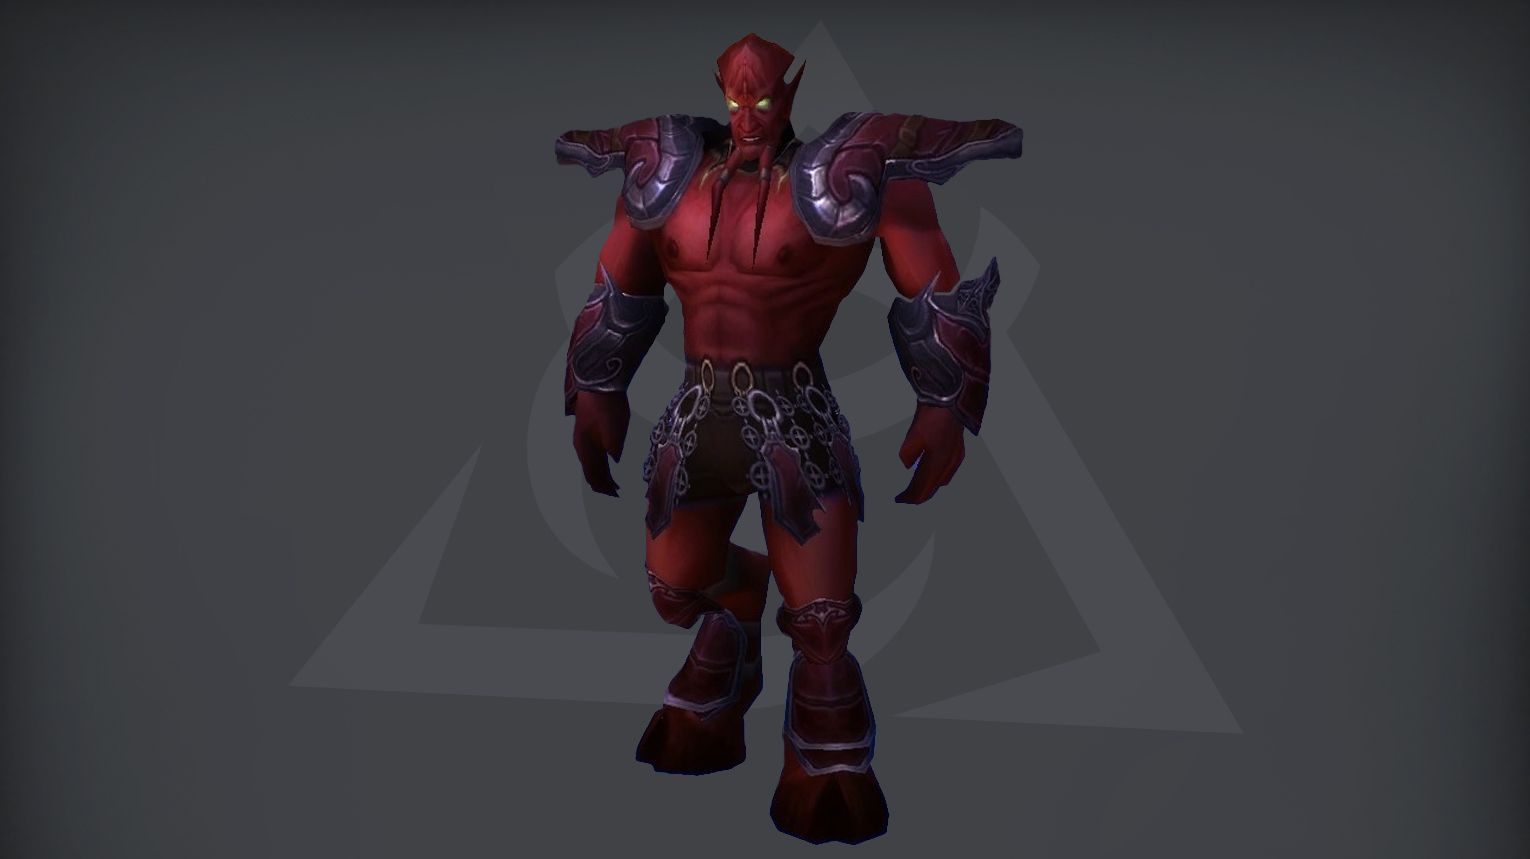
The Nighthold, the third raid in World of Warcraft: Legion, opened on January 17th, 2017, for US servers and January 18th, 2017, for EU servers. It remains a great place to get transmogs, mounts, and collectibles. Located in Suramar, this grand palace features ten bosses, including Gul’dan, and offers unique armor sets, weapons, and achievements.
In this guide, we’ll cover:
- Nighthold location
- Bosses and their rewards
- Available mounts, weapons, and transmogs
- Achievements you can earn
- Can you solo Nighthold?
If you want the strongest items available, stop grinding old content and jump into the newest raid. Buy WoW raid carry at Gamingcy and get BIS gear fast and hassle-free. Elite EU and US teams handle the raid in 1–2 hours. Runs happen every hour, so you can start when it works for you.
Whether you’re farming cosmetics, want to check the raid location, or challenge yourself solo, this guide will help you make the most of the Nighthold in WoW Retail.
Nighthold Entrance and Subregions
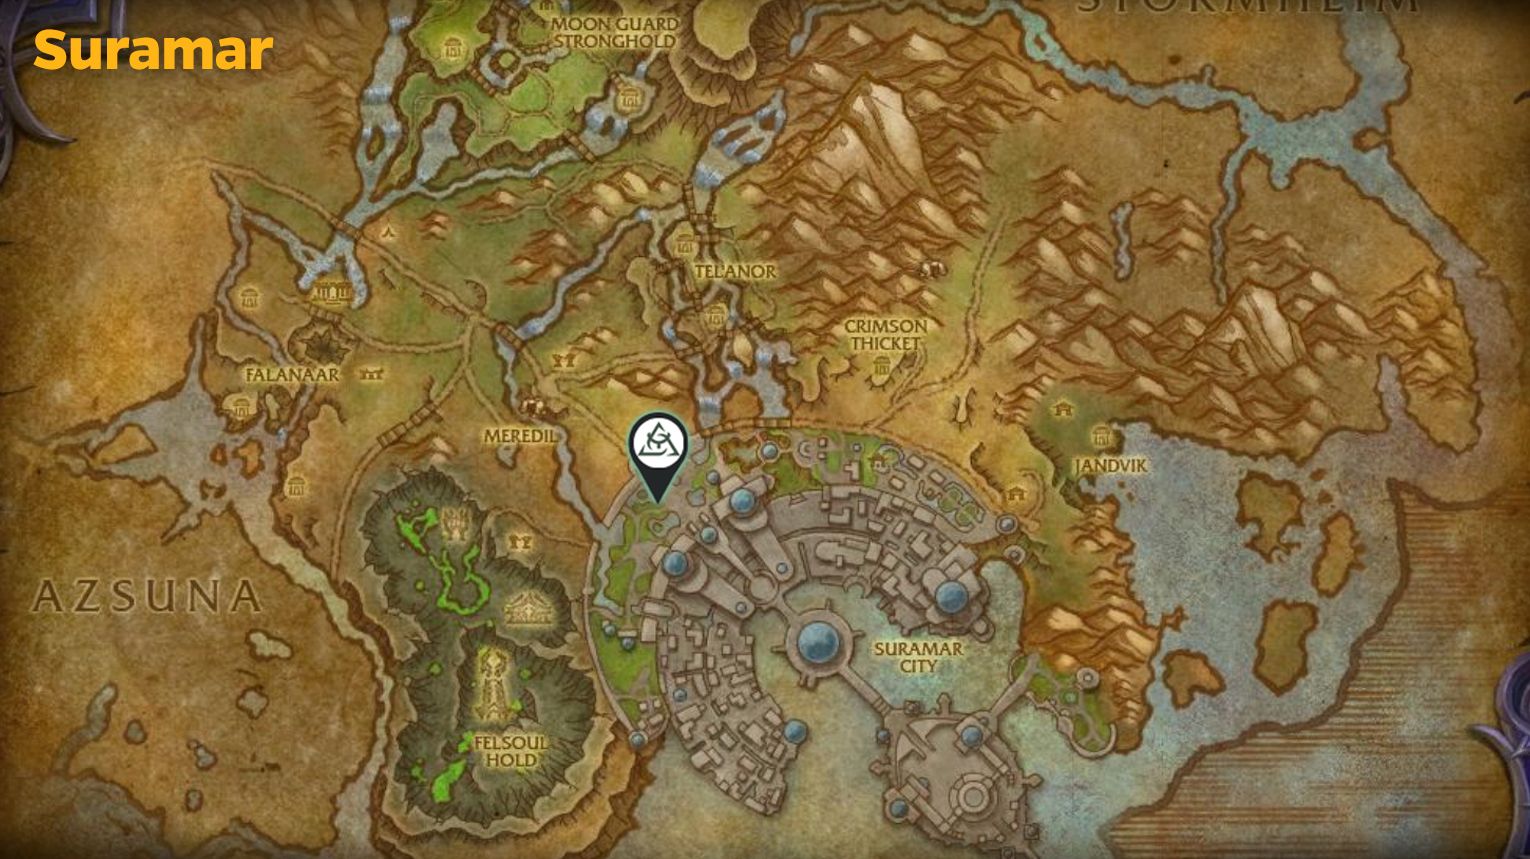
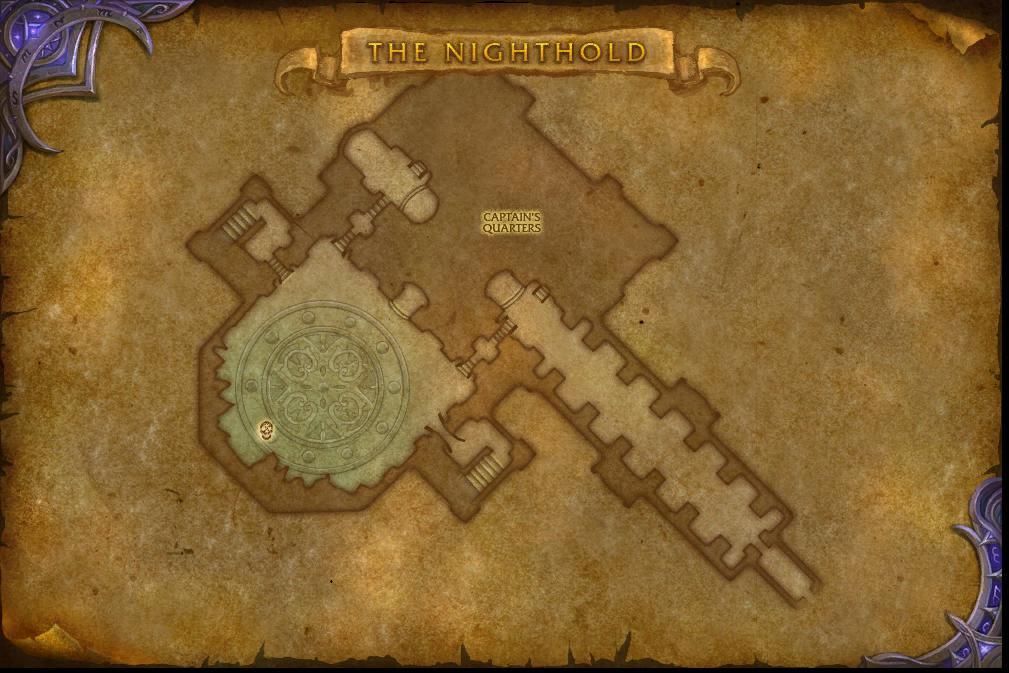
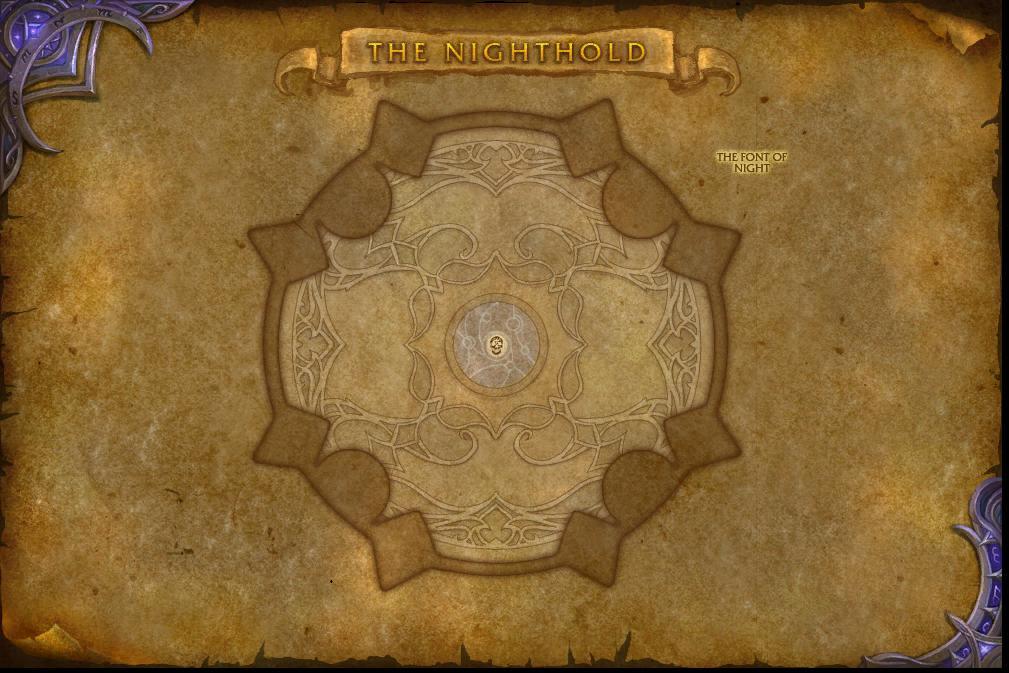
The Nighthold is located in the Suramar zone in World of Warcraft: Legion. To reach it, travel to Suramar, which can be accessed via Dalaran in the Broken Isles. From there, head to the northern part of Suramar City, near the Nightwell. The entrance to The Nighthold is at the base of the grand palace, marked by a large, ornate doorway. Follow the path, avoid or defeat any enemies, and you’ll arrive at the raid entrance. Walk through the massive gates to begin your exploration of the raid.
Inside, you’ll progress through different sections as you fight your way to Gul’dan.
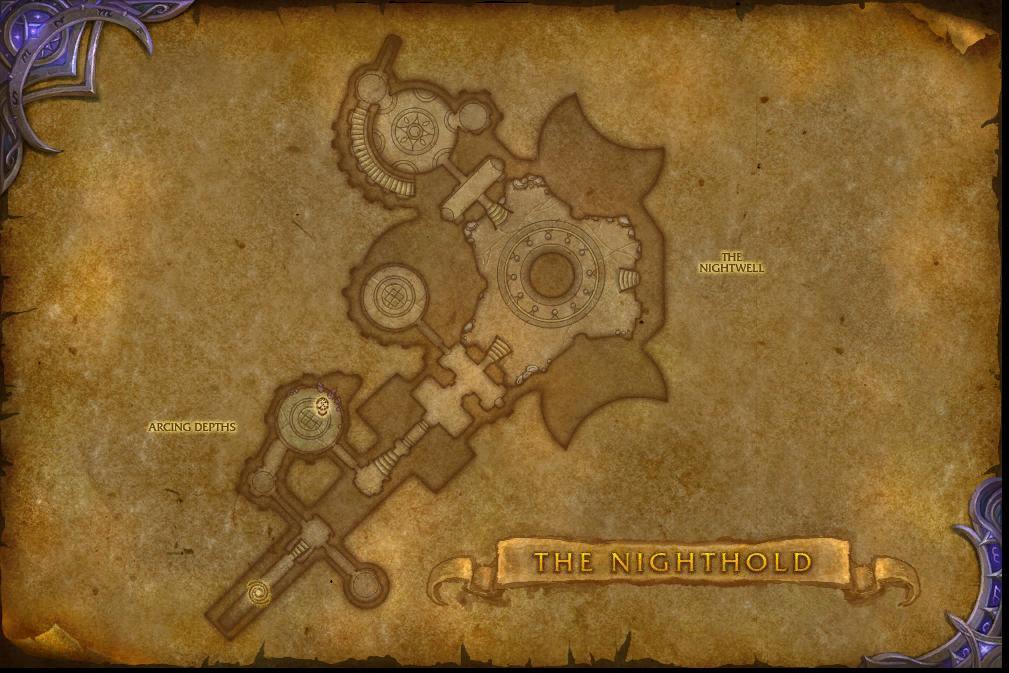
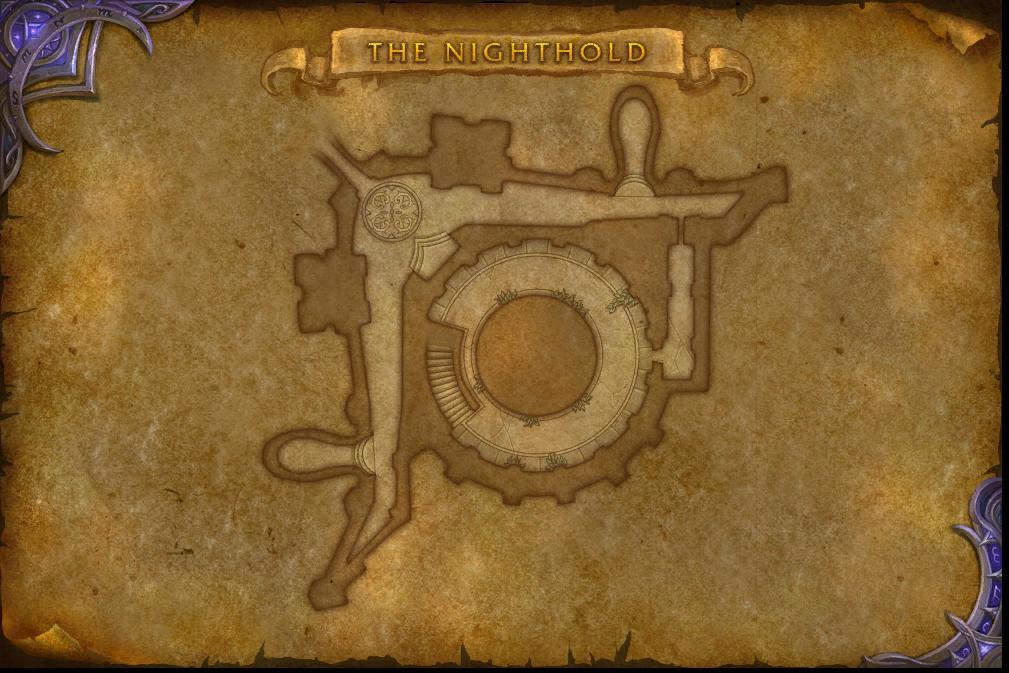
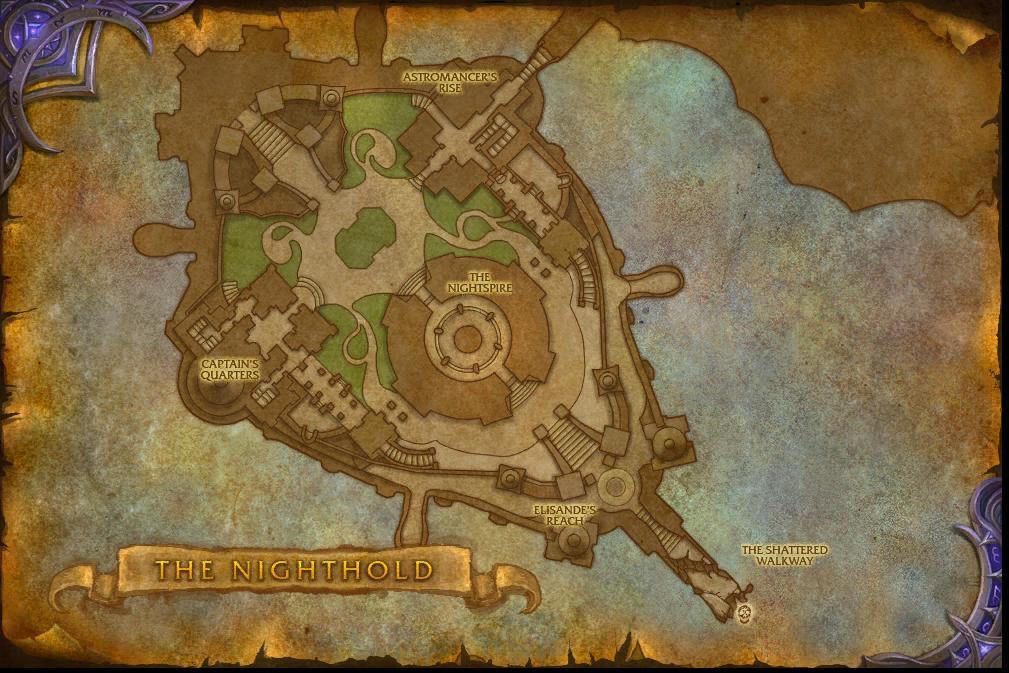
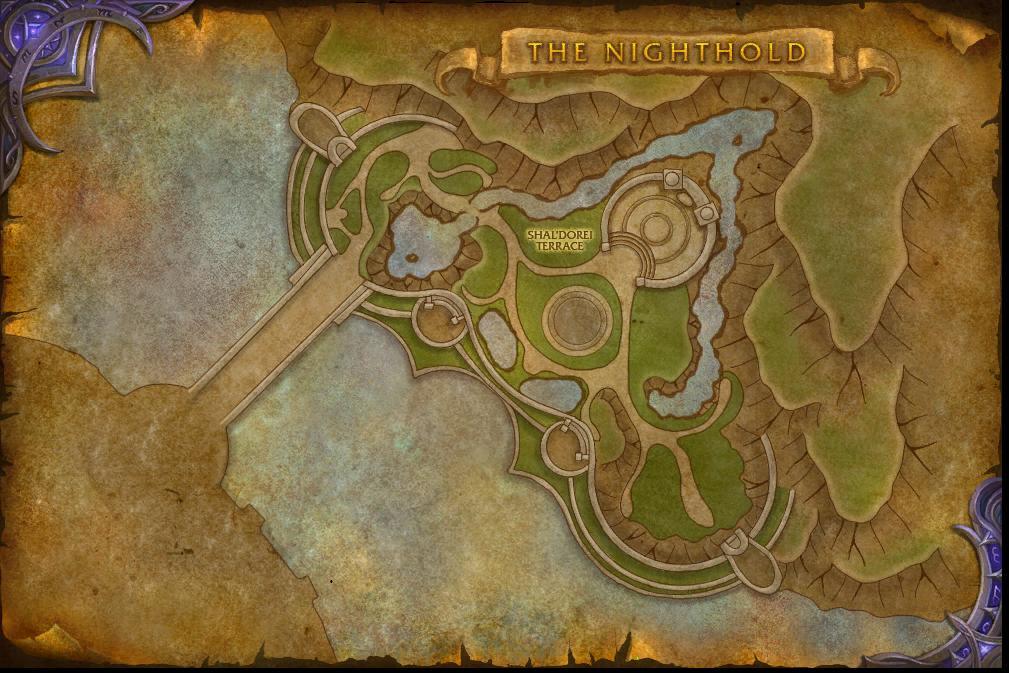
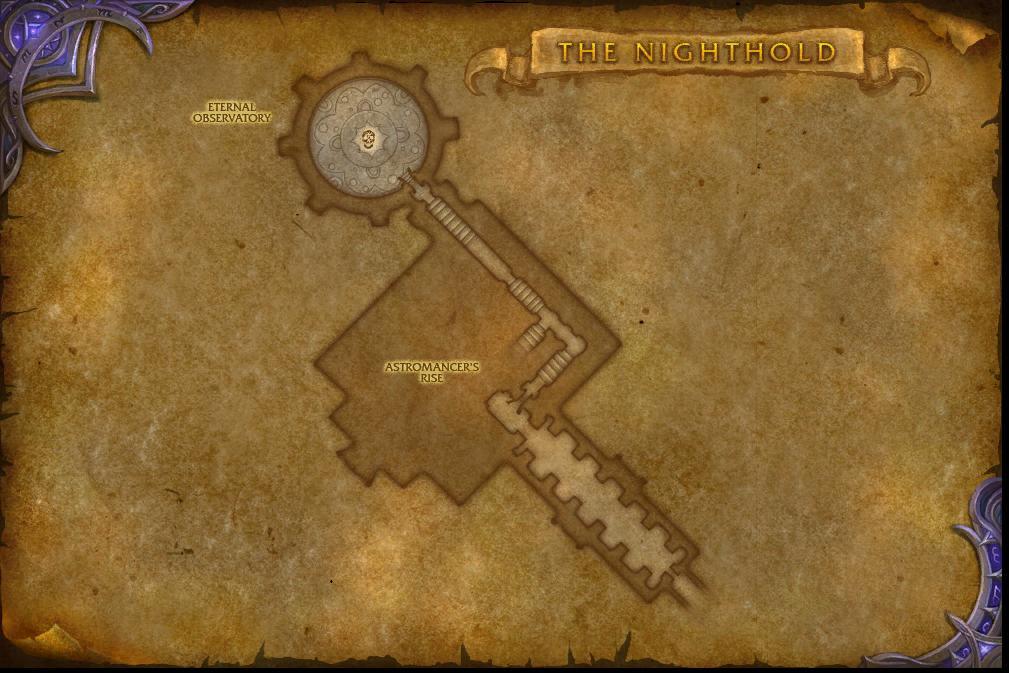
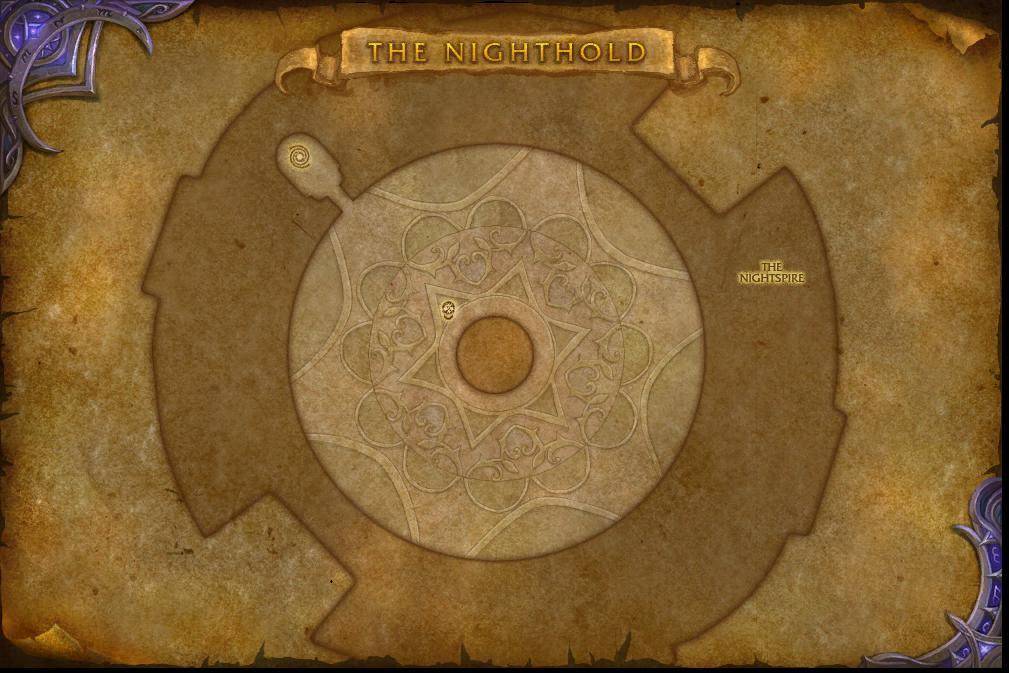
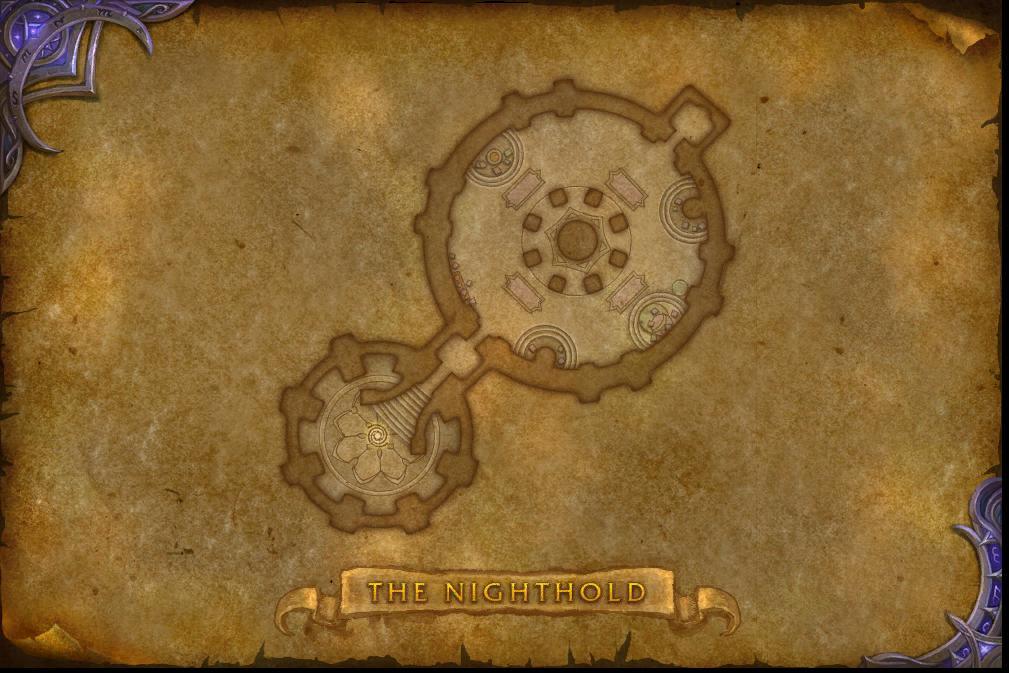
The Nighthold has the following subregions (check the gallery below):
- The Nightwell,
- Arcing Depths,
- The Nighthold,
- Shal’Dorei Terrace,
- Captain’s Quarters,
- Astromancer’s Rise,
- The Nightspire,
- Elisande’s Quarters,
- The Font of Night.
Each section has its own challenges and bosses, which we’ll briefly overview below.
Nighthold Collectibles: Mounts, Pets, Transmogs
| Collectible | Source (% drop rate) | Obtainable / Not Obtainable |
| Nighthold Tier Sets | ||
| Defiled Reins | Glory of the Legion Raider | Yes |
| Fiendish Hellfire Core | Gul’dan (1%) | Yes |
| Living Infernal Core | Gul’dan (1%) | Yes |
| Golden Hearthstone Card: Lord Jaraxxus | The Demon Within (1%) | Yes |
| Skull of Corruption | The Demon Within (1%) | Yes |
Nighthold Bosses Overview

The Nighthold is a grand palace raid in World of Warcraft: Legion, where players confront Gul’dan and his minions in Suramar. This raid includes ten bosses, each connected to the enchanting and mysterious themes of the Nightborne culture. From Skorpyron, a giant scorpion-like creation, to Krosus, a huge demonic beast that destroys bridges, the battles are diverse and demanding. Encounters like Spellblade Aluriel need careful teamwork, while Star Augur Etraeus challenges players with cosmic abilities. The final fight against Gul’dan is a dramatic confrontation in the Twisting Nether, where players must prevent him from releasing the Burning Legion’s full might.
Below, we’ll review the Nighthold boss fights and their loot tables.
Can You Solo Nighthold in The War Within?

Farming The Nighthold solo in The War Within is an excellent way to collect transmog sets, mounts, pets, and achievements from Legion.
- Level and Gear:
- Be at least level 80 (current max level in The War Within).
- Equip high item-level gear (preferably above 600+ for smoother runs).
- Use consumables like food, flasks, and potions if needed.
- Class and Spec:
 Tanks and self-healing classes (e.g.,
  Blood DK,
  Vengeance DH,
  Protection Paladin) are ideal for soloing.
 DPS specs with strong survivability (e.g.,
  Beast Mastery Hunter,
  Demonology Warlock) can also work well.
- Know the Mechanics:
- Some bosses have mechanics that require specific strategies, even when soloing.
- Research the fights beforehand if you’re unfamiliar.
- General Tips
- Use Pets or Minions: If you’re a class with pets (e.g.,
 Hunter,
  Warlock), use them to tank and distract enemies.
 - Cooldowns: Use your defensive and offensive cooldowns liberally.
- Patience: Some fights may take longer, especially if you’re undergeared.
- Legacy Loot Mode: Ensure you’re in Legacy Loot Mode (if applicable) to maximize your loot drops.
- Use Pets or Minions: If you’re a class with pets (e.g.,
- Why Solo Nighthold?
- Transmog gear (Tier 19 sets and unique appearances).
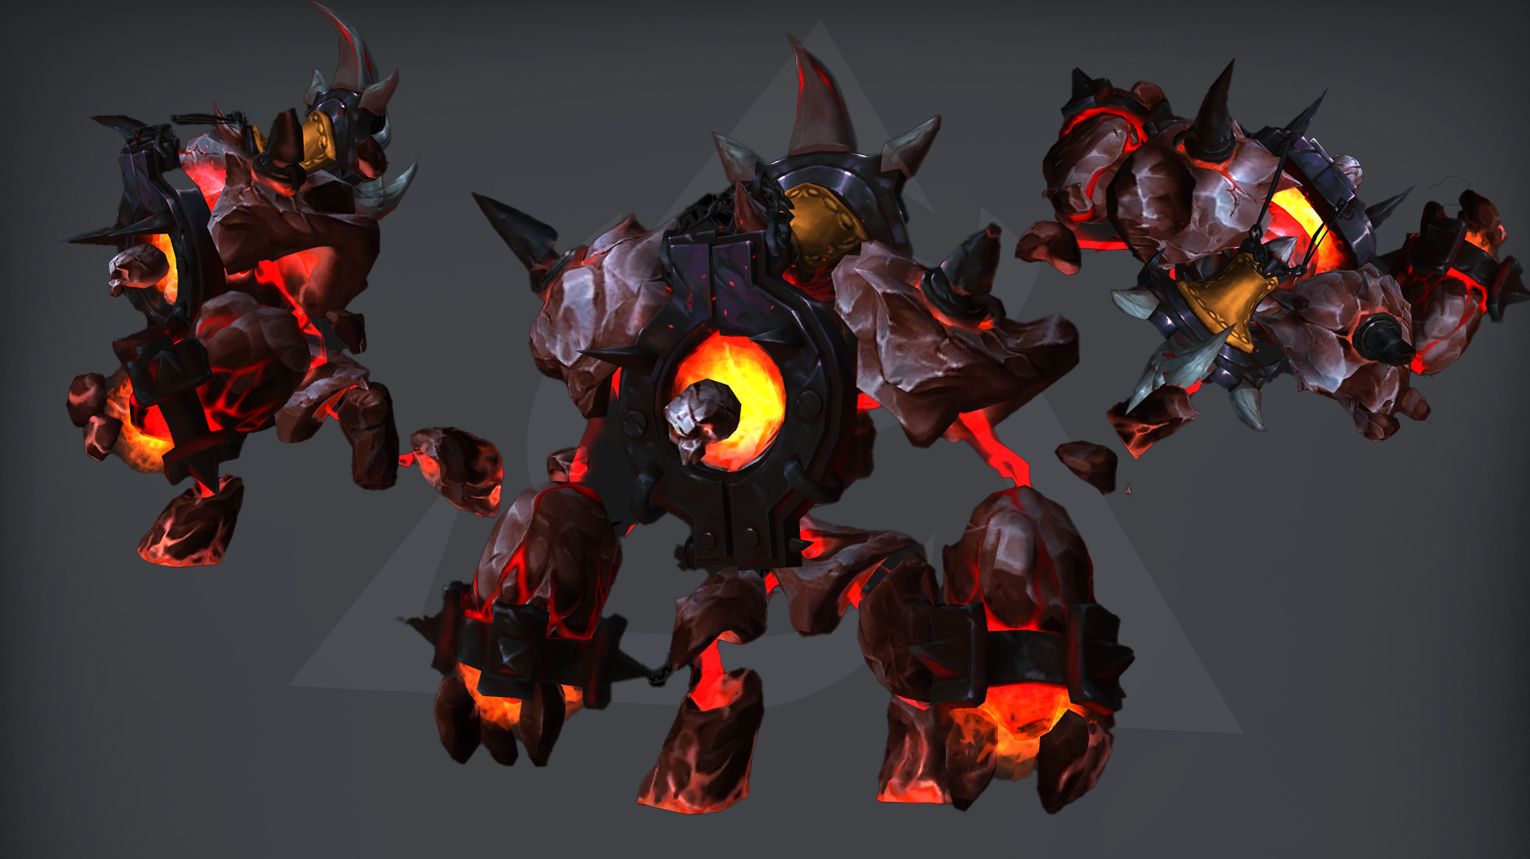
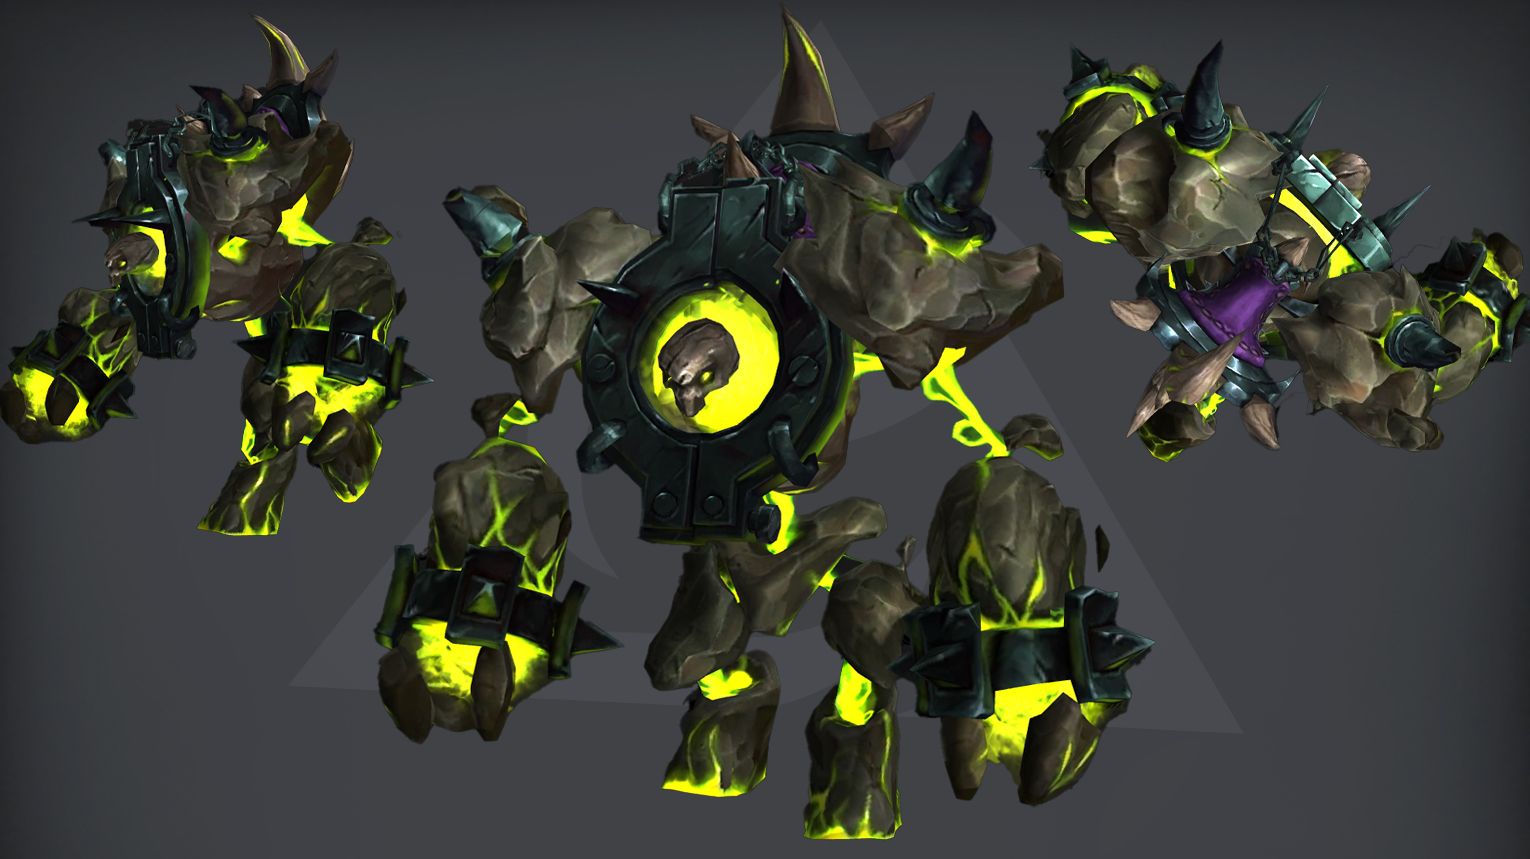
- Mounts like the Living Infernal Core and Fiendish Hellfire Core.
- Achievements and titles.
Skorpyron
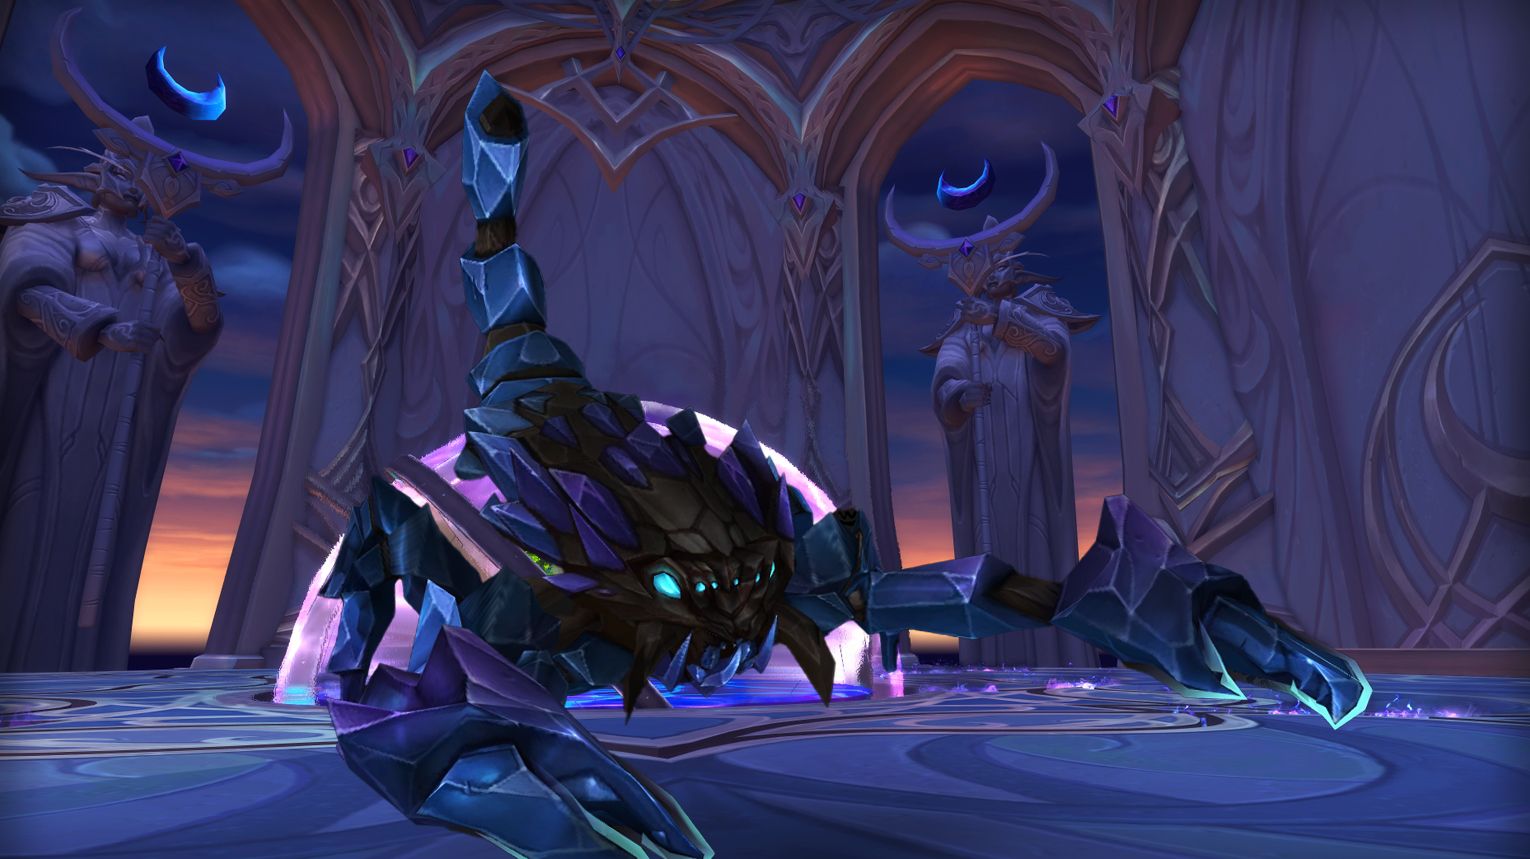
Skorpyron, the first boss in The Nighthold’s Arcing Aqueducts, is a single-target fight with waves of low-health Crystalline Scorpids. Key mechanics include breaking his Chitinous Exoskeleton for damage phases, avoiding Shockwave by hiding behind Crystalline Shards, and dodging FocusedBlast. Tanks must manage Arcane Tether and adds, while DPS should cleave adds and save cooldowns for Exoskeletal Vulnerability phases. Use Bloodlust/Drums at 25% health for the final burn. On Heroic and Mythic, watch for Volatile Scorpids and Acidmaw Scorpids, which add explosive and toxic mechanics.
 Preferred Classes:
 Tanks:
- One tank focuses on Skorpyron, the other on adds.
- Tanks must manage Arcane Tether (break by moving 10 yards) and avoid Arcanoslash damage.
 Damage Dealers:
- Strong AoE/cleave classes for add management.
- Classes with burst cooldowns for Exoskeletal Vulnerability phases.
 Healers:
- High raid healing output to handle Crystalline Fragments and Shockwave damage.
- Cooldown management for Exoskeletal Vulnerability transitions.
 Tips:
Tips:
- General:
- Stay within the decorative circle to avoid pulling unnecessary adds.
- Use Crystalline Shards to block Shockwave (stand close for Broken Shard debuff).
- Tanks:
- Skorpyron tank: Keep boss facing consistent to avoid Arcanoslash hitting raid.
- Adds tank: Gather and position adds for cleave damage.
- DPS:
- Focus on adds during Call of the Scorpid.
- Save cooldowns for Exoskeletal Vulnerability.
- Healers:
- Watch for Crystalline Fragments damage after Exoskeletal Vulnerability.
- Be ready to heal players knocked into adds by Shockwave.
 Strategy:
- Phase 1 (100%-75%):
- Tank Skorpyron in the center.
- Adds tank gathers Crystalline Scorpids and brings them to the boss for cleave.
- Avoid Shockwave by hiding behind Crystalline Shards.
- Break Chitinous Exoskeleton to trigger Exoskeletal Vulnerability.
- Phase 2 (75%-50%):
- Repeat Phase 1 mechanics.
- Watch for FocusedBlast and move out of its path.
- Use raid cooldowns for Crystalline Fragments damage.
- Phase 3 (50%-25%):
- Continue managing adds and avoiding mechanics.
- Save Bloodlust/Drums for the final Exoskeletal Vulnerability.
- Phase 4 (25%-0%):
- Burn boss during final Exoskeletal Vulnerability.
- Healers use cooldowns to handle increased damage from Infused Exoskeleton.
 Bloodlust/Drums:
During the final Exoskeletal Vulnerability phase (25% health).
 Skorpyron loot table:
| Type of Armor | Item | Loot type |
| Cloth | Antiquated Highborne Cinch | Waist |
| Scorpid Handler’s Gloves | Hands | |
| Leather | Vintage Suramar Nobility Hat | Legs |
| Gnawed Nightfallen Britches | Head | |
| Arcanochitin Hauberk | Wrist | |
| Stinger Resistant Bracers | Chest | |
| Plate | Jagged Carapace Wristclamps | Wrist |
| Leystone-Toe Kickers | Feet | |
| Any | Radiant String of Scorpid Eyes | Amulet |
| Claw of the Crystalline Scorpid | Trinket | |
| Animated Exoskeleton | Trinket |
Chronomatic Anomaly

Chronomatic Anomaly is the second boss in The Nighthold, featuring time-based mechanics like Passage of Time (Normal, Slow, Fast) that affect player speed and boss abilities. Key mechanics include killing Waning Time Particles to spawn Temporal Rifts, which tanks use to interrupt Power Overwhelming, and managing Time Bomb by moving away from the raid before detonation. Tanks must swap before 10 stacks of Chronometric Particles, while healers focus on Time Release shields and raid-wide damage from Warp Nightwell and Temporal Orbs. Use Bloodlust/Drums during Power Overwhelming or to burn down adds. On Mythic, two Waning Time Particles spawn, requiring split raid coordination.
 Preferred Classes:
 Tanks: Classes with strong active mitigation and mobility (e.g.,
  Protection Paladin,
  Blood DK).
 Healers: Classes with strong raid-wide healing and cooldowns (e.g.,
  Holy Priest,
  Restoration Shaman).
 DPS: Classes with strong burst damage and interrupts (e.g.,
  Fire Mage,
  Demon Hunter).
 Tips:
Tips:
- Tanks:
- Monitor Chronometric Particles stacks and swap before reaching 10.
- Use Temporal Charge to interrupt Power Overwhelming.
- Position the boss near Waning Time Particles for cleave damage.
- Healers:
- Focus on healing Time Release shields (prioritize red > yellow > green).
- Use cooldowns during Power Overwhelming and Temporal Orbs.
- DPS:
- Prioritize killing Waning Time Particles and Fragmented Time Particles.
- Interrupt Warp Nightwell casts.
- Move away from the raid if targeted by Time Bomb.
 Strategy:
- Phase Management:
- Adapt to Passage of Time changes (Normal, Slow, Fast).
- Save DPS cooldowns for Temporal Smash vulnerability windows.
- Add Control:
- Kill Waning Time Particles immediately upon spawn.
- Use AoE stuns and interrupts to control Fragmented Time Particles.
- Tank Mechanics:
- Swap tanks before Chronometric Particles stacks reach 10.
- Use Temporal Charge to interrupt Power Overwhelming.
- Healing Priorities:
- Focus on Time Release shields and tank healing during high-stack phases.
- Use raid cooldowns during Power Overwhelming and Temporal Orbs.
- DPS Priorities:
- Burst down adds and focus on boss during vulnerability phases.
- Avoid standing in Burst of Time and Temporal Orbs.
 Bloodlust/Drums:
During Power Overwhelming to quickly burn down Waning Time Particles.
 Chronomatic Anomaly loot table:
| Type of Armor | Item | Loot type |
| Cloth | Chaos-Scarred Mantle | Shoulder |
| Robes of Fluctuating Energy | Chest | |
| Leather | Stutterstep Treads | Feet |
| Temporally Displaced Gloves | Hands | |
| Hood of Fading Opportunity | Head | |
| Pauldrons of Warped Memory | Shoulder | |
| Plate | Gauntlets of Fractured Eons | Hands |
| Chrono-Tempered Legplates | Legs | |
| Any | Zealous Timestone Pendant | Amulet |
| Royal Dagger Haft | Trinket | |
| Erratic Metronome | Trinket |
Trilliax

Trilliax is a malfunctioning construct in The Nighthold raid, cycling through three phases: The Cleaner (eat Toxic Slice cakes), The Maniac (avoid Annihilation and handle Arcing Bonds), and The Caretaker (destroy Scrubbers casting Cleansing Destruction). Use Bloodlust/Heroism/Time Warp at the start for maximum DPS. Tanks must swap after 2 stacks of Arcane Slash, while DPS and healers manage Toxic Slice, Sterilize, and Mana Rupture. On Heroic and Mythic, watch for Stuffed debuffs and Personality Transference Imprints. Proper positioning, role assignments, and quick reactions to mechanics are key to success.
 Preferred Classes:
 Tanks: Classes with strong active mitigation and cooldowns (e.g.,
  Protection Paladin,
  Blood DK).
 Healers: Classes with strong raid-wide healing and cooldowns (e.g.,
  Holy Priest,
  Restoration Druid).
 DPS: Classes with high mobility and burst damage (e.g.,
  Demon Hunter,
  Mage,
Mage,  Rogue).
 Tips:
Tips:
- General:
- Avoid standing in the center of the room to prevent Arcane Seepage from interfering with mechanics.
- Use Bloodlust/Heroism/Time Warp at the start of the fight.
- Stay aware of phase transitions and adapt to mechanics accordingly.
- Tanks:
- Swap after 2 stacks of Arcane Slash.
- Kite Trilliax around the room to avoid Arcane Seepage buildup.
- DPS:
- Eat Toxic Slice cakes during The Cleaner phase.
- Stay close to your partner during Arcing Bonds.
- Destroy Scrubbers casting Cleansing Destruction.
- Healers:
- Focus healing on players with Toxic Slice stacks.
- Use raid cooldowns during The Maniac phase to handle Mana Rupture and Annihilation.
 Strategy:
Phase 1: The Cleaner
- Mechanics:
- Toxic Slice: Eat cakes to prevent them from triggering Cleansing Rage.
- Sterilize: Move away from the raid to avoid pulsing damage.
- Tips:
- Assign players to eat Toxic Slice cakes.
- Use Bloodlust/Heroism/Time Warp here for maximum DPS.
Phase 2: The Maniac
- Mechanics:
- Mana Rupture: Random damage to half the raid.
- Arcing Bonds: Stay close to your linked partner.
- Annihilation: Avoid the spinning laser by staying on Trilliax’s side.
- Tips:
- Clump for AoE healing during Mana Rupture.
Move carefully during Annihilation to avoid the laser.
- Clump for AoE healing during Mana Rupture.
Phase 3: The Caretaker
- Mechanics:
- Succulent Feast: Eat to gain a shield for soaking Cleansing Destruction.
- Tidy Up: Destroy Scrubbers before they cast Cleansing Destruction.
- Tips:
- Assign players with shields to destroy Scrubbers.
- Use Sterilize to drain Scrubbers’ Mana and delay their explosion.
 Bloodlust/Drums:
At the start of the fight during The Cleaner phase.
 Trilliax loot table:
| Type of Armor | Item | Loot type |
| Cloth | Perpetually Muddy Sandals | Feet |
| Nighthold Custodian’s Hood | Head | |
| Leather | Tunic of Unwavering Devotion | Chest |
| Cake Carrier’s Girdle | Waist | |
| Sterilizer’s Insulated Gauntlets | Hands | |
| Pertinacious Legplates | Legs | |
| Plate | Gilded Nightborne Waistplate | Waist |
| Immaculately Polished Boots | Feet | |
| Any | Cape of Second Sight | Cloak |
| Perfectly Preserved Cake | Trinket | |
| Arcanogolem Digit | Trinket |
Spellblade Aluriel

Spellblade Aluriel is a three-phase boss in The Nighthold, cycling through Frost, Fire, and Arcane enchantments. Each phase introduces unique mechanics like Mark of Frost, Searing Brand, and Arcane Orb, requiring players to spread, stack, or move strategically. Adds spawn during Animate abilities and must be killed quickly to avoid raid-wide damage. Tanks must swap at 2 stacks of Annihilated, while healers focus on debuffed players and raid-wide damage during Detonate mechanics. Use Bloodlust at the start or during critical phases (e.g., Arcane Phase on Mythic) to handle adds effectively.
 Preferred Classes:
 Tanks:
- Classes with strong active mitigation (e.g.,
 Protection Paladin,
  Blood Death Knight) to handle Annihilate.
 - A third tank is required for Mythic difficulty to handle the Fel Soul.
- Classes with strong active mitigation (e.g.,
 Healers:
- Classes with strong AoE healing (e.g.,
 Restoration Druid,
  Holy Priest) to manage Mark of Frost and Searing Brand.
 - Classes with raid cooldowns (e.g.,
 Holy Paladin,
  Restoration Shaman) for Detonate: Arcane Orb.
- Classes with strong AoE healing (e.g.,
 Damage Dealers:
- Classes with strong burst AoE (e.g.,
 Frost Mage,
  Destruction Warlock) to quickly kill adds.
 - Classes with interrupts (e.g.,
 Rogue,
  Shaman) to handle Pyroblast from Fiery Enchantments.
- Classes with strong burst AoE (e.g.,
 Tips:
Tips:
- General:
- Stay spread out during Arcane Phase to avoid Arcane Orb damage.
- Stack tightly during Fire Phase to minimize Searing Brand spread.
- Use defensive cooldowns liberally for Mark of Frost and Searing Brand.
- Tanks:
- Swap at 2 stacks of Annihilated.
- Position Aluriel away from ground effects (e.g., Pool of Frost, Burning Ground).
- Healers:
- Focus on players with Mark of Frost and Searing Brand.
- Use raid cooldowns during Detonate: Arcane Orb.
- DPS:
- Prioritize killing adds quickly (e.g., Icy Enchantments, Fiery Enchantments, Arcane Enchantments).
- Interrupt Pyroblast from Fiery Enchantments.
 Strategy:
Phase 1: Frost
- Mark of Frost:
- Spread out to avoid splash damage.
- Transfer the debuff by colliding with another marked player when Frostbitten stacks are high.
- Detonate: Mark of Frost:
- Move away from Pool of Frost patches.
- Animate: Mark of Frost:
- Gather and AoE down Icy Enchantments.
Phase 2: Fire
- Searing Brand: Targeted players should move to the side to avoid knocking others back.
- Detonate: Searing Brand: Spread out to minimize splash damage.
- Animate: Searing Brand: Gather and AoE down Fiery Enchantments quickly.
Phase 3: Arcane
- Arcane Orb: Spread out to avoid damage from multiple orbs.
- Detonate: Arcane Orb: Move as a group to avoid Arcane Fog patches.
- Animate: Arcane Orb: Gather and AoE down Arcane Enchantments.
 Bloodlust/Drums:
At the start of the fight to maximize DPS during the first phase.
 Spellblade Aluriel loot table:
| Type of Armor | Item | Loot type |
| Cloth | Bracers of Harnessed Flame | Wrist |
| Master Warmage’s Leggings | Legs | |
| Leather | Gloves of Synchronous Elements | Hands |
| Nightborne Battle-Magus Hood | Head | |
| Emblazoned Duskwatch Belt | Waist | |
| Sabatons of Burning Steps | Feet | |
| Plate | Captain’s Parade Breastplate | Chest |
| Duskwatch Plate Bracers | Wrist | |
| Any | Spellblade’s Gemmed Signet | Ring |
| Aluriel’s Mirror | Trinket | |
| Entwined Elemental Foci | Trinket |
Tichondrius

Tichondrius is a mechanically complex boss in The Nightholdwith two alternating phases: Phase 1 focuses on managing Carrion Plague (avoid spreading via Seeker Swarm), Feast of Blood (kill Tainted Bloods), and Echoes of the Void (hide behind Fel Spires), while Phase 2 (Illusionary Night) requires dodging Carrion Nightmare and killing Phantasmal Bloodfangs for Essence of Night buffs. On Heroic+, Brand of Argus must be detonated carefully to avoid raid damage, and Mythic adds mechanics like shielding Carrion Plague targets and mandatory Essence of Night buffs. Use Bloodlust/Drums in the final Phase 1 to handle dangerous adds. Tanks must kite adds, healers manage heavy raid damage, and DPS prioritize adds and positioning.
 Preferred Classes:
 Tanks: Classes with strong active mitigation and mobility (e.g.,
  Protection Paladin,
  Blood DK).
 Healers: Classes with strong raid-wide healing and dispels (e.g.,
  Restoration Druid,
  Holy Priest).
 DPS: High burst AoE and single-target damage dealers (e.g.,
  Fire Mage,
  Demon Hunter,
  Affliction Warlock).
 Tips:
Tips:
- Carrion Plague:
- Designate a specific area for players with Carrion Plague to stand.
- Avoid spreading the debuff via Seeker Swarm by keeping non-affected players away.
- Feast of Blood:
- Tanks must kite Tainted Bloods 30+ yards from Tichondrius to prevent healing.
- Use AoE stuns and burst damage to kill Tainted Bloods quickly.
- Echoes of the Void:
- Spread the raid evenly behind Fel Spires to avoid destroying them.
- Illusionary Night:
- Dodge Carrion Nightmare by stepping out of telegraphed zones.
- Prioritize killing Phantasmal Bloodfangs for Essence of Night buffs.
- Brand of Argus (Heroic+):
- Detonate deliberately in designated areas to minimize raid damage.
- Mythic Specifics:
- Use immunities to soak Seeker Swarm for Carrion Plague targets.
- Ensure all players obtain Essence of Night or they will die.
 Strategy:
Phase 1: Lord of the Nathrezim
- Carrion Plague:
- Affected players move to a designated area.
- Non-affected players avoid this area to prevent Seeker Swarm spread.
- Feast of Blood:
- Tank swap on debuff application.
- Kite Tainted Bloods away from Tichondrius to prevent healing.
- DPS focus on killing Tainted Bloods quickly.
- Echoes of the Void:
- Hide behind Fel Spires to avoid damage.
- Spread the raid evenly to prevent spire destruction.
Phase 2: Shadow of Terror
- Carrion Nightmare:
- Dodge telegraphed zones to avoid damage and stuns.
- Phantasmal Bloodfangs:
- Kill as many as possible to collect Essence of Night buffs.
- Prioritize strong DPS and healers for buffs first.
- Essence of Night:
- Grants 30% increased damage/healing and mana regeneration.
- Ensure all players obtain a buff before the phase ends (Mythic requirement).
Add Management (Heroic/Mythic):
- Felsworn Spellguards: Kill quickly; avoid dropping Nether Zones in critical areas.
- Sightless Watchers: Prioritize killing; healers must dispel Burning Soul carefully.
- Volatile Wound: Move to the edge of the room to drop Nether Zones safely.
 Bloodlust/Drums:
During the final Phase 1 (third repeat) when the most dangerous adds (Felsworn Spellguards and Sightless Watchers) spawn.
 Tichondrius loot table:
| Type of Armor | Item | Loot type |
| Cloth | Pauldrons of Azj’Aqir | Shoulder |
| Mantle of Everburning Knowledge | Shoulder | |
| Leather | Girdle of Nefarious Strategy | Waist |
| Shoulderguards of Second Sight | Shoulder | |
| Doomblade Spaulders | Shoulder | |
| Pauldrons of Enveloped Dissonance | Shoulder | |
| Eagletalon Spaulders | Shoulder | |
| Pauldrons of Shackled Elements | Shoulder | |
| Plate | Goresmeared Abyssal Waistplate | Waist |
| Pauldrons of the Highlord | Shoulder | |
| Dreadwyrm Shoulderguards | Shoulder | |
| Shoulderplates of the Obsidian Aspect | Shoulder | |
| Any | Dreadlord’s Tattered Wingcover | Cloak |
| Ring of Exclusive Servitude | Ring | |
| Icon of Rot | Trinket | |
| Fang of Tichondrius | Trinket |
Krosus

Krosus is a single-phase boss in The Nighthold raid with a 6-minute enrage timer. The fight revolves around managing Slam (tanks soak the first two, avoid the third), soaking Burning Pitch to prevent adds, dodging Fel Beam, and running away with Orb of Destruction. Tanks must swap at 5-7 stacks of Searing Brand, while DPS focus on single-target damage and killing Burning Embers. Use Bloodlust at the start, and be mindful of the shrinking bridge space. On Heroic and Mythic, mechanics like Felburst and Accelerated Burning Embers add extra complexity.
 Preferred Classes:
 Tanks: Classes with strong active mitigation (e.g.,
  Protection Paladin,
  Blood DK) to handle Slam and Searing Brand.
 Healers: Classes with strong raid-wide healing cooldowns (e.g.,
  Restoration Shaman,
  Holy Priest) to manage Slam, Orb of Destruction, and Burning Pitch damage.
 DPS: High single-target DPS classes (e.g.,
  Affliction Warlock,
  Marksmanship Hunter) to meet the tight enrage timer.
 Tips:
Tips:
- General:
- Use Bloodlust/Heroism/Time Warp at the start of the fight.
- Always be aware of the bridge’s destruction and move back before the 3rd Slam on each segment.
- Assign players to soak Burning Pitch pools to minimize add spawns.
- Tanks:
- Swap at 5-7 stacks of Searing Brand.
- Soak the first two Slams on each bridge segment but avoid the 3rd.
- Keep one tank in melee range to prevent Isolated Rage.
- DPS:
- Focus on single-target damage on Krosus.
- Interrupt and kill Burning Embers quickly.
- Run to the back of the bridge if targeted by Orb of Destruction.
- Healers:
- Use cooldowns to recover from heavy damage events like
- Slam and Orb of Destruction.
- Soak distant Burning Pitch pools to prevent adds.
 Strategy:
- Phase 1 (First Bridge Segment):
- Tanks soak the first two Slams.
- Players soak Burning Pitch pools to prevent Burning Embers.
- Dodge Fel Beam by moving to the safe side of the bridge.
- Targeted players run to the back of the bridge for Orb of Destruction.
- Phase 2 (Subsequent Bridge Segments):
- Repeat the mechanics, but be mindful of the shrinking space.
- Move back before the 3rd Slam destroys the bridge segment.
- On the final segment, stack in the opposite corner of the Orb of Destruction target.
- Add Management:
- Kill Burning Embers quickly to avoid raid damage.
- On Mythic, prioritize killing Accelerated Burning Embers before they Burnout.
 Bloodlust/Drums:
Use at the start of the fight to maximize DPS during the first bridge segment when the raid has the most space and can focus entirely on Krosus.
 Krosus loot table:
| Type of Armor | Item | Loot type |
| Cloth | Finery of Azj’Aqir | Chest |
| Man’ari Skullbuckled Cinch | Waist | |
| Purifier’s Cassock | Chest | |
| Robe of Everburning Knowledge | Chest | |
| Leather | Doomblade Tunic | Chest |
| Robe of the Astral Warden | Chest | |
| Tunic of Enveloped Dissonance | Chest | |
| Tunic of Second Sight | Chest | |
| Well-Flattened Wristguards | Waist | |
| Architect’s Coif of Despair | Head | |
| Eagletalon Tunic | Chest | |
| Raiment of Shackled Elements | Chest | |
| Plate | Breastplate of the Highlord | Hands |
| Bridgebreaker Gauntlets | Chest | |
| Chestplate of the Obsidian Aspect | Chest | |
| Dreadwyrm Breastplate | Chest | |
| Any | Beleron’s Choker of Misery | Amulet |
| Might of Krosus | Trinket | |
| Pharamere’s Forbidden Grimoire | Trinket |
High Botanist Tel’arn

High Botanist Tel’arn is a three-phase boss in The Nighthold, using Arcane, Nature, and Solar magic. In Phase 1, handle Solar Collapse, Parasitic Fetter, and Controlled Chaos while swapping tanks at 7 stacks of Recursive Strikes. Phase 2 introduces Solarist Tel’arn and Plasma Spheres—kill them staggered to avoid raid-wiping explosions. Phase 3 adds Naturalist Tel’arn, requiring players to manage Call of Night, Grace of Nature, and Toxic Spores. Use Bloodlust/Drums in Phase 3 for maximum DPS, and on Mythic, kill bosses in the order: Naturalist → Solarist → Arcanist.
 Preferred Classes:
 Tanks: Classes with strong active mitigation and cooldowns (e.g.,
  Protection Paladin,
  Blood DK).
 Healers: Strong single-target healers for tank healing (e.g.,
  Holy Paladin,
  Discipline Priest).
 DPS: Classes with strong cleave, multi-DoT, and mobility (e.g.,
  Affliction Warlock,
  Fire Mage,
  Havoc Demon Hunter).
 Tips:
Tips:
- Damage Dealers:
- Avoid Controlled Chaos and Solar Collapse.
- Kill Parasitic Lashers quickly and kite them if targeted.
- Stagger Plasma Sphere deaths to avoid lethal Plasma Explosion damage.
- Spread out to minimize Chosen Fate and Pillars of Night damage.
- Tanks:
- Swap at 7 stacks of Recursive Strikes.
- Position bosses together for cleave damage but avoid stacking during Flare.
- Move bosses out of Grace of Nature pools.
- Healers:
- Dispel Parasitic Fetter carefully.
- Use raid cooldowns for Plasma Explosion and Controlled Chaos.
- Focus healing on Call of Night and Toxic Spores targets.
 Strategy:
Phase 1 (100%-75% Health):
- Abilities:
- Solar Collapse: Run out of the expanding rings.
- Parasitic Fetter: Dispel and kill spawned Lashers quickly.
- Controlled Chaos: Move away from the growing explosions.
- Tank Swap: At 7 stacks of Recursive Strikes.
Phase 2 (75%-50% Health):
- Solarist Tel’arn joins the fight.
- Abilities:
- Summon Plasma Spheres: Kill one quickly, the second after the first debuff expires, and let the third die naturally.
- Flare: Tanks should not stack.
- Tank Positioning: Keep bosses together for cleave damage.
Phase 3 (50%-0% Health):
- Naturalist Tel’arn joins the fight.
- Abilities:
- Call of Night: Non-debuffed players must stand near debuffed players to soak damage.
- Grace of Nature: Move bosses out of the healing pool.
- Toxic Spores: Avoid and use immunities to clear if necessary.
 Bloodlust/Drums:
Start of Phase 3 (50% health), as it is the most complex and dangerous phase.
 High Botanist Tel’arn loot table:
| Type of Armor | Item | Loot type |
| Cloth | Woven Lasher Tendril Bracers | Wrist |
| Leather | Grove-Tender’s Moccasins | Feet |
| Trousers of Cultivation | Legs | |
| Shal’dorei Weedstompers | Feet | |
| Thistle-Proof Thorngrabbers | Wrist | |
| Plate | Eventide Casque | Head |
| Shoulderguard of the Eclipse | Shoulder | |
| Any | Ring of Braided Stems | Ring |
| Fury of the Burning Sky | Trinket | |
| Nightblooming Frond | Trinket |
Star Augur Etraeus

Star Augur Etraeus is a visually stunning boss in The Nighthold raid with four phases (0-3) triggered at 90%, 60%, and 30% health. Each phase introduces new mechanics: Phase 1 focuses on Frost abilities like Icy Ejection and Absolute Zero, Phase 2 introduces Fel-themed mechanics like Fel Ejection and Felflame, and Phase 3 revolves around Shadow abilities, priority adds (Thing That Should Not Be), and high raid damage from Voidburst. Use Bloodlust/Heroism in Phase 3 to burn priority adds and manage raid-wide damage. Key strategies include proper positioning, handling Ejection mechanics, and coordinating tank swaps for Gravitational Pull.
 Preferred Classes:
 Tanks: Classes with strong magic damage mitigation (e.g.,
  Paladins,
  Druids).
 Healers: Classes with strong AoE healing and cooldowns (e.g.,
  Holy Priests,
  Restoration Druids).
 DPS: Classes with strong single-target and cleave/AoE capabilities (e.g.,
  Mages,
  Warlocks,
  Rogues).
 Tips:
Tips:
- Phase 1:
- Spread into 3 groups for Absolute Zero mechanics.
- Icy Ejection targets must run to the edge to avoid Shatter damage.
- Phase 2:
- Spread out to avoid Fel Ejection pools.
- Tanks use Fel Impact to clear Felflame pools.
- Phase 3:
- Stack behind the boss for healing efficiency.
- Use Bloodlust/Heroism/Time Warp during Thing That Should Not Be spawns.
- Turn away from Witness the Void to avoid Fear.
- General:
- Avoid overlapping mechanics (e.g., Chilled with Absolute Zero).
- Use defensive cooldowns for Ejection mechanics.
 Strategy:
- Phase 0:
- Stay stacked to handle Coronal Ejection.
- Tanks mitigate Starburst damage.
- Phase 1:
- Tanks handle Gravitational Pull by running to marked spots for Comet Impact.
- Use 3 groups to clear Absolute Zero.
- Icy Ejection targets run to the edge to Shatter.
- Phase 2:
- Spread out to minimize Fel Ejection damage.
- Tanks use Fel Impact to clear Felflame pools.
- Avoid Fel Nova by running away from the boss.
- Phase 3:
 Bloodlust/Drums:
During the first Thing That Should Not Be spawn to burn it down quickly and minimize Witness the Void casts.
 Star Augur Etraeus loot table:
| Type of Armor | Item | Loot type |
| Cloth | Treads of Galactic Odyssey | Feet |
| Gloves of Everburning Knowledge | Hands | |
| Clutch of Azj’Aqir | Hands | |
| Purifier’s Gloves | Hands | |
| Leather | Mantle of the Torn Sky | Shoulder |
| Doomblade Gauntlets | Hands | |
| Gloves of Second Sight | Hands | |
| Gloves of the Astral Warden | Hands | |
| Gloves of Enveloped Dissonance | Hands | |
| Eagletalon Gauntlets | Hands | |
| Gauntlets of Shackled Elements | Feet | |
| Plate | Sabatons of Unchanging Fate | Feet |
| Gauntlets of the Highlord | Hands | |
| Dreadwyrm Gauntlets | Hands | |
| Gauntlets of the Obsidian Aspect | Hands | |
| Any | Brooch of the Astral Scryer | Amulet |
| Astromancer’s Greatcloak | Cloak | |
| Etraeus’ Celestial Map | Trinket | |
| Star Gate | Trinket |
Grand Magistrix Elisande

Grand Magistrix Elisande is a time-manipulation boss in The Nighthold with three phases, each escalating in difficulty. Key mechanics include dodging Arcanetic Rings using Slow Time and Fast Time zones, soaking Spanning Singularity pools, and managing adds like Recursive and Expedient Elementals. Use Bloodlust/Drums in Phase 1 to reduce mechanics or save for Phase 3 for maximum DPS. Tanks must swap on Ablation stacks, handle Ablating Explosion, and interrupt Ablative Pulse. Healers focus on raid-wide damage from Conflexive Burst and Epocheric Orbs, while DPS prioritize adds and mechanics over Elisande.
 Preferred Classes:
 Tanks: Classes with strong mobility and interrupt capabilities (e.g.,
  Demon Hunter,
  Warrior).
 Healers: Classes with strong raid-wide healing and cooldowns (e.g.,
  Holy Priest,
  Restoration Shaman).
 DPS: Classes with strong single-target and cleave damage, and interrupts (e.g.,
  Fire Mage,
  Assassination Rogue).
 Tips:
Tips:
- Time Zones: Use Slow Time and Fast Time zones strategically to manipulate mechanics like Arcanetic Rings and Conflexive Burst.
- Add Priority: Focus on killing Recursive Elementals first, then Expedient Elementals.
- Soaking: Assign players with defensive cooldowns to soak Spanning Singularity pools.
- Bloodlust/Drums: Use at the start of Phase 1 to reduce Arcanetic Ring casts or save for Phase 3 for maximum DPS during the hardest phase.
 Strategy:
- Phase 1:
- Dodge Arcanetic Rings by using gaps created by Slow Time and Fast Time zones.
- Soak Spanning Singularity pools with defensive cooldowns.
Tanks swap at 3-4 stacks of Ablation. - Use Bloodlust/Drums here if your group struggles with Phase 1 mechanics.
- Phase 2:
- Catch Epocheric Orbs to reduce raid damage.
- Delphuric Beam targets should move close to Elisande to minimize raid damage.
- Tanks swap after Ablating Explosion is applied; the debuffed tank should run away before it detonates.
- Phase 3:
- Manage Conflexive Burst by staggering detonations using
- Slow Time and Fast Time zones.
- Interrupt Ablative Pulse to avoid stacking debuffs on tanks.
Use Bloodlust/Drums here if not used in Phase 1.
 Bloodlust/Drums:
Use twice if possible (start of Phase 1 and end of Phase 3).
 Grand Magistrix Elisande loot table:
| Type of Armor | Item | Loot type |
| Cloth | Eyes of Azj’Aqir | Head |
| Hood of Everburning Knowledge | Head | |
| Mantle of Prestidigitation | Shoulder | |
| Purifier’s Gorget | Head | |
| Leather | Bracers of Impossible Choices | Wrist |
| Doomblade Cowl | Head | |
| Hood of Enveloped Dissonance | Head | |
| Hood of the Astral Warden | Head | |
| Mask of Second Sight | Head | |
| Belt of Celestial Alignment | Waist | |
| Eagletalon Cowl | Head | |
| Helm of Shackled Elements | Head | |
| Plate | Dreadwyrm Crown | Head |
| Eternally Recurring Bracers | Wrist | |
| Helmet of the Highlord | Head | |
| Waistplate of Fractured Realities | Waist | |
| Warhelm of the Obsidian Aspect | Head | |
| Any | Cloak of Temporal Recalibration | Cloak |
| Convergence of Fates | Trinket | |
| Ephemeral Paradox | Trinket |
Gul’dan

Gul’dan is the final boss of The Nighthold, featuring three phases: fighting mini-bosses, confronting Gul’dan directly, and surviving his empowered form. Key mechanics include Liquid Hellfire, Bonds of Fel, and Eye of Gul’dan, with role-specific abilities from the Essence of Aman’Thul. Tanks must manage Shatter Essence and Fel Scythe, while DPS prioritize killing adds and breaking bonds. Healers focus on mitigating raid-wide damage and dispelling debuffs. Use Bloodlust early in Mythic or during high-pressure moments in Phase 2/3 for optimal DPS. Unique rewards include the Arcanist’s Manasaber mount and Fiendish Hellfire Core.
 Preferred Classes:
 Tanks: Classes with strong active mitigation (e.g.,
  Protection Paladin,
  Blood Death Knight).
 Healers: Classes with strong raid-wide healing and dispels (e.g.,
  Restoration Druid,
  Holy Priest).
 DPS: High burst damage for mini-bosses and Eyes of Gul’dan (e.g.,
  Fire Mage,
  Demon Hunter).
- Utility: Classes with interrupts (e.g.,
 Rogues,
  Shamans) for Dreadlord’s Carrion Wave (Heroic+).
 Tips:
Tips:
- Phase 1:
- Avoid Fel Efflux and Hand of Gul’dan.
- Ranged stack for Liquid Hellfire; healers use Scattering Field.
- Tanks rotate Resonant Barrier for Shatter Essence.
- Kill Inquisitor Vethriz quickly to minimize Gaze of Vethriz eyes.
- Phase 2:
- Tanks stack every 11-12 seconds to trigger Fel Scythe at low energy.
- Ranged stack 10 yards behind Gul’dan for Bonds of Fel.
- Nuke Eye of Gul’dan adds immediately; use Time Dilation.
- Phase 3:
- Spread for Empowered Eye of Gul’dan and Flames of Sargeras.
- Soak Well of Souls to reduce Black Harvest damage.
- Use healing cooldowns for Black Harvest.
 Strategy:
- Phase 1:
- Focus on mini-boss mechanics: Shatter Essence, Soul Vortex, and Gaze of Vethriz.
- Stick to one side of the room to keep the other side clear for movement.
- Phase 2:
- Manage Bonds of Fel by breaking chains into melee/ranged groups.
- Position Gul’dan in the center; ranged stack for Liquid Hellfire.
Prioritize killing Eye of Gul’dan adds.
- Phase 3:
- Spread for Empowered Eye of Gul’dan and Flames of Sargeras.
- Soak Well of Souls evenly to distribute Soul Corrosion stacks.
- Use Time Stop Fields from Nightorbs to survive Visions of the Dark Titan (Mythic).
 Bloodlust/Drums:
Use early to burn down mini-bosses and bypass mechanics in Phase 1.
 Gul’dan loot table:
| Type of Armor | Item | Loot type |
| Cloth | Leggings of Azj’Aqir | Legs |
| Leggings of Everburning Knowledge | Legs | |
| Outcast Wanderer’s Footrags | Feet | |
| Purifier’s Leggings | Legs | |
| Leather | Doomblade Pants | Legs |
| High Shadow Councilor’s Wrap | Waist | |
| Leggings of Enveloped Dissonance | Legs | |
| Leggings of the Astral Warden | Legs | |
| Legwraps of Second Sight | Legs | |
| Eagletalon Legchains | Legs | |
| Leggings of Shackled Elements | Legs | |
| Netherbranded Shoulderpads | Shoulder | |
| Plate | Breastplate of the Remembered King | Chest |
| Dreadwyrm Legplates | Legs | |
| Legplates of the Highlord | Legs | |
| Legplates of the Obsidian Aspect | Legs | |
| Any | Fiendish Hellfire Core | Mount |
| Living Infernal Core | Mount | |
| Ring of the Scoured Clan | Ring | |
| Draught of Souls | Trinket | |
| Infernal Contract | Trinket | |
| Whispers in the Dark | Trinket |
Nighthold Achievements List
| Achievement | Requirement |
| Arcing Aqueducts | Defeat the bosses within the base of The Nighthold. |
| Nightspire | Kill the bosses within The Nighthold. |
| Royal Athenaeum | Slay the bosses within The Nighthold. |
| The Nighthold Guild Run | Defeat all bosses of The Nighthold on Normal difficulty or higher, while in a guild group. |
| Betrayer’s Rise | Kill Gul’dan atop The Nighthold. |
| Ahead of the Curve: Gul’dan | Slay Gul’dan on Heroic difficulty or higher, before the opening of the Tomb of Sargeras. |
| Cutting Edge: Gul’dan | Defeat Gul’dan on Mythic difficulty, before the opening of the Tomb of Sargeras. |
| Mythic: Gul’dan | Kill Gul’dan on Mythic difficulty. |
| Mythic: Gul’dan Guild Run | Slay Gul’dan on Mythic difficulty, while in a guild group. |
| Realm First! Gul’dan | First guild on the realm to defeat Gul’dan on Mythic difficulty while in a guild group. |
| Mythic: Chronomatic Anomaly | Defeat Chronomatic Anomaly on Mythic difficulty. |
| Mythic: Grand Magistrix Elisande | Kill Grand Magistrix Elisande on Mythic difficulty. |
| Mythic: High Botanist Tel’arn | Slay High Botanist Tel’arn on Mythic difficulty. |
| Mythic: Krosus | Defeat Krosus on Mythic difficulty. |
| Mythic: Skorpyron | Kill Skorpyron on Mythic difficulty. |
| Mythic: Spellblade Aluriel | Slay Spellblade Aluriel on Mythic difficulty. |
| Mythic: Star Augur Etraeus | Defeat Star Augur Etraeus on Mythic difficulty. |
| Mythic: Tichondrius | Kill Tichondrius on Mythic difficulty. |
| Mythic: Trilliax | Slay Trilliax on Mythic difficulty. |
| That’s So Last Millennium | Collect any class armor set from the Nighthold. |
| A Change In Scenery | Engage and defeat Spellblade Aluriel in the following areas of The Nighthold on Normal difficulty or higher. She must reach her destination within 120 seconds of entering combat and remain there until defeated: |
| Burning Bridges | Defeat Krosus after quenching 15 Burning Embers on Normal difficulty or higher. |
| Cage Rematch | Kill Skorpyron on Normal difficulty or higher without any player leaving the center rings. |
| Elementalry! | Slay Star Augur Etraeus after having defeated a Well-Traveled Nether Elemental on Normal difficulty or higher. |
| Fruit of All Evil | Defeat High Botanist Tel’arn while all members of the raid are afflicted with Arcane Exposure on Normal Difficulty or higher. |
| Gluten Free | Kill Trilliax while eating no more than 20 Toxic Slices on Normal Difficulty or higher. |
| Grand Opening | Activate all the spotlights around the Nightwell and then defeat the Chronomatic Anomaly, on Normal difficulty or higher. |
| I’ve Got My Eyes On You | Slay Gul’dan on Normal difficulty or higher, after defeating 16 Eyes of Gul’dan within 3 seconds. |
| Infinitesimal | Get betrayed by and then defeat an Infinite Whelpling during the Grand Magistrix Elisande encounter, then defeat Grand Magistrix Elisande, on Normal difficulty or higher. |
| Not For You | Defeat Tichondrius without taking any damage from Echoes of the Void on Normal difficulty or higher. |

