Terrace of Endless Spring is a raid from World of Warcraft: Mists of Pandaria, released on November 13, 2012. It’s the third raid in the expansion and part of Tier 14. The raid has four bosses, offering unique transmogs, pets, and achievements that are still worth farming today.
Farming legacy items from ToES is fun, but nothing beats the thrill of top-end raiding. Our World of Warcraft boost is the fastest way to get the best gear in the game right now. We work with top teams from both the EU and US, and they’ll carry you through any raid in 1–2 hours. New runs start every hour—jump in and enjoy the loot!
This guide will explore:
- Terrace of Endless location
- Bosses and their rewards
- Available mounts, weapons, and transmogs
- Achievements you can earn
- Can you solo Terrace of Endless?
Whether you want to check the loot table, learn how to clear ToES solo, or just want to check its location, this guide will help you conquer this raid in WoW Retail.
Terrace of Endless Spring Entrance and Subregions
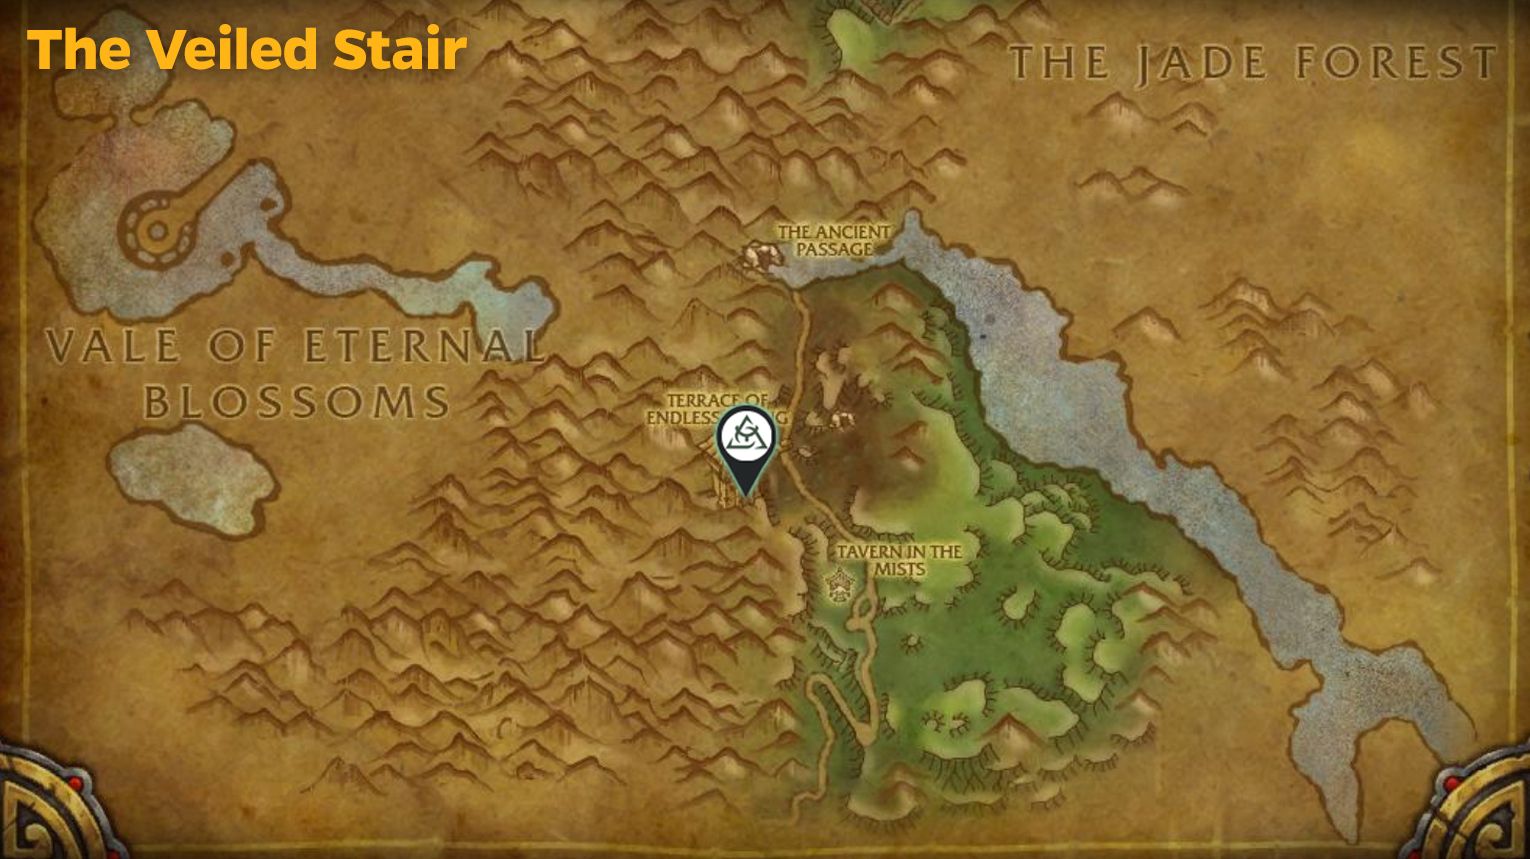 The Terrace of Endless Spring is found in The Veiled Stair, a hidden mountain pass in Pandaria. To get there:
- Travel to Vale of Eternal Blossoms (or take the portal from your faction shrine in Pandaria).
- Head northwest to The Veiled Stair (coordinates: 48.6, 42.6).
- The raid entrance is near the Tavern in the Mists—just follow the path up the mountain.
Once inside, you’ll fight through a serene but corrupted temple, facing four bosses in different areas.
Terrace of Endless Spring Subregions:
- The Terrace – Where you fight the Protectors of the Endless.
- The Moonlit Courtyard – Home to Tsulong, the corrupted cloud serpent.
- The Shattered Passage – The battleground against Lei Shi.
- The Heart of Fear’s Shadow – The final chamber where the Sha of Fear lurks.
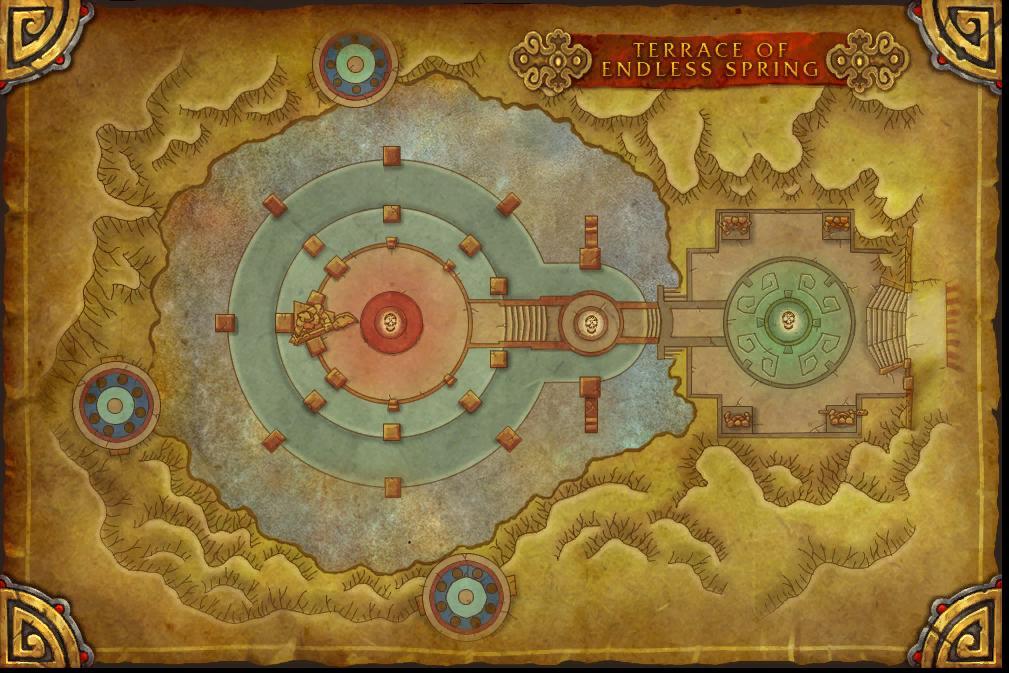 Each area has a unique atmosphere and mechanics. The raid is short but packed with memorable fights.
Terrace of Endless Collectibles: Mounts, Pets, Transmogs
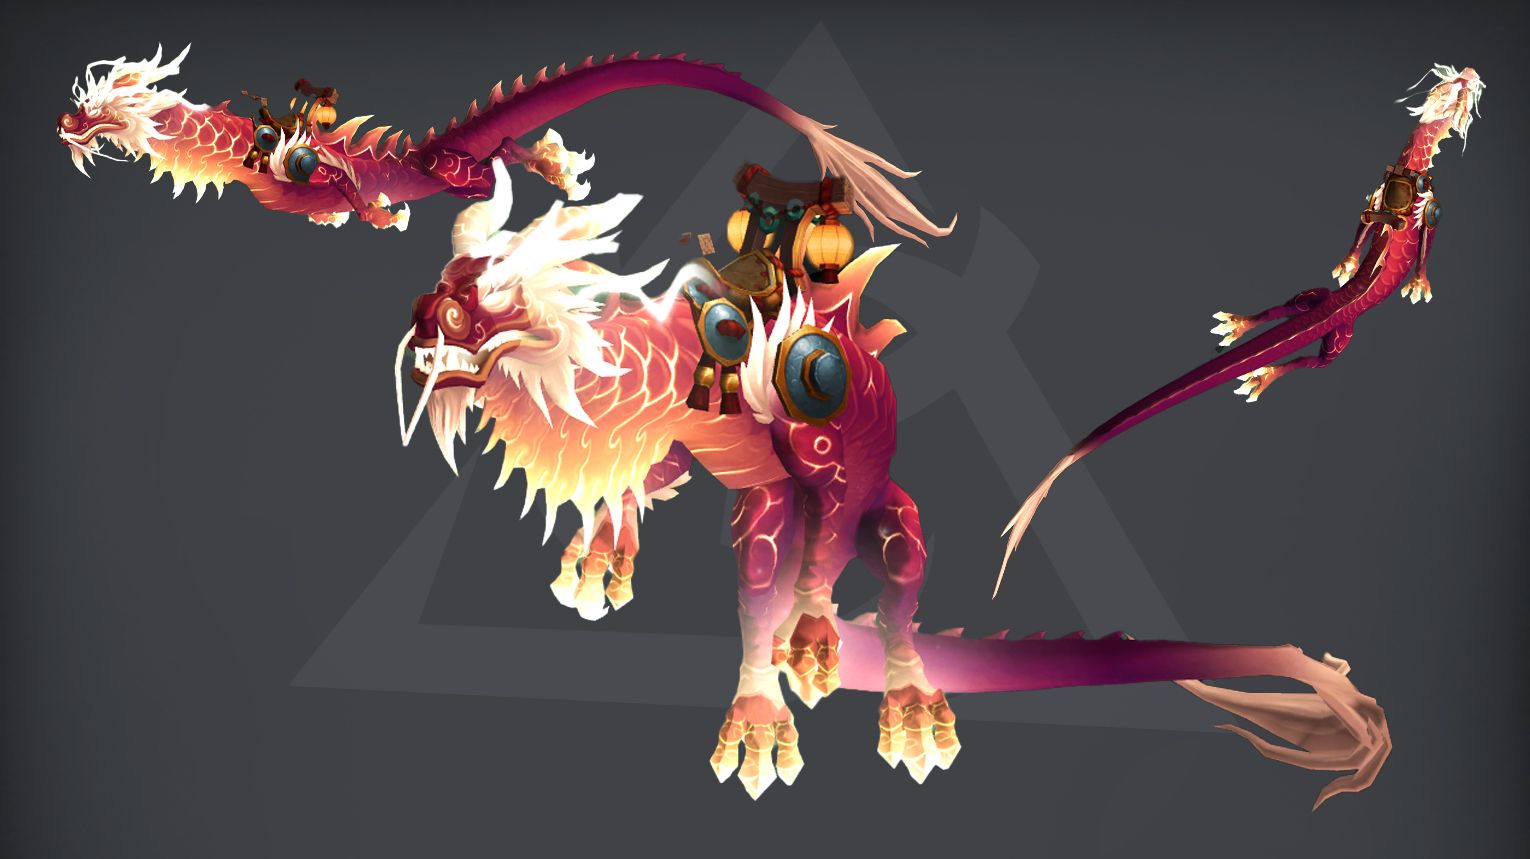
| Collectible | Source | Obtainable / Not Obtainable |
| Terrace of Endless Spring Sets (Tier 14) | ||
| Reins of the Heavenly Crimson Cloud Serpent | Glory of the Pandaria Raider | Yes |
Terrace of Endless Bosses Overview

Terrace of Endless Spring is a serene yet corrupted raid in World of Warcraft: Mists of Pandaria, where players battle the Sha’s influence over a sacred temple. The raid has four bosses, each representing different aspects of fear and corruption. You start against the Protectors of the Endless, three guardians fighting together—take them down in the right order for better loot. Next is Tsulong, a majestic cloud serpent twisted by darkness—a unique fight where you alternate between damaging and healing him. Then comes Lei Shi, a shy water spirit forced to fight—her battle gets fiercer as she weakens. Finally, the Sha of Fear awaits, sending players to distant platforms to break its hold before facing it directly. Each fight has its own twist, from teamwork challenges to survival tests. The raid is quick but packed with memorable mechanics and loot worth farming today.
Below, we’ll break down each boss fight and their rewards.
Can You Solo Terrace of Endless Spring in The War Within?

Soloing Terrace of Endless Spring in Retail WoW is a fast way to farm transmog gear, mounts, and achievements from Mists of Pandaria. At max level, the raid is easy, but a few mechanics might slow you down. This guide covers boss strategies, loot drops, and the best way to clear it quickly.
- Bosses & Mechanics:
- Protectors of the Endless (Stone Guard-like fight)
- No major mechanics; just burn them down.
- Tsulong (Two-phase fight: Day & Night)
- Day Phase: DPS him normally.
- Night Phase: Kill the adds quickly (though you may be able to ignore mechanics at high level).
- Lei Shi (Adds spawn, but can be burst down easily)
- She has a “Hide” mechanic, but it doesn’t matter with high damage.
- Sha of Fear (Final Boss, fear mechanics)
- Just nuke him; his fear mechanics won’t affect you much.
- Protectors of the Endless (Stone Guard-like fight)
- Loot & Transmogs:
- Sha-touched weapons (can be transmogged).
- Tier 14 lookalike sets for transmog collectors.
Protectors of the Endless

The Protectors of the Endless is a council-style raid boss fight in WoW (Throne of Thunder) where you face three bosses: Kaolan, Regail, and Asani. Killing them in phases (3 → 2 → 1) makes surviving easier, with each phase adding new abilities. Key mechanics include spreading out, interrupting spells (Water Bolt/Lightning Bolt), and managing orbs (Corrupted Waters for haste buffs). Use Bloodlust in the final phase to burn the last boss quickly. Heroic mode adds Minions of Fear that require careful stack management to avoid wipes.
 Preferred Classes:
 Tanks: Two tanks (one for Kaolan, one for Regail/Asani).
 Healers: Strong AoE healers (due to raid-wide damage from Touch of Sha and Overwhelming Corruption).
 DPS:
DPS:
- Ranged DPS preferred for spread mechanics.
- Classes with strong interrupts (e.g.,
 Rogues,
  Mages) for Water Bolt and Lightning Bolt.
 - Burst DPS for Phase 3 burn.
 Tips:
Tips:
- Spread Out: Minimize splash damage from Water Bolt and Lightning Prison.
- Interrupts: Prioritize Water Bolt (Asani) and Lightning Bolt (Regail).
- Dispels: Remove Lightning Prison stuns immediately.
- Orb Management:
- Move bosses away from Cleansing Waters (heals bosses).
- Stack to kill Corrupted Waters for Purified buff (+25% haste).
- Avoid Void Zones: Defiled Ground (Kaolan) and Expel Corruption (Phase 3) reduce room space.
 Strategy:
Phase 1 (Three Bosses)
- Tank Assignments:
- Tank 1: Kaolan (melee + Touch of Sha DoT).
- Tank 2: Regail + Asani (interrupt spells).
- DPS Focus: Burn one boss (recommend Kaolan first for easier raid damage).
Phase 2 (Two Bosses)
- Regail + Asani:
- Dodge Lightning Storm by standing near ring borders (20/40/60-yard marks).
- Kill Corrupted Waters for haste buff.
- Kaolan + Asani:
- High raid damage (Touch of Sha + Defiled Ground voids).
- Kill Asani last with Purified buff active.
Phase 3 (One Boss)
- Final Burn: Use all cooldowns.
- Regail/Asani: Overwhelming Corruption (stacking raid damage).
- Kaolan: Expel Corruption orbs (move boss away).
 Bloodlust/Drums:
Phase 3: Optimal for burning the final boss before raid damage overwhelms healers.
 Protectors of the Endless loot table:
Tsulong
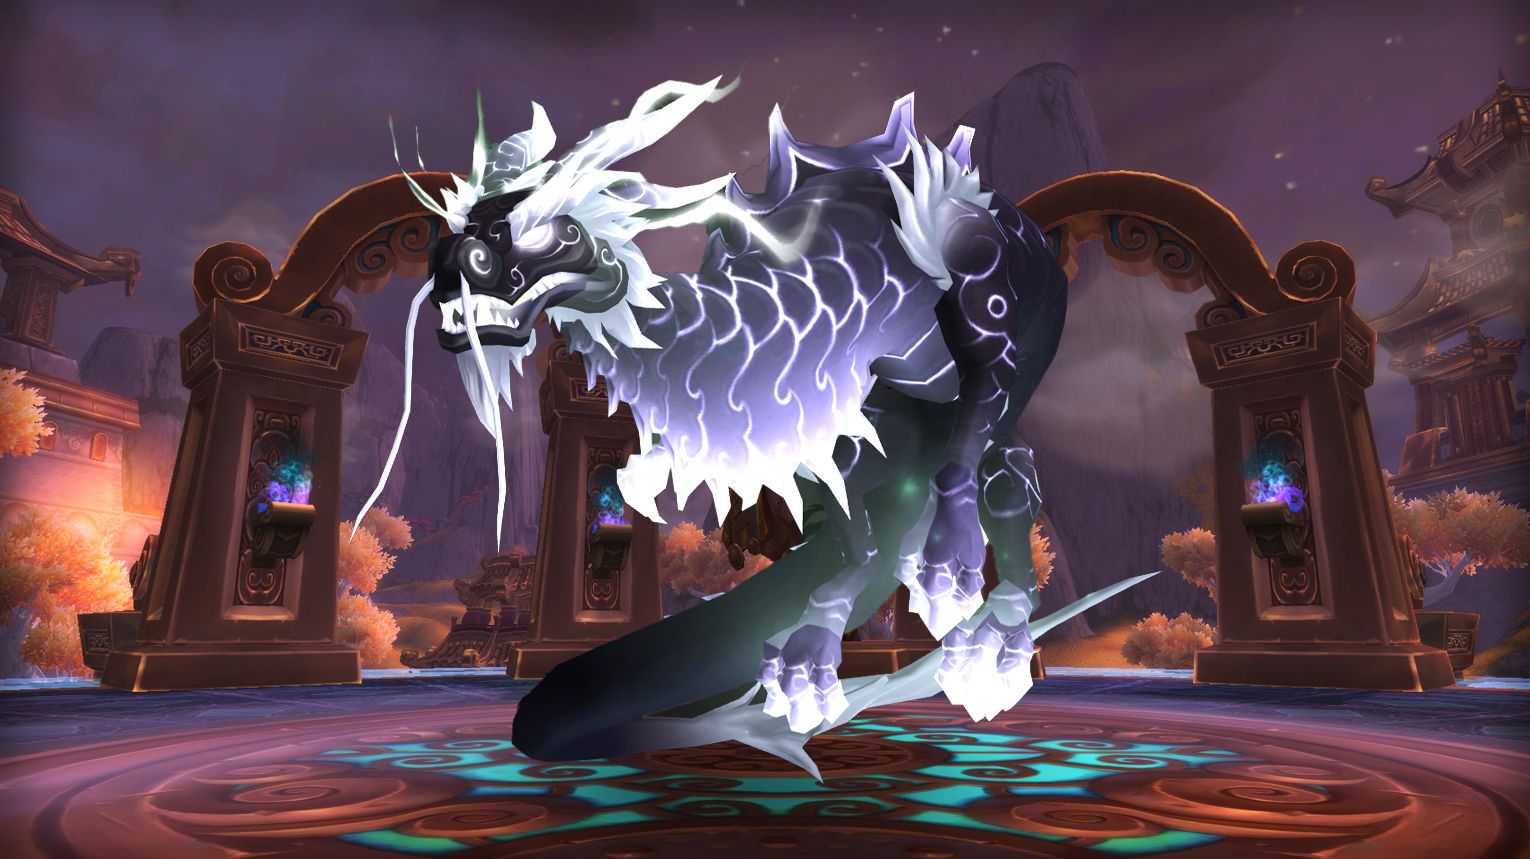
Tsulong is a two-phase raid boss alternating between Night Phase (DPS) and Day Phase (healing). During Night Phase, tanks must swap after Shadow Breath while raid resets Dread Shadows in Sunbeams. Day Phase requires healing Tsulong while killing adds – prioritize Unstable Shas and position Fright Spawns away from raid. Use Bloodlust in Night Phase for maximum DPS efficiency. Heroic adds Dark of Night (Night Phase) and Light of Day buff beams (Day Phase).
 Preferred Classes:
 Tanks: Two tanks required for Night Phase tank swaps
 Healers: Strong AoE healers for Day Phase
 DPS: Ranged DPS preferred for better Nightmare avoidance
- Classes with knockbacks/slows helpful for Unstable Shas in Day Phase
 Tips:
Tips:
- Night Phase: Always face boss away from raid, spread out 8+ yards
- Day Phase: Healers should position in front of Tsulong for buff
- Use Sunbeams efficiently to reset Dread Shadows stacks
- Kill Unstable Shas quickly before they reach Tsulong
- Time Embodied Terror kills to coincide with Sun Breath for easy Fright Spawn kills
 Strategy:
Night Phase Strategy
- Tank swap after every Shadow Breath
- Ranged spread out to minimize Nightmares damage
- Quickly dispel fear effects
- Rotate Sunbeam usage to reset Dread Shadows stacks
Day Phase Strategy
- Healers focus on Tsulong while keeping raid alive
- Tank Embodied Terrors in front of Tsulong for Sun Breath
- Kill Unstable Shas before they reach Tsulong
- Position Fright Spawns facing away from raid
 Bloodlust/Drums:
Night Phase: There are fewer distractions for your raid in this phase than in the Day Phases, and it is more efficient to DPS him rather than to heal him.
 Tsulong loot table:
| Type of Armor | Item | Loot type |
| Cloth | Sandals of the Blackest Night | Feet |
| Shoulderpads of Twisted Fate | Shoulder | |
| Invoker’s Belt of Final Winter | Waist | |
| Belt of Embodied Terror | Waist | |
| Healer’s Belt of Final Winter | Waist | |
| Sorcerer’s Belt of Final Winter | Waist | |
| Leather | Gauntlets of the Shadow’s Caress | Hands |
| Fear-Blackened Leggings | Legs | |
| Weaver’s Cord of Eternal Autumn | Waist | |
| Stalker’s Cord of Eternal Autumn | Waist | |
| Sunwrought Mail Hauberk | Chest | |
| Ranger’s Chain of Unending Summer | Waist | |
| Binder’s Chain of Unending Summer | Waist | |
| Plate | Sollerets of Instability | Feet |
| Grasps of Serpentine Might | Hands | |
| Patroller’s Girdle of Endless Spring | Waist | |
| Protector’s Girdle of Endless Spring | Waist | |
| Mender’s Girdle of Endless Spring | Waist | |
| Any | Loshan, Terror Incarnate | 1H Sword |
| Azure Cloud Serpent Egg | Battle Pet | |
| Daybreak Drape | Cloak | |
| Dread Shadow Ring | Ring | |
| Gao-Rei, Staff of the Legendary Protector | Staff | |
| Stuff of Nightmares | Trinket | |
| Spirits of the Sun | Trinket |
Lei Shi
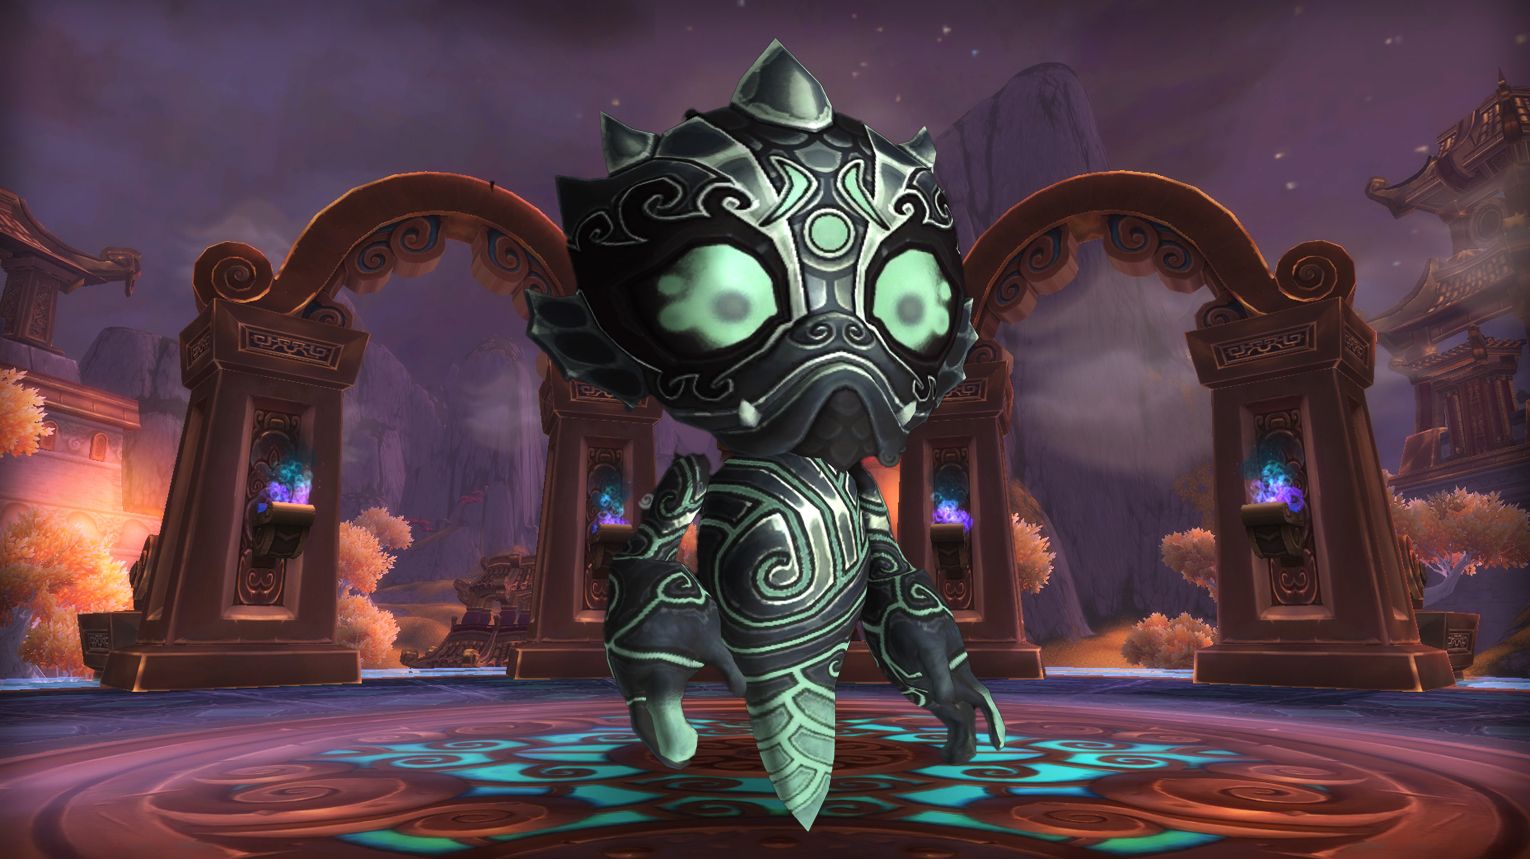
The encounter against Lei Shi is a single-phase fight that requires two tanks to alternate tanking the boss. As the fight progresses, Lei Shi‘s casting speed increases, leading to more tank damage. At specific health thresholds (80%, 60%, 40%, and 20%), Lei Shi summons adds and becomes immune until at least one add is killed. Additionally, Lei Shi can disappear and must be damaged through AoE attacks to reappear. Occasionally, Lei Shi will channel a wind that pushes players away and damages them, requiring players to move against the current and damage Lei Shi to break the effect.
 Preferred Classes:
 Tanks: Two tanks are required to alternate tanking Lei Shi due to the stacking debuff from Spray.
 DPS: Classes that can deal high damage while moving, such as Hunters, are beneficial. DoT classes can also be advantageous during the Get Away! phase.
 Healers: Healers with strong single-target healing and cooldowns to mitigate the high damage phases, especially during Get Away! and Protect phases.
 Tips:
Tips:
- Tank Switching: Ensure tanks are positioned correctly to avoid both being affected by Spray. Use the triangle formation with Lei Shi in the center.
- Add Management: Focus on killing one Animated Protector quickly to break Lei Shi‘s immunity. Crowd-control the other adds to reduce tank damage.
- Movement: During Get Away!, all players must move towards Lei Shi to reduce damage taken. Use cooldowns to survive this phase.
- AoE Damage: When Lei Shi disappears, distribute DPS evenly to quickly find and damage her.
 Strategy:
- Tank Switching: Alternate tanks to manage the Spray debuff.
- Handling Hide: Distribute DPS evenly to quickly find and damage Lei Shi.
- Dealing with Get Away!: Move towards Lei Shi and use cooldowns to survive the high damage. Focus on dealing 4% of Lei Shi‘s health to break the effect.
- Managing Protect: Focus down one Animated Protector to break Lei Shi‘s immunity. Crowd-control or tank the other adds.
- Positioning: Use a triangle formation with Lei Shi in the center to avoid both tanks being affected by Spray.
 Bloodlust/Drums:
20% health: This is the phase where Lei Shi deals the most damage, and killing her quickly is crucial.
 Lei Shi loot table:
| Type of Armor | Item | Loot type |
| Cloth | Robes of the Unknown Fear | Chest |
| Healer’s Belt of Final Winter | Waist | |
| Sorcerer’s Belt of Final Winter | Waist | |
| Invoker’s Belt of Final Winter | Waist | |
| Leather | Stalker’s Cord of Eternal Autumn | Waist |
| Weaver’s Cord of Eternal Autumn | Waist | |
| Ranger’s Chain of Unending Summer | Waist | |
| Binder’s Chain of Unending Summer | Waist | |
| Plate | Cuirass of the Animated Protector | Chest |
| Protector’s Girdle of Endless Spring | Waist | |
| Patroller’s Girdle of Endless Spring | Waist | |
| Mender’s Girdle of Endless Spring | Waist | |
| Any | Spirit of the Spring | Battle Pet |
| Spiritsever | Dagger | |
| Taoren, the Soul Burner | Gun | |
| Jin’ya, Orb of the Waterspeaker | Staff | |
| Terror in the Mists | Trinket | |
| Darkmist Vortex | Trinket |
Sha of Fear
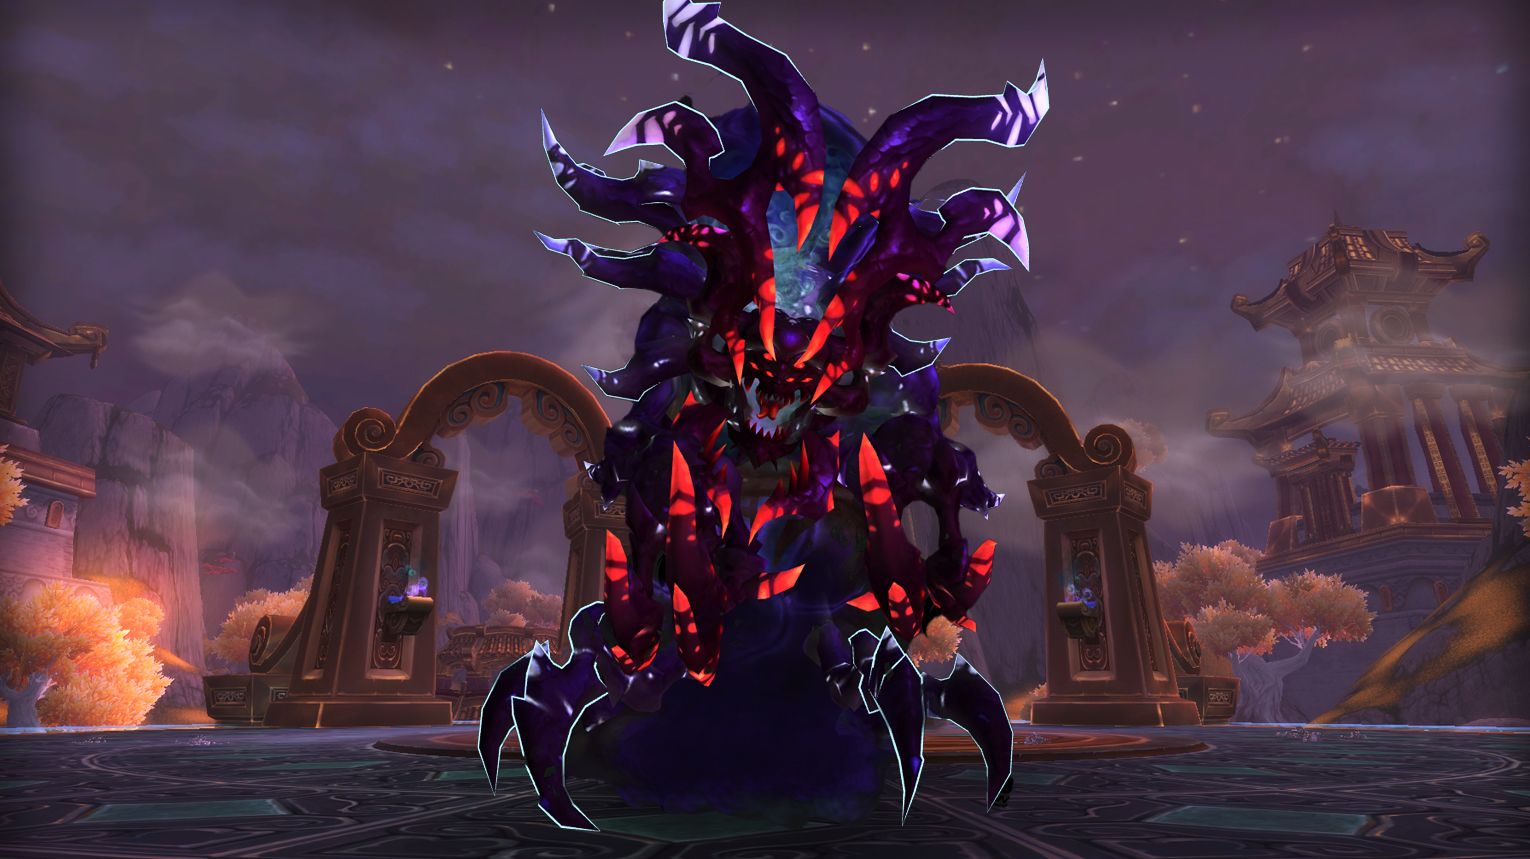
The fight against the Sha of Fear in World of Warcraft is a lengthy, single-phase encounter that takes place on a large round platform. The Sha of Fear uses various abilities and summons adds throughout the fight. The raid must avoid these abilities and manage the adds effectively. The platform has three smaller adjacent platforms where random raid members are sent to defeat hostile Pandaren NPCs. The difficulty remains constant throughout the fight, with a hard enrage timer and the need to defeat the Terrace Guardian before another group is sent away.
 Preferred Classes:
 Tanks: At least 2 tanks are required, with 3 being optimal for 25-man raids to handle the increased frequency of Ominous Cackle.
 Healers: 2 healers are recommended for 10-man raids, while 3-4 healers may be needed for 25-man raids.
 DPS: A mix of ranged and melee DPS is essential. Ranged DPS can stay within the Wall of Light safe zone, while melee DPS must move in and out to avoid Breath of Fear and deal with adds.
 Tips:
Tips:
- Positioning: Tanks must stand in the circle of light to create the Wall of Light safe zone. Raid members should spread out to minimize damage from Eerie Skull.
- Add Management: DPS players should focus on killing Terror Spawns from behind while avoiding Penetrating Bolts.
- Healing: Healers must be prepared for high damage spikes from Thrash, Eerie Skull, and Penetrating Bolts.
 Strategy:
- Main Platform: One tank should always be in the circle of light to maintain the Wall of Light. Raid members should stay within the safe zone, except for melee DPS who need to move out to attack the boss and adds. DPS players should kill Terror Spawns from behind and return to the safe zone before Breath of Fear.
- Adjacent Platforms: Groups sent to the adjacent platforms must defeat the Terrace Guardian quickly to return to the main platform. They should pick up Sha Globes, dispel fears from Dread Spray, and hide behind pillars during Death Blossom.
 Bloodlust/Drums:
Start of the Fight: Use Bloodlust/Drums at the beginning of the fight to maximize the benefit of cooldowns and potions.
 Sha of Fear loot table:
| Type of Armor | Item | Loot type |
| Cloth | Robes of Pinioned Eyes | Chest |
| Dreadwoven Leggings of Failure | Legs | |
| Leather | Wrap of Instant Petrification | Chest |
| Shadowgrip Girdle | Waist | |
| Any | Kilrak, Jaws of Terror | 1H Sword |
| Shin’ka, Execution of Dominion | 2H Axe | |
| Plans: Bloodforged Warfists | Blacksmithing Plans | |
| Plans: Ornate Battleplate of the Master | Blacksmithing Plans | |
| Plans: Gauntlets of Unbound Devotion | Blacksmithing Plans | |
| Plans: Chestplate of Limitless Faith | Blacksmithing Plans | |
| Plans: Gauntlets of Battle Command | Blacksmithing Plans | |
| Illusion: Jade Spirit | Illuson | |
| Pattern: Murderer’s Gloves | Leatherworking Pattern | |
| Pattern: Stormbreaker Chestguard | Leatherworking Pattern | |
| Pattern: Liferuned Leather Gloves | Leatherworking Pattern | |
| Pattern: Chestguard of Nemeses | Leatherworking Pattern | |
| Pattern: Fists of Lightning | Leatherworking Pattern | |
| Pattern: Imperial Silk Gloves | Tailoring Pattern | |
| Pattern: Legacy of the Emperor | Tailoring Pattern | |
| Essence of Terror | Trinket |
Terrace of Endless Spring Achievements List
| Achievement | Requirement |
| Raid Finder: Terrace of Endless Spring | Defeat the enemies in the Terrace of Endless Spring on any difficulty. |
| Terrace of Endless Spring | Defeat the enemies in the Terrace of Endless Spring on Normal difficulty or higher. |
| Terrace of Endless Spring Guild Run | Defeat the bosses while in a guild group. |
| Heroic: Terrace of Endless Spring | Defeat the enemies in the Terrace of Endless Spring on Heroic difficulty. |
| Heroic: Sha of Fear | Defeat the Sha of Fear on Heroic difficulty. |
| Heroic: Sha of Fear Guild Run | Defeat the Sha of Fear on Heroic difficulty while in a guild group. |
| Ahead of the Curve: Sha of Fear | Defeat the Sha of Fear on Normal difficulty, before the release of patch 5.2. |
| Cutting Edge: Sha of Fear | Defeat the Sha of Fear on Heroic difficulty, before the release of patch 5.2. |
| Realm First! Sha of Fear | First guild on the realm to defeat the Sha of Fear on Heroic difficulty while in a guild group. |
| Heroic: Lei Shi | Defeat Lei Shi on Heroic difficulty. |
| Heroic: Protectors of the Endless | Defeat the Protectors of the Endless on Heroic difficulty. |
| Heroic: Tsulong | Defeat Tsulong on Heroic difficulty. |
| Sha of Fabulous | Collect any class armor set from the Heart of Fear and Terrace of Endless Spring. |
| Face Clutchers | Defeat Lei Shi while all members of the raid are afflicted by Parasitic Clutch on Normal or Heroic difficulty. |
| Power Overwhelming | Defeat the Protectors of the Endless with each protector as the last member alive on Normal or Heroic difficulty. |
| Raiding with Leashes VI: Pets of Pandaria | Collect all of the battle pets listed below from Mogu’shan Vaults, Terrace of Endless Spring, and Heart of Fear. |
| The Mind-Killer | Defeat the Sha of Fear on Normal or Heroic difficulty without any raid members being feared by Dread Spray or Breath of Fear. |
