
Dual gathering in Voidstorm is the most efficient gold-making method available in Midnight. The zone’s dense node spawns, rare materials, and unique mechanics make it the premier farming location for any serious gold farmer.
Here’s everything you need to know to maximize your gold per hour:
- Why Voidstorm Is Best
- Optimal Combination
- Specialization Builds
- Profession Equipment
- Gathering Stats
- Consumables
- Infused Deposits & Overloading
- Farming Routes
- Skill Ranges
- Best Class for Voidstorm
Why Voidstorm Is the Best Farming Zone

Voidstorm has the highest node density in Midnight. The zone is packed with resources, and the nodes respawn quickly. Combined with the chance for Voidbound nodes and their valuable materials, this zone consistently outperforms others.
![]() The numbers are clear. A well-optimized dual gathering route in Voidstorm can yield 90,000–110,000 gold per hour. During peak early expansion weeks, that number can push past 130,000.
The numbers are clear. A well-optimized dual gathering route in Voidstorm can yield 90,000–110,000 gold per hour. During peak early expansion weeks, that number can push past 130,000.
Herbalism + Mining — The Optimal Combination

![]() Pick both. Herbalism and Mining together give you maximum node coverage. You’ll never fly past a valuable node because you have the wrong profession.
Pick both. Herbalism and Mining together give you maximum node coverage. You’ll never fly past a valuable node because you have the wrong profession.
| Profession | What You Gather | Why It’s Valuable |
|---|---|---|
| Herbalism | Eversong herbs (Dreamleaf, Ghost Orchid, Nightshade, etc.) | Alchemy consumables, Inscription, work orders |
| Mining | Ores (Copper, Silver, Umbrellin, etc.) | Blacksmithing, Engineering, Jewelcrafting |
Sell everything early. Hoarding is a trap. Prices drop fast as supply catches up. The gold you make in week one is worth more than the materials you hold onto for week four.
Specialization Builds for Voidstorm Farming
Your specialization choices determine your efficiency. Prioritize talents that let you gather while mounted and increase resource yield.
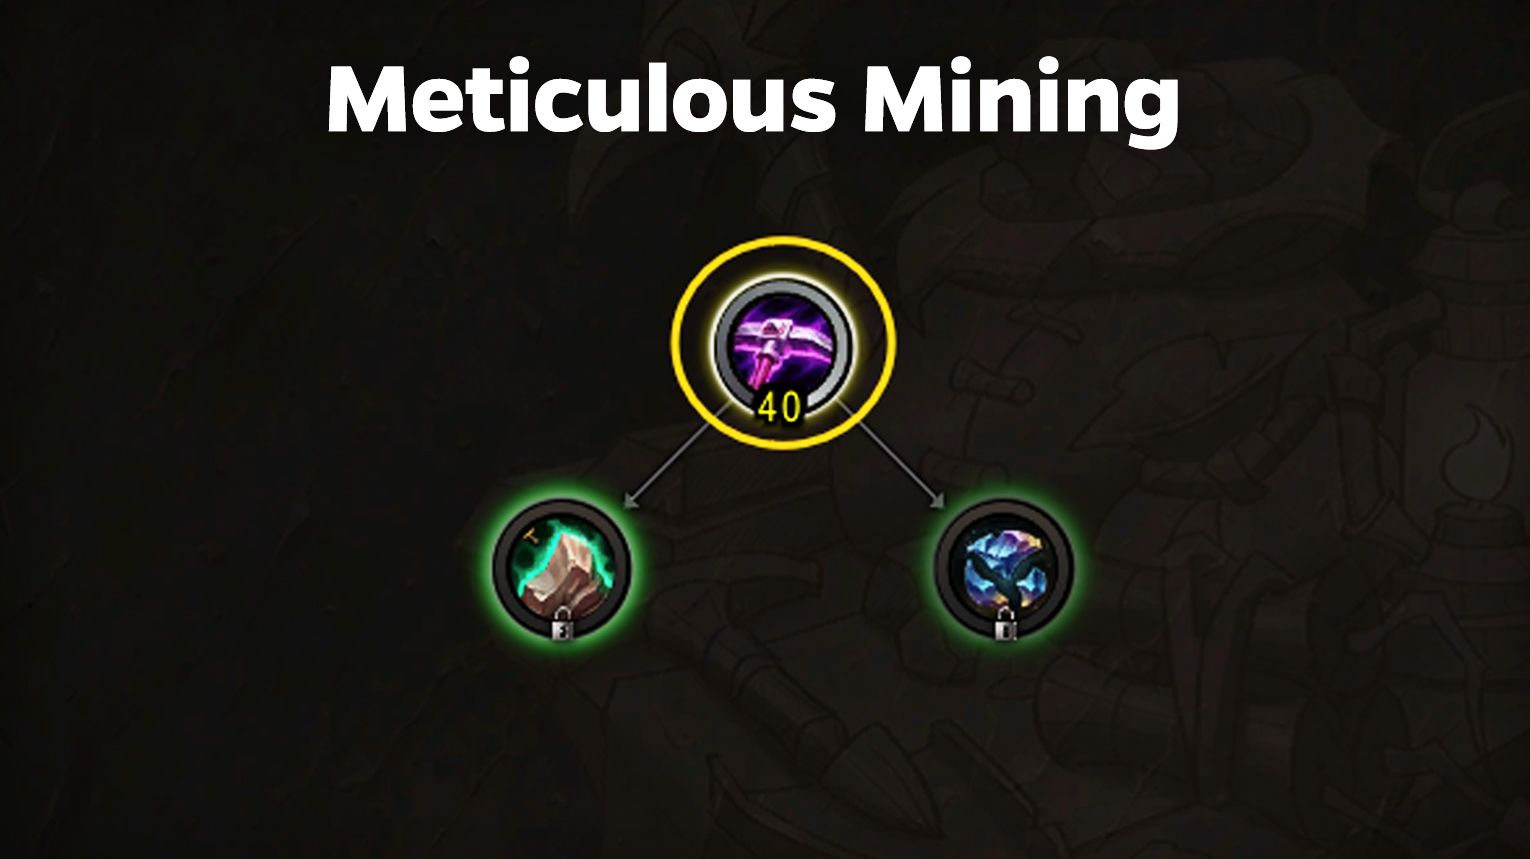
Mining Specialization Order
| Priority | Specialization | Why |
|---|---|---|
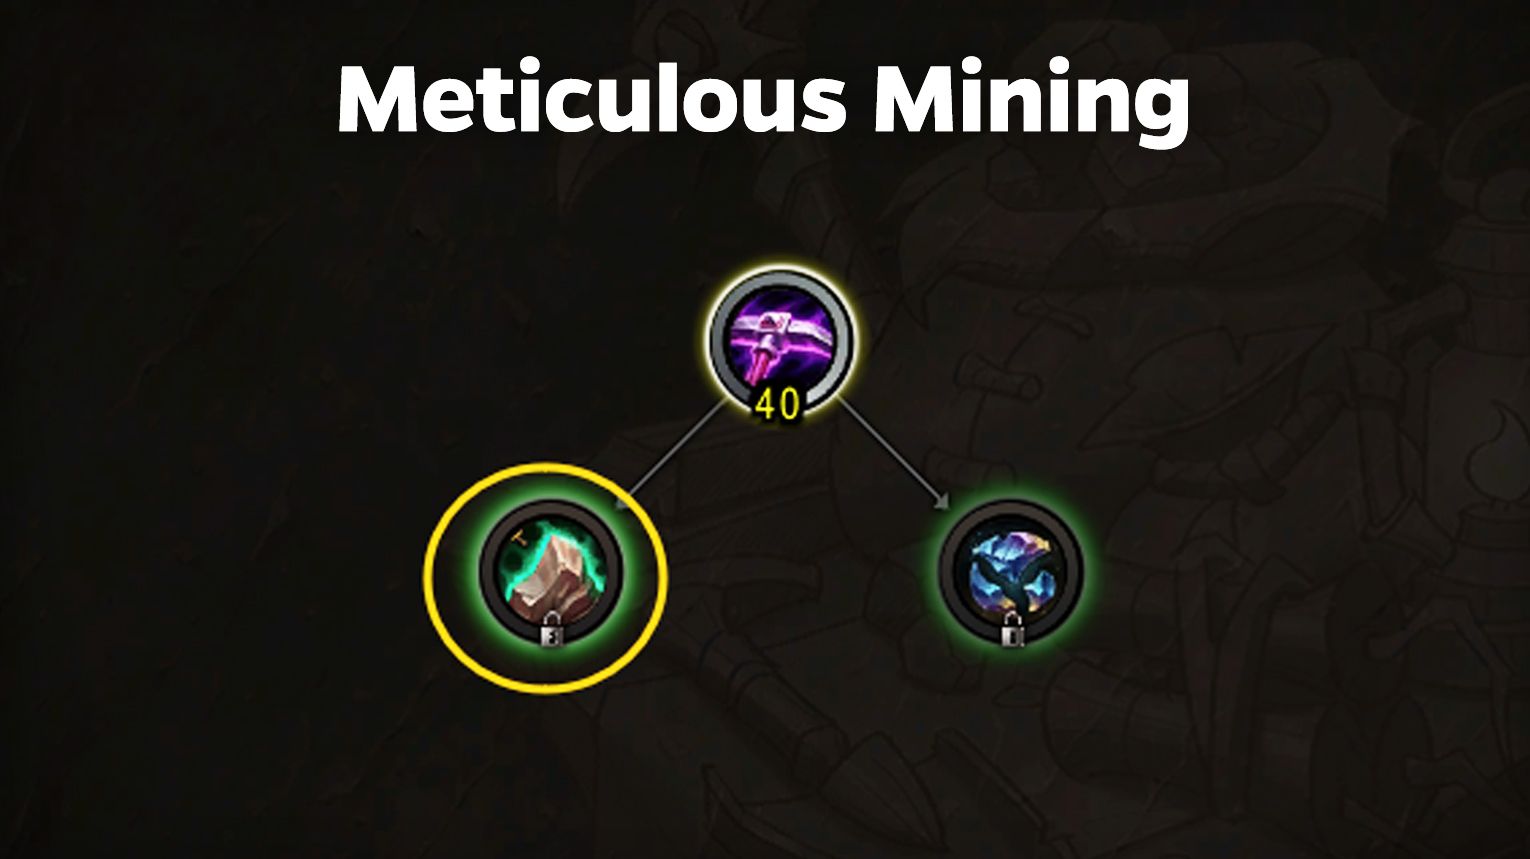
| 1 | Meticulous Mining | Unlocks gathering while mounted |
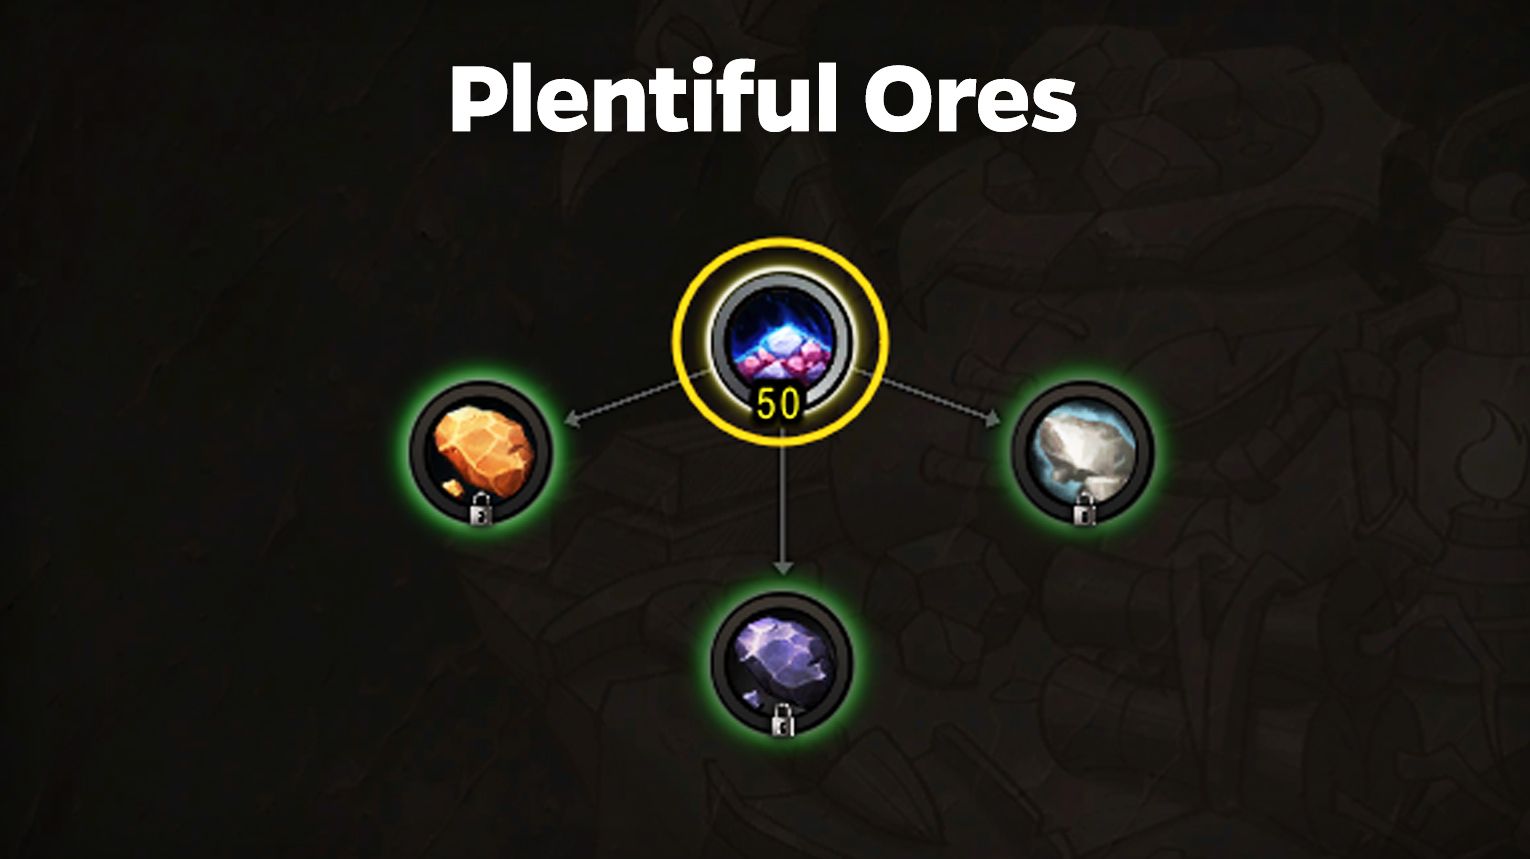
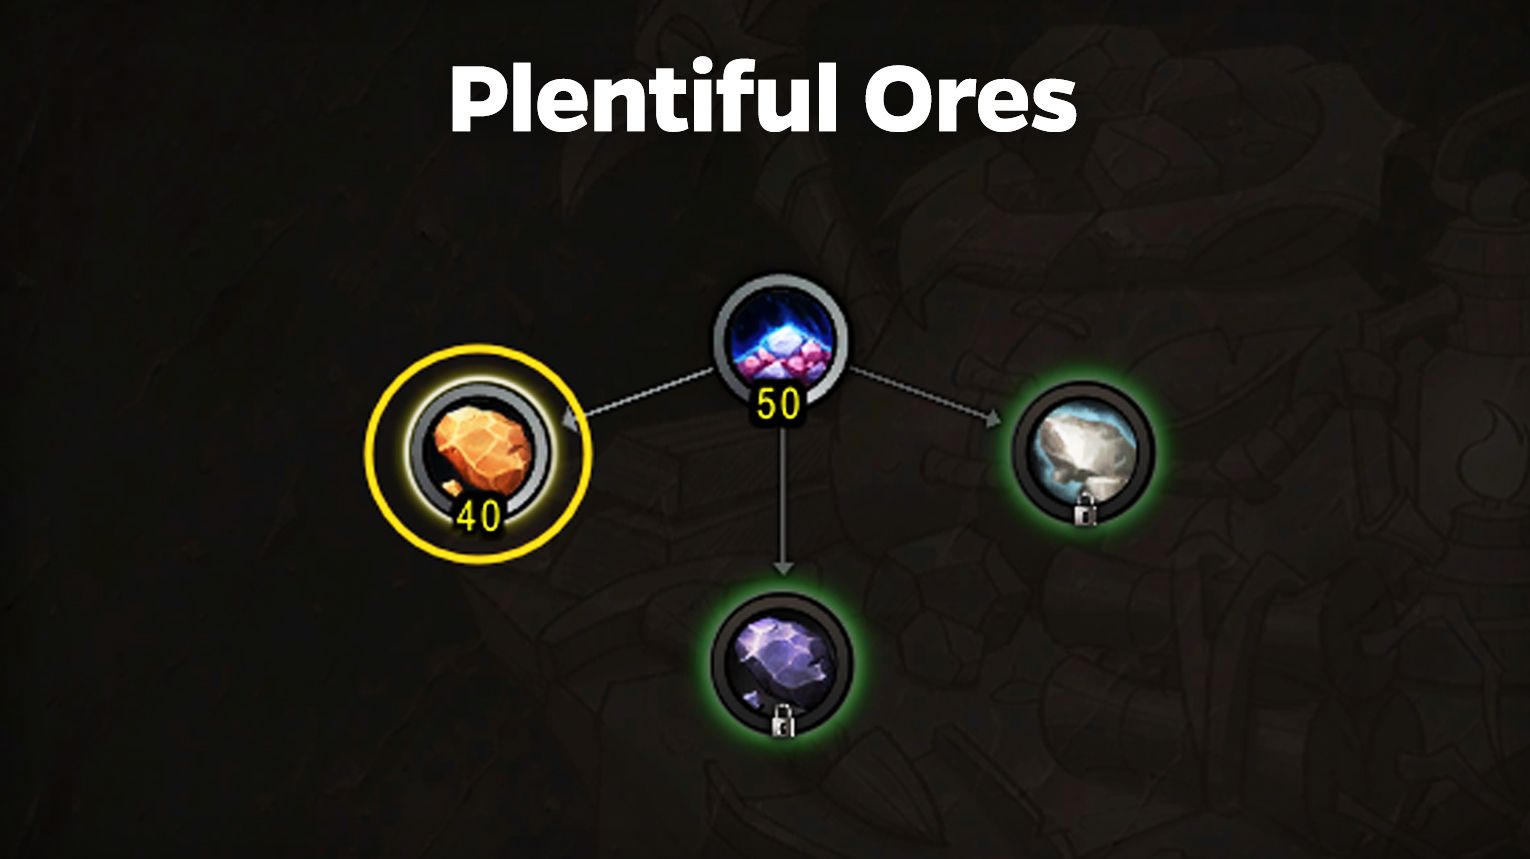
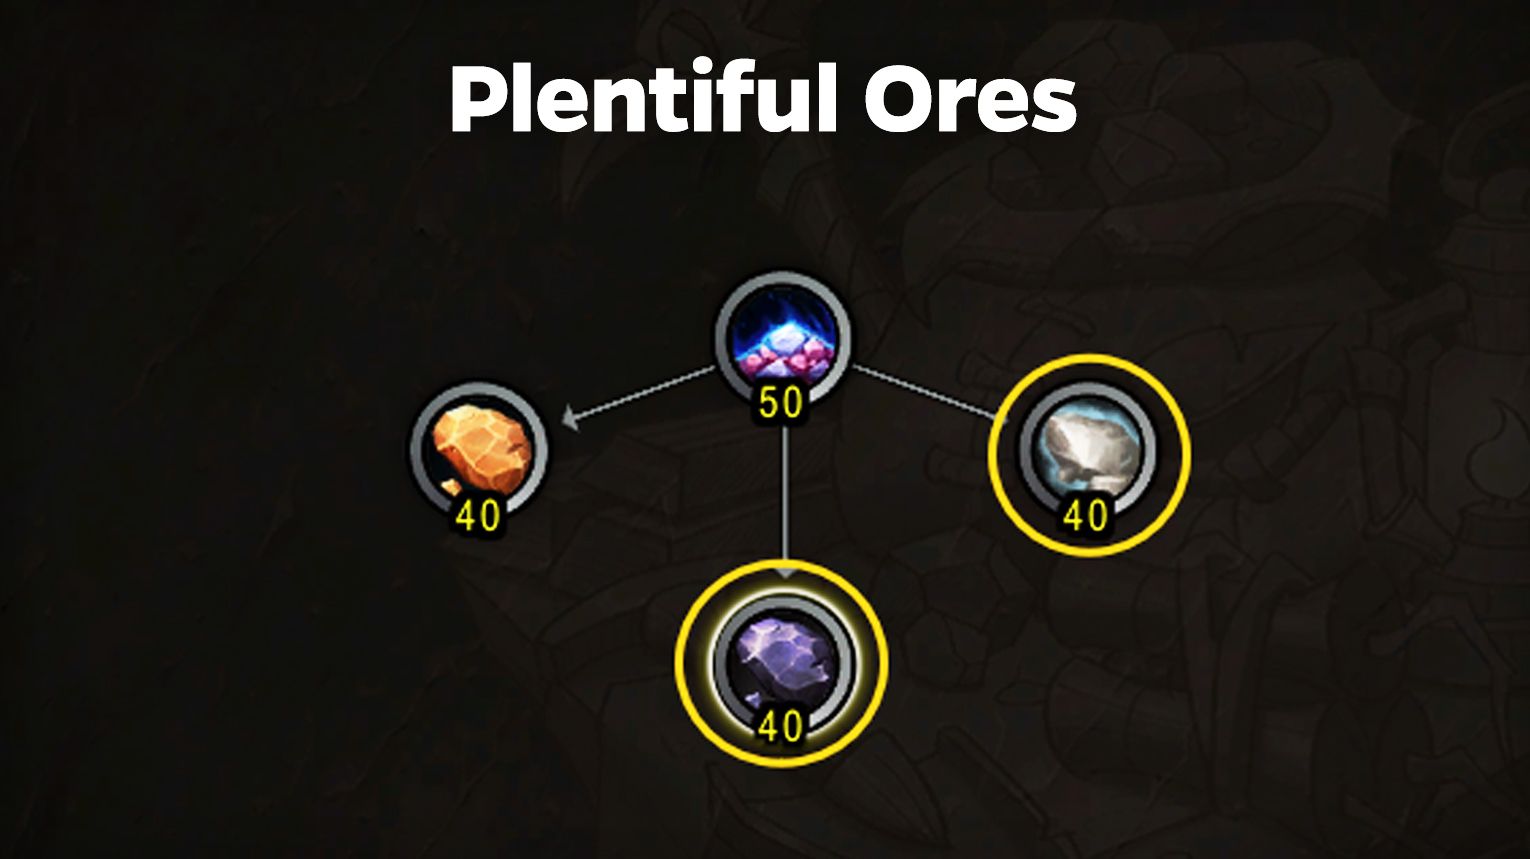
| 2 | Plentiful Ores | Increases yield from all ore nodes |
| 3 | Refulgent Copper | Copper is common and valuable early |
| 4 | Umbrellin or Brilliant Silver (pick one, max it) | Don’t split points |
| 5 | Rich Deposits | More value from rich nodes |
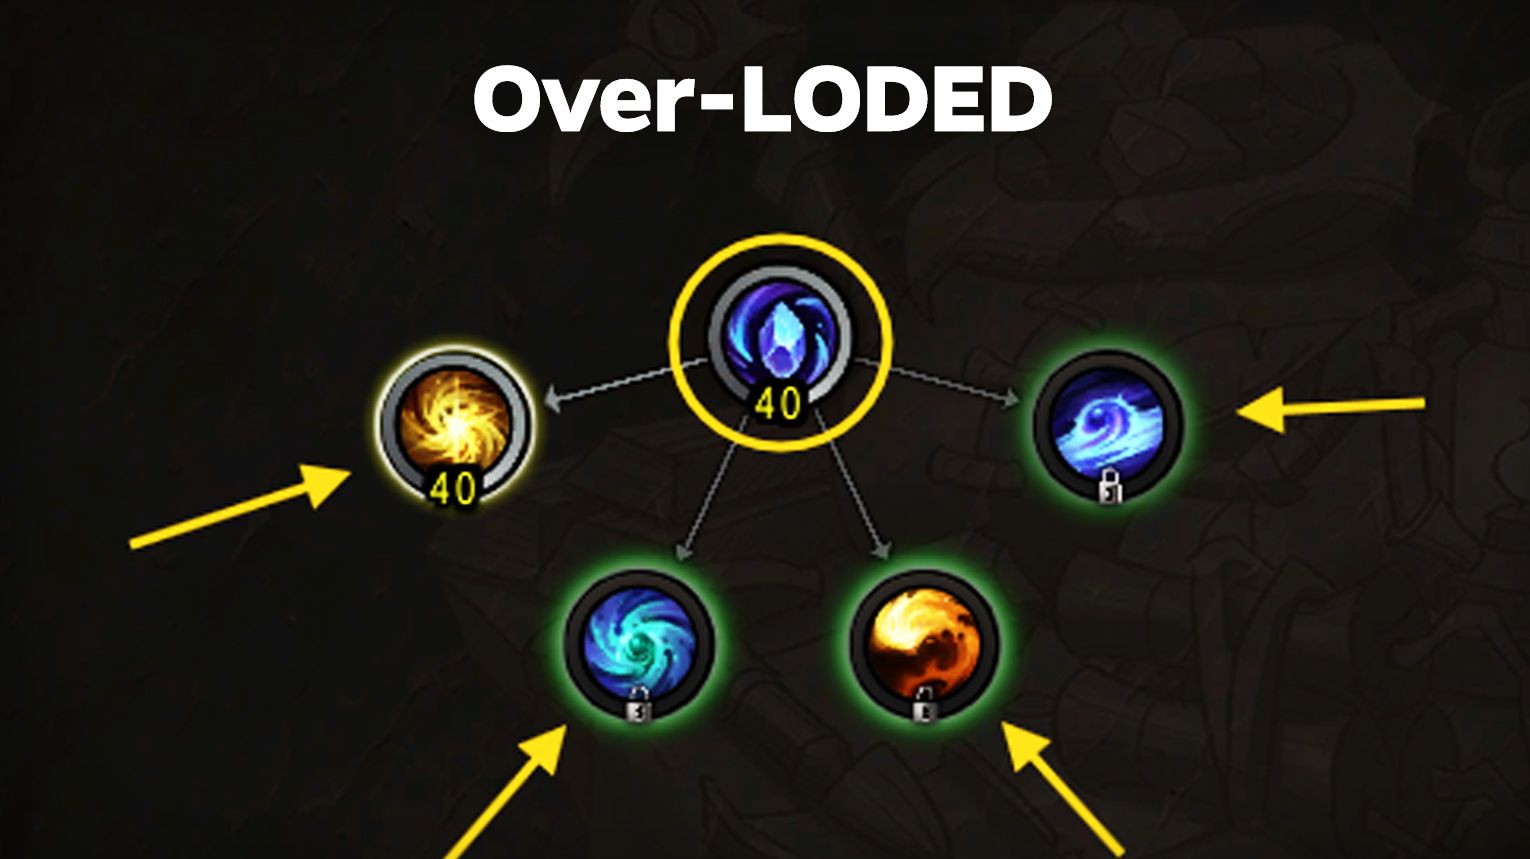
| 6 | Overload Specialization | Extra materials from overload |
Avoid Seams. They appear too rarely to justify investing points.
Herbalism Specialization Order (Non-Druid)


| Priority | Specialization | Why |
|---|---|---|
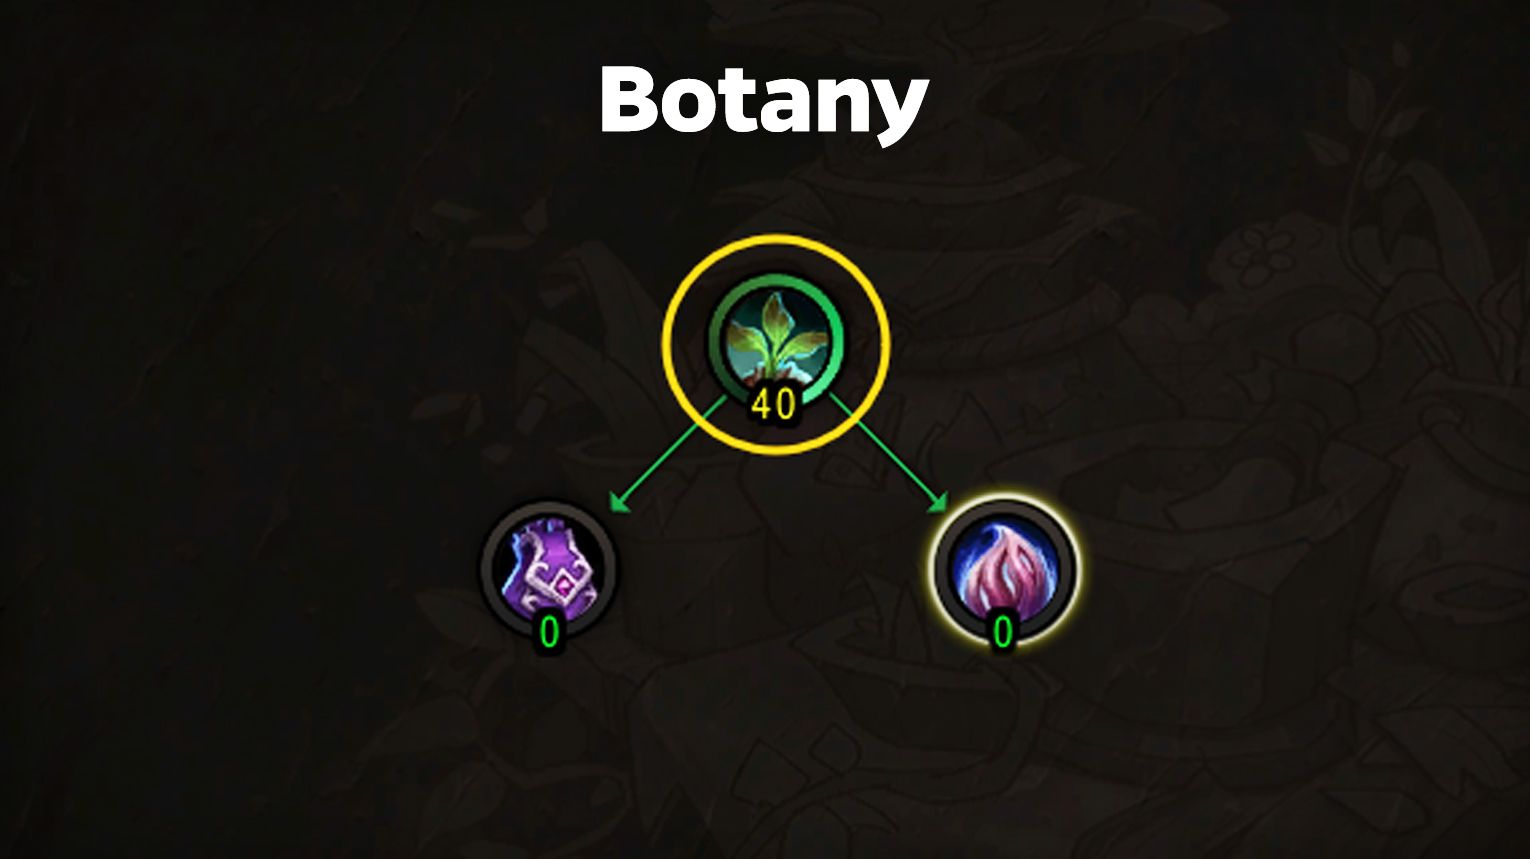
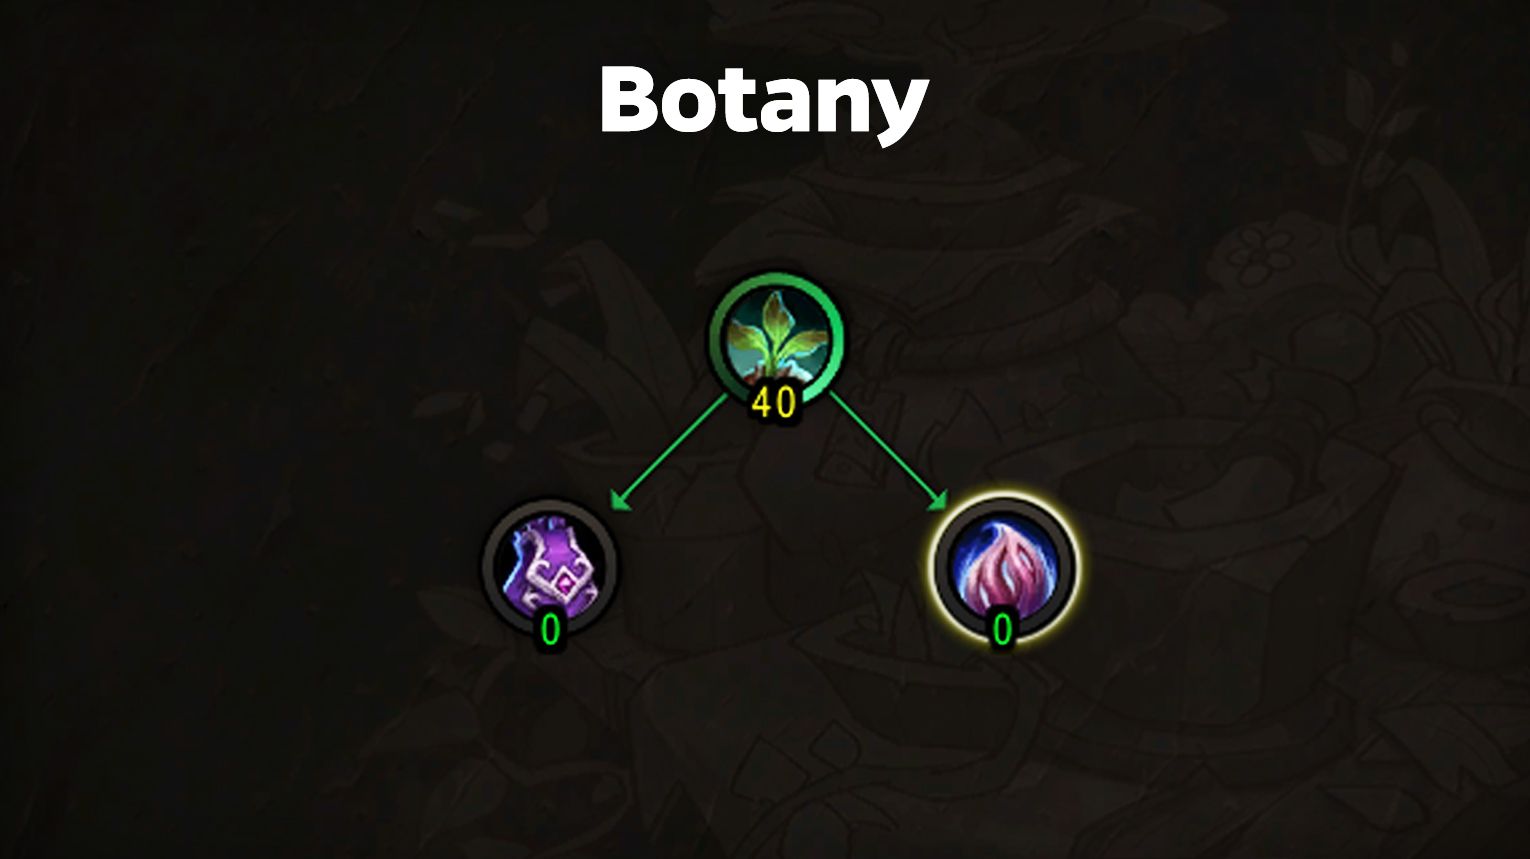
| 1 | Botany (max) | Unlocks gathering while mounted |
| 2 | Bloombringer | Increase herb yield |
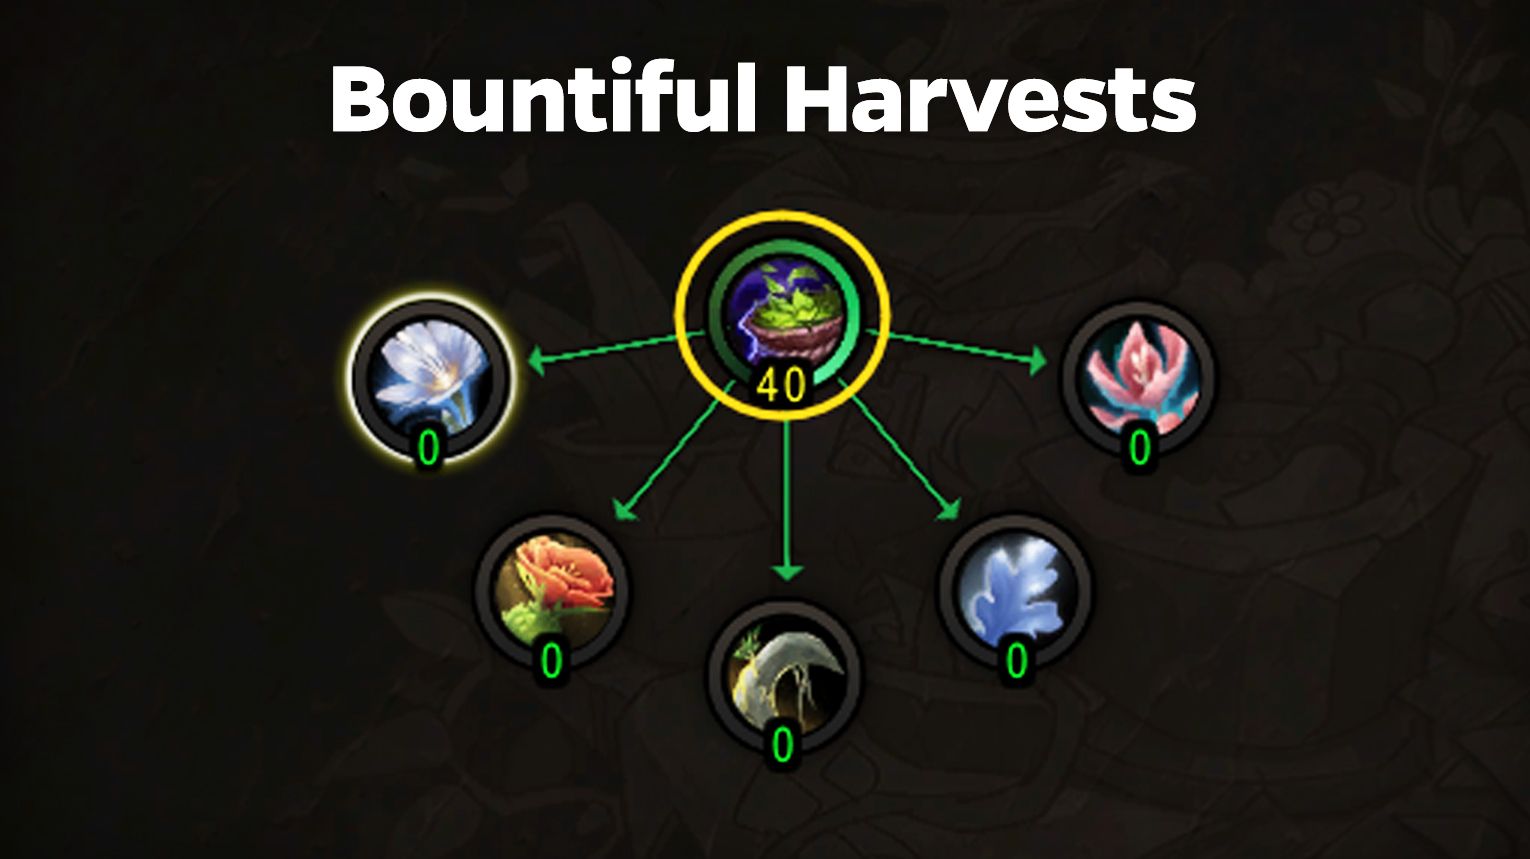
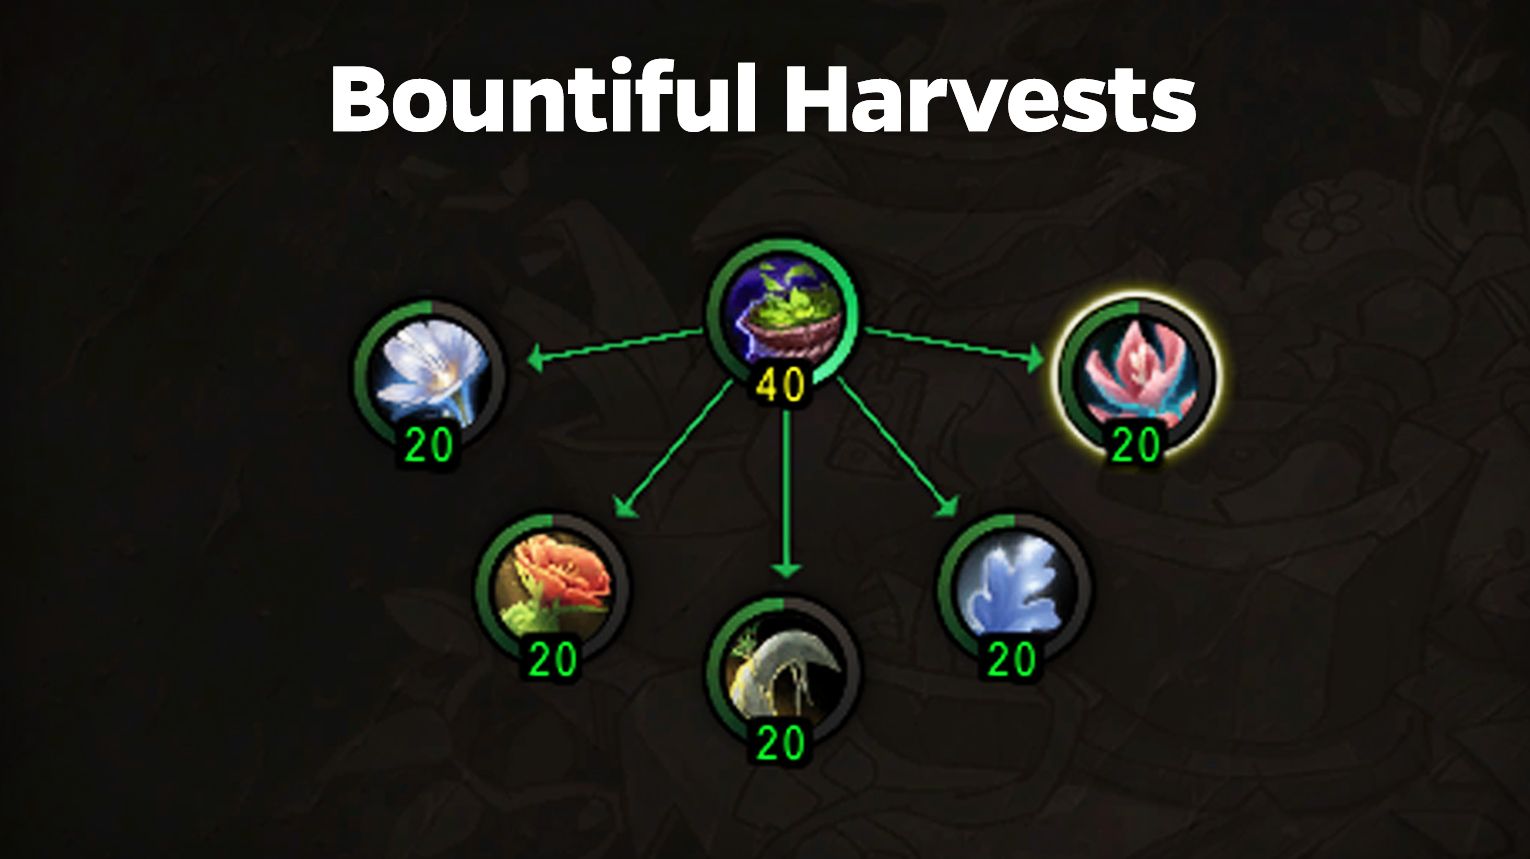
| 3 | Bountiful Harvest | More materials per node |
| 4 | Midnight Overload | Extra materials from overload procs |
| 5 | Mulch bonuses | Rare material chance |
 Herbalism Specialization Order (Druid)

| Priority | Specialization | Why |
|---|---|---|
| 1 | Bountiful Harvest | You can gather in flight form anyway |
| 2 | Bloombringer | Increase herb yield |
| 3 | Bountiful Harvest (max) | More materials per node |
| 4 | Midnight Overload | Extra materials from overload procs |
| 5 | Mulch bonuses | Rare material chance |
Profession Equipment — What Actually Matters

| Slot | Item | Crafted By | Materials |
|---|---|---|---|
| Hardhat | Farstrider Hardhat | Engineering | 1x Evercore, 1x Soul Sprocket |
| Satchel | Farstrider Rock Satchel | Engineering | 1x Evercore, 1x Soul Sprocket |
| Pickaxe | Thalassian Pickaxe | Blacksmithing | 6x Refulgent Copper Ingot |
| Hardhat (Epic) | Sin’dorei Gilded Hardhat | Engineering | 2x Evercore, 4x Aetherlume, 1x Majestic Hide |
| Satchel (Epic) | Junker’s Big Ol’ Bag | Engineering | 2x Evercore, 4x Aetherlume, 1x Majestic Hide |
| Pickaxe (Epic) | Sun-Blessed Pickaxe | Blacksmithing | 5x Sterling Alloy, 2x Dazzling Thorium, 1x Majestic Claw |
![]() Customizing stats: Accessory stats are fixed. Tool stats can be customized with missives. Blue items are BoE — check the Auction House or place a Crafting Order.
Customizing stats: Accessory stats are fixed. Tool stats can be customized with missives. Blue items are BoE — check the Auction House or place a Crafting Order.
The Three Gathering Stats — Which One to Stack

| Stat | Effect | Best For |
|---|---|---|
| Finesse | Chance to gather extra materials | Raw material farming (most consistent gold) |
| Deftness | Faster gathering speed | Reducing downtime during long sessions |
| Perception | Chance to get rare materials | Jackpot hunting for high-value drops |
For Voidstorm dual gathering: Finesse is your top priority. Extra materials mean more gold from every node. The zone’s high node density means you’ll gather hundreds of nodes per session — Finesse pays off the most over time.
![]() When to use Deftness: If mob density is high and you keep getting dismounted, stack Deftness to gather faster and avoid combat. With consumables listed below, you can hit a comfortable Deftness level and then stack Finesse.
When to use Deftness: If mob density is high and you keep getting dismounted, stack Deftness to gather faster and avoid combat. With consumables listed below, you can hit a comfortable Deftness level and then stack Finesse.
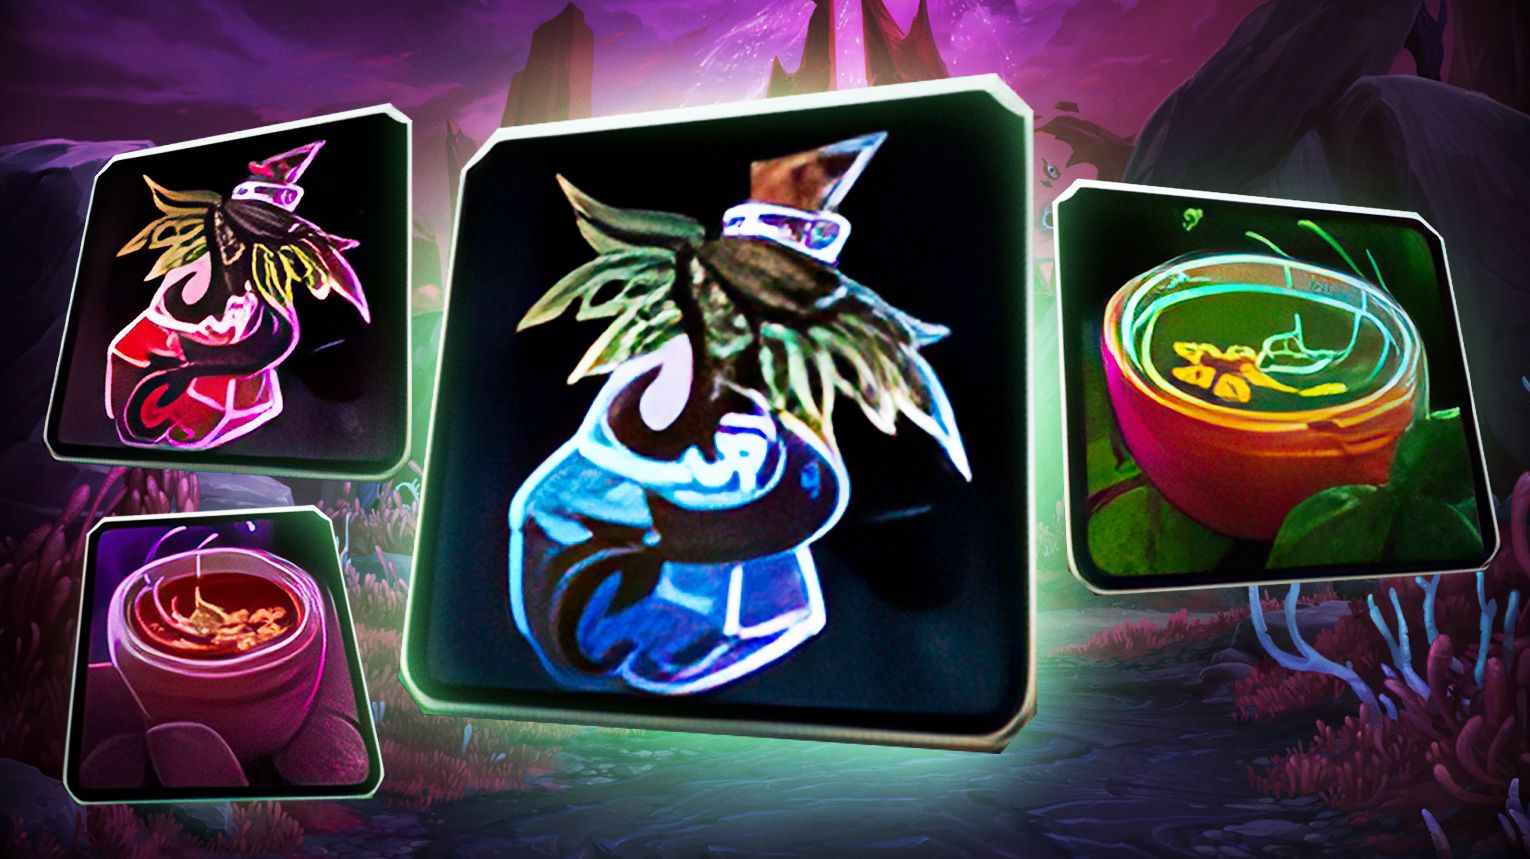
Consumables — Don’t Farm Without Them
| Consumable | Effect | Duration |
|---|---|---|
| Haranir Phial of Finesse | +38 Finesse (+3.8%), +11 Deftness (+3.6%) | 30 min |
| Haranir Phial of Perception | +38 Perception (+3.8%), +11 Deftness (+3.6%) | 30 min |
| Argentleaf Tea | +50 Finesse (+5.0%) | 1 hour |
| Sanguithorn Tea | +50 Perception (+5.0%) | 1 hour |
| Azeroot Tea | +50 Deftness (+16.6%) | 1 hour |
| Darkmoon Firewater | +15% Deftness | 1 hour |
| Refulgent Razorstone | +43 Finesse (+4.3%) for tools | 2 hours |
Recommendation for Voidstorm: Use Haranir Phial of Finesse + Argentleaf Tea + Darkmoon Firewater. This combination maximizes your material yield per hour.
Infused Deposits & Overloading

Infused deposits are special nodes with glowing visuals. They drop extra materials but also apply a negative effect when mined.
How to Learn Overload
Mine your first Infused Deposit to learn the Overload ability. Use it near an infused deposit for a bonus effect.
- Cooldown: 12 hours, reduced by 30 minutes per normal node mined. Roughly 24 deposits to fully reset.
- Where to find it: General tab in your spellbook (not profession tab).
Infused Deposit Types by Zone
| Deposit Type | Zone | Mote | Overload Effect |
|---|---|---|---|
| Lightfused | Eversong Woods | Mote of Light | Light circles appear on the ground — stand in them for extra motes |
| Wild | Zul’Aman | Mote of Wild Magic | Elite spawns — killing it gives 150 Perception for 5 minutes |
| Primal | Harandar | Mote of Primal Energy | Channel 50% of HP for extra motes (can kill you — stay above 50%) |
| Voidbound | Voidstorm | Mote of Pure Void | Portal + purple orbs — run into them quickly. Portal teleports you randomly (not worth using) |
![]() The mobs from wild nodes are worth killing. They drop a nice amount of extra resources. If you can kill them quickly, it’s absolutely worthwhile.
The mobs from wild nodes are worth killing. They drop a nice amount of extra resources. If you can kill them quickly, it’s absolutely worthwhile.
Farming Routes — Voidstorm
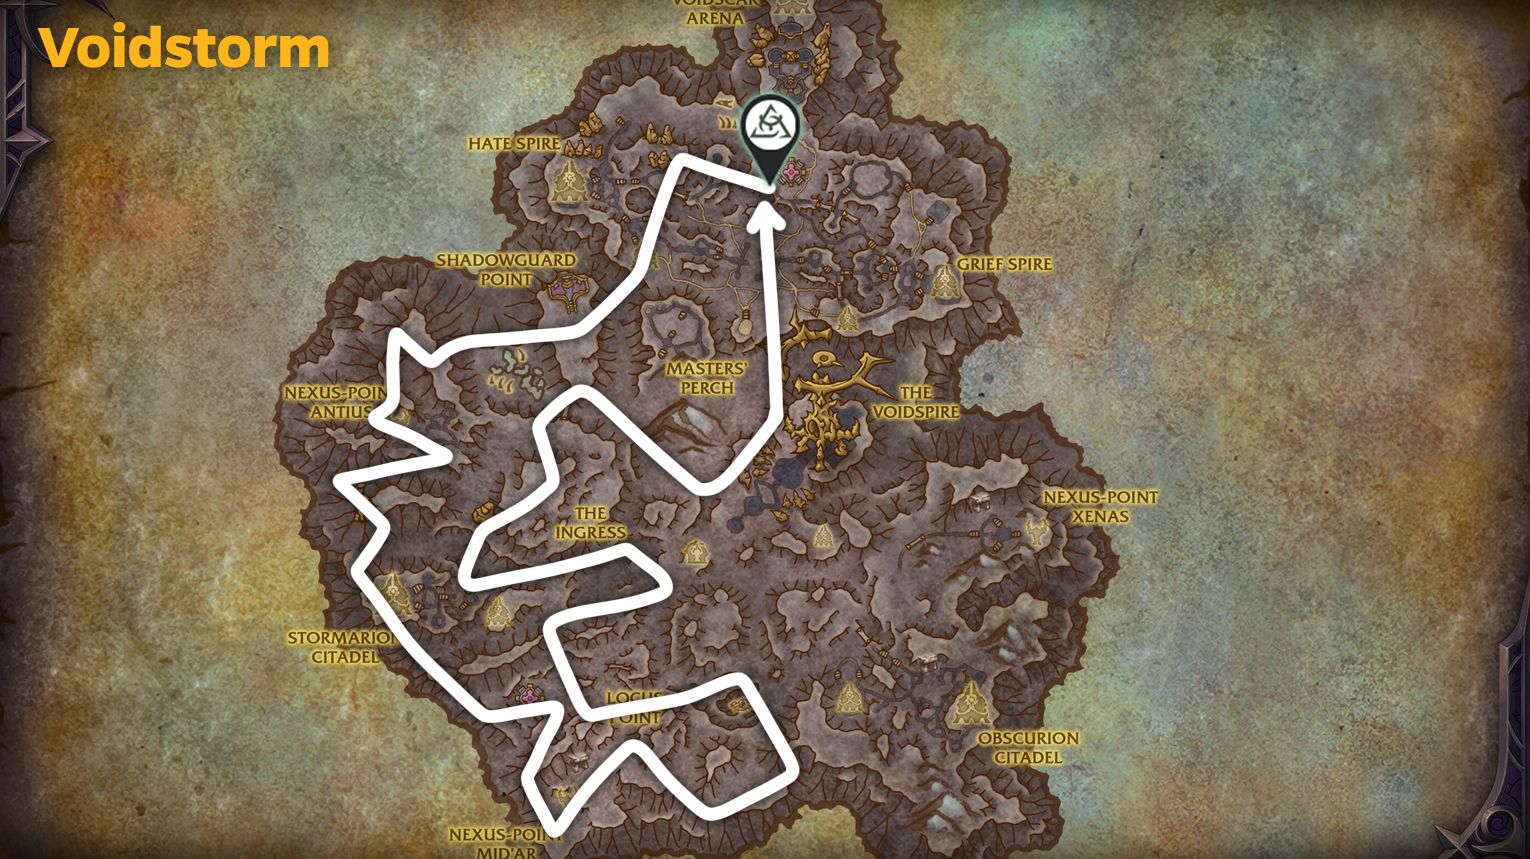
The Voidstorm route is simple and effective — a loop around the entire zone with short detours through the middle.
Route Strategy
| Step | Action |
|---|---|
| 1 | Start at the southern entrance |
| 2 | Loop clockwise around the zone perimeter |
| 3 | Take short detours through the center on each side |
| 4 | Cover the entire zone in one continuous path |
| 5 | Reset and repeat |
Why this works: The perimeter has the highest node density. Center detours catch the nodes that spawn in the middle. This route is easy to follow and can be run continuously without backtracking.
Other Zones
| Zone | Notes |
|---|---|
| Eversong Woods | Best starter zone — straightforward terrain, lower mob density |
| Zul’Aman | Good mob density in the northern half — wild nodes are valuable |
| Harandar | Primal nodes offer good overload rewards — use Primal Overload carefully |
| Voidstorm | Highest density — best for pure farming efficiency |
![]() Progression: Start in Eversong Woods to learn the mechanics. Move to Zul’Aman for wild nodes. Farm Harandar for primal motes. Finish in Voidstorm for maximum density.
Progression: Start in Eversong Woods to learn the mechanics. Move to Zul’Aman for wild nodes. Farm Harandar for primal motes. Finish in Voidstorm for maximum density.
Skill Ranges — What to Mine at Each Level
Mining Skill Progression
| Range | What Gives Skill | Notes |
|---|---|---|
| 1–30 | Everything | Mine whatever you find |
| 30–60 | Base (yellow), Rich, Seams, Infused | Base nodes still work here |
| 60–100 | Rich, Seams, Infused only | Base nodes are grey — skip them |
![]() How to find Rich/Infused nodes: They spawn randomly in place of normal deposits. Just keep mining and you’ll find them.
How to find Rich/Infused nodes: They spawn randomly in place of normal deposits. Just keep mining and you’ll find them.
Herbalism Skill Progression
| Range | What Gives Skill |
|---|---|
| 1–30 | Everything |
| 30–60 | Base (yellow), Rich, Infused |
| 60–100 | Rich, Infused only |
Best Class for Voidstorm Farming

| Class | Why It’s Good |
|---|---|
| Instant Flight Form — saves massive time. Best overall farming class | |
| High mobility for ground farming — good for killing wild node mobs | |
| Dracthyr | Soar movement ability — can quickly traverse long distances |
![]() Druid is the undisputed king. Instant Flight Form is invaluable for Voidstorm’s open terrain. The small time savings add up to huge gold gains over long sessions.
Druid is the undisputed king. Instant Flight Form is invaluable for Voidstorm’s open terrain. The small time savings add up to huge gold gains over long sessions.
Final Tips

| Tip | Why |
|---|---|
| Sell everything immediately | Prices drop fast — don’t hoard |
| Farm during peak hours | More players = more demand = higher prices |
| Check prices before farming | Some materials are worth more — adjust your route |
| Invest in good tools early | Better tools pay for themselves quickly |
| Don’t spread spec points | Commit to one specialization path |
| Kill Wild node mobs | They drop extra materials — worth the time |
| Avoid Voidbound Overload | Currently not worth using in its current form |
![]() Dual gathering in Voidstorm is the most reliable way to build a gold reserve in Midnight. The zone’s density, combined with the right specialization choices and consumables, will fund your entire season — without relying on luck or expensive investments.
Dual gathering in Voidstorm is the most reliable way to build a gold reserve in Midnight. The zone’s density, combined with the right specialization choices and consumables, will fund your entire season — without relying on luck or expensive investments.