
Zul’Aman is the most balanced farming zone in Midnight. Unlike Eversong Woods‘ safe but lower‑value nodes or Voidstorm‘s high‑risk terrain, Zul’Aman offers the perfect middle ground: dense node spawns, manageable mob density, and the valuable Wild node type that drops Motes of Wild Magic.
The zone’s landmark-heavy layout and natural ridge lines make it ideal for efficient route farming. Players consistently rank Zul’Aman as the best zone for dual gathering, provided you can gather while mounted. The only downside? Wild nodes spawn mobs — but those mobs are actually worth killing for mining.
Here’s everything you need to maximize your gold per hour in Zul’Aman:
- Why Zul’Aman Is Best
- Optimal Combination
- Specialization Builds
- Profession Equipment
- Gathering Stats
- Consumables
- Wild Nodes
- Overloading
- Farming Routes
- What to Mine
- Best Class for Zul’Aman
- The Abundance Event
- Session Plans
- Selling
- Common Mistakes
Why Zul’Aman Is the Best Balanced Farming Zone

Zul’Aman has the most consistent node density. The zone’s terrain naturally channels nodes along predictable lines — ridges, coastlines, and forest edges. This makes route planning straightforward and repeatable.
Wild nodes drop Motes of Wild Magic. These motes are used in high-end crafting recipes and maintain stable prices throughout the season.
The terrain is forgiving. Unlike Voidstorm‘s steep ledges or Harandar‘s pocket-heavy layout, Zul’Aman keeps you roughly on the same level as you farm, meaning you won’t struggle to locate nodes on specific ledges.
The numbers are solid. A well-optimized dual gathering route in Zul’Aman yields 80,000–100,000 gold per hour. The zone’s moderate competition and reliable spawns make it ideal for both new and experienced gatherers.
 Zul’Aman is also the best zone for skinning. The Raptor Pit hyperspawn location drops Amani War Leather — one of the most valuable leathers in Midnight, used in end-game Leatherworking recipes for best-in-slot BoE armor pieces.
Herbalism + Mining — The Optimal Combination

 Pick both. Herbalism and Mining together give you maximum node coverage. You’ll never fly past a valuable node because you have the wrong profession.
| Profession | What You Gather | Why It’s Valuable |
|---|---|---|
| Herbalism | Eversong herbs (Dreamleaf, Ghost Orchid, Nightshade, etc.) | Alchemy consumables, Inscription, work orders |
| Mining | Ores (Copper, Silver, Umbrellin, etc.) | Blacksmithing, Engineering, Jewelcrafting |
Sell everything early. Hoarding is a trap. Prices drop fast as supply catches up. The gold you make in week one is worth more than the materials you hold onto for week four.
Specialization Builds for Zul’Aman Farming
Your specialization choices determine your efficiency. Prioritize talents that let you gather while mounted and increase resource yield.
Mining Specialization Order
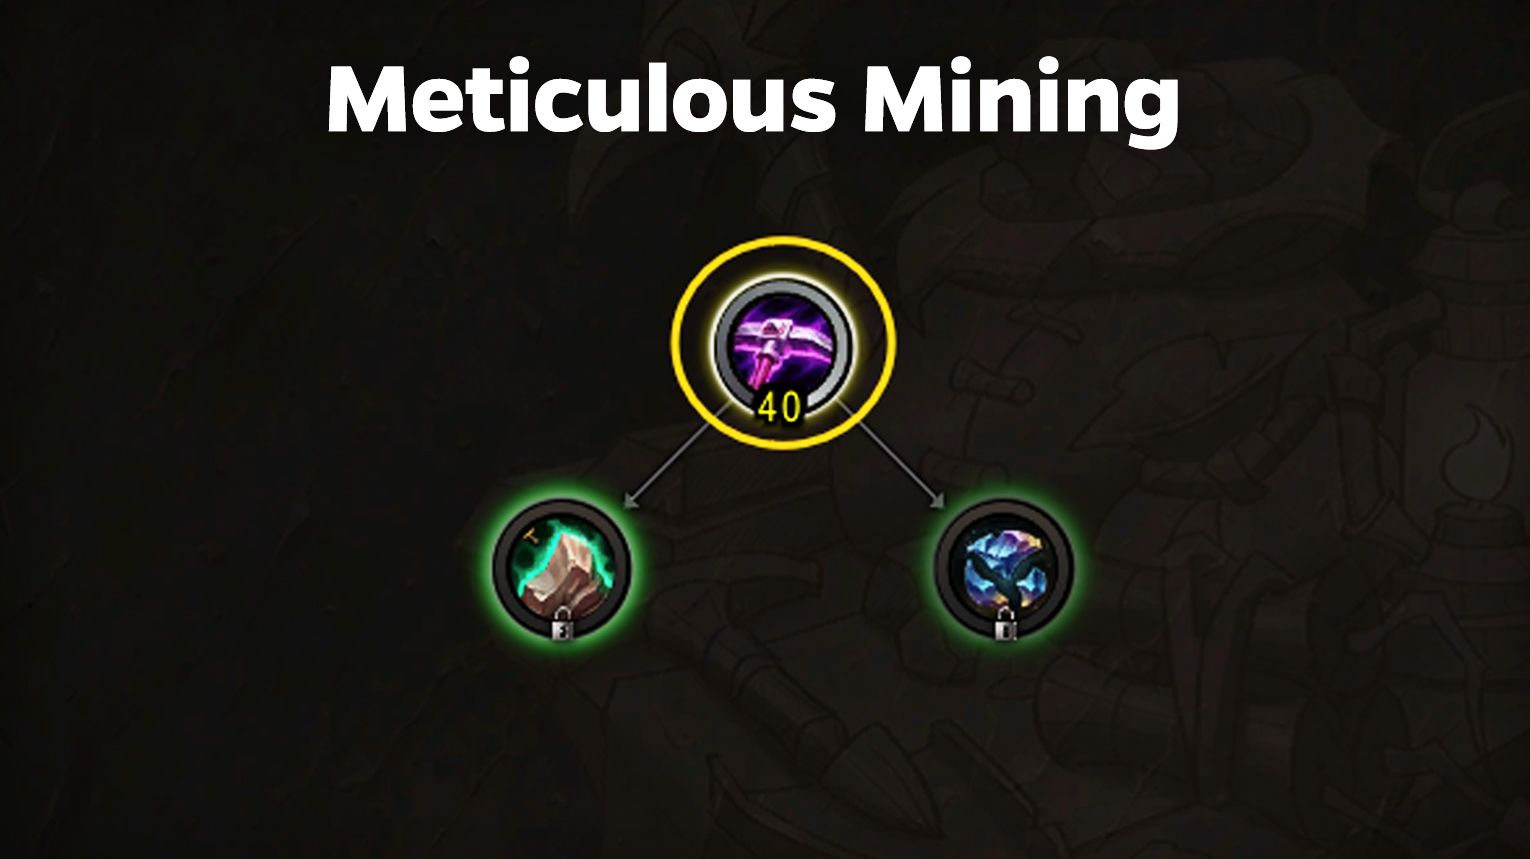
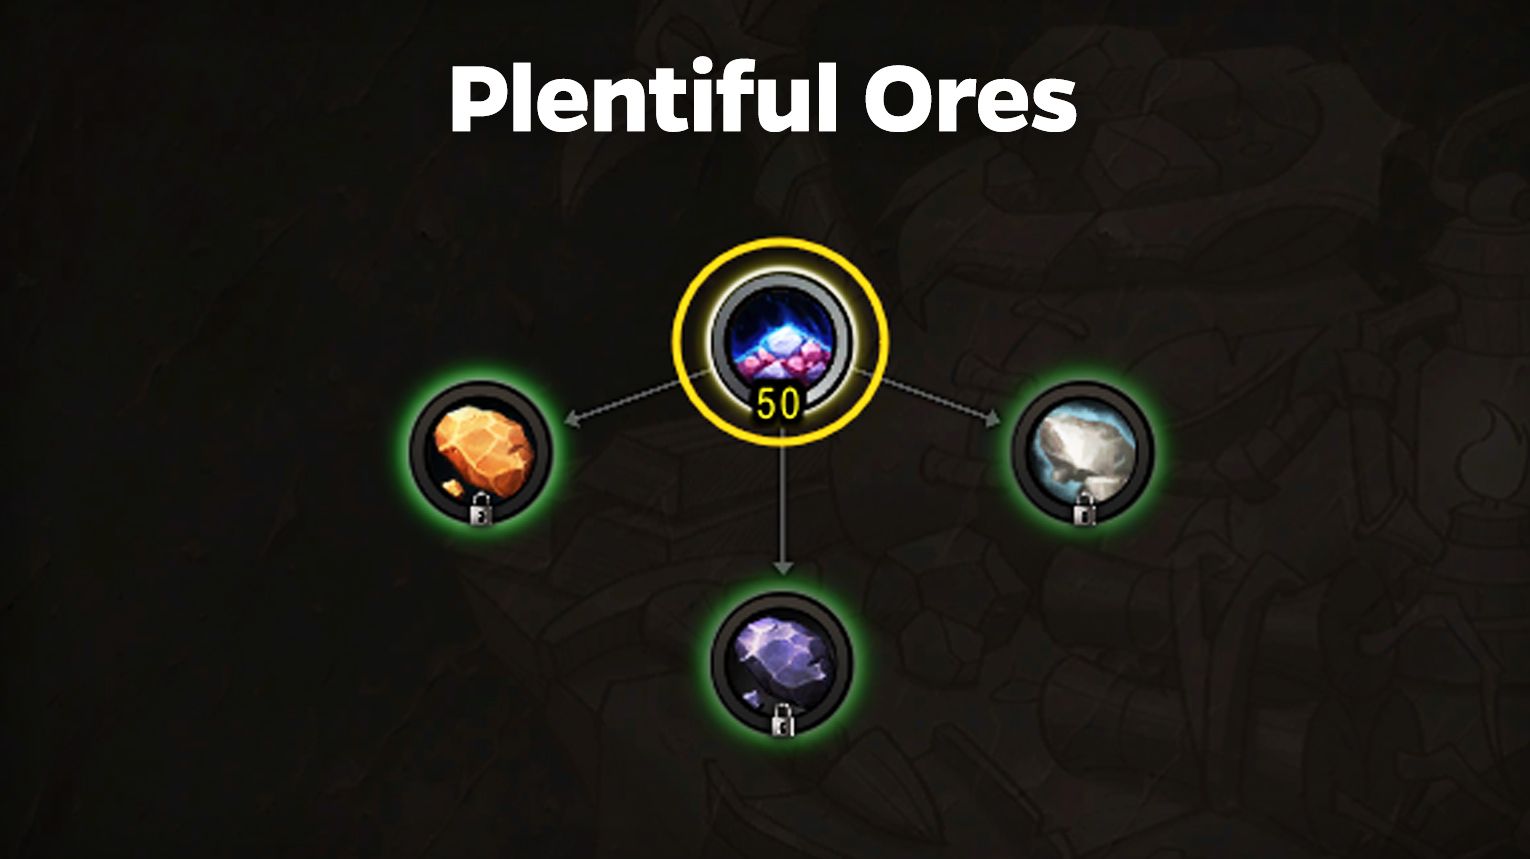
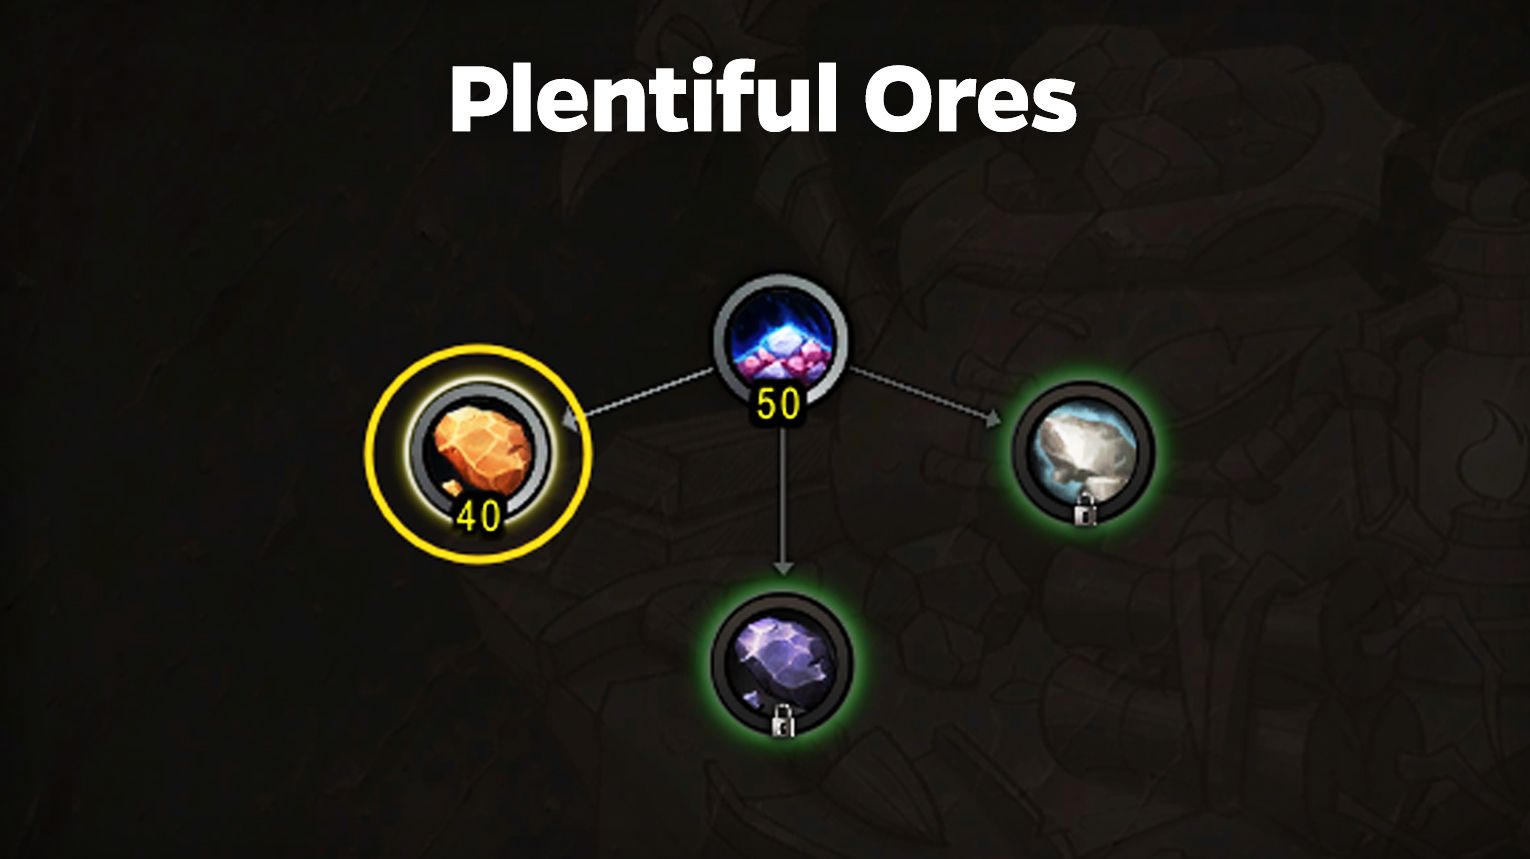
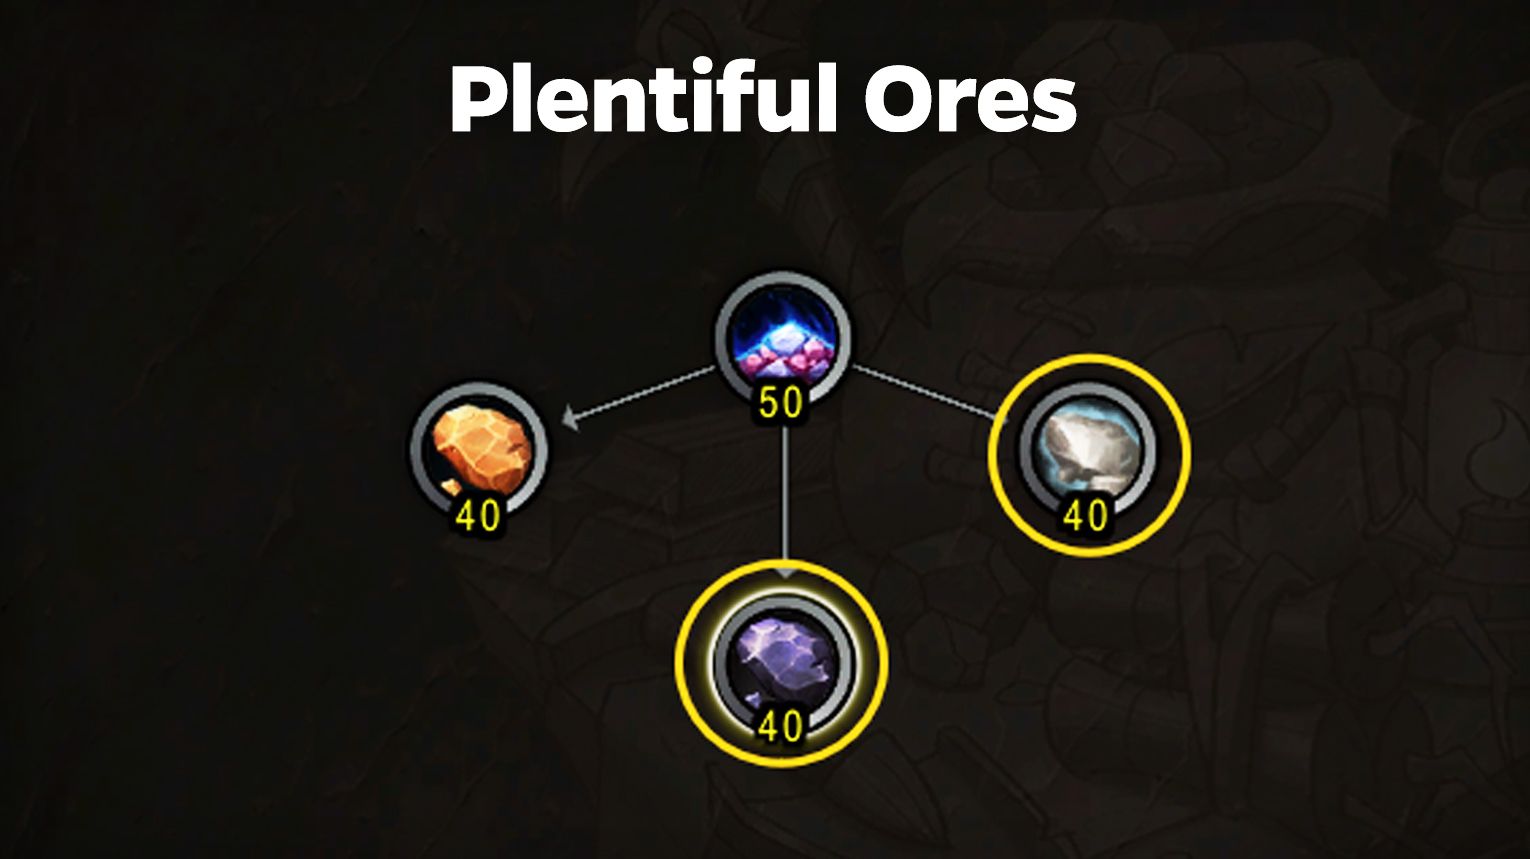
| Priority | Specialization | Why |
|---|---|---|
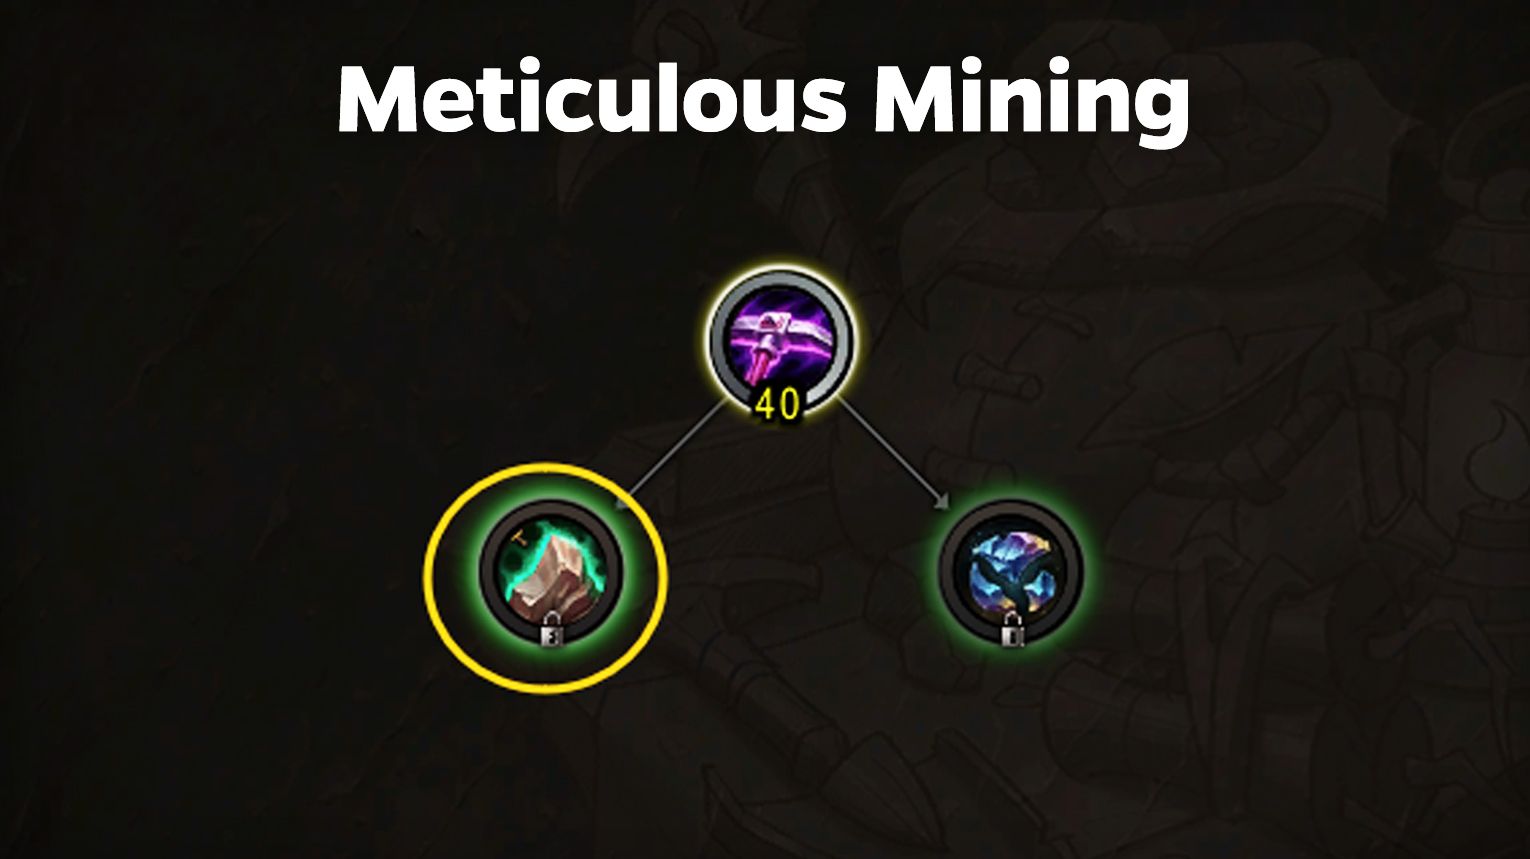
| 1 | Meticulous Mining | Unlocks gathering while mounted |
| 2 | Plentiful Ores | Increases yield from all ore nodes |
| 3 | Refulgent Copper | Copper is common and valuable early |
| 4 | Brilliant Silver or Umbral Tin (pick one, max it) | Don’t split points |
| 5 | Rich Deposits (sub-spec in Meticulous Mining) | More value from rich nodes |
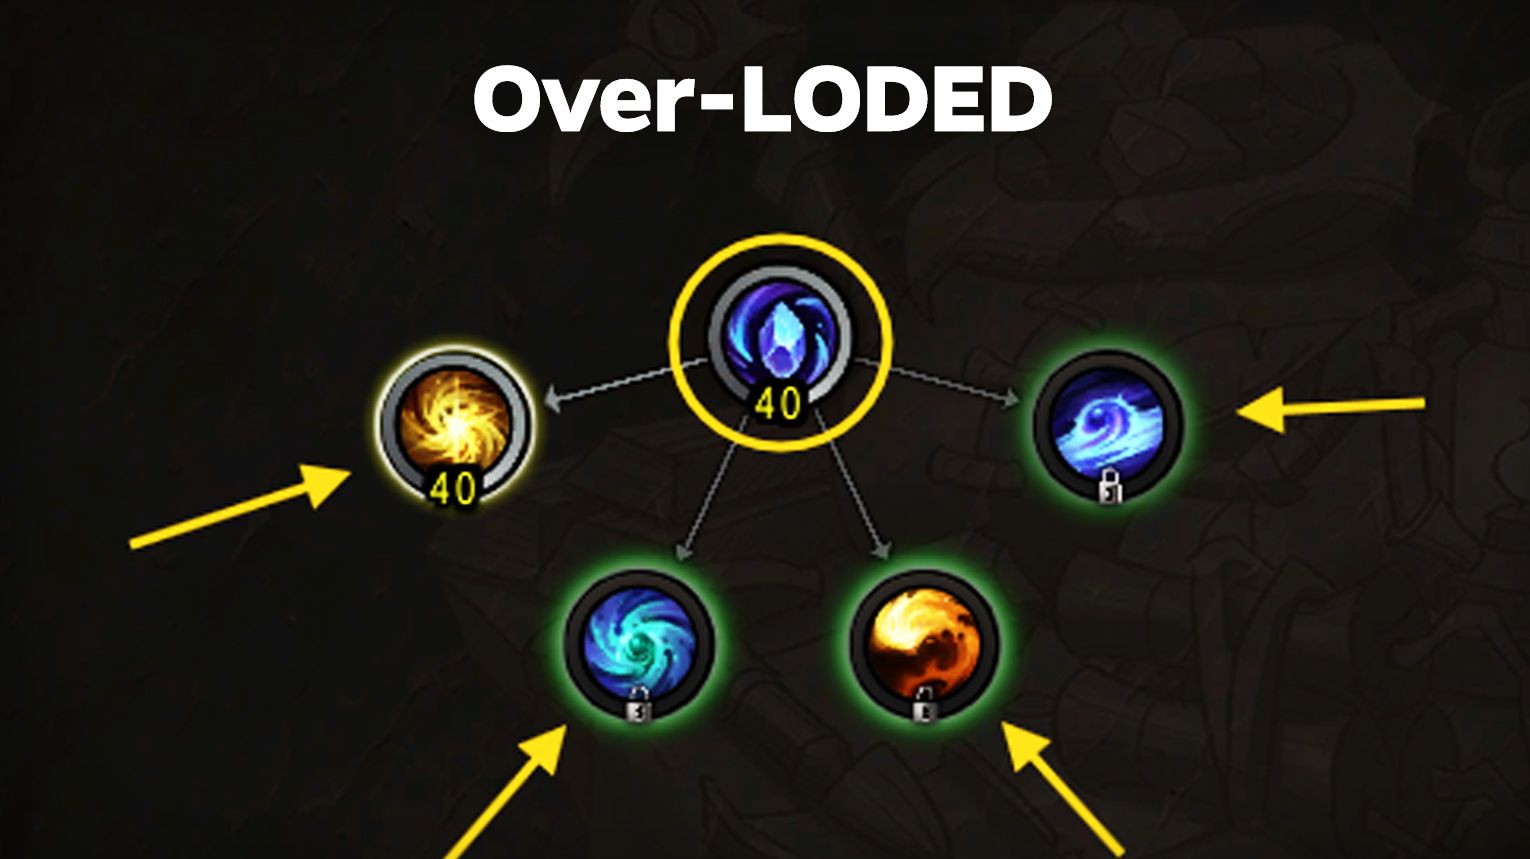
| 6 | Over-LODED (Wild specialization) | Extra materials from overload |
Critical for Zul’Aman: Put at least one point into the Wild wheel in the Over-LODED specialization. This makes Wild node mobs drop twice as many ore. With this single point, you turn one Wild node into the equivalent of five mining nodes.
Avoid Seams. They appear too rarely to justify investing points.
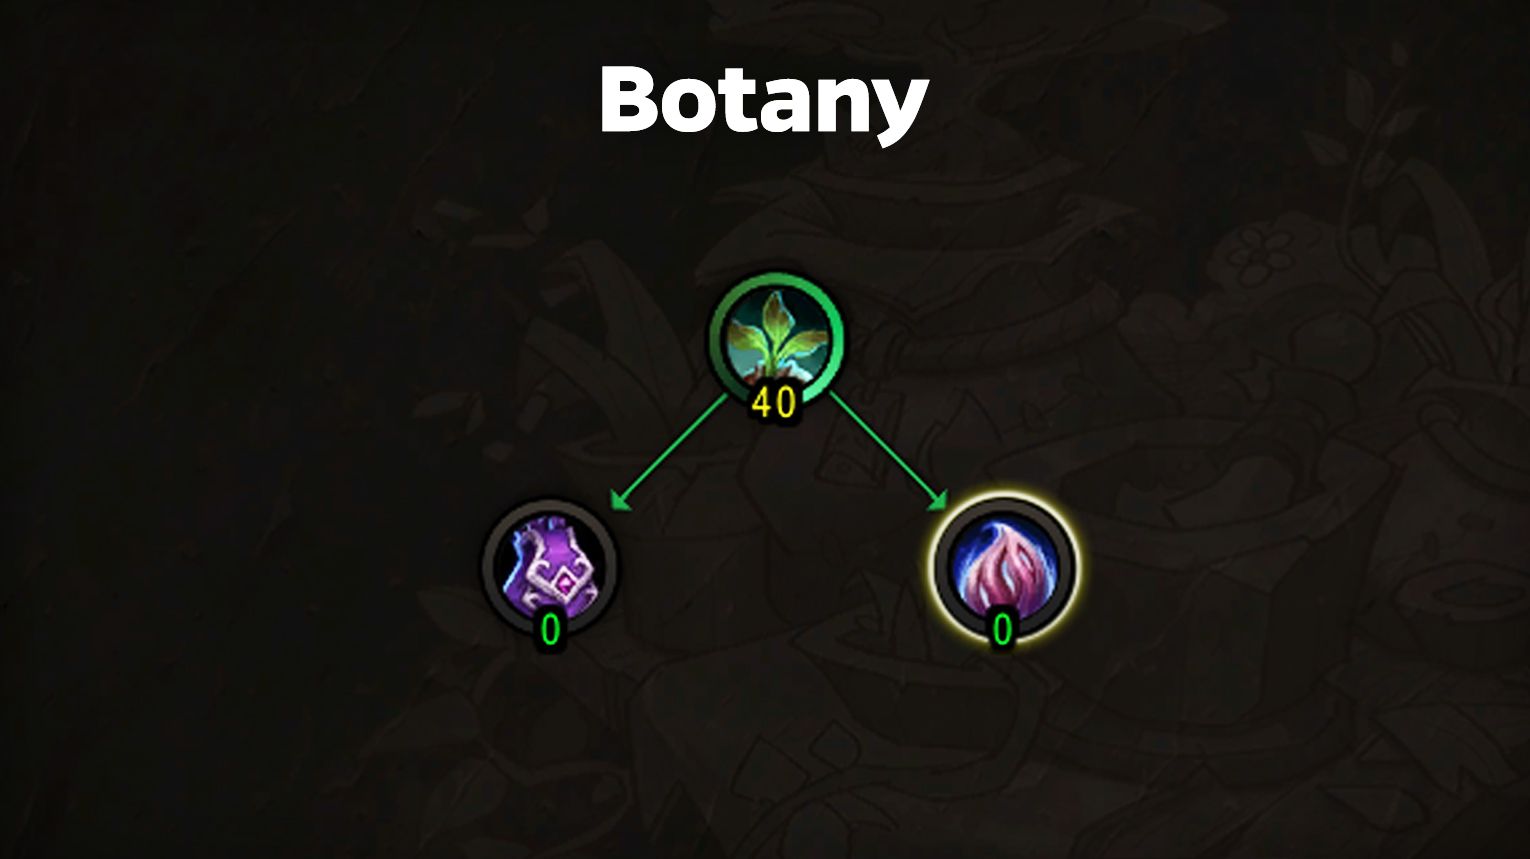
Herbalism Specialization Order (Non-Druid)
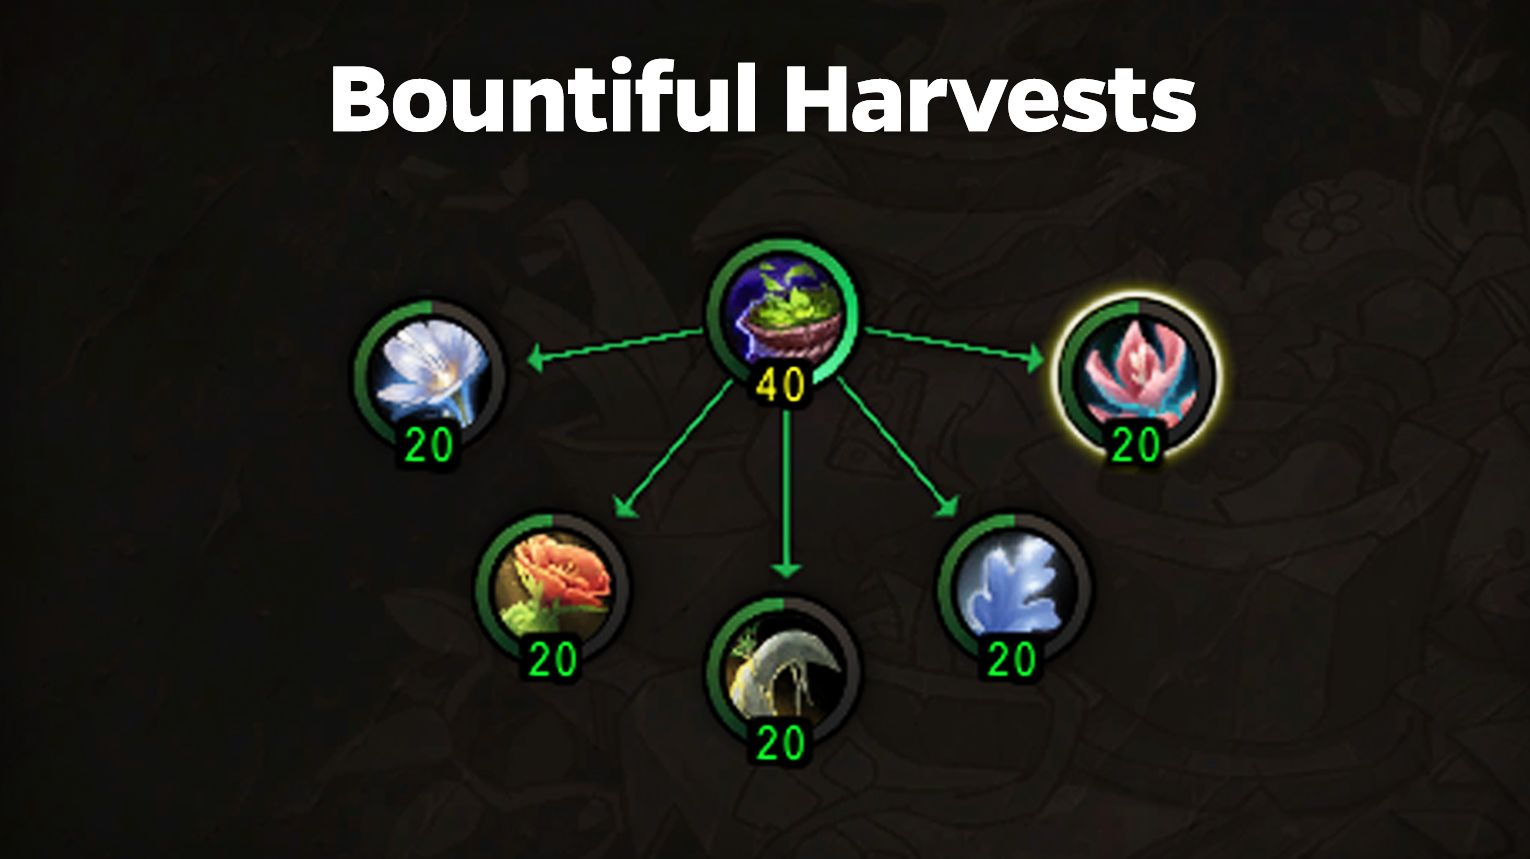
| Priority | Specialization | Why |
|---|---|---|
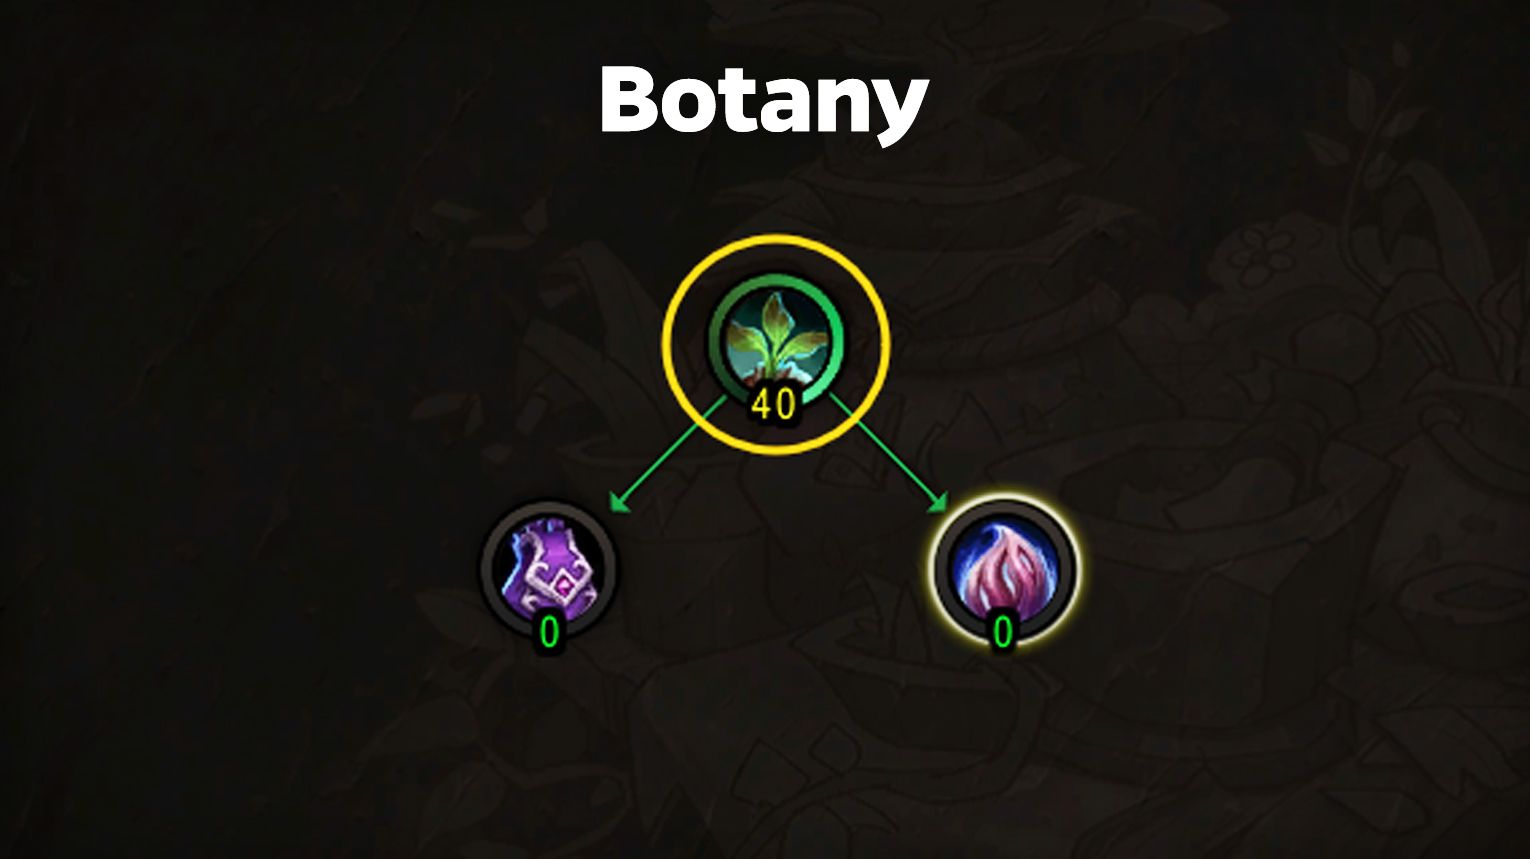
| 1 | Botany (max) | Unlocks gathering while mounted |
| 2 | Bloombringer (20 points) | Increase herb yield |
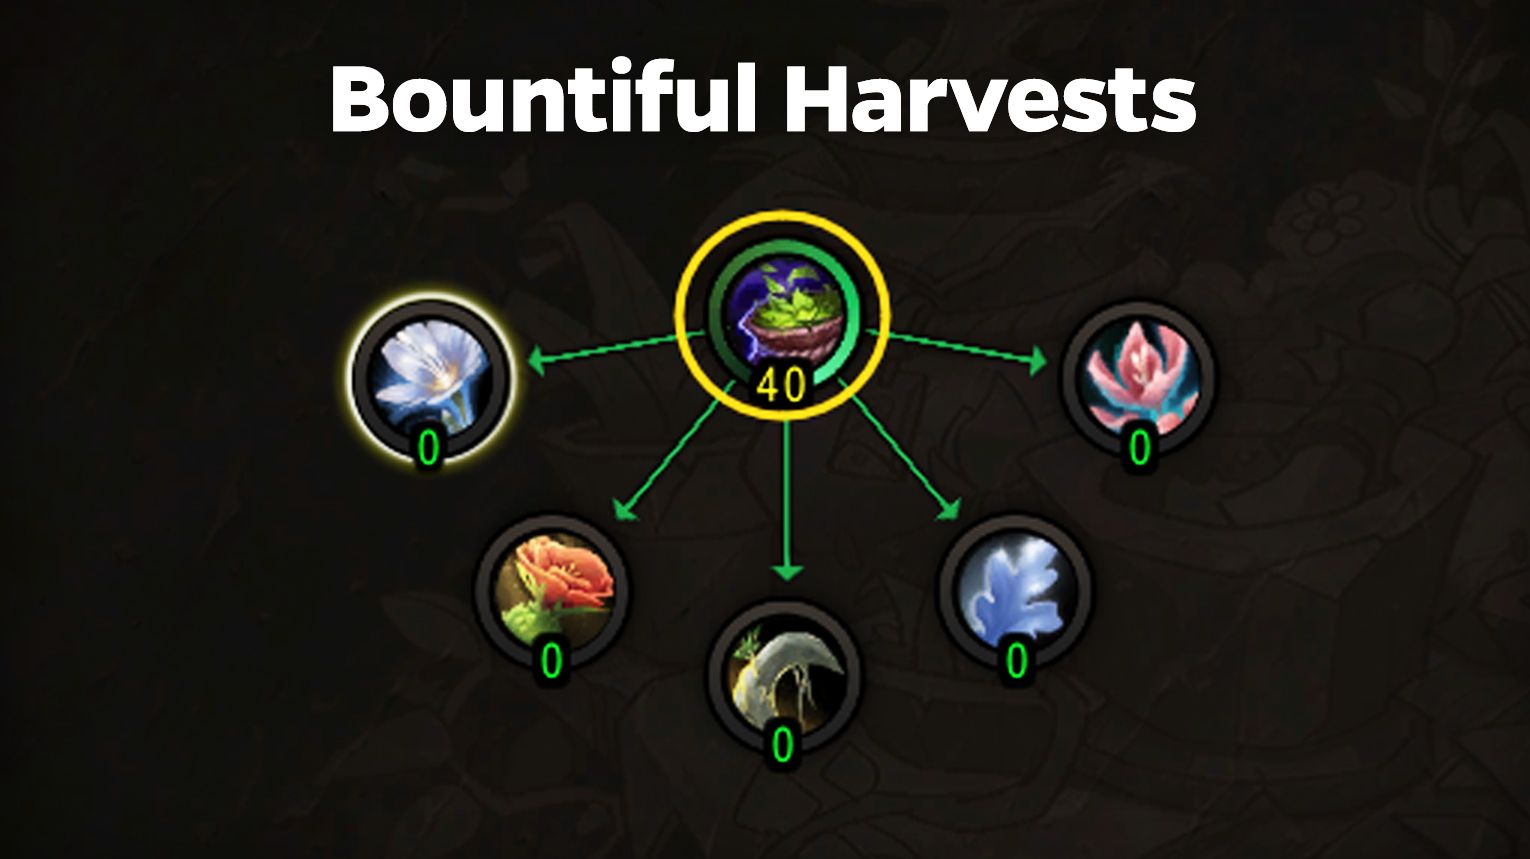
| 3 | Bountiful Harvest (max) | More materials per node |
| 4 | Midnight Overload | Extra materials from overload procs |
| 5 | Mulch bonuses | Rare material chance |
 Herbalism Specialization Order (Druid)
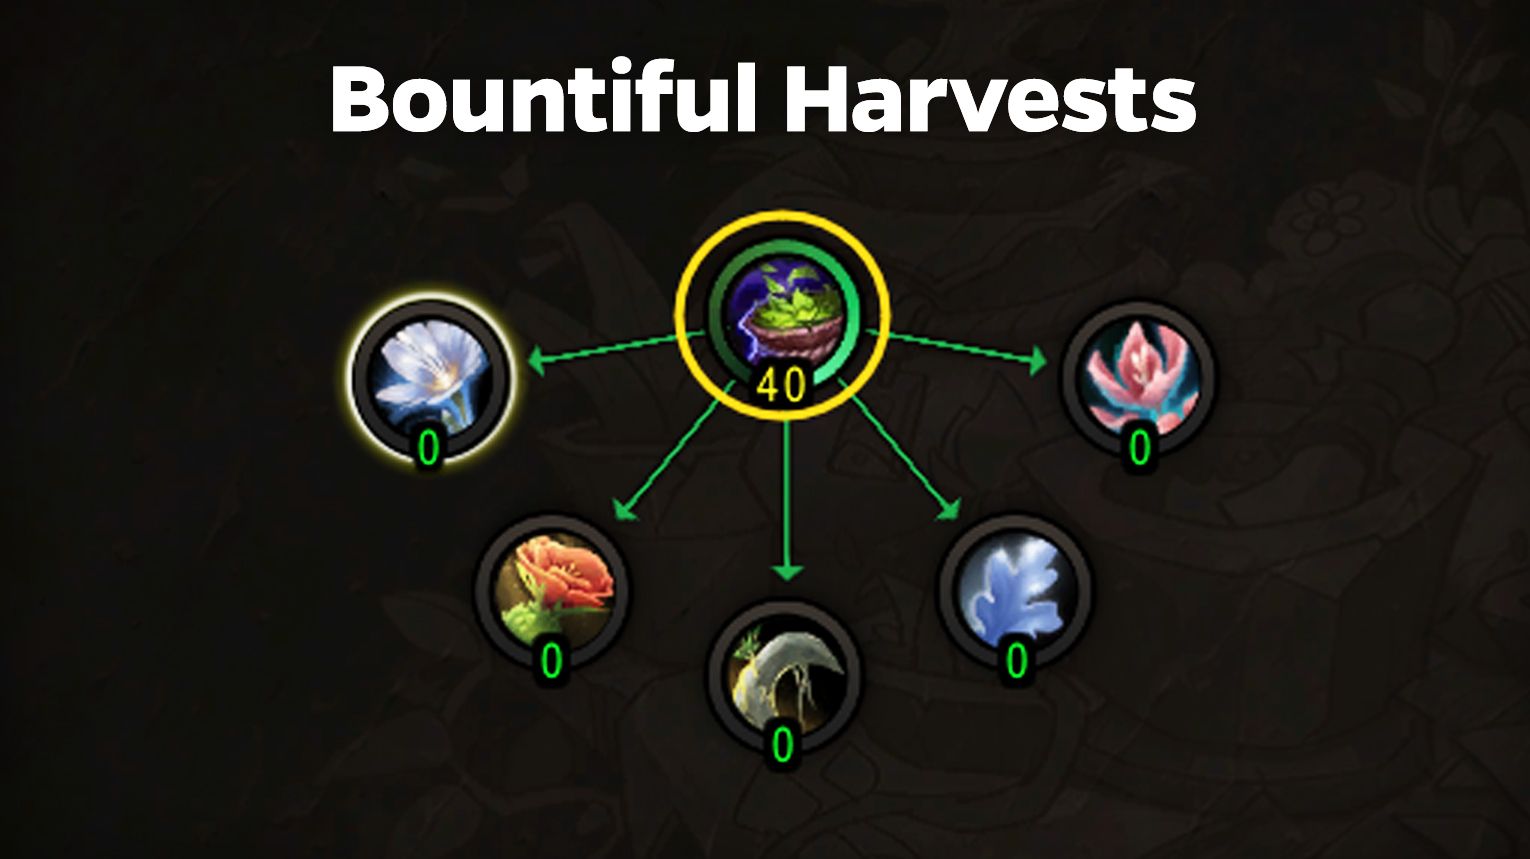
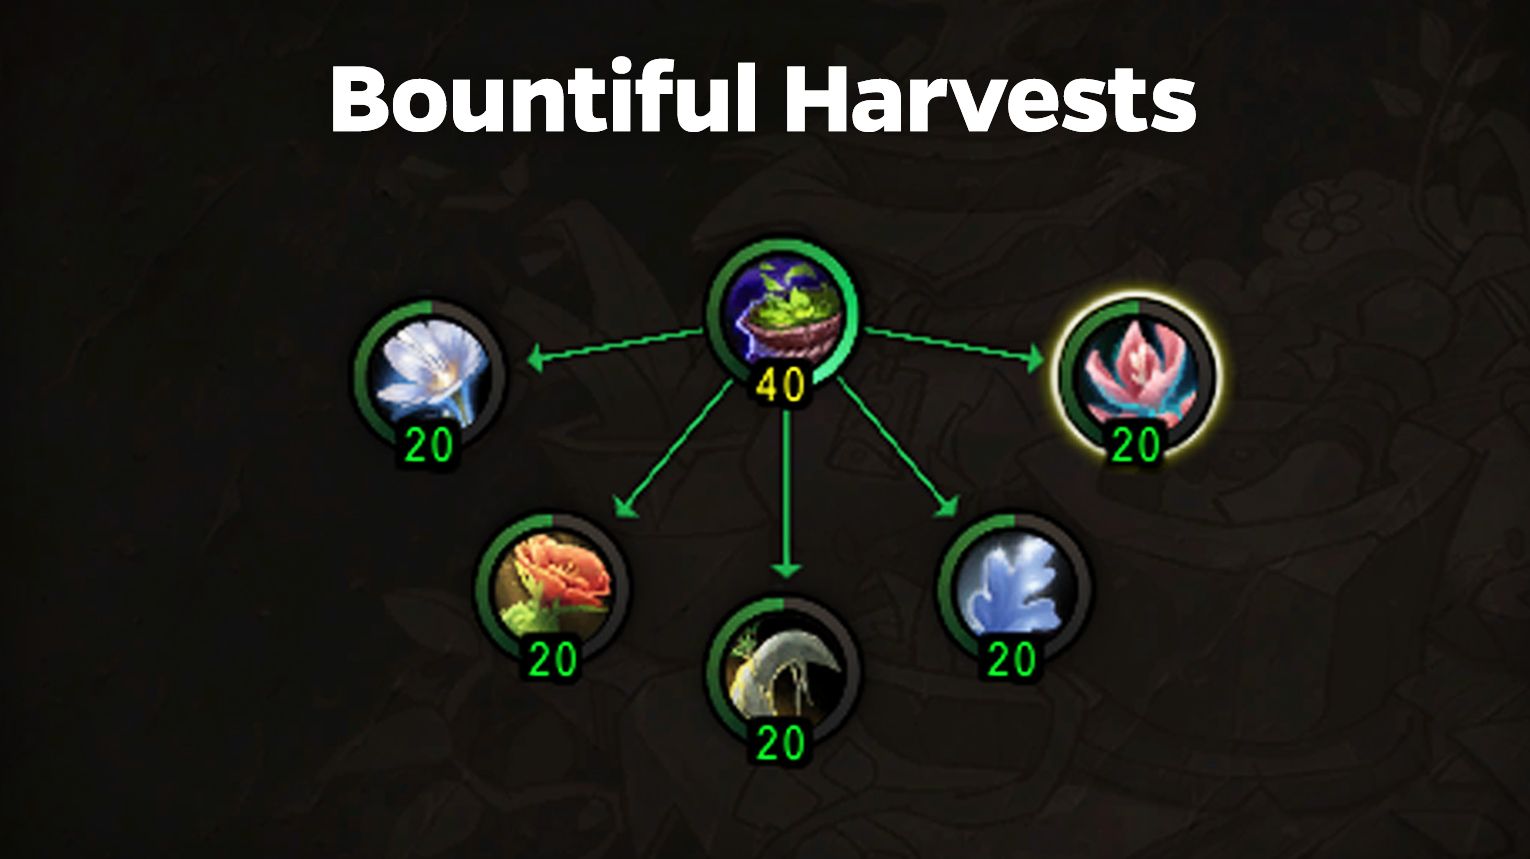
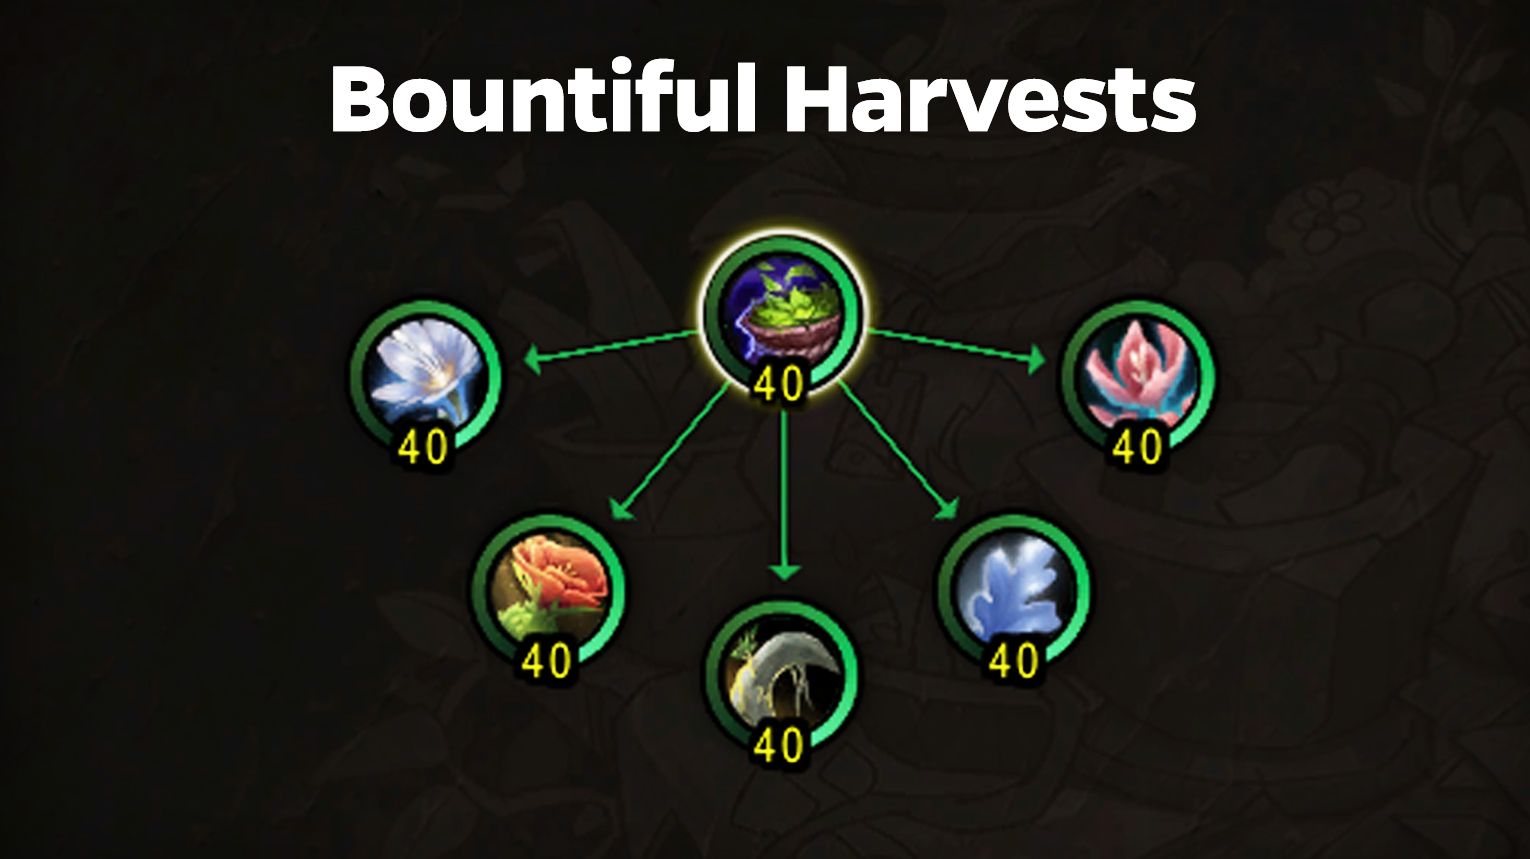
| Priority | Specialization | Why |
|---|---|---|
| 1 | Bountiful Harvest | You can gather in flight form anyway |
| 2 | Bloombringer | Increase herb yield |
| 3 | Bountiful Harvest (max) | More materials per node |
| 4 | Midnight Overload | Extra materials from overload procs |
| 5 | Mulch bonuses | Rare material chance |
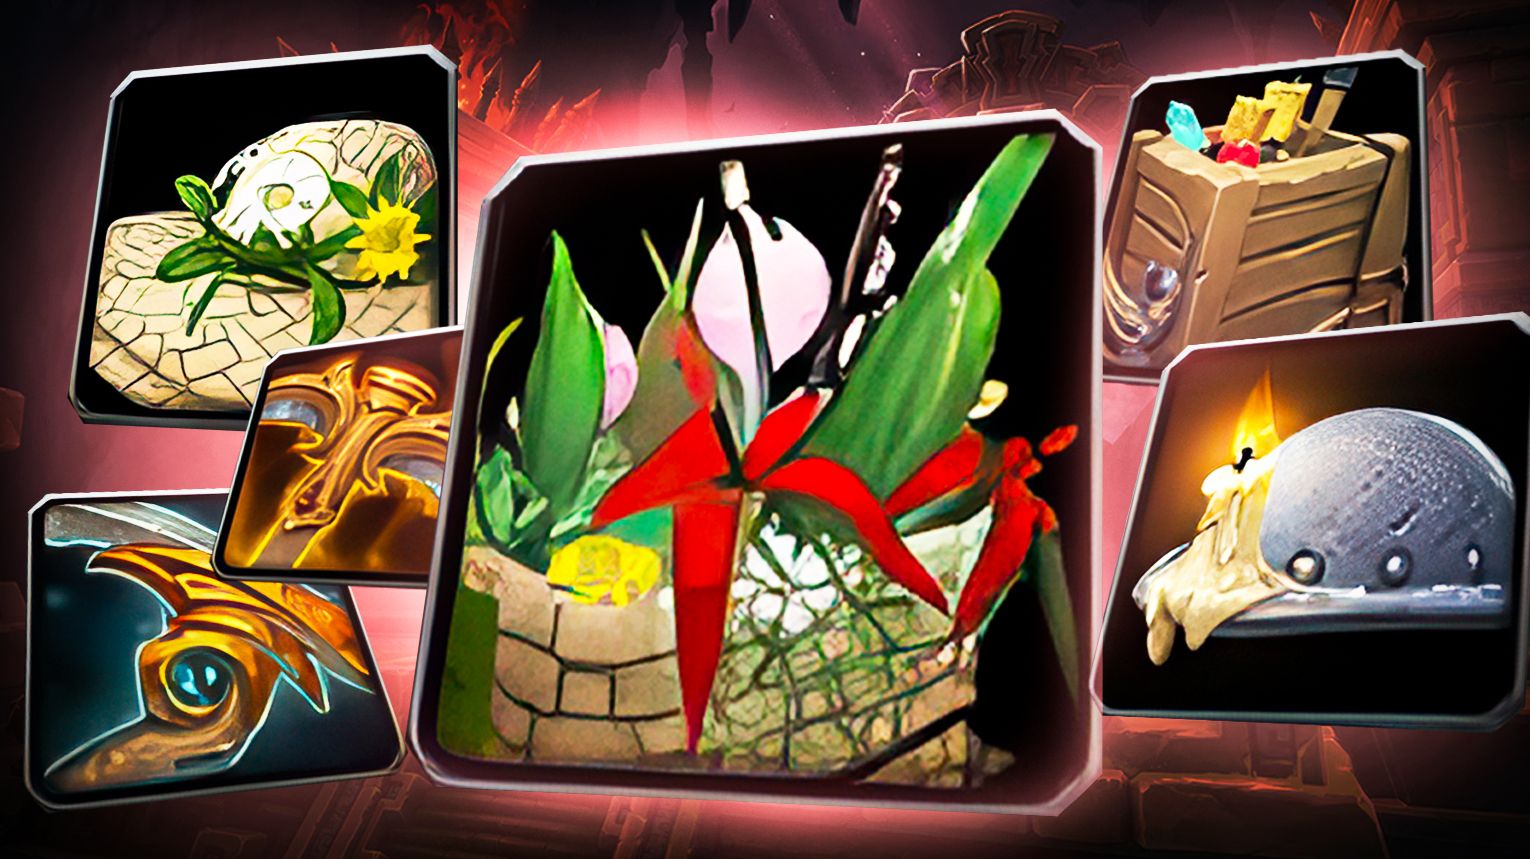
Profession Equipment — What Actually Matters
| Slot | Item | Crafted By | Materials |
|---|---|---|---|
| Hardhat | Farstrider Hardhat | Engineering | 1x Evercore, 1x Soul Sprocket |
| Satchel | Farstrider Rock Satchel | Engineering | 1x Evercore, 1x Soul Sprocket |
| Pickaxe | Thalassian Pickaxe | Blacksmithing | 6x Refulgent Copper Ingot |
| Hardhat (Epic) | Sin’dorei Gilded Hardhat | Engineering | 2x Evercore, 4x Aetherlume, 1x Majestic Hide |
| Satchel (Epic) | Junker’s Big Ol’ Bag | Engineering | 2x Evercore, 4x Aetherlume, 1x Majestic Hide |
| Pickaxe (Epic) | Sun-Blessed Pickaxe | Blacksmithing | 5x Sterling Alloy, 2x Dazzling Thorium, 1x Majestic Claw |
 Customizing stats: Accessory stats are fixed. Tool stats can be customized with missives. Blue items are BoE — check the Auction House or place a Crafting Order.
The Three Gathering Stats — Which One to Stack

| Stat | Effect | Best For |
|---|---|---|
| Finesse | Chance to gather extra materials | Raw material farming (most consistent gold) |
| Deftness | Faster gathering speed | Reducing downtime during long sessions |
| Perception | Chance to get rare materials | Jackpot hunting for high-value drops |
For Zul’Aman dual gathering: Finesse is your top priority. Extra materials mean more gold from every node. The zone’s high node density means you’ll gather hundreds of nodes per session — Finesse pays off the most over time.
 Why Finesse matters for Wild nodes: Finesse can proc off each roll from Wild node mobs. With the single point in Wild, each mob gives two rolls, so you have up to five chances at Finesse procs from one Wild node. A single Wild node can yield up to 30 ore with everything rolling in your favor.
Consumables — Don’t Farm Without Them

| Consumable | Effect | Duration |
|---|---|---|
| Haranir Phial of Finesse | +38 Finesse (+3.8%), +11 Deftness (+3.6%) | 30 min |
| Haranir Phial of Perception | +38 Perception (+3.8%), +11 Deftness (+3.6%) | 30 min |
| Argentleaf Tea | +50 Finesse (+5.0%) | 1 hour |
| Sanguithorn Tea | +50 Perception (+5.0%) | 1 hour |
| Azeroot Tea | +50 Deftness (+16.6%) | 1 hour |
| Darkmoon Firewater | +15% Deftness | 1 hour |
| Refulgent Razorstone | +43 Finesse (+4.3%) for tools | 2 hours |
Recommendation for Zul’Aman: Use Haranir Phial of Finesse + Argentleaf Tea + Darkmoon Firewater. This combination maximizes your material yield per hour.
Wild Nodes — The Key to Zul’Aman Farming
Wild nodes are the signature feature of Zul’Aman. They exist throughout the zone and drop Motes of Wild Magic. Mining a Wild node spawns two Rumbling Orelings. Herbing a Wild node spawns Vengeful Lashers.
Mining Wild nodes: Absolutely worth killing the mobs.
| Aspect | Detail |
|---|---|
| Mobs spawned | 2x Rumbling Oreling |
| Drop from main node | 1-2 ore + 2 Motes of Wild Magic |
| Drop from each mob | 1-6 ore + 1 Motes of Wild Magic |
| Total from one node | 5-30+ ore (typical result: 13 ore) |
| With 1 point in Wild spec | Mobs drop twice as many rolls |
| With Finesse procs | Up to 30 ore from one node |
Herbing Wild nodes: Not worth killing the mobs.
| Aspect | Detail |
|---|---|
| Mobs spawned | 4x Vengeful Lashers |
| Drop from mobs | Only Motes of Wild Magic (approx 5g each) |
| Time to kill | Significant, especially for multiple mobs |
| Conclusion | Kill them only if you can do it in under 5 seconds |
Common mistake: Players mine a Wild node and fly away, leaving the mobs behind. Don’t do this. One player reported getting 400g worth of ore from the orelings compared to only 50g from the main node. The mobs are where the real value comes from.
 The etiquette issue: If you leave your Wild node mobs behind, other players have to deal with them. Some players avoid Zul’Aman entirely for herbalism because of this. Be a considerate gatherer — kill what you spawn.
Overloading in Zul’Aman

How to learn Overload: Mine your first Infused Deposit to learn the Overload ability. Use it near an infused deposit for a bonus effect.
Cooldown: 12 hours, reduced by 30 minutes per normal node mined. Roughly 24 deposits to fully reset.
Wild Overload (Herbalism): Overloading a Wild herb challenges an Avatar of Halazzi, the Lynx Loa, in combat. Success grants a temporary but significant increase to Perception.
Wild Overload (Mining): Overloading a Wild deposit spawns an elite creature. Killing it gives you a +150 Perception buff for 5 minutes.
When to use Overload: Use it when you have time to complete the encounter. The Perception buff from the mining overload is valuable for increasing rare material drops.
Farming Routes — Zul’Aman
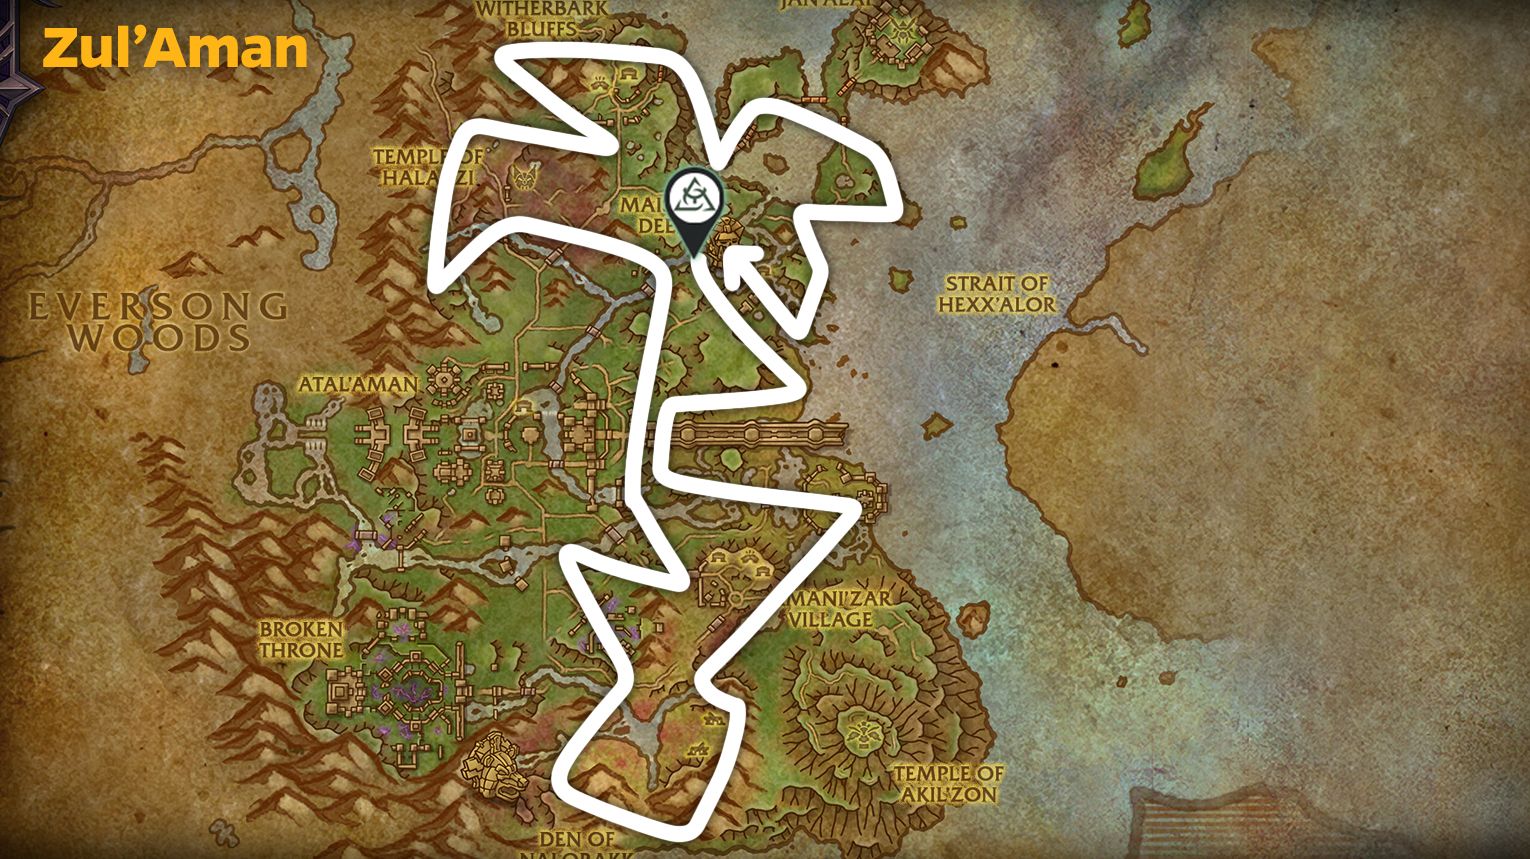
Zul’Aman rewards landmark-based farming. The zone’s temples, ruins, and natural features make excellent anchor points for efficient loops.
Herbalism Routes
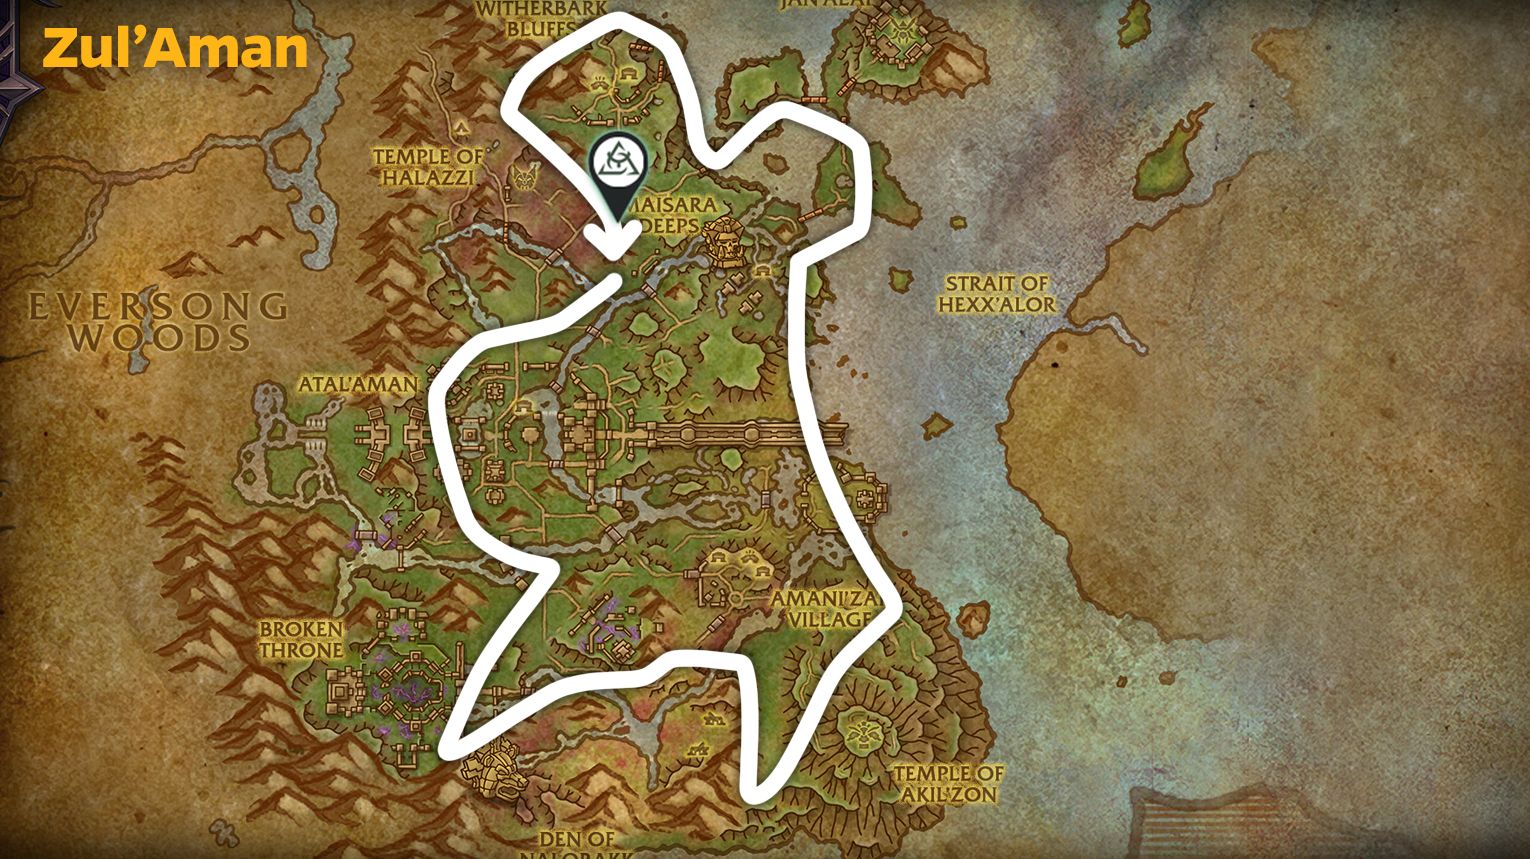
Route A: Temple-to-Temple Figure-Eight
| Step | Action |
|---|---|
| 1 | Pick two strong landmarks (ruins/temple structures) |
| 2 | Run a loop between them with a crossover lane through a forest edge |
| 3 | Repeat |
Why it works: You never get lost, and the crossover lane acts like a “density refresh.”
When to use: Long sessions where you want a stable rhythm.
Route B: Forest Edge Herb Sweep
| Step | Action |
|---|---|
| 1 | Stay on forest-to-open seams |
| 2 | Skim the edge rather than diving deep into dense jungle |
| 3 | Keep visibility high and combat low |
Why it works: Visibility stays high; fewer dismounts; nodes stand out.
When to use: Squishy specs, or when you want a chill loop.
Route C: Edge Loop
| Step | Action |
|---|---|
| 1 | Stick to the edges of the zone |
| 2 | Stay roughly on the same level |
| 3 | Avoid struggling with nodes on specific ledges |
Why it works: Keeps you moving fast and consistently.
When to use: Your default farming route.
Zul’Aman herbalism rule: Overloading nodes here gives a really nice buff for additional rare materials. Use it when available.
Mining Routes
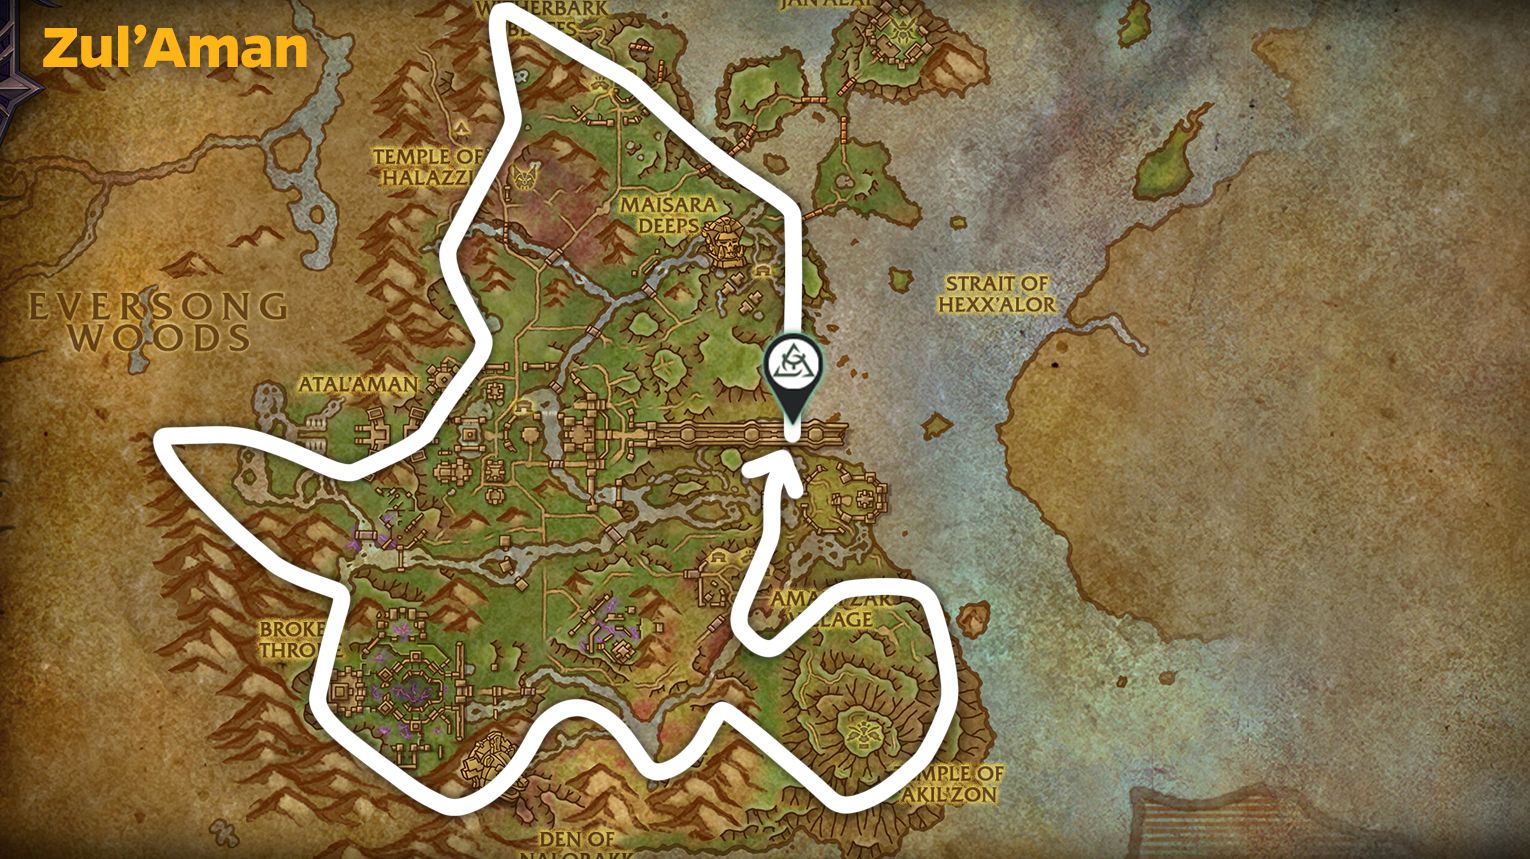
Route A: Ridge Rail Loop
| Step | Action |
|---|---|
| 1 | Stay high along mountain lines |
| 2 | Drop only for visible clusters |
| 3 | Return to the ridge immediately |
Why it works: High visibility means fewer wasted detours.
When to use: Your default mining route for efficiency.
Route B: Southern Coast Run
| Step | Action |
|---|---|
| 1 | Follow the southernmost coast |
| 2 | Hit the large density of nodes found there |
| 3 | Loop back and repeat |
Why it works: Method found a large density of nodes along the southern coast.
When to use: When central routes are crowded.
Route C: Edge Loop
| Step | Action |
|---|---|
| 1 | Farm along the edges of the zone |
| 2 | Skip the center unless you see clusters |
| 3 | Keep momentum |
Why it works: Edge routes are consistently underfarmed.
When to use: Peak hours.
Zul’Aman mining rule: Mine the orelings. They can proc Finesse, leading to a large amount of extra ore.
Skinning Routes — Zul’Aman
Zul’Aman is home to the Raptor Pit hyperspawn location — one of the highest-tier leather farming opportunities in Midnight.
Raptor Pit Farming
| Aspect | Detail |
|---|---|
| Location | Zul’Aman |
| Beast Type | Amani Raptors |
| Leather Drop | Amani War Leather |
| Value | High-tier leather used in end-game Leatherworking recipes |
| Strategy | Continuous loop — kill, skin, repeat |
High Value Beast (HVB) Circuit
| Step | Action |
|---|---|
| 1 | Enable the Find High-Value Beasts tracking feature |
| 2 | HVBs appear on your minimap with a skinning knife icon |
| 3 | HVBs have sparkle particles around them |
| 4 | Skin HVBs for significantly more reagents than normal |
| 5 | Move immediately to the next HVB signal |
Why HVBs matter: They provide significantly more materials per skin than normal targets. Time spent moving between HVBs is more profitable than time spent grinding one camp.
Zul’Aman skinning note: Some HVBs in Zul’Aman are high-flying dragonhawks that are impossible to reach. Skip these and focus on ground targets.
Skill Ranges — What to Mine at Each Level
Mining Skill Progression
| Range | What Gives Skill | Notes |
|---|---|---|
| 1–30 | Everything | Mine whatever you find |
| 30–60 | Base (yellow), Rich, Seams, Infused | Base nodes still work here |
| 60–100 | Rich, Seams, Infused only | Base nodes are grey — skip them |
How to find Rich/Infused nodes: They spawn randomly in place of normal deposits. Just keep mining and you’ll find them.
Herbalism Skill Progression
| Range | What Gives Skill |
|---|---|
| 1–30 | Everything |
| 30–60 | Base (yellow), Rich, Infused |
| 60–100 | Rich, Infused only |
Best Class for Zul’Aman Farming

| Class | Why It’s Good |
|---|---|
| Druid |
Instant Flight Form — saves massive time. Best overall farming class |
 Demon Hunter Demon Hunter |
High mobility for ground farming — good for killing Wild node mobs |
| Dracthyr | Soar movement ability — can quickly traverse long distances |
Druid is the undisputed king. Instant Flight Form is invaluable for Zul’Aman‘s open terrain. The small time savings add up to huge gold gains over long sessions.
The Abundance Event — Your Burst Route
The Abundance event is a professions-themed gathering event that pops across Midnight zones. For gatherers, it’s not just extra loot — it’s a time window where your node-per-minute skyrockets.
How to use Abundance efficiently:
| Tip | Why |
|---|---|
| Pick a tight loop when the event starts | Don’t wander — density is the goal |
| Prioritize density over curiosity | Skip slow nodes |
| Skip nodes that trigger slow combat | If it’s a time sink, it’s not worth it |
| Treat it as a 10–15 minute sprint | Then return to your normal route |
| Farm during the event, sell during prime-time | Timing is everything |
Session Plans — Match Your Route to Your Schedule
20-Minute Session (Daily Quick Farm)
| Aspect | Choice |
|---|---|
| Zone | Zul’Aman (edge loop) |
| Route | One complete edge loop |
| Goal | Volume and consistency |
| End | Mail materials immediately |
60-Minute Session (The Sweet Spot)
| Aspect | Choice |
|---|---|
| Zone | Zul’Aman (ridge rail + southern coast) |
| Route | 2× 25-minute blocks + 10 minutes to sell/mail |
| Strategy | Reverse your loop if you see competition |
| Add-on | If Abundance is up, replace one block with Abundance sprint |
2-Hour Session (Weekend Efficiency)
| Aspect | Choice |
|---|---|
| Zone | Zul’Aman + Harandar (pockets) |
| Route | 3× 30-minute blocks (two safe, one risky) |
| Strategy | 10-minute breaks to reset and sell |
| End | List a portion immediately, hold a portion for peak demand |
Selling What You Farm
| Tip | Why |
|---|---|
| Sell in clean stack sizes | Buyers prefer simple stacks |
| Don’t panic undercut | Commodities move — you don’t need to win every price war |
| Sell at spending times | Reset days and prime-time evenings move materials fastest |
| Keep a small reserve | If you craft, keep enough mats to avoid buying at peak prices |
Your goal is not the highest price ever. Your goal is steady turnover.
Common Gathering Mistakes

| Mistake | Fix |
|---|---|
| Fighting for nodes | Reverse the loop, change altitude, or change zone |
| Overloading everything | Overload only when it’s faster than skipping |
| Running a tight loop in a crowded shard | Widen the loop and lean into edges |
| Leaving Wild node mobs behind | Kill what you spawn — the ore is worth it |
| Farming until you’re exhausted | Farm in blocks. End with a plan, not when you’re angry |
Zul’Aman is the most balanced gold-making zone in Midnight. The combination of dense nodes, valuable Wild drops, and the Raptor Pit hyperspawn makes it the ideal choice for players who want consistent income without the extreme risks of Voidstorm or the pocket-heavy layout of Harandar. Master the edge loops, put one point into the Wild specialization, and kill what you spawn — and you’ll build a gold reserve that funds your entire season.
